Create Populated Text with airSlate SignNow
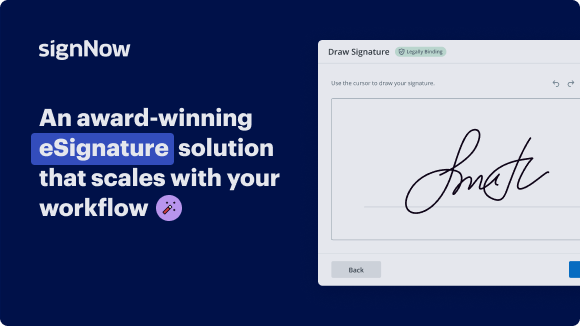
Award-winning eSignature solution


Get the powerful eSignature capabilities you need from the company you trust
Select the pro platform created for professionals
Configure eSignature API quickly
Collaborate better together
Create populated text, in minutes
Cut the closing time
Maintain important data safe
See airSlate SignNow eSignatures in action


airSlate SignNow solutions for better efficiency
Our user reviews speak for themselves


Why choose airSlate SignNow
-
Free 7-day trial. Choose the plan you need and try it risk-free.
-
Honest pricing for full-featured plans. airSlate SignNow offers subscription plans with no overages or hidden fees at renewal.
-
Enterprise-grade security. airSlate SignNow helps you comply with global security standards.

Your step-by-step guide — create populated text
Using airSlate SignNow’s eSignature any business can speed up signature workflows and eSign in real-time, delivering a better experience to customers and employees. create populated text in a few simple steps. Our mobile-first apps make working on the go possible, even while offline! Sign documents from anywhere in the world and close deals faster.
Follow the step-by-step guide to create populated text:
- Log in to your airSlate SignNow account.
- Locate your document in your folders or upload a new one.
- Open the document and make edits using the Tools menu.
- Drag & drop fillable fields, add text and sign it.
- Add multiple signers using their emails and set the signing order.
- Specify which recipients will get an executed copy.
- Use Advanced Options to limit access to the record and set an expiration date.
- Click Save and Close when completed.
In addition, there are more advanced features available to create populated text. Add users to your shared workspace, view teams, and track collaboration. Millions of users across the US and Europe agree that a solution that brings everything together in a single holistic enviroment, is exactly what businesses need to keep workflows functioning efficiently. The airSlate SignNow REST API enables you to integrate eSignatures into your app, website, CRM or cloud storage. Try out airSlate SignNow and enjoy faster, easier and overall more productive eSignature workflows!
How it works
airSlate SignNow features that users love


Get legally-binding signatures now!
FAQs
-
How do you create AutoText?
Highlight the text that you want to add as an entry, including paragraph marks. ... From the Word menu select Insert > AutoText > New (or use Alt+F3 as a shortcut). When the Create AutoText form appears, type the name that you want to use for the AutoText entry, and click OK. -
Can you auto populate in Word?
Built in and custom DocProperty fields can be used once or multiple times in each document to populate form entries and repeat text. When all of your fields are entered simply select all (CTRL+a) and F9 to update the fields. -
How do I auto populate text in Word?
Type the text you want AutoComplete to insert. ... Highlight the text. Click "Insert" in the Word menu bar. ... Click "OK" to add the text. Check the box labeled "Show AutoComplete Suggestions." Click "OK." Type "Iron" anywhere in your document. ... Press "Enter" to insert "Ironfoundersson Inc." into your Word document. -
How do I create an autofill form in Word?
Enable Developer Tab. Open Microsoft Word, then go to the File Tab > Options > Customize Ribbon > check the Developer Tab in the right column > Click OK. Insert a Control. ... Edit Filler Text. ... Design Mode button again to exit the mode. Customize Content Controls. -
How do I create a shortcut for text in Word?
Define your AutoText entry as you normally would. Display the Word Options dialog box. ... At the left of the dialog box click Customize (Word 2007) or Quick Access Toolbar (Word 2010). Click the Customize button. ... Position the insertion point in the Press New Shortcut Key text box. Press the shortcut key you want to use. -
How do I auto populate text in Excel?
Click File > Options. Click Advanced, and then under Editing options, select or clear the Enable AutoComplete for cell values check box to turn this option on or off. -
How do I autofill text in Excel?
Put the mouse pointer over the bottom right-hand corner of the cell until it's a black plus sign. Click and hold the left mouse button, and drag the plus sign over the cells you want to fill. And the series is filled in for you automatically using the AutoFill feature. -
How do I create a fillable form in Word?
Enable Developer Tab. Open Microsoft Word, then go to the File Tab > Options > Customize Ribbon > check the Developer Tab in the right column > Click OK. ... Insert a Control. ... Edit Filler Text. ... Customize Content Controls. -
How do I autofill text in Word?
Type the text you want AutoComplete to insert. ... Highlight the text. Click "Insert" in the Word menu bar. ... Click "OK" to add the text. Check the box labeled "Show AutoComplete Suggestions." Click "OK." Type "Iron" anywhere in your document. ... Press "Enter" to insert "Ironfoundersson Inc." into your Word document. -
How do I turn on auto text in Word?
Open Microsoft Word. Click Format in the menu bar. Click AutoFormat. Click the Options button. Click the AutoText tab. In the Enter AutoText entries here field, type the common text or phrase you want to have displayed in AutoText. -
How do I auto populate text in Excel based on another cell?
Use formula to auto fill text based on the cell filled color Select a cell, supposing cell A1, click Formulas > Define Name in the Defined Names group. Into the Refers to textbox. Click OK. Press Enter key, then you will return the text based on the cell filled color. -
How can you create your own AutoText entries?
Highlight the text that you want to add as an entry, including paragraph marks. ... From the Word menu select Insert > AutoText > New (or use Alt+F3 as a shortcut). When the Create AutoText form appears, type the name that you want to use for the AutoText entry, and click OK.
What active users are saying — create populated text


Related searches to create populated text with airSlate SignNow
