Default Validation Made Easy
Award-winning eSignature solution


Get the powerful eSignature capabilities you need from the company you trust
Choose the pro platform designed for pros
Configure eSignature API with ease
Collaborate better together
Default validation, within minutes
Decrease the closing time
Maintain important information safe
See airSlate SignNow eSignatures in action


airSlate SignNow solutions for better efficiency
Our user reviews speak for themselves


Why choose airSlate SignNow
-
Free 7-day trial. Choose the plan you need and try it risk-free.
-
Honest pricing for full-featured plans. airSlate SignNow offers subscription plans with no overages or hidden fees at renewal.
-
Enterprise-grade security. airSlate SignNow helps you comply with global security standards.

Your step-by-step guide — default validation
Employing airSlate SignNow’s eSignature any company can enhance signature workflows and eSign in real-time, giving an improved experience to clients and staff members. Use default validation in a couple of simple steps. Our mobile apps make operating on the run achievable, even while off the internet! eSign signNows from anywhere in the world and make tasks faster.
Keep to the walk-through instruction for using default validation:
- Log in to your airSlate SignNow profile.
- Find your document within your folders or upload a new one.
- Open the record adjust using the Tools list.
- Drop fillable fields, add text and sign it.
- Include several signees via emails configure the signing order.
- Specify which users can get an completed copy.
- Use Advanced Options to limit access to the record and set an expiry date.
- Tap Save and Close when done.
In addition, there are more enhanced functions accessible for default validation. Include users to your shared digital workplace, browse teams, and monitor collaboration. Numerous customers all over the US and Europe concur that a system that brings everything together in a single holistic workspace, is exactly what enterprises need to keep workflows working effortlessly. The airSlate SignNow REST API enables you to embed eSignatures into your app, internet site, CRM or cloud. Try out airSlate SignNow and enjoy quicker, smoother and overall more productive eSignature workflows!
How it works
airSlate SignNow features that users love


See exceptional results default validation made easy
How to submit and eSign a document online
Try out the fastest way to default validation. Avoid paper-based workflows and manage documents right from airSlate SignNow. Complete and share your forms from the office or seamlessly work on-the-go. No installation or additional software required. All features are available online, just go to signnow.com and create your own eSignature flow.
A brief guide on how to default validation in minutes
- Create an airSlate SignNow account (if you haven’t registered yet) or log in using your Google or Facebook.
- Click Upload and select one of your documents.
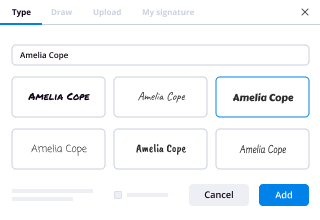
- Use the My Signature tool to create your unique signature.
- Turn the document into a dynamic PDF with fillable fields.
- Fill out your new form and click Done.
Once finished, send an invite to sign to multiple recipients. Get an enforceable contract in minutes using any device. Explore more features for making professional PDFs; add fillable fields default validation and collaborate in teams. The eSignature solution gives a secure process and operates in accordance with SOC 2 Type II Certification. Make sure that all your information are guarded and therefore no person can edit them.

How to eSign a PDF template in Google Chrome
Are you looking for a solution to default validation directly from Chrome? The airSlate SignNow extension for Google is here to help. Find a document and right from your browser easily open it in the editor. Add fillable fields for text and signature. Sign the PDF and share it safely according to GDPR, SOC 2 Type II Certification and more.
Using this brief how-to guide below, expand your eSignature workflow into Google and default validation:
- Go to the Chrome web store and find the airSlate SignNow extension.
- Click Add to Chrome.
- Log in to your account or register a new one.
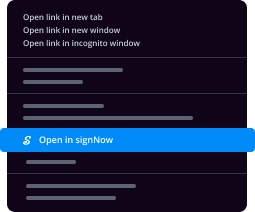
- Upload a document and click Open in airSlate SignNow.
- Modify the document.
- Sign the PDF using the My Signature tool.
- Click Done to save your edits.
- Invite other participants to sign by clicking Invite to Sign and selecting their emails/names.
Create a signature that’s built in to your workflow to default validation and get PDFs eSigned in minutes. Say goodbye to the piles of papers on your desk and start saving money and time for additional significant tasks. Choosing the airSlate SignNow Google extension is a smart handy decision with many different advantages.

How to sign an attachment in Gmail
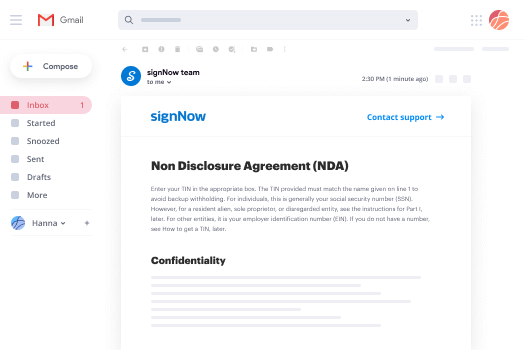
If you’re like most, you’re used to downloading the attachments you get, printing them out and then signing them, right? Well, we have good news for you. Signing documents in your inbox just got a lot easier. The airSlate SignNow add-on for Gmail allows you to default validation without leaving your mailbox. Do everything you need; add fillable fields and send signing requests in clicks.
How to default validation in Gmail:
- Find airSlate SignNow for Gmail in the G Suite Marketplace and click Install.
- Log in to your airSlate SignNow account or create a new one.
- Open up your email with the PDF you need to sign.
- Click Upload to save the document to your airSlate SignNow account.
- Click Open document to open the editor.
- Sign the PDF using My Signature.
- Send a signing request to the other participants with the Send to Sign button.
- Enter their email and press OK.
As a result, the other participants will receive notifications telling them to sign the document. No need to download the PDF file over and over again, just default validation in clicks. This add-one is suitable for those who like concentrating on more important aims instead of wasting time for absolutely nothing. Improve your day-to-day compulsory labour with the award-winning eSignature application.
How to eSign a PDF template on the go with no mobile app
For many products, getting deals done on the go means installing an app on your phone. We’re happy to say at airSlate SignNow we’ve made singing on the go faster and easier by eliminating the need for a mobile app. To eSign, open your browser (any mobile browser) and get direct access to airSlate SignNow and all its powerful eSignature tools. Edit docs, default validation and more. No installation or additional software required. Close your deal from anywhere.
Take a look at our step-by-step instructions that teach you how to default validation.
- Open your browser and go to signnow.com.
- Log in or register a new account.
- Upload or open the document you want to edit.
- Add fillable fields for text, signature and date.
- Draw, type or upload your signature.
- Click Save and Close.
- Click Invite to Sign and enter a recipient’s email if you need others to sign the PDF.
Working on mobile is no different than on a desktop: create a reusable template, default validation and manage the flow as you would normally. In a couple of clicks, get an enforceable contract that you can download to your device and send to others. Yet, if you want a software, download the airSlate SignNow mobile app. It’s secure, quick and has an excellent interface. Enjoy effortless eSignature workflows from your business office, in a taxi or on an airplane.
How to sign a PDF file having an iPad
iOS is a very popular operating system packed with native tools. It allows you to sign and edit PDFs using Preview without any additional software. However, as great as Apple’s solution is, it doesn't provide any automation. Enhance your iPhone’s capabilities by taking advantage of the airSlate SignNow app. Utilize your iPhone or iPad to default validation and more. Introduce eSignature automation to your mobile workflow.
Signing on an iPhone has never been easier:
- Find the airSlate SignNow app in the AppStore and install it.
- Create a new account or log in with your Facebook or Google.
- Click Plus and upload the PDF file you want to sign.
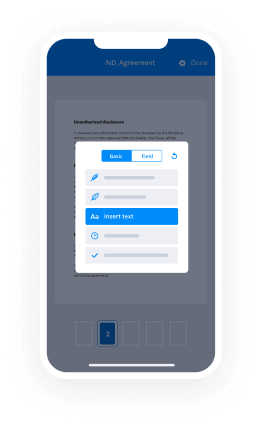
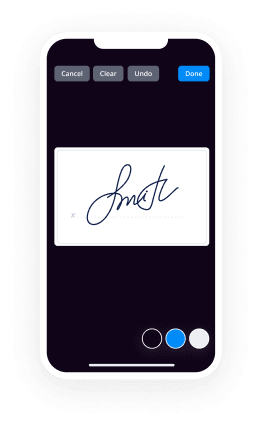
- Tap on the document where you want to insert your signature.
- Explore other features: add fillable fields or default validation.
- Use the Save button to apply the changes.
- Share your documents via email or a singing link.
Make a professional PDFs right from your airSlate SignNow app. Get the most out of your time and work from anywhere; at home, in the office, on a bus or plane, and even at the beach. Manage an entire record workflow effortlessly: generate reusable templates, default validation and work on PDF files with business partners. Transform your device right into a effective organization for executing contracts.
How to sign a PDF file taking advantage of an Android
For Android users to manage documents from their phone, they have to install additional software. The Play Market is vast and plump with options, so finding a good application isn’t too hard if you have time to browse through hundreds of apps. To save time and prevent frustration, we suggest airSlate SignNow for Android. Store and edit documents, create signing roles, and even default validation.
The 9 simple steps to optimizing your mobile workflow:
- Open the app.
- Log in using your Facebook or Google accounts or register if you haven’t authorized already.
- Click on + to add a new document using your camera, internal or cloud storages.
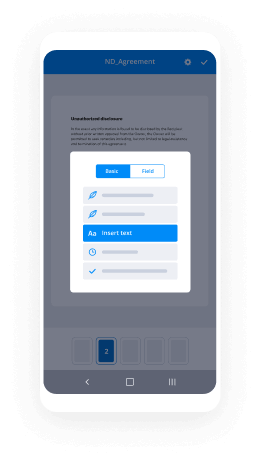
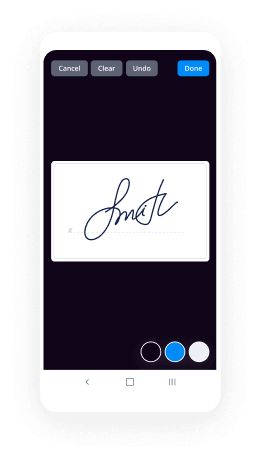
- Tap anywhere on your PDF and insert your eSignature.
- Click OK to confirm and sign.
- Try more editing features; add images, default validation, create a reusable template, etc.
- Click Save to apply changes once you finish.
- Download the PDF or share it via email.
- Use the Invite to sign function if you want to set & send a signing order to recipients.
Turn the mundane and routine into easy and smooth with the airSlate SignNow app for Android. Sign and send documents for signature from any place you’re connected to the internet. Generate professional-looking PDFs and default validation with just a few clicks. Come up with a perfect eSignature process with just your mobile phone and enhance your total productiveness.
Get legally-binding signatures now!
FAQs
-
How do you validate a form?
Basic Validation \u2212 First of all, the form must be checked to make sure all the mandatory fields are filled in. It would require just a loop through each field in the form and check for data. Data Format Validation \u2212 Secondly, the data that is entered must be checked for correct form and value. -
Why form validation is required?
Form validation is required to prevent web form abuse by malicious users. Improper validation of form data is one of the main causes of security vulnerabilities. It exposes your website to attacks such as header injections, cross-site scripting, and SQL injections. -
Where should form validation occur?
Data validation should occur in two locations: The point where data is acted upon, for example validating input parameters to an SQL query. General validation at the point where data is submitted, for example in a web application some validation should occur on the client. -
How do you validate a contact form?
Suggested clip Contact Us Form Validation Using Javascript | Form Validation In ...YouTubeStart of suggested clipEnd of suggested clip Contact Us Form Validation Using Javascript | Form Validation In ... -
How do I get contact form to work?
Suggested clip 58: How to Create A PHP Contact Form | PHP Tutorial | Learn PHP ...YouTubeStart of suggested clipEnd of suggested clip 58: How to Create A PHP Contact Form | PHP Tutorial | Learn PHP ... -
How do you validate in HTML?
Syntax for form in HTML. Validating a form : The data entered into a form needs to be in the right format and certain fields need to be filled in order to effectively use the submitted form. ... Form validation : Styling the form : COMBINED CODE [ALL OF THE ABOVE SECTIONS CLUBBED) Reference : -
What happens when an HTML code is validated?
Validating your web page does not ensure that it will appear the way you want it to. It merely ensures that your code is without HTML or CSS errors. ... So if you write HTML code that has (say) the wrong order, the HTML validator will spot it and tell you. -
What is password validation?
Password validation. Sometimes a password validation in a form is essential. ... Check a password between 8 to 15 characters which contain at least one lowercase letter, one uppercase letter, one numeric digit, and one special character. -
How can I get password and confirm password in PHP?
Suggested clip PHP Tutorial : 30 : PHP Project : how to confirm password in php ...YouTubeStart of suggested clipEnd of suggested clip PHP Tutorial : 30 : PHP Project : how to confirm password in php ... -
How do I create a form in HTML?
The -
How do I create a form in HTML and CSS?
Suggested clip 24: Forms In HTML and CSS | How To Create A Form | Learn HTML ...YouTubeStart of suggested clipEnd of suggested clip 24: Forms In HTML and CSS | How To Create A Form | Learn HTML ... -
What is front end validation?
front-end validation in forms is able to highlight wrong user input and disable the input button. This is useful to give the user some immediate feedback when entering values in the form. ... There will be no highlighting of incorrect values in the front-end. -
What is Web technology validation?
Form validation is useful when you need a user to input information that is expected to meet certain requirements. There are two validation standards: server side validation and client side validation. ... Client side validation is performed by a web browser, before input is sent to a web server. -
What is client side validation?
When you enter data, the browser and/or the web server will check to see that the data is in the correct format and within the constraints set by the application. Validation done in the browser is called client-side validation, while validation done on the server is called server-side validation. -
Is client side validation enough?
Server-side validation is a must because client-side validation does not ensure not-validated data will arrive in the server. Client-side validation is not enough because its scope of action is very restrict. The validation is performed in the browser user-interface only. ... A browser is not even required.
What active users are saying — default validation


Clear validated field
data validation is extremely important the problem is they can create a lot of excess code plus you end up in the position of having similar validation code throughout your application violating the DRI principle in this video I'm gonna introduce you to fluent validation a free tool to help make your validation clean easy to create and easy to maintain as a bonus it even works on models that you don't own and can't change now if you're new to this channel my name is Tim quarry and it's my goal to make learning c-sharp easier whether you're new c-sharp or have used it for years you should be able to find something here that will benefit you one of the biggest ways you can see improvement in your c-sharp skill is through practice make sure that whatever you learn you practice that's why I have an ongoing series on Thursdays called the weekly challenge I would encourage you to participate each week to make sure you keep your skills sharp ok let's get started now as you can see we're starting out with some code already written if you want to have a copy of this starter code or if you want to get the code from the end of this video file the link in the description below to go to the blog post entry for this video now I've got a forum project here dashboard for me create a user first name last name account balance and date of birth now it's not much here but behind the scenes let's just look real quick just to show you what code there is we have a binding list that binds to our errors list which wasn't even wired up yet it's just a basically a list of string it's not even wired yeah to our error list box then we have this create button click and again there's code behind here and as well I've mentioned in previous demos and I mention here as well this is demo code so it's be clear here I wouldn't normally put all this code in this button click event I usually have it if I could in a different layer of my application or if I was gonna pull this information out I would have it at least in a different method but there it is just this is demo code so what does it clears the errors out that's that up here and then it has a tryparse on the account balance and once it's done that as long as it works if it does not work it puts an error there and says hey that's a bad balance and returns but if it if it's works then it creates a new person model which is this person right down here this model which has first-name lastname account balance and date of birth which sounds familiar so we put our first-name text in the first name last name in a last name account balance into account balance and date of birth into day of birth so pretty simple stuff but we're getting information from the user in one of my very foundational tenets of programming is never trust the user and that's not to say that we're saying users are bad but users will find a way usually accidentally to give you data you never anticipated well my common examples is you ask a person for their age and you expect them to give you a number as in 1 2 3 4 but in numeric form and they give you te n well that's not a number that's a string but they don't know that that's a number to them so you wouldn't actually think of that so when we get information from the user we shouldn't put it straight into the database so that's kind of we're doing here I'm just simulating that I'm not gonna actually going to do it but this would be a step to insert this in the database so what I do here is somewhere up in here I would validate my data ok and validation in case you're not familiar just means I need to make sure that it's as much as I can that it's valid data as in real data so for example a person's first name needs to have something in it same as last name and account balance we really can't check that unless we have some rules around it so for example as long as it's a number is that invalid like the account balance could be a negative made a balance to check or something like that in which case it's a negative where they owes something and zero is a valid balance because may they have no money coming in or going out that's not zero account balance so that might not be something can check unless we have some rules around it for example maybe this is a particular kind of checking account where you have to have a balance of at least $5,000 in order to maintain this type that back to me something we check date of birth well a day of birth it probably can't be in the future and I know it came to the Future and it probably won't be something that is more than let's say a hundred and twenty years ago because that's older than the oldest person on the planet so that's a range we can put as date of birth sort of validate these things we could put these checks in a place the ala Sud we're starting to write this complex code or at least a number of checks so if we put the checks right here we recheck as soon that comes in the first name check to make sure it's a valid name it's it's not null it's not white space and it's it got at least one character in it same and last name account balance may well say that yes the rule is at least a thousand dollars in the account so we could check for that as well and date of birth we're gonna check that it's not greater than today and it's not over the one hundred and twenty years ago so those are checked be put in place and if we put them right here that would make sense for this particular form but what if we had a different form that also gathered information about the the user well then we've got to do validation there as well and so then we think about well maybe you could put it in the model itself and sometimes that works and you can even do decorators which those are nice and I've done a video on those but maybe you don't control this model made of class library is actually a dll and you don't have access to make modifications to it or maybe you just don't want to pass all that data around all that those methods around with it because you want to use other places or in different ways or you want to swap out which ones you use well then you gotta create different place for all this and so it kind of becomes a little bit of a depends on your circumstances type of answer for validation well today we're gonna look at fluent validation like I said now what I'm gonna do is I'm going to put it in the front end now you don't have to do this in fact it might not be the right place for you might be better to put it in the library for you with your of it with your models but in this case I'm gonna put it in the front end because the fact that I want to simulate the idea of I have no control over this library so I'm not gonna change anything in this library so I'm gonna do is I'm gonna add a reference in nougat so manage new get packages in my dashboard UI I'm gonna search for fluent validation there we go and the red asterisk is the one you want it's been downloaded 9.3 million times so it's a very popular library it has actually got a lot of add-ons as well but we're gonna use just this fluent validation for it today so install that for me it's version 8.1 point oh and notice down here it will work with dotnet standard dotnet framework and other versions of a standard M framework which also means orcid dotnet core so that's a a really great things we can we can take this to any either asp.net or Windows forms or console application to UPF or even you know xamarin iOS those type of things we can take fluent validation with us for those things so this is a truly cross-platform tool which I try to make all my tools cross-platform because of the fact that yeah you might need to go that direction someday so let's just check real quick and see annotations we can upgrade if you want to I'm gonna leave that as is we don't need to do that that's all we need to do to prepare for annotations or for this fluent validation so I'm gonna right click on my UI and create a folder for the the validators I'm actually gonna call it the validators and in here let's create a person validator which is a class person validator and I get public and I am going to inherit from abstract validator control dot to bring in the using fluent validation and this is going to validate the person model okay so I specify that this person validator is going to validate the person model now notice this is in the UI project and yeah I'm validating something somewhere else in this case somewhere I'm simulating I have no control over you could put this in the same library and be just fine so this right here will be the tool that we use to validate the person model which means that all the code for validation will be in one spot and it will be attached to the person model without being tied to it meaning the person model can move around we can have different validators also for a person model so you can kind of swap them out and yet everybody has accesses value to use it if we want to so a value is pretty simple let's create a constructor that's where the value kind of lives let's create our first rule we say rule four and we do our open parens and we give it a name it's gonna use a an arrow function or a lambda function so we're gonna choose what our variable name is let's call it P for person and we'll do our arrow function and say P dot first name so I'd say okay we're gonna work on the first name property so it's getting a rule for the first name we say dot and here's all the potential rules we can do in other actions and there's a lot in here but let's start with something simple not empty now what is not empty if we look at this list here it says defines a not empty validator that's great it will fail if the property is null is empty or is the default value for the type so that covers quite a few different options for our first name now let's leave it just like that with nothing else we created one rule that's it save that and now let's come over to our dashboard here we're going to validate our code and the validation I'll put it all in one spot so you can see it so person validator which we have the ABI using statement for let's call it validate or equals new person validator and they can say let's do I'll show you the results but let's just do a var for now results equals validator dot validate person so we're passing in our newly-created person object we're saying go ahead and validate this and the results that come back is called a fluent validation dot result that validation result okay so that's that's what came back we could say validation result like so and then do a control dot and add this second using statement fluent validation doubt results but if you wanted to do var that's okay as well it's kind of up to you I usually shy away from var for simple types but when it's complex like this and it's obvious what it is for then I I sometimes use var it's up to you okay so we've we've just said go ahead and validate this person so what's going to do when we create this person validator it sets up these rules now you notice there is no validate method in my validator that's because in the abstract validator okay there's a whole bunch of stuff in here about setting up and there's validate so it passes back of validation results and that's a you know kind of the information about it so what's gonna do is we write we call a validate method either gonna say is this a valid method or model based upon the rules you specified we only have one rule and the rule is that first name can't be empty so let's go ahead and create the if statement here if results dot is valid equals false okay so results dot is valid that's pretty self-explanatory if it's true that it is valid if it's false it's not valid it's gonna check for false here then I'll do is I'll do a for and will say I believe a string failure in results dot errors so errors actually no it's a validation failure there we go so now we have a list of errors we can look through if this model is not valid so let's for each validation error let's add it to our errors list okay so we have our errors dot add we ask string so let's create our string interpolation and we'll start off with just the name so failure dot property name and then but the format use up here was this is the name and then colon and then the the error so let's say colon and the error is fail your dot error message okay so that's it what's going to happen is if we fail the validation it's going to loop through every error we get back because we have more than one error and if we get back more one error that's gonna mean there's two entries here are three entries or five entries and it's going to loop through each one one or more and add that to our errors list so let's go wire this errors list up so our list error list box dot data source equals errors and that should do it we can verify that by putting in a couple of bad values or just one bad value actually we know the account balance if we put test here we hit create it's an invalid amount so let's put a zero there and let's put nothing for a first name either the operation is complete but first name must not be empty now where'd that message come from well that came from our validation because it failed validation so if I put test here operation is complete no errors in the list because test could be a valid name so that's really all there is the validation is pretty simple stuff but here's the cool thing is we're not done here we can chain more things to this rule for example okay the first name is not empty but what if it's a hundred characters that doesn't seem like it's a valid first name either and probably not one character that's an initial it's not a name I think the first name has to add at least two characters so if we said that's the rule I'm not sure if it would be or not in my case in the real world I'd probably say as long as one character more call it good but probably last name last name probably to be two characters or more but in this case let's just do two characters or more so let's just say the length and this is the cool thing okay that's provided but we have this exact length here but maybe you don't want that maybe instead we want is we want a min a max that sounds better so let's say that minimum is two characters and maximum is 50 characters since our database table only accepts up to 50 characters that's a good validation rule here if we stop the user and say nope if your name is more than 50 characters then it's gonna have a problem a database so let's tell you right up front and maybe you can use a nickname or maybe you can rethink the name you were putting in because maybe you were putting in three names your first and middle names or something like that it's an a length of to 250 now that error message wasn't the greatest so what if we said with message and said please provide a valid first name like so that's you know more stuff attached to that first name rule but now we're kind of dialing in the rules his first name let's write again first name create oh I've got an invalid account balance first name first name must not be empty and please provide a valid first name okay so what happened here well it ran both rules and the second one has a message no problem here you're going to do let's we can use our Enter key this is kind of nice the Enter key allows us to put multiple lines kind of shrink down the width this line so it's not so long and yet at the same time it's still one line as far as the compiler is concerned so we can do now is we can actually put another message here I just copy this and paste it but I'm starting to get long names let's change you to something shorter so not empty is let's say the the first name is empty likes that and for this one is length of first name invalid okay it means not quite as short I hope it to be but that's get is there and let's run that real quick and see it working so first name where I leave blank will put a value in for our account balance and hit create now it says the first name is empty as it's a length of first name is invalid so we're getting both of those messages which is we now have both custom messages but what if he didn't want both messages because why tell them this empty and the length is invalid so we can do is we add one more property at the beginning let's say cascade and this is a rule essentially against the rule so here's how you're gonna process cascading so cascade mode let's say that it is stopped on first failure no notice you say dot this and then dot this then dot this just keep adding and extending this rule so now we're going to stop in the first failure that's just for this particular rule so we're if if this rule the not empty rule fails it's not going to check the length let's validate that or verify that so my account balance is 1 now we have one error first name was empty well let's put the T in there now the first name is not empty but the length of first name is invalid so let's put another check in place for this string because it is a string and if I were to put one two three they go oh no I'm a account balance but never first name that says it's a valid name there's no error here say that's an invalid name the 1 2 3 is not a valid name and that's where you might have to deviate outside of the standard built-in rules they're provided for you that's not a problem we're going to create a protected method so protected bool be a valid name say string name so this is gonna sound a little weird be a valid name but when you put it in the context of our rule it'll make sense and it's gonna read very easily because so far we read very easily rule 4 first named cascade the stop on first failure if it's not empty with message a length with message to kind of reads almost like just normal English yeah it's a little stilted it's got a couple of quirks but it's very easy to understand we want the same thing for our method names so it's a custom rule we're gonna create in for this rule we're gonna do is we're a strip out a couple of the characters that are ok to be a name but they're not alphanumeric alpha characters and by alpha I mean ABC but beyond that there's also other characters that may be in there you know with accent marks thing like that we're going to check for all of those but first we'll strip out a couple books throughout space and we'll strip out the - because those could be a name so we're gonna say name equals name dot replace and we'll replace a space and it has to be double quotes here not sale quotes we replaced that with an empty string so it's replacing a space with an empty string and we'll also replace the a dash with an empty string now typically the replace we do a char which is a single quote but since we've outputs an empty string in place we have to use double quotes it's a quirk okay so we don't really care for this name so that's why we're modifying it we're just checking to make sure that it has only valid characters so I've stripped out the two that might otherwise cause a problem with this return name dot all it's got check every character in this name I'll say char dot is letter in the is letter we'll check for any valid letter and that's Unicode letter so it does do the accent characters and other things that aren't in a u.s. standard keyboard okay so this allows it to go a little more international with our our wording which probably might affect you it probably should because usually a name database is going to be international so with this what's gonna do is return name dot all and what all does is says dude does every character in this sequence pass the it's a letter test so go through every character and check to make sure it's a letter that's why I pulled the spaced out first and the dash out first because those are not letters but they are valid for a name so if all of them are letters now you've removed the two non letters that are okay that's gonna return true otherwise they'll return false let's add this test at the end so must be a be a valid H okay now I can add I'm sorry a valid name about H be a valid name and we're going to add the with message and we'll say that name will say first name contains invalid characters like so now notice I'm typing first name a lot so we're gonna get back to that in just a minute verify this works first so let's get back here 1 2 3 1 2 3 create first name contains invalid characters so now it's failing but if I were to say te s T is a valid name so there we go now we have a name check it's a little more granular in its check but we're still like I said using this first name over and over again which is especially problematic because once I get this rule done I think this is pretty good once I get done I'm gonna copy the whole thing and paste it for lasting well let's use one of the built-in variables that the fluent validation provides us and say property name so we replace that everywhere is just in curly braces and it's writing a string no dollar sign up front or string that format necessary and the really cool thing here that with the property name is when it looks at a property name and sees first name it the F in the anti capitalize it says ok those are two different words therefore I'll split it apart and put a space in between let's see it's run again and I'm going to say I leave it empty create first name is empty now let's put something in there length of first name invalid t2 first end contains invalid characters so now it's telling me that the field name in my string which means I don't need to have this the beginning probably in fact let's get rid of it he'll save us some space and let's just actually say we'll just add just the error message like so and now if we run this let me do this it just has the error message and since it says first name we know which property applies to so we can use these variables to tell us information about what we're checking against but also we could say this length right here well how many characters was it so what if it was more than enough character me is 51 characters we could take one off but if it's a hundred and one characters well that's a little harder to deal with we have to do something different telling the user that would allow them to make a choice so let's put it inside parens rafter length and just say just a number so we'll put inside curly braces total length and this one he works for string fields but it's kind of handy total length so now if you run this again and I put one here and let's first of all put just one letter in length of length one of first name invalid that's okay but what if I just start typing letters crazy hit create a hundred and five so now if I take off well let's say I have half of G's or more than half there you go all the G's I'm done I 73 I'm making progress okay so you can very easily see Oh only six away one two three four five six there we go but if I put K in there I'm sorry one over so that allows me to know exactly where I'm at in my in the validation it's you know just a little outside or it's way outside so more information can provide the user the easier it makes their job in fixing the errors so as there's a number of different variables for example the min length and max length to get put in there as well so to grab this number right here instead of you have to type it out again the property name the property value as well so you can you can grab these different parameters and put them into your string directly with the curly braces around them and create some really nice error messages for your users all right so we've done this for one field the first name let's do it for last name copy this whole thing and paste and yet sounds redundant but we may be treating last name differently so create a similar rule set is okay and notice since we use property name everywhere I didn't have to redo these strings now also notice that the with message we also have with localized message so if you are dealing with an application needs to have localization this is a way to use a localized message and adjust for whatever language you're displaying your information in so it's not just in this case just English you can have Spanish or French or whatever by using the localized string I'll cover that in this video but just know that's there because yes these string messages are a little scary in the fact that they're just one language alright so let's just make sure this this runs so I'm gonna say now notice that the Cascade mode is stopped on first failure so I'll just puts a 1 account balance and create notice that first name is empty and last name is empty so just no cascade mode only applies the rule it's in so even though we stopped after this right here that was for this rule and we've stopped after this one for this rule so just note that even if you do a cascade mode for your entire your entire validator what you can do a global for this whole validator it still is per rule it's not like if the first rule stops no other rule gets run all right and part of the reason for that is because this valuator can run asynchronously if you want it to and so it run these rules in parallel so that's why you can't say if one fails the others stop because then you get inconsistent results as to which one stops everything else now there is a way and then I cover it in this video but the documentation that site is great so you can go and see how to do it there is a way to nest rules so that if you do the first check and it fails then you don't do other checks on other properties even so it's ways of doing that but in general we just stack the rules like this and then they'll get run in parallel if you're doing async wrestling all right last rule just kind of show something a little bit different so let's create a rule for and rest say P and the arrow function P dot date of birth and we're gonna say that this one rockin we're about cascading for this but we'll say must be a valid age okay now I don't have that yeah I'm going to create that and we'll do a whiff message and we'll say invalid and we'll put the the proper name which we date of birth now yes is yell at me so go ahead and create that's protected bool and we'll say it's going to date time we'll call it date so date you're passing it right check to make sure this is valid so the first thing I'll do is I'll grab the year of this year so it'd be 2018 so int year let's call it current year equals date time dot now dot year let's get 2018 they're going to check to see if the year on the date is is valid so actually grab that year as well we'll say DOB year date of birth year equals date dot year so now we have these two years to compare and all I make sure is that the date of birth year isn't in the future so it's not 2019 or beyond and I want to check as well is that the day of birth year is not more than a hundred and twenty years ago so if current year let's actually say did birth year date of birth year is less than or equal to the current year if that's true then that's good and the date of birth here is greater than the current year - 120 okay so there's our two different checks if it's less than or equal to this year and if it's greater than a hundred and twenty years ago if both of those are true return true okay come down here and return false I could put that in else but the reality is this return stops it right here so it only gets here if it was false so it's up to you if you want to do that or not the other thing I could have done is I could have just returned this right here I don't find that very easy to read because it kind of make you think a little bit what's going on whereas with this I can break point I can look through it and it's just a little easier and it's a little more understandable so I don't typically do that but remember any if statement the result is a true or false value so in theory you can return that value and I'd be true or false and that's we're looking for it so now you have this be a valid age so date of birth must be a valid age with message invalid date of birth let's try it so let's test and test and one two three now a date let's leave it as correct and that's that passes let's move it into January 1st of 2019 invalid date of birth let's move it back to oh I don't know actually probably changing the picker easier let's let's do this let's say 1934 that's fine but now what if we did the 1800s 1866 that's an invalid date of birth okay so that gives you a little more information about you know kind of bracketing in something or you know in other ways of kind of limiting the data that comes through and making sure that's valid data so we have three different rules or three different rule sets one for first name one for last name those are similar basically the same and one for date of birth so all you to do to add more validation is just add more rules into this constructor that's it if you want to create more custom rules no problem just create these little bits right here and it's just pass in the value pass back a boolean as to whether or not it's valid so you don't have to put these in your in your validator you can put them outside of that and have this for your entire application to share so you create these anywhere in public instead it protected probably but what does it do is allow you to you know make name validators that can use anywhere in any model validation not just in this specific one you can even make a company-wide one or create something new get package where you can create your own standard validators that go with the standard values that come with the fluent validation okay so don't think you're limited to putting it inside of this particular validator you can bring them outside now there's a lot more they could cover I'm not going to they want to get you started in this so you know get in get your hands dirty try it out make your own validators try some different data types may validate that account balance or other things as well and just try and figure it all out because if you don't use it then you don't really grasp it as a sale URI dope doesn't click as well okay so try it out and then once you get it then unless you do is I want you to go to the website and read the documentation because there's so much more that you could learn about and the documentation is excellent so go this website fluent validation dotnet and there'll be information there that will cover some of the more detailed aspects of fluent validation okay things like if you have models inside your models or lists of models those type of things so definitely check it out once you gotta start to use this and it'll probably come up in one of my future weekly challenges we've seen like something you should try out because validation is very important so figure out a way to make your validation easy and yet powerful and yet also the ability you have the ability to be dry doing it and I think this one flue and validation fits all those criteria and it's just great so try it out and let me know you think down the comments below alright I appreciate thanks for watching and as always I am Tim quarry [Music] you [Music]
Show more