Digi-sign Event Feedback Made Easy
Award-winning eSignature solution


Get the powerful eSignature capabilities you need from the company you trust
Choose the pro service designed for professionals
Configure eSignature API quickly
Work better together
Digi sign event feedback, within a few minutes
Cut the closing time
Maintain important information safe
See airSlate SignNow eSignatures in action


airSlate SignNow solutions for better efficiency
Our user reviews speak for themselves


Why choose airSlate SignNow
-
Free 7-day trial. Choose the plan you need and try it risk-free.
-
Honest pricing for full-featured plans. airSlate SignNow offers subscription plans with no overages or hidden fees at renewal.
-
Enterprise-grade security. airSlate SignNow helps you comply with global security standards.

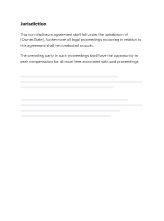
Your step-by-step guide — digi sign event feedback
Using airSlate SignNow’s electronic signature any company can enhance signature workflows and eSign in real-time, providing an improved experience to customers and staff members. Use digi-sign Event Feedback in a couple of simple steps. Our mobile-first apps make work on the go feasible, even while offline! Sign documents from any place worldwide and close up trades faster.
Keep to the stepwise instruction for using digi-sign Event Feedback:
- Log on to your airSlate SignNow profile.
- Locate your needed form in your folders or upload a new one.
- Open up the record and edit content using the Tools menu.
- Place fillable areas, add text and eSign it.
- Include numerous signers via emails and set up the signing sequence.
- Indicate which individuals will receive an executed doc.
- Use Advanced Options to reduce access to the template and set an expiry date.
- Press Save and Close when completed.
Furthermore, there are more extended features accessible for digi-sign Event Feedback. Include users to your shared work enviroment, browse teams, and track teamwork. Numerous customers all over the US and Europe recognize that a system that brings people together in a single holistic workspace, is what companies need to keep workflows working efficiently. The airSlate SignNow REST API enables you to embed eSignatures into your app, internet site, CRM or cloud. Check out airSlate SignNow and get faster, easier and overall more effective eSignature workflows!
How it works
airSlate SignNow features that users love


See exceptional results digi-sign Event Feedback made easy
How to submit and sign a PDF online
Try out the fastest way to digi-sign Event Feedback. Avoid paper-based workflows and manage documents right from airSlate SignNow. Complete and share your forms from the office or seamlessly work on-the-go. No installation or additional software required. All features are available online, just go to signnow.com and create your own eSignature flow.
A brief guide on how to digi-sign Event Feedback in minutes
- Create an airSlate SignNow account (if you haven’t registered yet) or log in using your Google or Facebook.
- Click Upload and select one of your documents.
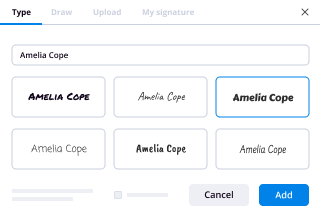
- Use the My Signature tool to create your unique signature.
- Turn the document into a dynamic PDF with fillable fields.
- Fill out your new form and click Done.
Once finished, send an invite to sign to multiple recipients. Get an enforceable contract in minutes using any device. Explore more features for making professional PDFs; add fillable fields digi-sign Event Feedback and collaborate in teams. The eSignature solution supplies a protected workflow and runs according to SOC 2 Type II Certification. Be sure that your information are protected and therefore no one can change them.
How to eSign a PDF in Google Chrome
Are you looking for a solution to digi-sign Event Feedback directly from Chrome? The airSlate SignNow extension for Google is here to help. Find a document and right from your browser easily open it in the editor. Add fillable fields for text and signature. Sign the PDF and share it safely according to GDPR, SOC 2 Type II Certification and more.
Using this brief how-to guide below, expand your eSignature workflow into Google and digi-sign Event Feedback:
- Go to the Chrome web store and find the airSlate SignNow extension.
- Click Add to Chrome.
- Log in to your account or register a new one.
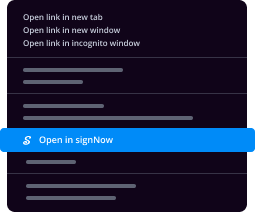
- Upload a document and click Open in airSlate SignNow.
- Modify the document.
- Sign the PDF using the My Signature tool.
- Click Done to save your edits.
- Invite other participants to sign by clicking Invite to Sign and selecting their emails/names.
Create a signature that’s built in to your workflow to digi-sign Event Feedback and get PDFs eSigned in minutes. Say goodbye to the piles of papers sitting on your workplace and begin saving money and time for additional important activities. Selecting the airSlate SignNow Google extension is an awesome convenient option with plenty of benefits.

How to eSign an attachment in Gmail
If you’re like most, you’re used to downloading the attachments you get, printing them out and then signing them, right? Well, we have good news for you. Signing documents in your inbox just got a lot easier. The airSlate SignNow add-on for Gmail allows you to digi-sign Event Feedback without leaving your mailbox. Do everything you need; add fillable fields and send signing requests in clicks.
How to digi-sign Event Feedback in Gmail:
- Find airSlate SignNow for Gmail in the G Suite Marketplace and click Install.
- Log in to your airSlate SignNow account or create a new one.
- Open up your email with the PDF you need to sign.
- Click Upload to save the document to your airSlate SignNow account.
- Click Open document to open the editor.
- Sign the PDF using My Signature.
- Send a signing request to the other participants with the Send to Sign button.
- Enter their email and press OK.
As a result, the other participants will receive notifications telling them to sign the document. No need to download the PDF file over and over again, just digi-sign Event Feedback in clicks. This add-one is suitable for those who choose working on more significant aims as an alternative to burning time for absolutely nothing. Boost your day-to-day routine with the award-winning eSignature solution.
How to sign a PDF template on the go without an app
For many products, getting deals done on the go means installing an app on your phone. We’re happy to say at airSlate SignNow we’ve made singing on the go faster and easier by eliminating the need for a mobile app. To eSign, open your browser (any mobile browser) and get direct access to airSlate SignNow and all its powerful eSignature tools. Edit docs, digi-sign Event Feedback and more. No installation or additional software required. Close your deal from anywhere.
Take a look at our step-by-step instructions that teach you how to digi-sign Event Feedback.
- Open your browser and go to signnow.com.
- Log in or register a new account.
- Upload or open the document you want to edit.
- Add fillable fields for text, signature and date.
- Draw, type or upload your signature.
- Click Save and Close.
- Click Invite to Sign and enter a recipient’s email if you need others to sign the PDF.
Working on mobile is no different than on a desktop: create a reusable template, digi-sign Event Feedback and manage the flow as you would normally. In a couple of clicks, get an enforceable contract that you can download to your device and send to others. Yet, if you really want a software, download the airSlate SignNow app. It’s comfortable, quick and has an excellent interface. Try out smooth eSignature workflows from the office, in a taxi or on a plane.
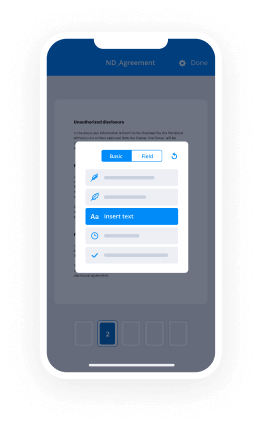
How to sign a PDF file employing an iPhone
iOS is a very popular operating system packed with native tools. It allows you to sign and edit PDFs using Preview without any additional software. However, as great as Apple’s solution is, it doesn't provide any automation. Enhance your iPhone’s capabilities by taking advantage of the airSlate SignNow app. Utilize your iPhone or iPad to digi-sign Event Feedback and more. Introduce eSignature automation to your mobile workflow.
Signing on an iPhone has never been easier:
- Find the airSlate SignNow app in the AppStore and install it.
- Create a new account or log in with your Facebook or Google.
- Click Plus and upload the PDF file you want to sign.
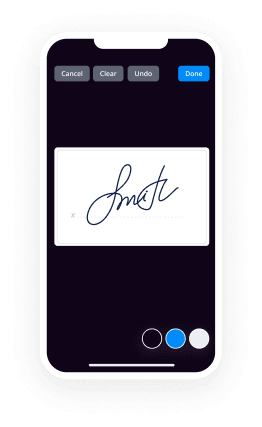
- Tap on the document where you want to insert your signature.
- Explore other features: add fillable fields or digi-sign Event Feedback.
- Use the Save button to apply the changes.
- Share your documents via email or a singing link.
Make a professional PDFs right from your airSlate SignNow app. Get the most out of your time and work from anywhere; at home, in the office, on a bus or plane, and even at the beach. Manage an entire record workflow seamlessly: make reusable templates, digi-sign Event Feedback and work on documents with business partners. Transform your device right into a highly effective business for closing deals.
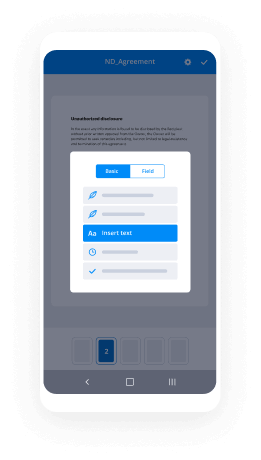
How to eSign a PDF using an Android
For Android users to manage documents from their phone, they have to install additional software. The Play Market is vast and plump with options, so finding a good application isn’t too hard if you have time to browse through hundreds of apps. To save time and prevent frustration, we suggest airSlate SignNow for Android. Store and edit documents, create signing roles, and even digi-sign Event Feedback.
The 9 simple steps to optimizing your mobile workflow:
- Open the app.
- Log in using your Facebook or Google accounts or register if you haven’t authorized already.
- Click on + to add a new document using your camera, internal or cloud storages.
- Tap anywhere on your PDF and insert your eSignature.
- Click OK to confirm and sign.
- Try more editing features; add images, digi-sign Event Feedback, create a reusable template, etc.
- Click Save to apply changes once you finish.
- Download the PDF or share it via email.
- Use the Invite to sign function if you want to set & send a signing order to recipients.
Turn the mundane and routine into easy and smooth with the airSlate SignNow app for Android. Sign and send documents for signature from any place you’re connected to the internet. Build professional-looking PDFs and digi-sign Event Feedback with couple of clicks. Created a perfect eSignature workflow using only your smartphone and improve your general productivity.
Get legally-binding signatures now!
FAQs
-
How do I create a digital signature?
Android: Use airSlate SignNow Fill & Sign It can also capture pictures of airSlate SignNow documents with your camera so you can sign them electronically. After installing the app, you can open PDF documents in the app and tap the signature button to sign them. -
How do I create a digital signature in Word?
To add a digital signature, open your Microsoft Word document and click where you'd like to add your signature line. From the Word ribbon, select the Insert tab and then click Signature Line in the Text group. A Signature Setup pop-up box appears. Enter your information in the text fields and click OK. -
How do I create a digital signature in Word for free?
Place the cursor where you'd like your signature line to go in your Word document. Go to the Insert tab and under \u201cText\u201d click \u201cSignature List,\u201d followed by \u201cMicrosoft Office Signature Line\u201c. Complete the fields about signature details in the setup box that pops up and select your preferences for the signature box. -
How can I create a digital signature online?
Suggested clip How to Create Electronic and Digital Signature and Sign PDF and ...YouTubeStart of suggested clipEnd of suggested clip How to Create Electronic and Digital Signature and Sign PDF and ... -
How do I electronically sign a document in Word?
Suggested clip How to Add A Signature in a Word Document - YouTubeYouTubeStart of suggested clipEnd of suggested clip How to Add A Signature in a Word Document - YouTube -
How do I digitally sign a document?
Click the File tab. Click Info. Click Protect Document, Protect Workbook or Protect Presentation. Click Add a Digital Signature. Read the Word, Excel, or PowerPoint message, and then click OK. -
How do I do an electronic signature?
Draw your signature using your finger or a stylus. If you have access to a touchscreen, you can use your finger to create an electronic signature directly in your document. ... Upload an image of your signature. ... Use your cursor to draw your signature. ... Use your keyboard to type in your signature. -
How do I electronically sign a Word document on a Mac?
Select "Preferences" from the "Preview" menu to open the Preferences panel. Select the "Signatures" tab. Click the "Add Signature" plus button at the bottom of the list of signatures. Hold the signed sheet of airSlate SignNow in front of the built-in camera on your Mac, typically located above the screen. -
How can I electronically sign a Word document?
Sign up for a free trial at airSlate SignNow, and then log in. Select New > Sign a Document, and then upload the Word document. Select Sign. Review the document, and then select Continue. Drag your electronic signature from the left pane, and drop it into the Word document. -
How do I sign a Word document in 2019?
Place the cursor in your Word document where you want to insert a signature. Click the Insert tab. Select Signature Line. A menu will appear. Fill out the required fields. Select OK. -
How do I create a handwritten signature?
Sign your name on a piece of airSlate SignNow. ... Scan your signature and save it on your computer. ... Open the word processor and open a new document. ... Move the cursor to the line about your address. ... Open Microsoft Outlook and click "Tools" on the top toolbar. -
How do you copy a signature?
Suggested clip How to copy a signature!! - YouTubeYouTubeStart of suggested clipEnd of suggested clip How to copy a signature!! - YouTube -
How do I create a free electronic signature?
Create an airSlate SignNow account. It only takes a few seconds. Upload your document to your account. ... Select who needs to sign your document. ... Prepare the document for signature. ... Sign the document or send it out for signature. -
How do you create a line in Word that you can type on?
Suggested clip How to Add Text Over a Line Without the Line Moving as You Type ...YouTubeStart of suggested clipEnd of suggested clip How to Add Text Over a Line Without the Line Moving as You Type ...
What active users are saying — digi sign event feedback


Related searches to digi-sign Event Feedback made easy

Digi sign event feedback
Hello. And welcome to the TI Precision Lab, Discussing intrinsic Op Amp Noise, Part 1. Overall, this video series on noise will show how to predict op amp noise with calculation and simulation, as well show how to accurately measure noise. In part 1, we will define intrinsic noise, introduce the different types of noise, and discuss noise spectral density. Noise can be defined as an unwanted signal that combines with the desired signal to result in an error. In audio, for example, noise can be noticed as a hiss or a popping sound. In a sensor system, noise can be an error in the measured sensor output, such as pressure or temperature. Noise can be categorized into two basic groups, extrinsic and intrinsic. Extrinsic noise is noise produced from some external circuit or natural phenomena. For example, 60 hertz powerline noise and interference from mobile phones are common examples of extrinsic noise. Cosmic radiation is another example of a natural phenomenon that causes extrinsic noise. Intrinsic noise is caused by components within a circuit. Resistors and semiconductor devices, for example, generate noise. Intrinsic noise is very predictable. Whereas extrinsic noise is typically difficult to predict. In this noise video series we will focus on intrinsic noise. As we mentioned before, our discussion will focus on how to calculate, simulate and measure noise. We will also discuss techniques for reducing noise. This slide illustrates how an amplifier circuit can be translated into a noise equivalent circuit. Each resistor has a noise voltage source associated with it. The noise voltage source is denoted by a circle with an asterisk inside. The amplifier also has a noise voltage source, and a noise current source. The noise current source is denoted by a diamond with an asterisk inside. The magnitude of the noise sources inside the amplifier is given in the amplifier's data sheet. The magnitude of the noise associated with the resistor is dependent on the resistance value, and can be calculated. We will soon learn how to combine the effects of all the noise sources to determine the total output noise. But first, let's look at some general categories of noise. This slide shows the time domain waveform for white noise, also known as broadband noise. The time domain waveform is what you would see if you measured noise with an oscilloscope. Notice that the horizontal axis is 1 millisecond full scale. Taking the reciprocal of the full scale time gives the frequency of 1 kilohertz. In general, broadband noise is considered to be in the middle-to-high high frequency range. That is frequencies greater than 1 kilohertz. In the next slide we'll consider lower frequency noise sources. Also note the statistical distribution to the right-hand of the slide. The distribution is Gaussian, with a mean value of 0 volts, and the skirts of the distribution at approximately plus or minus 40 millivolts. The distribution indicates that the probability of measuring noise near 0 volts is high. Whereas the probability of measuring noise near the skirts of the distribution is relatively low. Later we will see how the distribution can be used to estimate the peak-to-peak value of the noise signal. Flicker noise, also known as 1 over f, or low frequency noise, is another category of noise. This slide shows the time domain waveform, as well as the statistical distribution for 1 over f noise. The time domain waveform is what you would see if you measured noise with an oscilloscope. Notice that the horizontal axis is 10 seconds full scale. Taking the reciprocal of the full scale time gives a frequency of 0.1 hertz. In general, 1 over f noise is considered to be in the low-frequency range. That is frequencies less than 1 kilohertz. Another category of noise is called burst or popcorn noise. Popcorn noise is a sudden change or step in voltage or current. It does not follow a Gaussian distribution. Instead it has a bimodal or multimodal distribution. The example above jumps between three discrete modes of operation. Popcorn noise is low frequency from 0.1 hertz to 1 kilohertz. Popcorn noise sounds like popping popcorn when played on a speaker or headphones. Popcorn noise is caused by defects in a device, and unfortunately it cannot be mathematically predicted. This presentation does not give further details on popcorn noise. As we have already seen, the various categories of noise have many synonyms. For example, broadband noise is also called white noise, Johnson noise, thermal noise, and resistor noise. It can become very confusing to engineers that are new to the subject, when literature and presentations switch between these different terms. A brief background in statistics is helpful with noise analysis, because most noise has a Gaussian distribution. The probability density function creates the outline of the Gaussian curve. The probability distribution is derived by integrating the probability density function. The probability distribution function gives the probability that an event will occur in a certain interval. For example, if the probability distribution function is equal to 0.3 for x in the range of minus 1 to plus 1, then there is a 30% chance that x will be between minus 1 and plus 1 at any instant in time. In the case of noise, we will use the probability distribution function to estimate peak-to-peak noise. The probability distribution function indicates that there is a 68% chance that a peak will occur between plus or minus 1 standard deviation or 2 sigma. For plus or minus 3 standard deviations, or 6 sigma, the probability increases to 99.7%. This is often used as an estimate of peak-to-peak noise. Keep in mind, however, that the tails of the Gaussian curve are infinite. So there's always a finite probability that noise can be measured outside of the interval of plus or minus 3 sigma. The table shown here relates the number of standard deviations to the probability that a measurement is bounded by this range. For example, there's a 68.3% chance that any instantaneous noise measurement will be in the range of 2 sigma, or plus or minus 1 standard deviation. 6 sigma and 6.6 sigma are common ways of estimating the peak-to-peak noise. In the case of 6 sigma, for example, there is a 99.7% percent chance that any instantaneous measurement will occur within that range. Thus the chance that a noise reading is outside this limit at any instant in time is only 0.3%. The 0.3% probability is considered to be negligible. So 6 sigma is often used as an approximation for peak-to-peak noise. If you are familiar with noise analysis you may have heard the term standard deviation and RMS used interchangeably. This leads one to wonder, is RMS equivalent to standard deviation? The answer is both yes and no. If the signal has no DC offset, the answer is yes. This is the case for most noise signals. Notice that the equation for RMS and standard deviation are the same, except that the standard deviation equation subtracts out the average or DC offset. In the case where a signal has a DC offset, RMS will not be equal to the standard deviation. Fortunately, op amp and resistor noise do not have a DC offset. So we can consider RMS to be equivalent to the standard deviation in these cases. Some extrinsic noise, such as digital switching noise, may not be symmetrical and thus will have a DC offset. It is important to note, however, that some instruments or simulation tools will report RMS noise, including the offset term, AC plus DC, and others will report RMS without the offset term, AC only. An important concept in noise analysis is adding noise values. Noise cannot be added algebraically, for example, 3 plus 5 equals 8. Noise must be added as a vector as shown here, where we take the square root of 3 millivolts RMS squared, plus 5 millivolts RMS squared for a result of 5.83 millivolts RMS. It is important to note that this relationship applies only to uncorrelated random noise. If the noise source is correlated, a different formula applies. Do you remember that white light is the combination of all colors? Well, white noise is the combination of all frequencies. This figure shows that when you add several signals of different frequencies together in the time domain, the result is a random-looking signal. In the frequency domain, each one of these signals looks like an impulse. Combining an infinite number of these signals across all frequencies, creates what is called a noise spectral density curve. Voltage noise spectral density is often a confusing parameter to engineers who are not familiar with noise analysis. Spectral density has units of nanovolts per square root hertz. Multiplying spectral density by the square root of the noise bandwidth gives the RMS noise, as shown in the equation on the top right. Looking at the units in the equation, you can see how the square root hertz cancels out. The spectral density curve is the main amplifier specification used to describe an amplifier's noise characteristics. In this video series we will use the spectral density curve extensively in noise calculations. At this point we have introduced many of the fundamentals needed to understand noise. This slide shows how to calculate the noise produced by a resistor. This noise is generated by the random motion of charges within the resistor. The equation shown above gives the total RMS noise generated by a resistor. Notice that the equation requires the temperature in Kelvin, the resistance, the bandwidth, and Boltzmann's constant. Dividing both sides of the equation by the square root of the bandwidth yields the voltage spectral density equation. Remember that amplifier's noise specifications are usually given in terms of spectral density. Determining the noise spectral density for a resistor is useful. Because it allows for easy comparison of the noise generated by resistors and the noise generated by amplifiers. This plot was generated using the equation given in the last slide. Note that the equation was divided by the square root of the bandwidth to give a spectral density, which is useful, because it provides a quick way of comparing resistor noise to op amp noise. Remember, most op amps specify noise in nanovolts per square root hertz. A very low noise amplifier may have intrinsic noise of only 1 nanovolt per root hertz. Comparing to this plot, 1 nanovolt per root hertz corresponds to a resistor value of approximately 70 ohms. Thus for this example, you should try to use resistors of 70 ohms or less with this op amp. For best performance it's recommended for the amplifier in a circuit to generate more noise than the resistors. Low noise amplifiers can be expensive. And you would not want to pay extra for an expensive low-noise amplifier, and have resistor noise dominate the circuit's noise performance. Neglecting resistor noise is a very common oversight of engineers who are new to noise analysis. For this reason, it is useful to have this chart available for quick reference. This slide shows the typical op amp noise model. In some cases, it is important to have two separate current noise sources, as shown in the upper left. In other cases, the simplified model with a single noise source between the inputs, is adequate. The noise sources represent the spectral density curves. In the following videos discussing noise, we will learn how to use the op amp noise model to predict the total peak-to-peak output noise for different amplifier configurations. That concludes this video. Thank you for watching. Please try the quiz to check your understanding of this video's content.
Show moreFrequently asked questions
How can I allow customers to eSign contracts?
How do you sign PDF docs online?
How can I sign emailed documents?
Get more for digi-sign Event Feedback made easy
- Print signature service Prenuptial Agreement
- Prove electronically signing Rental Property Lease Agreement Template
- Endorse digi-sign Succession Agreement
- Authorize digital sign Income Verification Letter
- Anneal signatory Statement of Work Template
- Justify eSignature HR Outsourcing Proposal Template
- Try initial OPM 71 Form
- Add Employee Matters Agreement signatory
- Send Software Sales Proposal Template initials
- Fax Pet Adoption Agreement eSign
- Seal Thank you Letter for Donation esigning
- Password Non-Compete Agreement digisign
- Pass Agile Software Development Contract Template electronic signature
- Renew Rent-to-Own Agreement countersign
- Test Wedding Contract sign
- Require Convertible Note Agreement Template electronically signing
- Comment heir digital sign
- Boost company autograph
- Compel caller eSignature
- Void Residential Roofing Contract Template template electronically signed
- Adopt solicitation template byline
- Vouch Meeting Itinerary template esigning
- Establish Free Movie Ticket template signature block
- Clear Exclusivity Agreement Template template signature service
- Complete Social Media Press Release template countersign
- Force Proforma Invoice Template template email signature
- Permit Dog Shot Record template signatory
- Customize Music Producer Contract Template template initials