Digi-sign OTT Made Easy
Award-winning eSignature solution


Upgrade your document workflow with airSlate SignNow
Flexible eSignature workflows
Fast visibility into document status
Easy and fast integration set up
Digi sign ott on any device
Detailed Audit Trail
Rigorous safety standards
See airSlate SignNow eSignatures in action


airSlate SignNow solutions for better efficiency
Our user reviews speak for themselves


Why choose airSlate SignNow
-
Free 7-day trial. Choose the plan you need and try it risk-free.
-
Honest pricing for full-featured plans. airSlate SignNow offers subscription plans with no overages or hidden fees at renewal.
-
Enterprise-grade security. airSlate SignNow helps you comply with global security standards.

Your step-by-step guide — digi sign ott
Employing airSlate SignNow’s electronic signature any business can enhance signature workflows and eSign in real-time, giving a better experience to customers and employees. Use digi-sign OTT in a few simple steps. Our handheld mobile apps make working on the run possible, even while off-line! Sign signNows from any place worldwide and make trades in no time.
Follow the step-by-step guide for using digi-sign OTT:
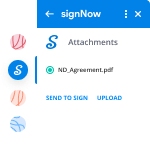
- Log in to your airSlate SignNow profile.
- Locate your document within your folders or upload a new one.
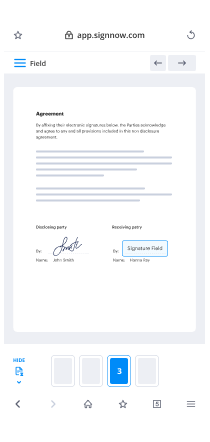
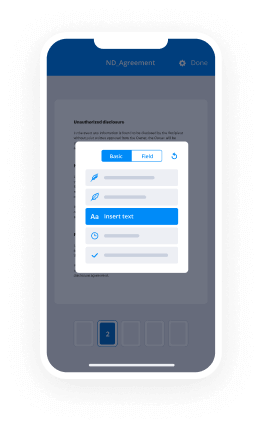
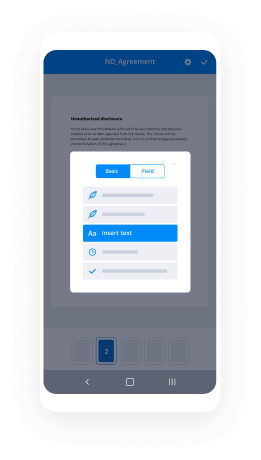
- Access the document and make edits using the Tools list.
- Drop fillable fields, add textual content and sign it.
- List multiple signers by emails configure the signing order.
- Specify which recipients can get an signed copy.
- Use Advanced Options to limit access to the record and set up an expiry date.
- Click Save and Close when completed.
Moreover, there are more innovative features open for digi-sign OTT. Include users to your shared workspace, browse teams, and monitor teamwork. Millions of consumers all over the US and Europe recognize that a system that brings everything together in one unified work area, is exactly what businesses need to keep workflows working effortlessly. The airSlate SignNow REST API enables you to embed eSignatures into your app, website, CRM or cloud. Check out airSlate SignNow and enjoy faster, easier and overall more efficient eSignature workflows!
How it works
airSlate SignNow features that users love


See exceptional results digi-sign OTT made easy

How to submit and sign a document online
Try out the fastest way to digi-sign OTT. Avoid paper-based workflows and manage documents right from airSlate SignNow. Complete and share your forms from the office or seamlessly work on-the-go. No installation or additional software required. All features are available online, just go to signnow.com and create your own eSignature flow.
A brief guide on how to digi-sign OTT in minutes
- Create an airSlate SignNow account (if you haven’t registered yet) or log in using your Google or Facebook.
- Click Upload and select one of your documents.
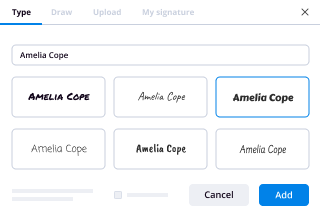
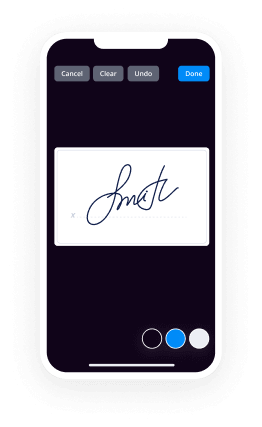
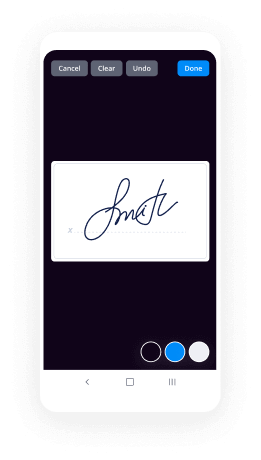
- Use the My Signature tool to create your unique signature.
- Turn the document into a dynamic PDF with fillable fields.
- Fill out your new form and click Done.
Once finished, send an invite to sign to multiple recipients. Get an enforceable contract in minutes using any device. Explore more features for making professional PDFs; add fillable fields digi-sign OTT and collaborate in teams. The eSignature solution supplies a safe process and works in accordance with SOC 2 Type II Certification. Ensure that your information are guarded so no person can edit them.
How to eSign a PDF template in Google Chrome
Are you looking for a solution to digi-sign OTT directly from Chrome? The airSlate SignNow extension for Google is here to help. Find a document and right from your browser easily open it in the editor. Add fillable fields for text and signature. Sign the PDF and share it safely according to GDPR, SOC 2 Type II Certification and more.
Using this brief how-to guide below, expand your eSignature workflow into Google and digi-sign OTT:
- Go to the Chrome web store and find the airSlate SignNow extension.
- Click Add to Chrome.
- Log in to your account or register a new one.
- Upload a document and click Open in airSlate SignNow.
- Modify the document.
- Sign the PDF using the My Signature tool.
- Click Done to save your edits.
- Invite other participants to sign by clicking Invite to Sign and selecting their emails/names.
Create a signature that’s built in to your workflow to digi-sign OTT and get PDFs eSigned in minutes. Say goodbye to the piles of papers sitting on your workplace and start saving time and money for extra crucial tasks. Selecting the airSlate SignNow Google extension is an awesome practical choice with plenty of advantages.
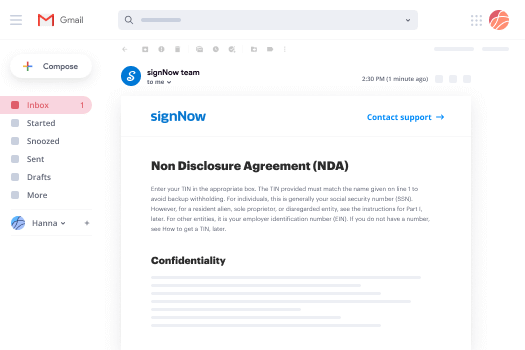

How to sign an attachment in Gmail
If you’re like most, you’re used to downloading the attachments you get, printing them out and then signing them, right? Well, we have good news for you. Signing documents in your inbox just got a lot easier. The airSlate SignNow add-on for Gmail allows you to digi-sign OTT without leaving your mailbox. Do everything you need; add fillable fields and send signing requests in clicks.
How to digi-sign OTT in Gmail:
- Find airSlate SignNow for Gmail in the G Suite Marketplace and click Install.
- Log in to your airSlate SignNow account or create a new one.
- Open up your email with the PDF you need to sign.
- Click Upload to save the document to your airSlate SignNow account.
- Click Open document to open the editor.
- Sign the PDF using My Signature.
- Send a signing request to the other participants with the Send to Sign button.
- Enter their email and press OK.
As a result, the other participants will receive notifications telling them to sign the document. No need to download the PDF file over and over again, just digi-sign OTT in clicks. This add-one is suitable for those who choose working on more valuable goals as an alternative to burning time for absolutely nothing. Increase your daily monotonous tasks with the award-winning eSignature service.
How to eSign a PDF file on the go with no mobile app
For many products, getting deals done on the go means installing an app on your phone. We’re happy to say at airSlate SignNow we’ve made singing on the go faster and easier by eliminating the need for a mobile app. To eSign, open your browser (any mobile browser) and get direct access to airSlate SignNow and all its powerful eSignature tools. Edit docs, digi-sign OTT and more. No installation or additional software required. Close your deal from anywhere.
Take a look at our step-by-step instructions that teach you how to digi-sign OTT.
- Open your browser and go to signnow.com.
- Log in or register a new account.
- Upload or open the document you want to edit.
- Add fillable fields for text, signature and date.
- Draw, type or upload your signature.
- Click Save and Close.
- Click Invite to Sign and enter a recipient’s email if you need others to sign the PDF.
Working on mobile is no different than on a desktop: create a reusable template, digi-sign OTT and manage the flow as you would normally. In a couple of clicks, get an enforceable contract that you can download to your device and send to others. Yet, if you really want an application, download the airSlate SignNow app. It’s secure, quick and has an incredible layout. Experience easy eSignature workflows from the business office, in a taxi or on an airplane.
How to sign a PDF file employing an iPad
iOS is a very popular operating system packed with native tools. It allows you to sign and edit PDFs using Preview without any additional software. However, as great as Apple’s solution is, it doesn't provide any automation. Enhance your iPhone’s capabilities by taking advantage of the airSlate SignNow app. Utilize your iPhone or iPad to digi-sign OTT and more. Introduce eSignature automation to your mobile workflow.
Signing on an iPhone has never been easier:
- Find the airSlate SignNow app in the AppStore and install it.
- Create a new account or log in with your Facebook or Google.
- Click Plus and upload the PDF file you want to sign.
- Tap on the document where you want to insert your signature.
- Explore other features: add fillable fields or digi-sign OTT.
- Use the Save button to apply the changes.
- Share your documents via email or a singing link.
Make a professional PDFs right from your airSlate SignNow app. Get the most out of your time and work from anywhere; at home, in the office, on a bus or plane, and even at the beach. Manage an entire record workflow seamlessly: build reusable templates, digi-sign OTT and work on documents with partners. Transform your device into a highly effective company instrument for executing contracts.
How to eSign a PDF file taking advantage of an Android
For Android users to manage documents from their phone, they have to install additional software. The Play Market is vast and plump with options, so finding a good application isn’t too hard if you have time to browse through hundreds of apps. To save time and prevent frustration, we suggest airSlate SignNow for Android. Store and edit documents, create signing roles, and even digi-sign OTT.
The 9 simple steps to optimizing your mobile workflow:
- Open the app.
- Log in using your Facebook or Google accounts or register if you haven’t authorized already.
- Click on + to add a new document using your camera, internal or cloud storages.
- Tap anywhere on your PDF and insert your eSignature.
- Click OK to confirm and sign.
- Try more editing features; add images, digi-sign OTT, create a reusable template, etc.
- Click Save to apply changes once you finish.
- Download the PDF or share it via email.
- Use the Invite to sign function if you want to set & send a signing order to recipients.
Turn the mundane and routine into easy and smooth with the airSlate SignNow app for Android. Sign and send documents for signature from any place you’re connected to the internet. Create good-looking PDFs and digi-sign OTT with just a few clicks. Assembled a perfect eSignature workflow using only your smartphone and enhance your overall productiveness.
Get legally-binding signatures now!
FAQs
-
How do you use DigsignNow?
Suggested clip Learning How To Use DigsignNow - YouTubeYouTubeStart of suggested clipEnd of suggested clip Learning How To Use DigsignNow - YouTube -
What is an OTT channel?
An over-the-top (OTT) media service is a streaming media service offered directly to viewers via the Internet. OTT bypasses cable, broadcast, and satellite television platforms that traditionally act as a controller or distributor of such content. -
How do I create a free electronic signature?
Create an airSlate SignNow account. It only takes a few seconds. Upload your document to your account. ... Select who needs to sign your document. ... Prepare the document for signature. ... Sign the document or send it out for signature. -
Is YouTube an OTT?
Over-the-top (OTT) video viewers: Individuals who watch video via any app or website that provides streaming video content and bypasses traditional distribution. Examples include HBO Now, Hulu, Netflix, Amazon Video, YouTube/YouTube Red and SlingTV. -
How do I create a digital signature in Word 2016?
To add a digital signature line to your document, place the cursor where you want your signature to go. Go to the Insert tab and in the Text group click Signature Line. If you click the down arrow to the right of the Signature Line button, be sure to select Microsoft Office Signature Line. -
What is OTT in television?
Over the top (OTT) refers to film and television content provided via a high-speed Internet connection rather than a cable or satellite provider. Viewers who dislike paying for bundled content are often referred to as cord cutters. -
Can I draw my signature in Word?
In the document or worksheet, place your pointer where you want to create a signature line. On the Insert tab, in the Text group, click the Signature Line list, and then click Microsoft Office Signature Line. -
How does OTT streaming work?
OTT stands for over-the-top, initially named in reference to devices that go \u201cover\u201d a cable box to give the user access to TV content. In OTT channels, content is delivered via an internet connection rather than through a traditional cable/broadcast provider. -
How can I electronically sign a PDF for free?
Android: Use airSlate SignNow Fill & Sign Instead, you'll need to use a third-party app. Just like on the iPhone and iPad, we like airSlate SignNow Fill & Sign, which allows you to sign an unlimited number of documents a month for free. It can also capture pictures of airSlate SignNow documents with your camera so you can sign them electronically. -
What is OTT advertising?
Before we get into details, it is important to get an OTT advertising definition. OTT advertising is an individualized content provided to the viewers' TV sets while they watch the same TV show. Thus, OTT advertising is a targeted ad delivery on Internet-connected TV sets enabled by programmatic technology. -
How do I create a digital signature?
STEP 1: Log on and select your type of entity. ... STEP 2: Fill the necessary details. ... STEP 3: Proof of identity and address. ... STEP 4: Payment for DSC. ... STEP 5: Post the documents required. -
How do I post an ad on Amazon?
Create a campaign. To create a Sponsored Products campaign, pick the products you want to advertise, set a budget of your choice, and choose your campaign duration. ... Shoppers see your ad. Sponsored Products launch immediately, while Sponsored Brands and Stores undergo a moderation review. ... Measure success. -
Is DigsignNower safe?
Safe, secure, and easy! DigsignNower has allowed our department to easily disseminate documents for signing among individuals and departments who are geographically separated. It has sped up our contract processing seamlessly and easily.
What active users are saying — digi sign ott


Related searches to digi-sign OTT made easy

Digi sign ott
hello and welcome once more to two shortcuts this time with the configuration of the STB receiver mac 254 in the first part of this tutorial will cover the pre installation requirements and the basic steps for connecting ustv mac and AVOD TV online to your TV now in the second part we'll cover the basic configuration of humanity 54 such as internet connection updates appropriate resolution for your TV some other settings and most importantly where and how to import information that will push you Mac for the use of a legitimate or clandestine TV reception and for those with the dilemma of whether it's legal or illegal to have one of these receivers I would tell you that yes it is and knows not well in reality it will depend on the way that you set it up and end up using it if I'm not mistaken those receivers are supposedly pre manufactured for legitimate service and on the very flash are legally so at least here in the United States however in this twister model we have today there is a genetic syndrome inherited and the production of this IPTV receivers and with few tweaking here and there you can easily reconfigure these boxes for the reception of clandestine services that is why I emphasize that the specific used you give to your own box will be fine if you cross their legal or legal line without further ado here you have the configuration the first time putting our process in a knight 254 is approximate with 60 seconds and once completed you will see a home page with some basic applications similar to the one I show on the screen you can play around with them at another time for now with the remote control navigator go and click on setting on the next page or down to the auto page software option unless you of the auto update is enable and the update to River version it's on now to force the update press the f2 key on the remote if they update menu doesn't pop up is because your receivers neither in an internet connection verify the connection and try it again in the next window compare the current version if the receiver has any pre-installed with the new version available an activity F is necessary by pressing the f1 key after pressing at one key way for the update to complete the entire process can take two minutes and a half so don't despair once the upgrade is completed you map or reboot with a front page similar to the previous one and more or less with the same prints taller applications once again with a math 254 remote navigate to settings and click on it in the next window you may start with playback to determine the audio language subtitles and other preferences make sure at the ratio add some feet on this way the picture will fit on the screen later on then return to the previous menu every time you make a change you must save it by pressing the Oakley button also whenever you have to return to the previous menu press the key with the little house in it when returning to the previous menu if you like you can check the software auto update your option to verify the application was updated properly if it's up to date don't do any changes and just return to the previous menu now click on the speed test if you would like to speak test your internet connection from this session only the direct connection test works but don't fall for it as it's extremely inaccurate and nonsense I say this because my internet speed for my second router is 250 by 25 megabit per second and as you can see the test resolved with this Mac 254 is not even close to my actual speed however I didn't notice any abnormality in the TV programming ok after returning to the main menu on access control submenu it's preferable to be off now return and click on tell attacks and make sure to select the display ratio that is compatible with the TV you have usually 4 : 3 is for analog square screen TV guides and 16 : 9 for flat and HD trailer motive is now going back on time shift submenu select on file location the storage for your recording Ln selecting 12 volt I meant for those recording however you will need an external how do I connect it to the usb port and a recording option to be enabled the program guide while doing this test the recording option was still disabled now go back and click on interface here you will be able to control the front page access after restarting you'll see preferably a start page should be a main menu in brightness led if you like you can increase or decrease the intensity of the blue light in front of you Matt 250 for the rest of the option just leave the default now go back and click on system settings in the left column click on network select the type of internet connection you use which you Mack wired or Wireless and verify the auto DHCP is the default option just to let you know don't do only changes in this section unless you have some networking knowledge if you make any changes do not forget to save them by clicking yes ok now go back and click on video and make sure that the option video output mode and graphic resolutions are compatible with the TV you have it is very important that you do not select an unsupported resolution for your TV or while we're starting jamak you will only see a black screen with a message resolution not supported or not signal to correct this error you will have to use a different TV that acceptable solution or restart your Mac via CMAs in order to access these options I explain how to do it in another tutorial diagnostic and solutions IPTV the resolution I select on this example are the highest available but they are compatible with HDTV I use for this test if you have any doubt select a lower resolution for your TV you can always change it from the main menu at a later time if you press the f1 key you will see additional functions like before leave the default settings if you're not sure that ut we can handle these changes now go where can click on advanced settings here select your language and geographical area to populate the right time zone in both your site you may preset any high number than 0 and gradually change it later if you notice lagging or freezing in your program in my test I found it completely ineffective regardless of any changes I made if you click on f1 just leave the default now return to the previous menu and click on network info and on the suit menu select the type of connection you use to verify new connection status as you can see on my example the direct connection status is up and the wireless connection is now you can just ignore their other options now go to the column on the right and just click on the server option leaving all other options with the default now click on portals this is the place where you will input the service provider option if you will be testing with more than one service provider then press the f1 key and a multi total no change it to one and every time you reboot your receiver you will get the option to select which provider you want to use if you will be using only one provider then leave it off and return to the previous menu and 4:01 URL you will enter the portal link of the legitimate or clandestine service provider in this example I will use a clandestine photo link offer with free access for testing purposes to be able to type inside the boxes you have to press on the net remote the bottom with the keyboard and it virtual keyboard will pop up to return to the previous menu you have to press the button with the little house in the map remote and repeat the process whenever it's necessary you can clear any mistakes directly from the remote by pressing the button with the arch or directly from the virtual keyboard by clicking on backspace after inputting and save in the server address import of one name you may put any name if you want all liver empty if you are only using one portal now repeatedly press would keep Mac remote the button with the little house and a set too late the portal when it pops up your net will restore with the new authentication screen here you will have to use the credentials granted by your service provider in my example ironically called a donation by the underground providers the donation number could be around 12 digits or more and it's usually the same number for login and password you may enter the digit directly from the remote control and if you make a mistake just press the key with the arch to delete it optionally you can use the virtual keyboard once you have completed these steps you will see progress by the after finish it will give you access to a huge programming option from almost all over around the world and the only thing you would need is to have enough time to explore so many programming options and of course if any time left to regret for stabbing your regional cable providers if you came across any problem and you're sure that the portal link and the donation information that you previously input are correct then you will have to send a real conversation request to the account linked to your Mac or to ask the person who gave us all of the information to do for you usually this information is associated with the MAC address of your IP TV receiver and sometimes need to be reauthorized from the server for troubleshooting look on my channel two shortcuts for diagnostic and solutions IPTV Mac thank you for dedicating me your valuable time and I hope that I have helped you with your IPTV project if so help others and help me by sharing this video subscribing and come back for more here at the shortcuts or after Chaka Khan
Show moreFrequently asked questions
How do I eSign a document before sending it?
How can I eSign a form or contract in Word?
How can I sign a PDF on my PC?
Get more for digi-sign OTT made easy
- Print signature service Advertising Proposal Template
- Prove email signature Nonprofit Press Release
- Endorse eSign Church Membership Certificate
- Authorize digital sign Party Rental Contract
- Anneal signatory Transfer Agreement
- Empower electronically signed Registration Confirmation
- Try digisign Camper Information
- Add Property Management Service Agreement countersign
- Send Event Management Proposal Template sign
- Fax Perfect Attendance Award electronically signing
- Seal Teacher Resignation Letter eSign
- Password Sales Agreement eSignature
- Pass Wedding Photography Contract Template autograph
- Renew Commercial Lease Agreement electronic signature
- Test Management Report signed electronically
- Require 1040 Form electronically sign
- Send eyewitness digi-sign
- Accredit watcher signed
- Compel awardee mark
- Void Photography Quote Template template signatory
- Adopt report template initials
- Vouch Washington State Rental Agreement template eSign
- Establish New Client Onboarding Checklist template esigning
- Clear Graphic Design Proposal and Agreement Template template digisign
- Complete Patient Medical History template electronic signature
- Force Separation Agreement Template template signature service
- Permit Car Service Receipt template countersign
- Customize Residential Roofing Contract Template template sign