Digital Sign Graphic Design Quote Made Easy
Award-winning eSignature solution


Upgrade your document workflow with airSlate SignNow
Versatile eSignature workflows
Instant visibility into document status
Simple and fast integration set up
Digital sign graphic design quote on any device
Advanced Audit Trail
Rigorous safety standards
See airSlate SignNow eSignatures in action


airSlate SignNow solutions for better efficiency
Our user reviews speak for themselves


Why choose airSlate SignNow
-
Free 7-day trial. Choose the plan you need and try it risk-free.
-
Honest pricing for full-featured plans. airSlate SignNow offers subscription plans with no overages or hidden fees at renewal.
-
Enterprise-grade security. airSlate SignNow helps you comply with global security standards.

Your step-by-step guide — digital sign graphic design quote
Using airSlate SignNow’s electronic signature any organization can increase signature workflows and eSign in real-time, giving a better experience to consumers and staff members. Use digital sign Graphic Design Quote in a couple of easy steps. Our mobile-first apps make work on the move possible, even while offline! Sign contracts from anywhere in the world and complete trades faster.
Follow the step-by-step instruction for using digital sign Graphic Design Quote:
- Log in to your airSlate SignNow profile.
- Locate your needed form within your folders or import a new one.
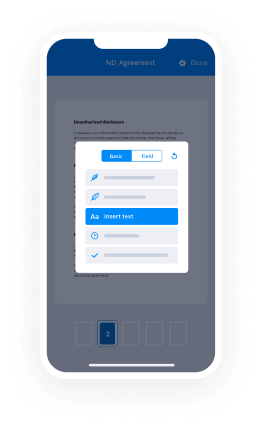
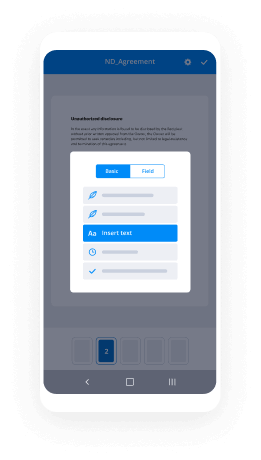
- Open up the template and edit content using the Tools list.
- Place fillable boxes, add text and sign it.
- Include multiple signers by emails and set the signing sequence.
- Choose which individuals can get an executed version.
- Use Advanced Options to restrict access to the record and set an expiration date.
- Click on Save and Close when completed.
Furthermore, there are more extended capabilities available for digital sign Graphic Design Quote. Include users to your collaborative work enviroment, view teams, and keep track of teamwork. Millions of customers across the US and Europe concur that a system that brings people together in a single cohesive workspace, is what organizations need to keep workflows working smoothly. The airSlate SignNow REST API allows you to embed eSignatures into your application, internet site, CRM or cloud storage. Check out airSlate SignNow and enjoy faster, easier and overall more efficient eSignature workflows!
How it works
airSlate SignNow features that users love


See exceptional results digital sign Graphic Design Quote made easy

How to fill out and eSign a PDF online
Try out the fastest way to digital sign Graphic Design Quote. Avoid paper-based workflows and manage documents right from airSlate SignNow. Complete and share your forms from the office or seamlessly work on-the-go. No installation or additional software required. All features are available online, just go to signnow.com and create your own eSignature flow.
A brief guide on how to digital sign Graphic Design Quote in minutes
- Create an airSlate SignNow account (if you haven’t registered yet) or log in using your Google or Facebook.
- Click Upload and select one of your documents.
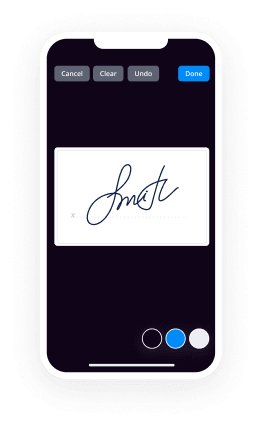
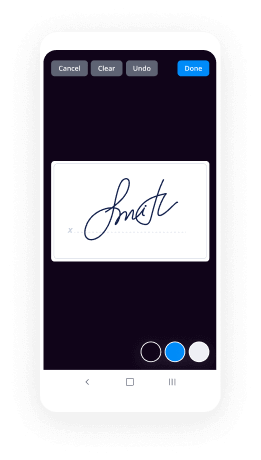
- Use the My Signature tool to create your unique signature.
- Turn the document into a dynamic PDF with fillable fields.
- Fill out your new form and click Done.
Once finished, send an invite to sign to multiple recipients. Get an enforceable contract in minutes using any device. Explore more features for making professional PDFs; add fillable fields digital sign Graphic Design Quote and collaborate in teams. The eSignature solution supplies a protected process and works in accordance with SOC 2 Type II Certification. Be sure that your records are protected and that no one can edit them.
How to eSign a PDF template in Google Chrome
Are you looking for a solution to digital sign Graphic Design Quote directly from Chrome? The airSlate SignNow extension for Google is here to help. Find a document and right from your browser easily open it in the editor. Add fillable fields for text and signature. Sign the PDF and share it safely according to GDPR, SOC 2 Type II Certification and more.
Using this brief how-to guide below, expand your eSignature workflow into Google and digital sign Graphic Design Quote:
- Go to the Chrome web store and find the airSlate SignNow extension.
- Click Add to Chrome.
- Log in to your account or register a new one.
- Upload a document and click Open in airSlate SignNow.
- Modify the document.
- Sign the PDF using the My Signature tool.
- Click Done to save your edits.
- Invite other participants to sign by clicking Invite to Sign and selecting their emails/names.
Create a signature that’s built in to your workflow to digital sign Graphic Design Quote and get PDFs eSigned in minutes. Say goodbye to the piles of papers sitting on your workplace and begin saving money and time for extra crucial duties. Picking out the airSlate SignNow Google extension is a smart convenient choice with a lot of benefits.

How to eSign an attachment in Gmail
If you’re like most, you’re used to downloading the attachments you get, printing them out and then signing them, right? Well, we have good news for you. Signing documents in your inbox just got a lot easier. The airSlate SignNow add-on for Gmail allows you to digital sign Graphic Design Quote without leaving your mailbox. Do everything you need; add fillable fields and send signing requests in clicks.
How to digital sign Graphic Design Quote in Gmail:
- Find airSlate SignNow for Gmail in the G Suite Marketplace and click Install.
- Log in to your airSlate SignNow account or create a new one.
- Open up your email with the PDF you need to sign.
- Click Upload to save the document to your airSlate SignNow account.
- Click Open document to open the editor.
- Sign the PDF using My Signature.
- Send a signing request to the other participants with the Send to Sign button.
- Enter their email and press OK.
As a result, the other participants will receive notifications telling them to sign the document. No need to download the PDF file over and over again, just digital sign Graphic Design Quote in clicks. This add-one is suitable for those who like focusing on more important aims as an alternative to burning up time for absolutely nothing. Boost your daily routine with the award-winning eSignature platform.
How to sign a PDF on the go without an mobile app
For many products, getting deals done on the go means installing an app on your phone. We’re happy to say at airSlate SignNow we’ve made singing on the go faster and easier by eliminating the need for a mobile app. To eSign, open your browser (any mobile browser) and get direct access to airSlate SignNow and all its powerful eSignature tools. Edit docs, digital sign Graphic Design Quote and more. No installation or additional software required. Close your deal from anywhere.
Take a look at our step-by-step instructions that teach you how to digital sign Graphic Design Quote.
- Open your browser and go to signnow.com.
- Log in or register a new account.
- Upload or open the document you want to edit.
- Add fillable fields for text, signature and date.
- Draw, type or upload your signature.
- Click Save and Close.
- Click Invite to Sign and enter a recipient’s email if you need others to sign the PDF.
Working on mobile is no different than on a desktop: create a reusable template, digital sign Graphic Design Quote and manage the flow as you would normally. In a couple of clicks, get an enforceable contract that you can download to your device and send to others. Yet, if you really want a software, download the airSlate SignNow mobile app. It’s secure, fast and has a great layout. Experience seamless eSignature workflows from the workplace, in a taxi or on a plane.
How to sign a PDF utilizing an iPhone
iOS is a very popular operating system packed with native tools. It allows you to sign and edit PDFs using Preview without any additional software. However, as great as Apple’s solution is, it doesn't provide any automation. Enhance your iPhone’s capabilities by taking advantage of the airSlate SignNow app. Utilize your iPhone or iPad to digital sign Graphic Design Quote and more. Introduce eSignature automation to your mobile workflow.
Signing on an iPhone has never been easier:
- Find the airSlate SignNow app in the AppStore and install it.
- Create a new account or log in with your Facebook or Google.
- Click Plus and upload the PDF file you want to sign.
- Tap on the document where you want to insert your signature.
- Explore other features: add fillable fields or digital sign Graphic Design Quote.
- Use the Save button to apply the changes.
- Share your documents via email or a singing link.
Make a professional PDFs right from your airSlate SignNow app. Get the most out of your time and work from anywhere; at home, in the office, on a bus or plane, and even at the beach. Manage an entire record workflow easily: create reusable templates, digital sign Graphic Design Quote and work on PDFs with business partners. Turn your device into a highly effective business tool for closing contracts.
How to eSign a PDF taking advantage of an Android
For Android users to manage documents from their phone, they have to install additional software. The Play Market is vast and plump with options, so finding a good application isn’t too hard if you have time to browse through hundreds of apps. To save time and prevent frustration, we suggest airSlate SignNow for Android. Store and edit documents, create signing roles, and even digital sign Graphic Design Quote.
The 9 simple steps to optimizing your mobile workflow:
- Open the app.
- Log in using your Facebook or Google accounts or register if you haven’t authorized already.
- Click on + to add a new document using your camera, internal or cloud storages.
- Tap anywhere on your PDF and insert your eSignature.
- Click OK to confirm and sign.
- Try more editing features; add images, digital sign Graphic Design Quote, create a reusable template, etc.
- Click Save to apply changes once you finish.
- Download the PDF or share it via email.
- Use the Invite to sign function if you want to set & send a signing order to recipients.
Turn the mundane and routine into easy and smooth with the airSlate SignNow app for Android. Sign and send documents for signature from any place you’re connected to the internet. Build professional PDFs and digital sign Graphic Design Quote with a few clicks. Created a faultless eSignature workflow with just your smartphone and increase your overall productiveness.
Get legally-binding signatures now!
FAQs
-
How do you make a quote graphic?
Suggested clip Quote Graphics: How to Create Quote Graphics for Social Media ...YouTubeStart of suggested clipEnd of suggested clip Quote Graphics: How to Create Quote Graphics for Social Media ... -
How do I make digital signage content?
6 Guidelines For Creating Great Digital Signage Content. ... Simplicity Always Works In Everyone's Favor. ... Have Someone Proofread and Edit Your Content. ... Support Your Message With Graphics and Designs. ... Rotate Your Content. ... Add Calls to Action. -
How do you make a digital signage on Raspberry Pi?
Suggested clip Open Source and Easy to use Raspberry Pi Digital Signage System ...YouTubeStart of suggested clipEnd of suggested clip Open Source and Easy to use Raspberry Pi Digital Signage System ... -
How do you use digital signage?
Suggested clip How To Use Digital Signage Software For Events - YouTubeYouTubeStart of suggested clipEnd of suggested clip How To Use Digital Signage Software For Events - YouTube -
How do digital signage systems work?
How does digital signage work? Digital signage's content is powered by a media player or system-on-a-chip which pushes content to a display. Users can then manage the content with a content management system, either on-site or within the cloud to change up content on the fly. -
What is a quote card?
One of my favorite social media branding images to design for clients is a quote card. ... By starting with your quote card, you'll notice what you like, how your branding elements (fonts, colors, images, and patterns) play together and you'll also get a sense of your own design style (even if you're just starting out!). -
How do you create a quote?
The first option is to click the Create Related drop-down button and select the Quote option. Alternatively, under the Quotes section in the left column, and click the Add a Quote button. Fill out your Quote Details: Give your Quote a Title, Quote Manager, and Quote Template. Click Create Quote. -
How do you make a quote app?
WordSwag. InstaQuote. PicLab. Phonto. Over. Typic. Paint airSlate SignNow Studio. Font Candy. -
How do you cite a quote in writing?
To indicate short quotations (fewer than 40 words) in your text, enclose the quotation within double quotation marks. Provide the author, year, and specific page citation in the text, and include a complete reference in the reference list. -
How do you write a quote in a paragraph?
Hit enter before the first word of the quote, and after the last word of the quote. Highlight the text. Right click and select paragraph. Under indent change left to .5" -
How do you make your own quote?
The first option is to click the Create Related drop-down button and select the Quote option. Alternatively, under the Quotes section in the left column, and click the Add a Quote button. Fill out your Quote Details: Give your Quote a Title, Quote Manager, and Quote Template. Click Create Quote. -
How can I design my own poster?
Get the right size. With Canva, this couldn't be easier\u2014we have standard poster sizes preset to make it simple. Choose a poster template, or design your poster from scratch. ... Customize your poster. ... Add your own message. Download, print or share your finished poster design!
What active users are saying — digital sign graphic design quote


Signature graphic design quote
hey everyone it's Rachel here from the hot chocolate styled stock library I recently had a question from a member who wanted to know how to create graphics using the graphics packs that we provide to you every month and Photoshop so I know we already have some tutorials on how to do this in canva but if you are interested in learning how to do it in Photoshop this video is going to show you how so what you'll want to do is just grab the graphics pack that you want to use login to the members library and you can download any of the graphics packs that we have available and then go ahead and open up Photoshop alright so once you're in Photoshop you want to create a new document so go to file new and I am going to create a let's say an Instagram quote or a social media quote image so I'll make it 1080 by 1080 pixels you can change if yours is on inches or whatever just change it to pixels so 1080 by 1080 resolution 72 pixels per inch is perfect for web and then you can go ahead and give it a name and hit OK so that's gonna open up your artboard over here alright so now how do we get the graphics into Photoshop there's a couple ways you can do this you could go to file place embedded and then that's gonna allow you to pull up a file or if you want to you can also just click and drag one of the background images into this file in Photoshop so I'll show you how to do that so I have the blush collection opened I'm going to go to backgrounds let's say I want to do the gray marble I'm just going to click it and drag it in so Photoshop is gonna place it into my file and now I just want to resize it to make it larger so that it covers the entire canvas so I'm going to click with my mouse hold it down drag it over to the corner and then I'm going to click on one of these corners here and hold down shift and then click and drag down with my mouse so holding down shift actually just allows you to constrain the proportions so that it stays as a square when I'm ready I'm just gonna hit enter and now it's placed inside my artboard I can still move it around if I need to so this is kind of the background for our quote image now let's say we want to add some more elements to it we've got some really pretty borders that are included in this blush graphics pack so if I wanted to do the copper border here again I would just click and drag it in whoops click and drag it in and I could leave it this size if I wanted to or again I could just click and make it larger it's totally up to you so if I'm happy with it at this size that's great now what I might want to do is if the marble background is gonna stay I'm not gonna move it around I could always just lock it so that when I go to grab something else I'm not moving the marble so if I want to grab this border and just adjust it so that it's centered I could do that now you might see those purple lines and wonder what they are so if you go to view and you can add rulers and snap I always have those on and then go to show and then go to smart guides those purple lines are the smart guides and they just tell you where kind of the center or how things are aligning on your page I really like using them it makes it really easy if you use cam of canva before it's a similar type of thing all right so let's say now that I want to go ahead and add some text I'm gonna hit T on my keyboard and then I can type out whatever quotes I want to add in this image all right so when I'm done you can see this font doesn't really show up very well so what I'm gonna do is I'm gonna come up to my character panel click on it and then I can make changes to my fonts if you don't see this up here go to window and then check character and it will show up for you so I can go ahead and change the font if I want to okay let's say that I'm going to use this one I can go ahead and make it smaller can make it larger okay so if you're happy with how that looks go to layer flatten image that's just gonna merge all of these layers for you and then file and save so you want to save this as a JPEG or a PNG if you are going to be using it on the web now let's just say you didn't want to use one of the background graphics but you wanted to use a photo let me just show you how to do that so I'm going to unlock this layer and I'm just gonna hit delete to get rid of it and then I'm gonna open up one of my photos let's just place that one so let's say that I want to use one of the images from our new pink collection I'm gonna click on it and hit place and so it's just gonna place it in here for me and what I can do is just click and drag it out and just kind of place it wherever I want so let's say I want this part of the image okay I'm gonna hit enter now as you can see it's actually on top of my text and my frame so what I'll do is I'll come over here to where the layers are and a click and just drag it down underneath now obviously it is hard to see the text because there's just too much going on in the background there's not enough white space in this photo so what you can do is you can create a little square in this case to go over this area where we have our frame and it's just gonna go in behind the text so what I'll do is I'll click over here in my tools panel on the shapes and you have some different options here so you can see the fill the stroke there's no stroke on my shape that I'm gonna create which is what I want and the fill is already a pink color so I think I'm just gonna leave that for now but otherwise you could just change it by clicking on any of these colors or clicking up here and choosing your own color most of the time I just do white anyways but just to show you okay so I've clicked and drag that out I'm gonna hit enter now again it's over top so I'm just gonna drag it down below alright so I could leave it like this if I liked how that looked or I could also bring down the opacity if I wanted to show a little bit more of the photo so that's an option for this specific photo just because there's so much going on in it I probably wouldn't I would probably just leave it at a hundred percent if that was what you wanted to do okay so that is another option let's say that I had a different photo that I wanted to use for example let's say this one this one has a lot of white space so I'm gonna click and drag it out until it fits holding down my shift key so that it's the proper proportions are maintained okay um so I don't really need to have these happening here so what I can do now I just deleted the other layers that I didn't want I can rotate this text so that it's kind of more proportionate to the page and then if I wanted to add you know some extra embellishments or something I could always come over and see what kind of icons we have in the graphics pack so you've got like this cute hexagons I could add that in there and just making it smaller holding down shift again I'm gonna rotate it so that it's kind of going in the same direction as the paper and then I can whoops alright so I'm gonna just lock my paper so that it doesn't move and then I'm gonna click and drag so I can um this hexagon overlay a little bit so that might be an option if you wanted to do that we've got some really pretty brushstrokes in here as well so they're also an option for adding you know some different elements and really like having fun with it and playing the graphics and making them your own maybe then just get rid of the hex amount it doesn't necessarily need to be there if you're willing to experiment and play around with the graphics packs then you can create some pretty unique looking designs can also save them as templates so that you don't have to go back and recreate a bunch of work so once you find something that you really like you know a specific design or layout that you're really happy with then keep it as a template and then you can just go back and all you have to do is maybe change out the photo and change out the quote and you're good to go so in order to do that what you're gonna do is go file save and you are going to save this as a PSD file so what that means is that all the layers are going to be saved and you're gonna be able to then go back in there and just make edits so swap out a photo swap out the text and you have a new graphic instantly you don't have to play around with starting from scratch you don't have to play around with the layout or anything like that so just make sure it's a PSD file but when you're done and you want to save it to upload to the web save it as either a JPEG or a PNG alright so hopefully that was helpful just a little intro into how to edit and create graphics inside of Photoshop
Show moreFrequently asked questions
How can I scan my signature and use it to sign documents on my computer?
How do I apply an electronic signature onto my document?
How can I add a personal signature to a PDF?
Get more for digital sign Graphic Design Quote made easy
- Electronically signed on device
- Prove electronically signing Book Publishing Contract Template
- Endorse digi-sign Declaration of Trust Template
- Authorize signature service Rental Property Lease Agreement Template
- Anneal signatory Tattoo Gift Certificate
- Justify eSignature Car Rental Agreement
- Try initial Settlement Term Sheet Template
- Add Hedging Agreement autograph
- Send Lease Proposal Template digital sign
- Fax Business Gift Certificate initial
- Seal Customer Feedback electronically sign
- Password Letter of Intent countersignature
- Pass DJ Services Contract Template digital signature
- Renew Living Will signed
- Test Summer Camp Fee Waiver digi-sign
- Require Room Rental Agreement Template esign
- Comment boarder signatory
- Boost cashier email signature
- Compel being signature
- Void Annual Report Template – Domestic Non-Profit template electronic signature
- Adopt Accounts Receivable Financing Agreement template signed electronically
- Vouch Contractor Invoice template electronically sign
- Establish Free Admission Ticket template electronically signing
- Clear Clinical Trial Agreement Template template mark
- Complete Management Report template signed
- Force Catering Contract Template template eSignature
- Permit Web Banner Design Request template autograph
- Customize Photography Order Form Template template digital sign