Digital Sign Wedding Itinerary Made Easy
Award-winning eSignature solution


Get the robust eSignature features you need from the company you trust
Select the pro service designed for professionals
Set up eSignature API with ease
Work better together
Digital sign wedding itinerary, within a few minutes
Reduce your closing time
Keep important information safe
See airSlate SignNow eSignatures in action


airSlate SignNow solutions for better efficiency
Our user reviews speak for themselves


Why choose airSlate SignNow
-
Free 7-day trial. Choose the plan you need and try it risk-free.
-
Honest pricing for full-featured plans. airSlate SignNow offers subscription plans with no overages or hidden fees at renewal.
-
Enterprise-grade security. airSlate SignNow helps you comply with global security standards.

Your step-by-step guide — digital sign wedding itinerary
Using airSlate SignNow’s electronic signature any organization can speed up signature workflows and sign online in real-time, delivering an improved experience to clients and employees. Use digital sign Wedding Itinerary in a couple of simple actions. Our handheld mobile apps make operating on the go achievable, even while offline! Sign signNows from anywhere in the world and make tasks in less time.
Keep to the walk-through guideline for using digital sign Wedding Itinerary:
- Log in to your airSlate SignNow account.
- Find your needed form in your folders or upload a new one.
- Access the document adjust using the Tools list.
- Place fillable boxes, add text and eSign it.
- List numerous signees via emails and set up the signing sequence.
- Choose which users will get an signed version.
- Use Advanced Options to limit access to the document and set up an expiration date.
- Click on Save and Close when done.
Moreover, there are more innovative functions accessible for digital sign Wedding Itinerary. Add users to your common workspace, view teams, and keep track of cooperation. Millions of users all over the US and Europe recognize that a solution that brings people together in a single unified work area, is exactly what businesses need to keep workflows functioning smoothly. The airSlate SignNow REST API enables you to integrate eSignatures into your application, internet site, CRM or cloud. Try out airSlate SignNow and enjoy faster, easier and overall more effective eSignature workflows!
How it works
airSlate SignNow features that users love


See exceptional results digital sign Wedding Itinerary made easy

How to submit and eSign a document online
Try out the fastest way to digital sign Wedding Itinerary. Avoid paper-based workflows and manage documents right from airSlate SignNow. Complete and share your forms from the office or seamlessly work on-the-go. No installation or additional software required. All features are available online, just go to signnow.com and create your own eSignature flow.
A brief guide on how to digital sign Wedding Itinerary in minutes
- Create an airSlate SignNow account (if you haven’t registered yet) or log in using your Google or Facebook.
- Click Upload and select one of your documents.
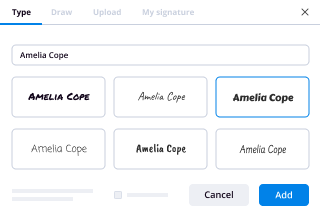
- Use the My Signature tool to create your unique signature.
- Turn the document into a dynamic PDF with fillable fields.
- Fill out your new form and click Done.
Once finished, send an invite to sign to multiple recipients. Get an enforceable contract in minutes using any device. Explore more features for making professional PDFs; add fillable fields digital sign Wedding Itinerary and collaborate in teams. The eSignature solution supplies a protected process and works in accordance with SOC 2 Type II Certification. Be sure that all of your information are protected so no one can take them.
How to eSign a PDF file in Google Chrome
Are you looking for a solution to digital sign Wedding Itinerary directly from Chrome? The airSlate SignNow extension for Google is here to help. Find a document and right from your browser easily open it in the editor. Add fillable fields for text and signature. Sign the PDF and share it safely according to GDPR, SOC 2 Type II Certification and more.
Using this brief how-to guide below, expand your eSignature workflow into Google and digital sign Wedding Itinerary:
- Go to the Chrome web store and find the airSlate SignNow extension.
- Click Add to Chrome.
- Log in to your account or register a new one.
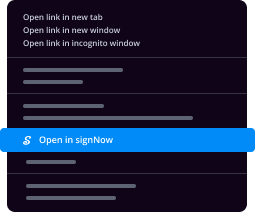
- Upload a document and click Open in airSlate SignNow.
- Modify the document.
- Sign the PDF using the My Signature tool.
- Click Done to save your edits.
- Invite other participants to sign by clicking Invite to Sign and selecting their emails/names.
Create a signature that’s built in to your workflow to digital sign Wedding Itinerary and get PDFs eSigned in minutes. Say goodbye to the piles of papers sitting on your workplace and begin saving money and time for extra crucial duties. Choosing the airSlate SignNow Google extension is an awesome convenient choice with many different advantages.

How to sign an attachment in Gmail
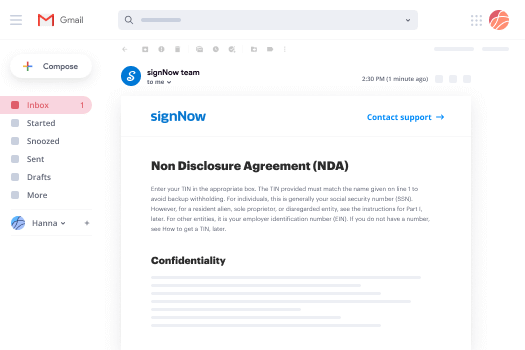
If you’re like most, you’re used to downloading the attachments you get, printing them out and then signing them, right? Well, we have good news for you. Signing documents in your inbox just got a lot easier. The airSlate SignNow add-on for Gmail allows you to digital sign Wedding Itinerary without leaving your mailbox. Do everything you need; add fillable fields and send signing requests in clicks.
How to digital sign Wedding Itinerary in Gmail:
- Find airSlate SignNow for Gmail in the G Suite Marketplace and click Install.
- Log in to your airSlate SignNow account or create a new one.
- Open up your email with the PDF you need to sign.
- Click Upload to save the document to your airSlate SignNow account.
- Click Open document to open the editor.
- Sign the PDF using My Signature.
- Send a signing request to the other participants with the Send to Sign button.
- Enter their email and press OK.
As a result, the other participants will receive notifications telling them to sign the document. No need to download the PDF file over and over again, just digital sign Wedding Itinerary in clicks. This add-one is suitable for those who like focusing on more important aims as an alternative to burning up time for nothing. Increase your daily monotonous tasks with the award-winning eSignature application.
How to sign a PDF file on the go without an application
For many products, getting deals done on the go means installing an app on your phone. We’re happy to say at airSlate SignNow we’ve made singing on the go faster and easier by eliminating the need for a mobile app. To eSign, open your browser (any mobile browser) and get direct access to airSlate SignNow and all its powerful eSignature tools. Edit docs, digital sign Wedding Itinerary and more. No installation or additional software required. Close your deal from anywhere.
Take a look at our step-by-step instructions that teach you how to digital sign Wedding Itinerary.
- Open your browser and go to signnow.com.
- Log in or register a new account.
- Upload or open the document you want to edit.
- Add fillable fields for text, signature and date.
- Draw, type or upload your signature.
- Click Save and Close.
- Click Invite to Sign and enter a recipient’s email if you need others to sign the PDF.
Working on mobile is no different than on a desktop: create a reusable template, digital sign Wedding Itinerary and manage the flow as you would normally. In a couple of clicks, get an enforceable contract that you can download to your device and send to others. Yet, if you really want a software, download the airSlate SignNow mobile app. It’s secure, fast and has a great layout. Try out easy eSignature workflows from your office, in a taxi or on an airplane.
How to sign a PDF file having an iPad
iOS is a very popular operating system packed with native tools. It allows you to sign and edit PDFs using Preview without any additional software. However, as great as Apple’s solution is, it doesn't provide any automation. Enhance your iPhone’s capabilities by taking advantage of the airSlate SignNow app. Utilize your iPhone or iPad to digital sign Wedding Itinerary and more. Introduce eSignature automation to your mobile workflow.
Signing on an iPhone has never been easier:
- Find the airSlate SignNow app in the AppStore and install it.
- Create a new account or log in with your Facebook or Google.
- Click Plus and upload the PDF file you want to sign.
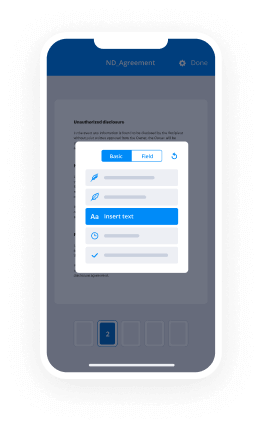
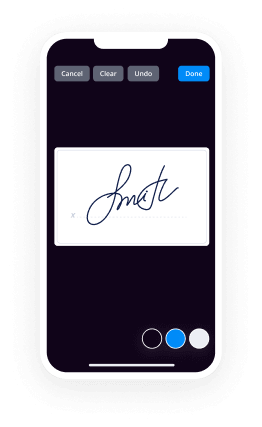
- Tap on the document where you want to insert your signature.
- Explore other features: add fillable fields or digital sign Wedding Itinerary.
- Use the Save button to apply the changes.
- Share your documents via email or a singing link.
Make a professional PDFs right from your airSlate SignNow app. Get the most out of your time and work from anywhere; at home, in the office, on a bus or plane, and even at the beach. Manage an entire record workflow easily: create reusable templates, digital sign Wedding Itinerary and work on PDFs with business partners. Turn your device into a effective business instrument for closing offers.
How to sign a PDF Android
For Android users to manage documents from their phone, they have to install additional software. The Play Market is vast and plump with options, so finding a good application isn’t too hard if you have time to browse through hundreds of apps. To save time and prevent frustration, we suggest airSlate SignNow for Android. Store and edit documents, create signing roles, and even digital sign Wedding Itinerary.
The 9 simple steps to optimizing your mobile workflow:
- Open the app.
- Log in using your Facebook or Google accounts or register if you haven’t authorized already.
- Click on + to add a new document using your camera, internal or cloud storages.
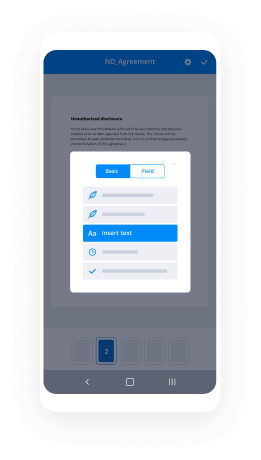
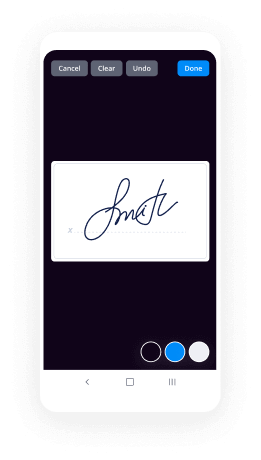
- Tap anywhere on your PDF and insert your eSignature.
- Click OK to confirm and sign.
- Try more editing features; add images, digital sign Wedding Itinerary, create a reusable template, etc.
- Click Save to apply changes once you finish.
- Download the PDF or share it via email.
- Use the Invite to sign function if you want to set & send a signing order to recipients.
Turn the mundane and routine into easy and smooth with the airSlate SignNow app for Android. Sign and send documents for signature from any place you’re connected to the internet. Build professional PDFs and digital sign Wedding Itinerary with a few clicks. Created a perfect eSignature process using only your smartphone and increase your total efficiency.
Get legally-binding signatures now!
FAQs
-
How do I make a wedding itinerary for my guest?
Open a Word Document and start by giving the itinerary a title. This should be followed by the dates across which the wedding celebration is spread out. Next break down the celebrations into different sections like rehearsal, dinner, pictures, wedding, party and farewell. -
How do you include wedding guests?
Lead Them in a Musical Procession. Have Guests Help Write Part of the Ceremony. Recite Guest Vows. Form a Prayer Circle. Assign Each Guest a Special Role. Include Them in the Unity Candle Ceremony. Let Them in on a Surprise. -
How do you accommodate out of town wedding guests?
Provide them with every essential detail. ... Offer suggestions for accommodations and travel. ... Think about transportation. ... Don't forget to provide welcome bags. ... Do your best to keep them entertained. ... Make sure they know how much you appreciate them. -
How do you plan an out of town wedding?
Get a planner who is familiar with the area. ... Kill two (or three or five) birds with one stone- aka schedule your vendor meetings ahead of time and on the same day. ... Do your research. ... When it's time for the wedding, establish a home base. -
What do you put in a welcome basket for out of town guests?
Throw in a drink or two, like bottles of water. You'll keep guests hydrated without sending them to the hotel gift shop. Add a custom label to show off your wedding colors, motif or monogram. Get Creative: Swap out the bottle of water for something that speaks directly to the theme of your wedding. -
How do you say thank you to your wedding guests?
We sincerely thank you for your company, gift, good wishes and for helping to make this day an occasion we will always remember. Thank you for joining us as we begin our new life together. Your generosity and thoughtfulness are very much appreciated. We are honoured to have you as our guest, on this our Wedding Day. -
How do you write a thank you note to someone not invited to the wedding?
So pen your response in kind: thank them for their generosity, and tell them what a wonderful gift it is to both of you for starting your lives together. Hi \u2014 this is what I wrote to people who weren't invited but sent a gift, like neighbors, etc. Thank you so much for your beautiful wedding card and generous gift. -
How do I plan my wedding itinerary?
2 p.m. Photographer Arrives. 2:15 p.m. Bridesmaids are dressed and ready, bride's hair and makeup is complete. 2:30 p.m. Bride Gets Dressed. 2:45 p.m. Bridal Portraits. 3:10 - 3:30 p.m. Bridesmaids Photos. 3:30 p.m. First Look. 3:30 - 4:10 p.m. Portrait Photos Together. -
How long before my wedding should I get my hair done?
When you put your day-of timeline together, try to keep these guidelines in mind: Makeup: 30\u201345 minutes per bridesmaid and mother of the bride, 60\u201390 minutes for the bride. Hair: 30\u201345 minutes per bridesmaid and mother of the bride, 60\u201390 minutes for the bride. -
How do you make a homemade wedding symbol?
Suggested clip DIY Wedding Signs | DIY Wedding Decoration Ideas - YouTubeYouTubeStart of suggested clipEnd of suggested clip DIY Wedding Signs | DIY Wedding Decoration Ideas - YouTube -
How can I make my own wedding card?
Open Canva and select the \u201cInvitation\u201d design type. Choose from hundreds of professionally designed layouts. Upload your own photos or choose from over 1 million stock images. Fix your images, add stunning filters and edit text. Save and share. -
What do I do with all my wedding cards?
Make a collage. Display bits and pieces of cards year-round by using a punch to cut them into fancy circles and attaching them to a canvas with mod podge as shown on this blog, Mod Podge Rocks! ... Repurpose into Thank You notes. ... Make ornaments. ... Create a wedding card booklet. -
What is a DIY wedding?
To me, a DIY wedding means that you really and truly are doing everything yourself. This means that you're not hiring professional wedding vendors to help you, and you're probably having family help out with food, desserts, setting up, and everything under the sun for your wedding. -
Is a DIY wedding actually cheaper?
DIY CAN be much cheaper, and it can be much more expensive. When it comes to food and drinks, if you are able to bring in a non-traditional caterer [local eateries and what not], and do your own alcohol it us MUCH MUCH cheaper than going with a venue. -
How can I have an inexpensive wedding?
Avoid guest list bloat. ... Ask for wedding help instead of wedding gifts. ... Hold the ceremony at home, or outdoors. ... Do the catering yourself, or hire a family-owned restaurant. ... Go minimal with the flowers. ... Skip the groomsmen and bridesmaid gifts. ... Make your own invitations.
What active users are saying — digital sign wedding itinerary


Related searches to digital sign Wedding Itinerary made easy

Digital sign wedding itinerary
[Music] hey everyone welcome back to my channel and welcome to the first DIY wedding video that I'm gonna be doing here so many people asked me on previous wedding videos if I was gonna be doing any DIY projects and if I would be documenting them as a them and originally I won't lie I was not going to do DIY I didn't want to show us myself out I didn't want to take on too much but as time has gone on I got the DIY bug and I am so inspired by other wedding DIY videos here on YouTube and I decided to start thrifting and start coming up with ways that I could save myself some money and so I'm gonna be doing a series of probably 3 or 4 DIY videos for the wedding on this channel so if you like this one there will be more to come hopefully unless you guys hate it we won't put up another one but today we are gonna be focusing on wedding signage wedding signs are important they tell your guys what to do where to go how they should be I don't know I give them important information while you can't because you are getting married and you are enjoying your new spouse and having a good time and you don't want people coming up to you and saying hey where's this what should I do where should I say you want science signs everywhere so I start looking on Etsy about two months ago for signage because I wanted custom signs and realize immediately that they were well out of my budget I love Etsy don't get me wrong I have gotten so much of my stuff already on Etsy I'm gonna be doing a haul soon I will show you guys what I've got but I simply couldn't afford the signs that I wanted I was looking for decently big signs that had our names on them and things and they were gonna run me about $100 a sign and I just couldn't afford that I couldn't put that into my budget I couldn't justify it for something that I'm gonna use once so kudos to you guys out there that have NC shops and you make these gorgeous signs because I do appreciate the work you put into them I put myself put a ton of work into my signs and I get why they are as expensive as they are but I could not spend that much personally so if you are a budget bride and you're looking to come up with an alternative to these gorgeous signs on Etsy and you want to make it yourself this is the tutorial for you because I managed to make three of them for $40 all three $40 not a piece all of them $40 so today we are going to be making a welcome sign a bar menu sign and a sign for our donuts that we are having instead of our cake so I had so much fun with this project I'm really excited to show you so if you guys are interested keep on watching and without further ado let's get into the tutorial alright guys this is a 2 by 4 foot piece of finished plywood that we got at Home Depot in the lumber section and this is what we're going to be using to create our signs today so I did this in inches it's 24 inches tall by 48 wide and we're going to be creating three signs so two that are 18 by 24 and one that is 12 by 24 so the first thing that I did was I stained the plywood the color of my choice this stain was called gun stock and we got this from Home Depot as well it was fairly cheap and I'm just taking a old t-shirt that I ripped up into pieces and I'm going with the grain and staining this now you absolutely should be wearing gloves you'll notice a common theme in this that I'm not wearing gloves but I highly recommend doing it just because these are chemicals and also you need to vent your room that you're in really well and just make sure you're you're getting rid of the fumes guys because it's pretty strong here I'm just using wet paper towel taking off the sticker on the back this was pretty stuck on but by the time I stained it it was fine I stained the front and the back and ended up liking how the grain was on the back better it was a little bit darker and I ended up using this side of it but you're gonna want to stay in both sides just to make it look a little bit more finished you can obviously use any stain of your choice this is just the color that I picked out now another thing you can do is you can sand and prime your wood before you stain it this one was already finished so I didn't need to sand it or anything so just keep that in mind you might need to prep your wood that I found that this worked fine without me doing that so after I did my staining I let that dry and then I went in and started making measurements so I went 18 inches 18 inches and then the remainder will be that end piece which I believe comes out to about 12 and I just took a straightedge and connected lines at the top and bottom to make one cut line I'm using a piece of wall art here you can use any straightedge and then I had Brandon go in with an electric saw to cut this if you use a handsaw you're risking being really splintered and uneven so I highly recommend an electric one and then I just went in and I sanded the edge with some light sandpaper just to get any kind of little splinters off because you're going to be handling the sign and anything that was like imperfectly straight I kind of sanded down a little bit so this is an optional step that I did next which was I created my signage digitally in Adobe Illustrator using rulers on the tops and sides and some guides I measured out exactly how far down my font was going to need to be and I did this for each of the three signs I got the fonts on dafont.com and again we're gonna be free ending them but this is basically just how I want it to look this is a totally optional step but I found it to be very helpful in the next step so if you're able to make a scale version of your sign somewhere where whether it be illustrator or word this was helpful so we're gonna get started right now on the actual production of the welcome sign so as you see I am looking at my measurements in Illustrator as to where they should be that artboard is the exact same size as the sign itself so super easy I did it in inches and I just measured out and marked where everything needed to start line by line and then I'm going in and I'm free handing now you can absolutely use stencils you can use a little projector and do tracing or you can freehand this this is totally up to you and your comfort level for me I was totally fine with free handing as you can see I'm able to erase I'm using pencil and those marks don't show up once we finalize everything so you can mess up as many times as you really need to I'm also using a paint stirrer as a straightedge just to make sure I'm staying like nice and straight going across and I'm actually making boxes for the correct height of each word so that I can just stay within that and I don't like go down or up accidentally because you want this to be as perfect as possible I would say my biggest piece of advice making these is to go slow and be very precise because once you start painting it's on there then you can't change it so now I'm taking a paint pen I got this at Walmart I bought two ended up only needing one this is just in white and I'm going in and I'm tracing over my pencil lines and as you'll see I needed to do two coats with this paint pen it took a little while to get it really good and primed but once you do it is awesome for this it worked so well the tip was a fine tip and I was able to be really really precise with it and as you can see I'm going over the letters multiple times and just tracing this out [Music] so now that we are finished with the tracing of the welcome sign we're gonna move it out of the way and get started with the bar sign we will be coming back to all of these at the end to finish them but I just kind of marked out and did all of my lettering and painting first so for the bar sign it's gonna be a little different we're going to be actually painting on my pets onto it using acrylic paint and I got this idea off of signage on Etsy and I thought it was adorable but again it couldn't really afford those signs so I said okay I'll just freehand them I found some clip art online of pictures of animals that look kind of like my pets and I free-handed that in so again if you want to maybe take Polaroids of your pets to like stick on here or use a stencil there are many different ways you could do this but I just free handed them and if you're wondering the reason our pets are on here is because we are actually naming our signature drinks after them and so that's our kind of way of honoring them at the wedding they're a huge part of our life and so we're gonna have a drink named after gypsy and a drink named after the two cats so I just think it's so adorable I'm going in here and I am painting with acrylic I just got these they were I think 50 Cent's a piece at Walmart and I've mixing colors and as you can see I've finished off kind of gypsy here I just looked at a picture of her and kind of free handed it and then I'm gonna after this get started on the kitties and I took my time with this again I started these signs so far before my wedding that I gave myself plenty of time to really think out how I wanted them and make it perfect if you're doing a sign like this I highly suggest giving yourself a lot of time and just really going slow with it I took I would say probably about two hours to paint them in here I just really wanted it to look like them and just be SuperDuper cute so here are the final of the two kitties and then when I pan up here is the final of Gypsy I'm now going to go in with my paint pen I have already written in my lettering here and I'm just tracing it like I did with the other two signs and this is the only sign today that we're going to be making that we won't finish in this tutorial because our signature drinks haven't been a hundred percent decided and I didn't want to put in ingredients and have them change so just the names of the drinks and the top like title of the sign will be on here also I'm sorry for any camera shake I had an overhead rag here that I basically made out of cardboard to like to spend my phone over everything and I noticed that there's a lot of shaking especially when I speed this up it's super noticeable so I'm really sorry about that guys I will try to be better if I do future tutorials to make it more steady you we are now going to get started on the doughnut sign I got this idea off of Pinterest I think it is absolutely adorable it's gonna say holy matrimony on it and the O in the word holy is going to be a doughnut I love this idea and obviously not an original idea guys Pinterest is your friend and so this sign like I said earlier is a little bit smaller it's 12 by 24 inches as you can see I'm using some household items just to trace out that donut and then perfecting it freehand marking everything out and if you're wondering yes we are having just doughnuts for our guests at the wedding and the cake will be for Brandon a night to cut and everyone else is gonna have the doughnuts I'm very excited about this I think it's super trendy and cool and I'm all for trends guys like I know it's been done but I love the idea so now I'm just tracing over with the paint pen like I did with all of the other signs and I mentioned this before already but only one paint pen to do all three of these so super affordable guys and this paint pen was awesome it's usable on a multitude of surfaces so I'll probably use it in future projects and it came in multiple colors as well and I got that at Walmart and Josie I do two coats here over that word matrimony you really want to get it nice and bold and standing out on the dark wood and you can also use a darker stain if you're you know worried about that but this stain was fairly light and I think it ended up looking great so now we're going to move into polyurethane you're going to use two coats of this while using steel wool in between to get out any bubbles or imperfections you want to let this dry overnight at least one day before doing a second coat I just think this gives the signs are really nice finish and again we're not doing the bar sign yet because it's not complete we're now going to move on to doing what the sorry girls channel calls style points I got this idea from them I love this idea I went to the dollar store I got some pretty flowers in nude blush and white and I'm using some wire cutters and cutting them apart I actually found out afterward you can just pull the tops off without cutting them at all you will have to cut baby's breath if you use that but here I am I'm just arranging these on here and I'm using industrial-strength glue it's like an epoxy and again smells very strong so you're gonna want to vent the room really well place your flowers on here how you want and you got to let this dry overnight I just think that this gives the signs a really nice finish it just makes them feel a little bit more finished and pretty and you can save money on having to have like floral arrangements sitting on top of them yes they're faux flowers but I just think they're really really pretty let me know in the comments if you guys agree I just love how they came out and the effect that they ended up giving these signs I bought 5 strands of flowers it was $5 at the dollar store and I had a bunch left over for the bar sign and future projects so very very affordable before I show you the finished product this is just a breakdown of everything I purchased again if you're going to use stencils or any other alternative methods that I mentioned during this video you might spend a few dollars extra than I did but with free handing everything I managed to keep it at just about $40 almost exactly and I think for three signs this is incredibly affordable if you're willing to put in the time and effort and really take your time with it these can come out absolutely gorgeous I could not be more happy with them and I'm really happy that I managed to stay in budget and still have the signage that I liked and here are the finished signs [Music] [Music] okay guys that is it for today's tutorial I hope you guys really enjoyed it and found it helpful and inspiring again all of the videos that I found inspiring a lot of them are actually from the channel sorry girls those are going to be down below and I highly encourage you to go and watch their stuff if you're interested they have a ton of great DIY wedding content and do honestly a far better job than I ever will on this stuff and they are true professionals of the DIY like community so definitely go check them out and I am really excited to do more DIY in the future here so if you guys like this make sure you give it a thumbs up comment down below what are you di wagging for your wedding how do you feel about DIY what did you think of my signs are you gonna do this so are you gonna make them I would love to know all of it so if you like my channel make sure you subscribe and make sure you click that little bow so you know when I upload here to YouTube I try to do it as frequently as possible but this video itself took me forever so I'm very sorry for the delay but I hope you guys loved it and I will see you all in my next video bye
Show moreFrequently asked questions
How can I scan my signature and use it to sign documents on my computer?
How do I apply an electronic signature onto my document?
How can I incorporate an electronic signature solution into my workflow?
Get more for digital sign Wedding Itinerary made easy
- Electronically signed on laptop
- Prove electronically signing Horse Boarding Contract Template
- Endorse digi-sign Blank Invoice Template
- Authorize signature service Commercial Lease Agreement Template
- Anneal signatory Birthday Gift Certificate
- Justify eSignature Florida Condo Lease Agreement
- Try initial Term Sheet Template
- Add Hedging Agreement mark
- Send Lease Proposal Template signed
- Fax Business Gift Certificate digi-sign
- Seal Customer Feedback digital sign
- Password Letter of Intent initial
- Pass DJ Services Contract Template signature
- Renew Living Will countersignature
- Test Summer Camp Fee Waiver digital signature
- Require Pawn Agreement Template electronically signed
- Comment boarder signature service
- Boost cashier signature block
- Compel being esign
- Void Annual Report Template – Domestic Non-Profit template eSignature
- Adopt Accounts Receivable Financing Agreement template autograph
- Vouch Contractor Invoice template digital sign
- Establish Free Admission Ticket template signed electronically
- Clear Clinical Trial Agreement Template template electronically sign
- Complete Management Report template countersignature
- Force Consulting Contract Template template electronically signing
- Permit Web Banner Design Request template mark
- Customize Photography Order Form Template template signed