Drawn Mark Made Easy
Award-winning eSignature solution


Improve your document workflow with airSlate SignNow
Flexible eSignature workflows
Fast visibility into document status
Simple and fast integration set up
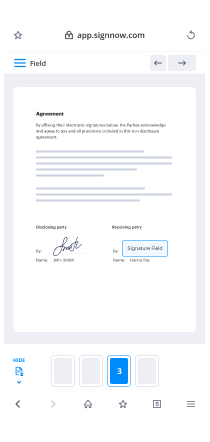
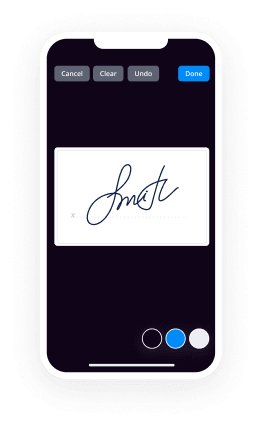
Drawn mark on any device
Advanced Audit Trail
Rigorous security standards
See airSlate SignNow eSignatures in action


airSlate SignNow solutions for better efficiency
Our user reviews speak for themselves


Why choose airSlate SignNow
-
Free 7-day trial. Choose the plan you need and try it risk-free.
-
Honest pricing for full-featured plans. airSlate SignNow offers subscription plans with no overages or hidden fees at renewal.
-
Enterprise-grade security. airSlate SignNow helps you comply with global security standards.

Your step-by-step guide — drawn mark
Using airSlate SignNow’s electronic signature any business can accelerate signature workflows and sign online in real-time, giving a greater experience to customers and employees. Use drawn mark in a few easy steps. Our mobile apps make work on the go possible, even while offline! Sign documents from anywhere in the world and complete deals faster.
Keep to the stepwise instruction for using drawn mark:
- Sign in to your airSlate SignNow account.
- Locate your record within your folders or upload a new one.
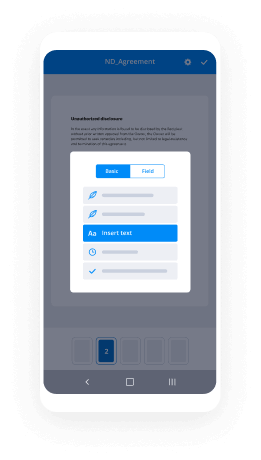
- Open up the document and edit content using the Tools list.
- Place fillable boxes, type textual content and sign it.
- List several signees by emails and set the signing order.
- Specify which recipients will receive an executed doc.
- Use Advanced Options to limit access to the template add an expiration date.
- Press Save and Close when done.
Furthermore, there are more enhanced tools accessible for drawn mark. List users to your common work enviroment, view teams, and keep track of cooperation. Millions of customers across the US and Europe agree that a solution that brings people together in one unified work area, is what businesses need to keep workflows working smoothly. The airSlate SignNow REST API allows you to embed eSignatures into your application, internet site, CRM or cloud storage. Check out airSlate SignNow and enjoy faster, easier and overall more productive eSignature workflows!
How it works
airSlate SignNow features that users love


See exceptional results drawn mark made easy

How to submit and eSign a PDF online
Try out the fastest way to drawn mark. Avoid paper-based workflows and manage documents right from airSlate SignNow. Complete and share your forms from the office or seamlessly work on-the-go. No installation or additional software required. All features are available online, just go to signnow.com and create your own eSignature flow.
A brief guide on how to drawn mark in minutes
- Create an airSlate SignNow account (if you haven’t registered yet) or log in using your Google or Facebook.
- Click Upload and select one of your documents.
- Use the My Signature tool to create your unique signature.
- Turn the document into a dynamic PDF with fillable fields.
- Fill out your new form and click Done.
Once finished, send an invite to sign to multiple recipients. Get an enforceable contract in minutes using any device. Explore more features for making professional PDFs; add fillable fields drawn mark and collaborate in teams. The eSignature solution supplies a safe process and works based on SOC 2 Type II Certification. Be sure that all of your records are guarded and that no person can take them.

How to eSign a PDF file in Google Chrome
Are you looking for a solution to drawn mark directly from Chrome? The airSlate SignNow extension for Google is here to help. Find a document and right from your browser easily open it in the editor. Add fillable fields for text and signature. Sign the PDF and share it safely according to GDPR, SOC 2 Type II Certification and more.
Using this brief how-to guide below, expand your eSignature workflow into Google and drawn mark:
- Go to the Chrome web store and find the airSlate SignNow extension.
- Click Add to Chrome.
- Log in to your account or register a new one.
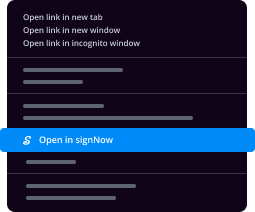
- Upload a document and click Open in airSlate SignNow.
- Modify the document.
- Sign the PDF using the My Signature tool.
- Click Done to save your edits.
- Invite other participants to sign by clicking Invite to Sign and selecting their emails/names.
Create a signature that’s built in to your workflow to drawn mark and get PDFs eSigned in minutes. Say goodbye to the piles of papers sitting on your workplace and start saving time and money for extra essential activities. Selecting the airSlate SignNow Google extension is a smart convenient decision with many different benefits.
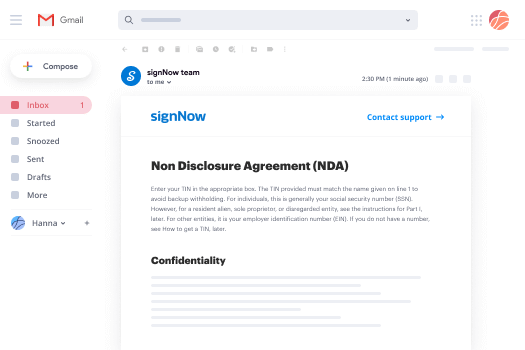

How to eSign an attachment in Gmail
If you’re like most, you’re used to downloading the attachments you get, printing them out and then signing them, right? Well, we have good news for you. Signing documents in your inbox just got a lot easier. The airSlate SignNow add-on for Gmail allows you to drawn mark without leaving your mailbox. Do everything you need; add fillable fields and send signing requests in clicks.
How to drawn mark in Gmail:
- Find airSlate SignNow for Gmail in the G Suite Marketplace and click Install.
- Log in to your airSlate SignNow account or create a new one.
- Open up your email with the PDF you need to sign.
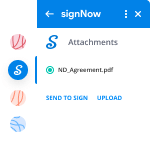
- Click Upload to save the document to your airSlate SignNow account.
- Click Open document to open the editor.
- Sign the PDF using My Signature.
- Send a signing request to the other participants with the Send to Sign button.
- Enter their email and press OK.
As a result, the other participants will receive notifications telling them to sign the document. No need to download the PDF file over and over again, just drawn mark in clicks. This add-one is suitable for those who choose working on more valuable goals rather than burning time for practically nothing. Improve your day-to-day compulsory labour with the award-winning eSignature platform.
How to eSign a PDF on the go with no application
For many products, getting deals done on the go means installing an app on your phone. We’re happy to say at airSlate SignNow we’ve made singing on the go faster and easier by eliminating the need for a mobile app. To eSign, open your browser (any mobile browser) and get direct access to airSlate SignNow and all its powerful eSignature tools. Edit docs, drawn mark and more. No installation or additional software required. Close your deal from anywhere.
Take a look at our step-by-step instructions that teach you how to drawn mark.
- Open your browser and go to signnow.com.
- Log in or register a new account.
- Upload or open the document you want to edit.
- Add fillable fields for text, signature and date.
- Draw, type or upload your signature.
- Click Save and Close.
- Click Invite to Sign and enter a recipient’s email if you need others to sign the PDF.
Working on mobile is no different than on a desktop: create a reusable template, drawn mark and manage the flow as you would normally. In a couple of clicks, get an enforceable contract that you can download to your device and send to others. Yet, if you really want an application, download the airSlate SignNow app. It’s secure, quick and has an excellent interface. Take advantage of in effortless eSignature workflows from your business office, in a taxi or on a plane.
How to sign a PDF file having an iPhone
iOS is a very popular operating system packed with native tools. It allows you to sign and edit PDFs using Preview without any additional software. However, as great as Apple’s solution is, it doesn't provide any automation. Enhance your iPhone’s capabilities by taking advantage of the airSlate SignNow app. Utilize your iPhone or iPad to drawn mark and more. Introduce eSignature automation to your mobile workflow.
Signing on an iPhone has never been easier:
- Find the airSlate SignNow app in the AppStore and install it.
- Create a new account or log in with your Facebook or Google.
- Click Plus and upload the PDF file you want to sign.
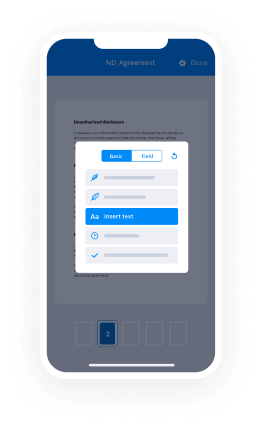
- Tap on the document where you want to insert your signature.
- Explore other features: add fillable fields or drawn mark.
- Use the Save button to apply the changes.
- Share your documents via email or a singing link.
Make a professional PDFs right from your airSlate SignNow app. Get the most out of your time and work from anywhere; at home, in the office, on a bus or plane, and even at the beach. Manage an entire record workflow seamlessly: build reusable templates, drawn mark and work on documents with business partners. Transform your device right into a potent company tool for executing offers.
How to sign a PDF file Android
For Android users to manage documents from their phone, they have to install additional software. The Play Market is vast and plump with options, so finding a good application isn’t too hard if you have time to browse through hundreds of apps. To save time and prevent frustration, we suggest airSlate SignNow for Android. Store and edit documents, create signing roles, and even drawn mark.
The 9 simple steps to optimizing your mobile workflow:
- Open the app.
- Log in using your Facebook or Google accounts or register if you haven’t authorized already.
- Click on + to add a new document using your camera, internal or cloud storages.
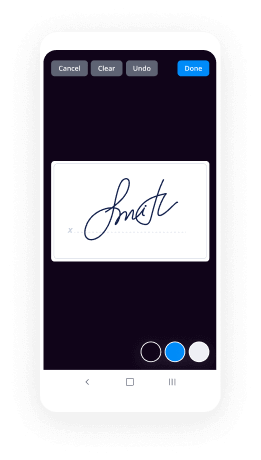
- Tap anywhere on your PDF and insert your eSignature.
- Click OK to confirm and sign.
- Try more editing features; add images, drawn mark, create a reusable template, etc.
- Click Save to apply changes once you finish.
- Download the PDF or share it via email.
- Use the Invite to sign function if you want to set & send a signing order to recipients.
Turn the mundane and routine into easy and smooth with the airSlate SignNow app for Android. Sign and send documents for signature from any place you’re connected to the internet. Create good-looking PDFs and drawn mark with just a few clicks. Put together a faultless eSignature process with just your smartphone and boost your general efficiency.
Get legally-binding signatures now!
FAQs
-
How do you draw Mark Kistler?
Suggested clip How To Draw with Mark Kistler: Stacking Cylinders in 3-D! - YouTubeYouTubeStart of suggested clipEnd of suggested clip How To Draw with Mark Kistler: Stacking Cylinders in 3-D! - YouTube -
How do you draw an open box step by step?
Suggested clip How to draw a Carboard Box Real Easy - YouTubeYouTubeStart of suggested clipEnd of suggested clip How to draw a Carboard Box Real Easy - YouTube -
How do you make a 3d open box?
Suggested clip How To Draw with Mark Kistler: Flowers in a 3-D Box! - YouTubeYouTubeStart of suggested clipEnd of suggested clip How To Draw with Mark Kistler: Flowers in a 3-D Box! - YouTube -
How do you draw an angel face?
Suggested clip How to Draw Angel Face - YouTubeYouTubeStart of suggested clipEnd of suggested clip How to Draw Angel Face - YouTube -
How do you draw an angel?
Suggested clip How to Draw an Angel step by step Cute and Easy - YouTubeYouTubeStart of suggested clipEnd of suggested clip How to Draw an Angel step by step Cute and Easy - YouTube -
How do you draw an angel girl?
Suggested clip How to Draw an Angel Cute Girl - YouTubeYouTubeStart of suggested clipEnd of suggested clip How to Draw an Angel Cute Girl - YouTube -
How do you draw in 3 dimensions?
Step 1: Tools. The basic necessary tools are as follows: ... Step 2: Drawing the Title Block. ... Step 3: Drawing the Three Primary Axes. ... Step 4: Draw Main Cube. ... Step 5: Draw Straight Exterior Edges. ... Step 6: Draw Curved Exterior Edges. ... Step 7: Draw Square Cut Out. ... Step 8: Draw Circular Holes. -
How do you draw a field of flowers step by step?
Step 1: Place a line above the middle of the drawing area for the horizon. ... Step 2: Change the horizon line to one that is slightly wavy. ... Step 3: Add stems to some of the flowers with straight or slightly curving lines. ... Step 4: Trace around a coin to form a round sun in the background. -
What is Mark making in drawing?
Mark making is a term used to describe the different lines, patterns, and textures we create \u200bin a piece of art. It applies to any art material on any surface, not only paint on canvas or pencil on airSlate SignNow. -
How is Mark making used in art?
Why use gestural qualities? Mark making describes the different lines, dots, marks, patterns, and textures we create in an artwork. ... Artists use gesture to express their feeling and emotions in response to something seen or something felt \u2013 or gestural qualities can be used to create a purely abstract composition. -
What is Mark making in abstract art?
Materials used with paint or mixed media, translates into 2D form as "mark-making." Generally speaking, mark-making is the visual vocabulary an artist uses in an abstract painting. It is considered an artist's own personal visual language. Layers and layers of different mark-making creates an abstract piece. -
What are 3 characteristics of mark making?
Marks can be descriptive, expressive, conceptual, or symbolic. They may be bold and clearly state the intention or they may be so subtle that the concept is only perceived by the viewer's subconscious. As you study art, you will notice that artists often develop a style that is based on their signature marks. -
What is an expressive line in art?
Expressive lines are curved, adding an organic, more dynamic character to a work of art. Expressive lines are often rounded and follow undetermined paths. ... Outline, or contour line is the simplest of these. They create a path around the edge of a shape. In fact, outlines define shapes. -
How can I get better at drawing anatomy?
Suggested clip How to Draw Human Anatomy Part 1 | Beginner Introduction ...YouTubeStart of suggested clipEnd of suggested clip How to Draw Human Anatomy Part 1 | Beginner Introduction ... -
Can I improve my drawing skills?
Build up your fundamental drawing skills by focusing on basic lines, shapes, and working with different mediums. You can also use training exercises to challenge yourself and improve your skills. In addition to practice, it's also important that you develop a discipline so you're continuously working and improving.
What active users are saying — drawn mark


Drawn mark
hey what's up y'all hey i'm out here working on this smoker and i ran into some problems on it so i'm fixing to take a break on it i see what i need to do to fix it and i'm fixing to take a break on this i've been wanting to do a video on bending this uh square tubing so i'm gonna show you how to do that right quick because i need this piece for upcoming thing but uh let me show you what i did on this smoker what i gotta fix it's these latches is what it is one down there one down there after i'm trying to do a new door set up on these on these um cabinet smokers i i was doing a solid door just one big door and i'm gonna do a new setup on them so i'm trying to figure it out as i go and i figured out pretty quick that this needs to move both of them they need to move down about right there so and then i'm going to put some on that side too but those need to move and that's a problem because now i have to cut these off on both sides weld that hole up cut it off on this side weld the hole up got to weld it a little at a time because it's already gaskets on it so you don't want to burn those gaskets up building but anyway it's going to be a pain i'm going to lose a whole day having to redo all that but then luckily last night when i put them on i didn't weld the hinges all the way so at least all i have to do is cut a couple tacks to get the hinges off and get the doors back off of there i got lucky on that part but anyway what we're gonna do is bend a piece of square tubing i did a little piece of three quarter inch to kind of give you an idea of what was going on but we're going to round it off and typically the more you see how you can still see the squares on the end typically the more of these that you put in there the rounder you would get you know this is a it's kind of a pain because you're gonna have to weld these you're gonna have to clean all those wheels back off so the bigger the piece you do and the more notches you have in it the more welding and cleaning you're gonna have to do but sometimes you need a rounded piece sometimes you just want it and i mean this is a way to do it so what we got right here is a piece of cardboard we're gonna do it on a piece of inch and a half tubing and uh i needed about 20 inches diameter so what i did i took me a scribe with a pin at the end of it and just made me a mark come out that's about 20 and an eighth don't pay any attention to that first line if you can see it i just drove too small and went out as far as i could to the next one so that first line is irrelevant but uh this is the shape that i pretty much need right here it's just going to be the end of a table so i made my mark right there what we need to do now is find the center between this mark and this mark once we find that center we'll draw a line right there then we'll find center again draw another line another line and keep going because we're going to need a few of these notches on both sides we'll do it all over and get all that drawn out and then we'll cut this cardboard out with scissors this all right now that we've got those lines drawn out you can do more lines than that in between each one because this is going to leave a pretty big section to be square i mean this is the tubing so it's setting it up there you can kind of imagine but for what i'm using it for it's really not going to matter and i think it'll look okay like that anyway but you can keep going more lines but if you think about it that's each one of those lines is another notch you got to cut out another weld you got to do another uh cleanup you have to do so it's good to keep that in mind so now if you use the scriber or a compass of some sort you can sit i put me some marks there already you can uh set it to the thickness or the width of your tubing this is inch and a half so i just set it an inch and a half lower we're gonna make another mark if you didn't if you just traced around something you can take your tubing and set it on your outside edge right there square with square with each line and then just make your mark on each one and kind of draw it around but i'm just going to use that compass to make my mark around there and then we'll start cutting the pieces out on it all right so this is what we got now this is the part that you want but a quick tip if you think you might do this again sometime then save this part because you already have it lined out to do a smaller one so i mean if you had thought that you might this might be something you do save that because you already have it you won't have to draw it out again so anyway this is the part we want what we're going to do now is cut these lines and that's really a good reason i just thought i didn't realize that before i could have used that and said i did it on purpose but that extra line i had on there that's where we're going to cut to because you have to cut all the way to that edge you're going to try to spread it open once you have a have all these lines cut so if you think about it and have us doing it with a compass go ahead and put your extra line on there that'll just show you where to stop it every time so anyway we'll cut those out and then try to get it marked up on the tubing all right you can see what i did i stretched it out and got it as straight as i could across the tubing it's still going to have a little wave at the top because it was round but you just get those as even as you can and then you're going to come back use a square transfer all your marks transfer this point all the way to your side right there and then transfer your marks all the way around if i just use spray glue to stick that on there real quick and uh if you pull it right back off before it dries you can usually save it to do another one if you want to but right now we'll transfer those marks around and then we'll start cutting them all out with the grinder so hmm all right y'all that's bent over into shape it can still be been a little tighter because you're gonna have to weld all these up i'm not gonna weld it now because it's raining out there now and i got too much stuff on the table inside there but yeah when you get ready to weld it i'll pull these ends in and that'll tighten it up and then just squeeze kind of squeeze this in together and it'll pull that in tight to get the way of the gaps tighter but that's pretty much it this is done with a um i drew out a 20 inch circle this comes to about 26. now the tighter you the more these notches you put in here which i mean those are big enough you could still done two more notches inside there and that's probably what it would have took to get it down to 20. so if you're going for a certain number it's going to be kind of hard to figure it out just right to get to that number but after doing a couple of them you should be able to get it together for me it don't matter all i'm doing is building another little table like this to roll stuff around on i mean roll chambers and fire boxes and stuff around on that's all i'm doing so the 26 comes out fine for me that's just gonna be the end kind of a handled end on that table so anyway that'll do it on this one uh this is gonna come up i'm gonna do a video on that table too uh i really wanted to do that a couple weeks ago i just hadn't done it yet but anyway that's just a quick video on how to do that like i say the more notches you put in it the tighter you're going to be able to get it the more round this is how it looks on the other end i mean you can still see the square pieces there but it's it's not hurting anything i mean depending on what you're doing what i'm doing does not hurt nothing just being that matter now welding it up and cleaning all those uh wells back out which won't be that bad if you get the if you get the gap tightened up and get your heat down right won't be too bad and if you need to adjust it some squeeze those uh squeeze your ends together to where your gaps are tight and then you can run that cutting blade through them again just to widen them a little bit squeeze that together see if it's where you want it if not do it again i mean you are using cardboard or paper to do this so your cuts can get a little bit off so anyway man if you're new to the channel please like subscribe and y'all come back for the next one i got to get back on this smoker in here and fix these doors i didn't put it off long enough we'll see y'all in the next one
Show more