eSign Exit Ticket Made Easy
Award-winning eSignature solution


Upgrade your document workflow with airSlate SignNow
Versatile eSignature workflows
Instant visibility into document status
Simple and fast integration set up
E sign exit ticket on any device
Advanced Audit Trail
Strict safety requirements
See airSlate SignNow eSignatures in action


airSlate SignNow solutions for better efficiency
Our user reviews speak for themselves


Why choose airSlate SignNow
-
Free 7-day trial. Choose the plan you need and try it risk-free.
-
Honest pricing for full-featured plans. airSlate SignNow offers subscription plans with no overages or hidden fees at renewal.
-
Enterprise-grade security. airSlate SignNow helps you comply with global security standards.

Your step-by-step guide — e sign exit ticket
Using airSlate SignNow’s eSignature any company can speed up signature workflows and sign online in real-time, delivering an improved experience to clients and workers. Use eSign Exit Ticket in a couple of easy steps. Our mobile apps make operating on the go feasible, even while off the internet! Sign signNows from any place worldwide and close up deals in less time.
Follow the step-by-step instruction for using eSign Exit Ticket:
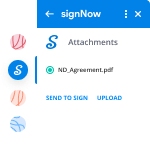
- Sign in to your airSlate SignNow account.
- Find your document in your folders or import a new one.
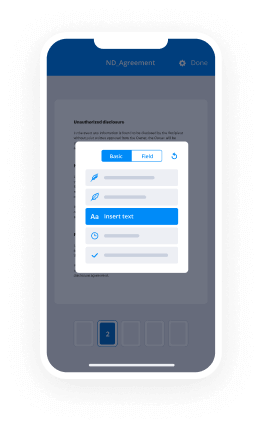
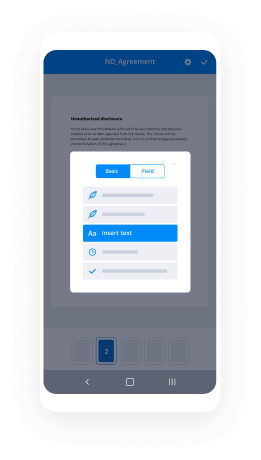
- Open the record adjust using the Tools list.
- Place fillable areas, type textual content and eSign it.
- List multiple signees using their emails configure the signing sequence.
- Specify which users will get an signed doc.
- Use Advanced Options to restrict access to the record add an expiration date.
- Tap Save and Close when finished.
Additionally, there are more innovative tools available for eSign Exit Ticket. Add users to your common digital workplace, browse teams, and track cooperation. Numerous users all over the US and Europe concur that a system that brings people together in a single cohesive enviroment, is exactly what organizations need to keep workflows functioning effortlessly. The airSlate SignNow REST API allows you to embed eSignatures into your app, website, CRM or cloud storage. Try out airSlate SignNow and enjoy quicker, easier and overall more productive eSignature workflows!
How it works
airSlate SignNow features that users love


See exceptional results eSign Exit Ticket made easy

How to fill out and eSign a document online
Try out the fastest way to eSign Exit Ticket. Avoid paper-based workflows and manage documents right from airSlate SignNow. Complete and share your forms from the office or seamlessly work on-the-go. No installation or additional software required. All features are available online, just go to signnow.com and create your own eSignature flow.
A brief guide on how to eSign Exit Ticket in minutes
- Create an airSlate SignNow account (if you haven’t registered yet) or log in using your Google or Facebook.
- Click Upload and select one of your documents.
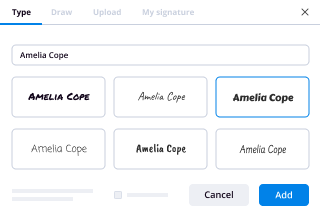
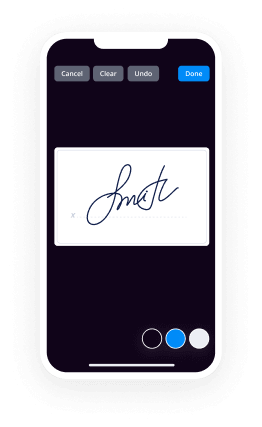
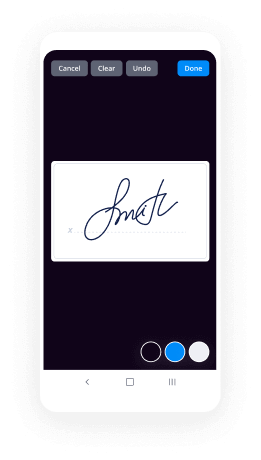
- Use the My Signature tool to create your unique signature.
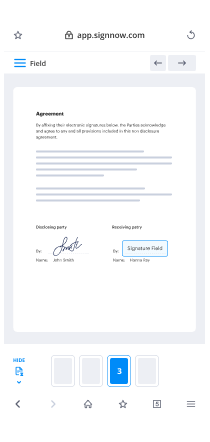
- Turn the document into a dynamic PDF with fillable fields.
- Fill out your new form and click Done.
Once finished, send an invite to sign to multiple recipients. Get an enforceable contract in minutes using any device. Explore more features for making professional PDFs; add fillable fields eSign Exit Ticket and collaborate in teams. The eSignature solution supplies a protected workflow and works in accordance with SOC 2 Type II Certification. Make sure that all your information are guarded and therefore no one can take them.
How to eSign a PDF file in Google Chrome
Are you looking for a solution to eSign Exit Ticket directly from Chrome? The airSlate SignNow extension for Google is here to help. Find a document and right from your browser easily open it in the editor. Add fillable fields for text and signature. Sign the PDF and share it safely according to GDPR, SOC 2 Type II Certification and more.
Using this brief how-to guide below, expand your eSignature workflow into Google and eSign Exit Ticket:
- Go to the Chrome web store and find the airSlate SignNow extension.
- Click Add to Chrome.
- Log in to your account or register a new one.
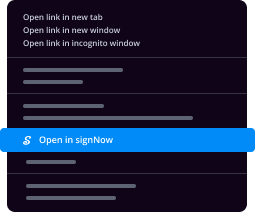
- Upload a document and click Open in airSlate SignNow.
- Modify the document.
- Sign the PDF using the My Signature tool.
- Click Done to save your edits.
- Invite other participants to sign by clicking Invite to Sign and selecting their emails/names.
Create a signature that’s built in to your workflow to eSign Exit Ticket and get PDFs eSigned in minutes. Say goodbye to the piles of papers sitting on your workplace and begin saving money and time for additional important tasks. Choosing the airSlate SignNow Google extension is a smart handy decision with a lot of advantages.

How to sign an attachment in Gmail
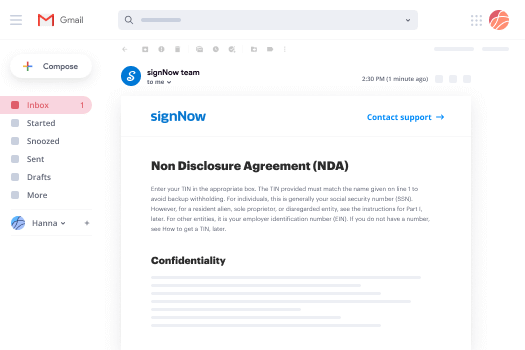
If you’re like most, you’re used to downloading the attachments you get, printing them out and then signing them, right? Well, we have good news for you. Signing documents in your inbox just got a lot easier. The airSlate SignNow add-on for Gmail allows you to eSign Exit Ticket without leaving your mailbox. Do everything you need; add fillable fields and send signing requests in clicks.
How to eSign Exit Ticket in Gmail:
- Find airSlate SignNow for Gmail in the G Suite Marketplace and click Install.
- Log in to your airSlate SignNow account or create a new one.
- Open up your email with the PDF you need to sign.
- Click Upload to save the document to your airSlate SignNow account.
- Click Open document to open the editor.
- Sign the PDF using My Signature.
- Send a signing request to the other participants with the Send to Sign button.
- Enter their email and press OK.
As a result, the other participants will receive notifications telling them to sign the document. No need to download the PDF file over and over again, just eSign Exit Ticket in clicks. This add-one is suitable for those who choose working on more significant aims instead of burning time for nothing. Boost your day-to-day monotonous tasks with the award-winning eSignature application.
How to eSign a PDF template on the go without an application
For many products, getting deals done on the go means installing an app on your phone. We’re happy to say at airSlate SignNow we’ve made singing on the go faster and easier by eliminating the need for a mobile app. To eSign, open your browser (any mobile browser) and get direct access to airSlate SignNow and all its powerful eSignature tools. Edit docs, eSign Exit Ticket and more. No installation or additional software required. Close your deal from anywhere.
Take a look at our step-by-step instructions that teach you how to eSign Exit Ticket.
- Open your browser and go to signnow.com.
- Log in or register a new account.
- Upload or open the document you want to edit.
- Add fillable fields for text, signature and date.
- Draw, type or upload your signature.
- Click Save and Close.
- Click Invite to Sign and enter a recipient’s email if you need others to sign the PDF.
Working on mobile is no different than on a desktop: create a reusable template, eSign Exit Ticket and manage the flow as you would normally. In a couple of clicks, get an enforceable contract that you can download to your device and send to others. Yet, if you really want a software, download the airSlate SignNow app. It’s comfortable, fast and has an intuitive design. Experience smooth eSignature workflows from your office, in a taxi or on an airplane.
How to sign a PDF utilizing an iPad
iOS is a very popular operating system packed with native tools. It allows you to sign and edit PDFs using Preview without any additional software. However, as great as Apple’s solution is, it doesn't provide any automation. Enhance your iPhone’s capabilities by taking advantage of the airSlate SignNow app. Utilize your iPhone or iPad to eSign Exit Ticket and more. Introduce eSignature automation to your mobile workflow.
Signing on an iPhone has never been easier:
- Find the airSlate SignNow app in the AppStore and install it.
- Create a new account or log in with your Facebook or Google.
- Click Plus and upload the PDF file you want to sign.
- Tap on the document where you want to insert your signature.
- Explore other features: add fillable fields or eSign Exit Ticket.
- Use the Save button to apply the changes.
- Share your documents via email or a singing link.
Make a professional PDFs right from your airSlate SignNow app. Get the most out of your time and work from anywhere; at home, in the office, on a bus or plane, and even at the beach. Manage an entire record workflow seamlessly: generate reusable templates, eSign Exit Ticket and work on PDFs with partners. Turn your device right into a powerful organization for closing offers.
How to sign a PDF Android
For Android users to manage documents from their phone, they have to install additional software. The Play Market is vast and plump with options, so finding a good application isn’t too hard if you have time to browse through hundreds of apps. To save time and prevent frustration, we suggest airSlate SignNow for Android. Store and edit documents, create signing roles, and even eSign Exit Ticket.
The 9 simple steps to optimizing your mobile workflow:
- Open the app.
- Log in using your Facebook or Google accounts or register if you haven’t authorized already.
- Click on + to add a new document using your camera, internal or cloud storages.
- Tap anywhere on your PDF and insert your eSignature.
- Click OK to confirm and sign.
- Try more editing features; add images, eSign Exit Ticket, create a reusable template, etc.
- Click Save to apply changes once you finish.
- Download the PDF or share it via email.
- Use the Invite to sign function if you want to set & send a signing order to recipients.
Turn the mundane and routine into easy and smooth with the airSlate SignNow app for Android. Sign and send documents for signature from any place you’re connected to the internet. Build professional-looking PDFs and eSign Exit Ticket with couple of clicks. Come up with a flawless eSignature workflow with just your mobile phone and enhance your general efficiency.
Get legally-binding signatures now!
FAQs
-
How do you make an exit ticket?
Create. Decide what you'd like to find out about students' learning at the end of the lesson. Write a question or pose a problem on the Exit Ticket, or post the question or problem for students to see. Collect. Set a specific amount of time for students to complete the Exit Ticket. ... Clarify. -
Should you grade exit tickets?
Exit Tickets do not require a grade because students are not expected to have mastered the topic they just learned in class the same day. ... Based on this data, teachers are able to tailor subsequent lessons to meet the needs of their students individually and their class as a whole. -
What type of assessment is an exit ticket?
Exit tickets are a formative assessment tool that give teachers a way to assess how well students understand the material they are learning in class. This tool can be used daily or weekly, depending on the unit being taught. -
Do you grade exit tickets?
Exit Tickets do not require a grade because students are not expected to have mastered the topic they just learned in class the same day. ... Based on this data, teachers are able to tailor subsequent lessons to meet the needs of their students individually and their class as a whole. -
What is an exit ticket?
Exit tickets are a formative assessment tool that give teachers a way to assess how well students understand the material they are learning in class. ... Teachers can then use this data for adapting instruction to meet students' needs the very next day. -
Is an exit ticket a formative assessment?
The exit ticket is simply a question that is posed to all students prior to class ending. ... This formative assessment technique engages all students and provides the all-important evidence of student learning for the teacher. The exit ticket is a great in class assessment tool that can also help plan instruction. -
What type of assessment is an exit slip?
The exit ticket is simply a question that is posed to all students prior to class ending. Students write their answer on a card or piece of airSlate SignNow and hand it in as they exit. This formative assessment technique engages all students and provides the all-important evidence of student learning for the teacher. -
What is an exit ticket in teaching?
Exit tickets are a formative assessment tool that give teachers a way to assess how well students understand the material they are learning in class. ... Teachers can then use this data for adapting instruction to meet students' needs the very next day. -
How do you use exit tickets effectively?
When to Use Use Exit Tickets at the end of class to: Check students' understanding by having them summarize key points from the lesson. Verify that students can solve a problem or answer an airSlate SignNow question based on the lesson. Emphasize the essential question for the day's lesson.
What active users are saying — e sign exit ticket


E sign exit ticket
in this video we're going to look at how we can use Google Forms to create an exit tickets or some kind of reflection for the end of the lesson so in order to do that what you really must do first is log on to your Google accounts now if you don't have a Google account what you need to do is go and sign up for a Google accounts and then you can start using the functionality of Google Forms so we're going to go to drive.google.com that will take you to Google Drive and this is where you can actually create the Google form so what I suggest you do is when you're in Google Drive is organize everything into folders so we're going to create a folder here I'm just going to click new and then folder and I'm going to call this Google Forms now you may want to name the folder for the class that you're actually teaching but this is what I'm going to do now but you just organize this the way that suits you so that's create and then let's go into the folder by double clicking and now what we want to do is go up to new and then go to more and then click Google Forms so this is what Google form looks like so let's give it a title to begin with so this is going to be training reflection and as you type the title you can type it in two places and it will take the title here as well so you can see that so our first question really is going to be to get the student name so let's put the name here and our question type is going to be a short answer now as you can see here we've got lots of different question types now I'm not going to go through every single question type in this video but you can have a look and you can experiment later so for this we're going to choose short answer we're actually going to say it's a required question we want that to be required now there is an option here we can click on these three little dots and we can put an extra description here and we have response validation so if we put description please and then we can go to validation now validation validates whether it's a number a text where it's the length or of whether it's a regular expression so you can change this to how you want it so it needs to be specific the answer to this question needs to be specific we're going to leave it out we're not going to use that for this particular question and then we're going to add a new question and then this question is going to be simply and for this what Google was done is automatically chosen the paragraph question because it uses artificial intelligence to determine what kind of question that you're asking and for this it's actually chosen a paragraph you can obviously override that by clicking on here and choosing a different option if you want but we'll keep with the paragraph we're also going to make that required so that's what you need is a basic reflection form before we continue what we also can do is go out to our color palettes and we can choose any of these colors at the moment you can see it's purple we can choose this option here that takes you to some other backgrounds so for example let's choose this one and then select and there we have it so that's the first part in creating a Google Form now the second part is how do we get this form to the students so they can fill it out now the easiest way is to go up to send and then send two email addresses so if you've got a group email address then you can send it to a group of students so that's one way of doing it you can also embed this into Google classroom if you wanted to put it into a Google classroom you could do that as well now if your students do not have email addresses we need another way of getting this form to the students so another way we could do it is by opening up a new tab and then going to bitly comm or you could go to another URL short in an application so here's bitly now what you need to do is click on create bit link and then you paste the URL in here now to get the URL what you need to do is go to your form and if the easiest way is to click send and then click the link button here there is the URL to the form so we can click that and we can click copy and then go back to bitly and paste that in there and now it's created our unique short URL and you can see that's very short there it's bit dr. lee slash and then this string of characters here so we can copy that and then we can put that on the whiteboard in some manner either in a presentation so the children can actually see it and then they would type it into their web browser now going back to our google form google also offers this shortened URL so you can click that but as you can see it's slightly longer than what the bitly one offers so I would personally go with a bitly one if that's something you wanted to do so that's using bitly another way to get this form to the students is by using a QR code so let's click another tab and we're going to type in QR code generator and normally this one here QR code generator com is a very good one so we're going to click on that and again this is where we're gonna paste our URL so again we can go back to here click on send click the link button copy this copy close that down back to our generator paste it in here click on create QR code and there is our QR code now we can download that and print it out and put it on the wall or we could just put it on the whiteboard and the children use it a QR code scanner on their iPads they can scan that and it will take them straight to the forum so that's another way of actually getting the forum out to the students a fourth way of getting it to the students is if you're using a website to distribute their learning to the students you can embed it into the website so again to do that we click on send we click on the two Chevron's this time so we're going to click on that and there we have the embed code now we can change the size here the heights and the width so we can click on this copy it and whatever web app that you're using to create your websites you can then embed that code into that website so that's another way then you can get that form out to your students now the third part of this tutorial is to show you how you can see the data from the responses of the students so on our Google Form here we've got this option that says responses so we click that this is going to show you all the responses that the students have given now at the moment you can see there there is no responses so let's create a response so let's go to our preview button here so let's click on our preview let's submit that now that submitted our response so let's go back to our forum now and now you can see here our responses says it's got one response so let's click on a response and you can see that's the information that's been delivered and you can go to individual here and you can see the individual ones that have been submitted so we got the summary and individual there is a third way and a third method of seeing the data now this method is very good if you want to start manipulating the data so let's click on create spreadsheet now that will create a spreadsheet with all the information that's been submitted from the Google Form so let's create that and here we go it gives us a spreadsheet it gives us the timestamp of when that entry was entered and then it will give us all the information that we've got in our Google Form now obviously if you've got more complicated forms then this spreadsheet could be the best way of analyzing the data now there's one more thing I want to show you that makes Google Forms really quite powerful there's an option if you go up to the settings option you can turn your reflection into a quiz so we click on that and we can make this a quiz so let's click on quiz and then it's going to ask you about the release mark immediately and release the mark after each submission and or later after a manual review so depending on what type of questions whether you've got multiple choice questions or long answer questions you can choose which one you want to do here multiple choice questions can be marked by a Google Forms so once we've turned this on we can click Save now we go back to our questions so I'm going to add another question here so my question is going to be what okay so my multiple-choice answers are so there are my three answers now I'm going to click on answer key now so what that's doing it's asking me to choose the correct answer so the correct answer is obviously the first it's giving me how many points I want to award so I'm gonna say one and what I could also do is add some feedback here if I want to so I can give some feedback for incorrect answers I could also give some feedback for correct answers I could add a link if I wanted to that would actually go to a particular link that might help the student more with the feedback that you want to give them I'm gonna leave that blank for now so let's preview the quiz again let's click preview and let's type in some answers and I'm going to click the correct answer and then click Submit now because in the settings I said that the student can view their score immediately after the test we can now click on view score and there the student can see what the score is now as a teacher if I go back to the spreadsheets I can see here that's the particular I can see here that's the entry that student has given and here is their score for that particular question incidentally if we go back to responses now we can now start to see we're getting a bit more information on our results and it gives us a much better idea of what's happening so I hope that's been informative and useful good luck with using Google Forms thanks for watching please click a like button and please subscribe to this channel for more educational technology videos until next time goodbye [Music]
Show moreFrequently asked questions
How can I allow customers to eSign contracts?
How can I turn a PDF into an eSigned document?
How can I add a personal signature to a PDF?
Get more for eSign Exit Ticket made easy
- Print signature service Birthday Party Contract Template
- Prove electronically signing Profit Sharing Plan
- Endorse digi-sign quote
- Authorize digital sign Travel Booking Form
- Anneal signatory Window Cleaning Proposal Template
- Justify eSignature Redemption Agreement Template
- Try initial Equipment Lease
- Add Bridge Loan Agreement digi-sign
- Send Product Sales Proposal Template esign
- Fax Work for Hire Agreement signature block
- Seal Leaving a Church Letter signature
- Password Confidentiality Agreement email signature
- Pass Term Sheet Template signatory
- Renew Pet Addendum to a Lease Agreement electronically signed
- Test Delivery Driver Contract byline
- Require Profit Sharing Agreement Template esigning
- Comment beneficiary sign
- Boost person countersign
- Compel client signature service
- Void Interior Design Contract Template template digital sign
- Adopt petition template initial
- Vouch Cruise Itinerary template signature
- Establish Boarding Pass template countersignature
- Clear Loan Agreement Template template digital signature
- Complete 911 Release Form PDF template electronically signed
- Force Business Letter Template template signed
- Permit Camp Trip Planning template digi-sign
- Customize Annual Report Template – Domestic for Profit template esign