Edit Mark Picture with airSlate SignNow
Award-winning eSignature solution


Improve your document workflow with airSlate SignNow
Agile eSignature workflows
Instant visibility into document status
Simple and fast integration set up
Edit mark picture on any device
Detailed Audit Trail
Rigorous protection standards
See airSlate SignNow eSignatures in action


airSlate SignNow solutions for better efficiency
Our user reviews speak for themselves


Why choose airSlate SignNow
-
Free 7-day trial. Choose the plan you need and try it risk-free.
-
Honest pricing for full-featured plans. airSlate SignNow offers subscription plans with no overages or hidden fees at renewal.
-
Enterprise-grade security. airSlate SignNow helps you comply with global security standards.

Your step-by-step guide — edit mark picture
Using airSlate SignNow’s eSignature any business can speed up signature workflows and eSign in real-time, delivering a better experience to customers and employees. edit mark picture in a few simple steps. Our mobile-first apps make working on the go possible, even while offline! Sign documents from anywhere in the world and close deals faster.
Follow the step-by-step guide to edit mark picture:
- Log in to your airSlate SignNow account.
- Locate your document in your folders or upload a new one.
- Open the document and make edits using the Tools menu.
- Drag & drop fillable fields, add text and sign it.
- Add multiple signers using their emails and set the signing order.
- Specify which recipients will get an executed copy.
- Use Advanced Options to limit access to the record and set an expiration date.
- Click Save and Close when completed.
In addition, there are more advanced features available to edit mark picture. Add users to your shared workspace, view teams, and track collaboration. Millions of users across the US and Europe agree that a system that brings people together in one cohesive workspace, is exactly what organizations need to keep workflows working efficiently. The airSlate SignNow REST API allows you to embed eSignatures into your application, internet site, CRM or cloud storage. Check out airSlate SignNow and get faster, smoother and overall more productive eSignature workflows!
How it works
airSlate SignNow features that users love


See exceptional results edit mark picture with airSlate SignNow
How to submit and sign a document online
Try out the fastest way to edit mark picture. Avoid paper-based workflows and manage documents right from airSlate SignNow. Complete and share your forms from the office or seamlessly work on-the-go. No installation or additional software required. All features are available online, just go to signnow.com and create your own eSignature flow.
A brief guide on how to edit mark picture in minutes
- Create an airSlate SignNow account (if you haven’t registered yet) or log in using your Google or Facebook.
- Click Upload and select one of your documents.
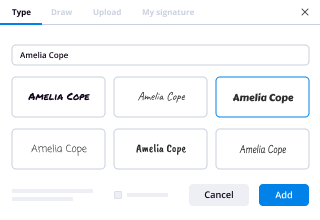
- Use the My Signature tool to create your unique signature.
- Turn the document into a dynamic PDF with fillable fields.
- Fill out your new form and click Done.
Once finished, send an invite to sign to multiple recipients. Get an enforceable contract in minutes using any device. Explore more features for making professional PDFs; add fillable fields edit mark picture and collaborate in teams. The eSignature solution gives a secure process and works based on SOC 2 Type II Certification. Make sure that your data are guarded so no one can take them.
How to eSign a PDF file in Google Chrome
Are you looking for a solution to edit mark picture directly from Chrome? The airSlate SignNow extension for Google is here to help. Find a document and right from your browser easily open it in the editor. Add fillable fields for text and signature. Sign the PDF and share it safely according to GDPR, SOC 2 Type II Certification and more.
Using this brief how-to guide below, expand your eSignature workflow into Google and edit mark picture:
- Go to the Chrome web store and find the airSlate SignNow extension.
- Click Add to Chrome.
- Log in to your account or register a new one.
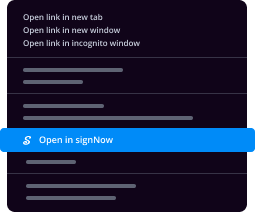
- Upload a document and click Open in airSlate SignNow.
- Modify the document.
- Sign the PDF using the My Signature tool.
- Click Done to save your edits.
- Invite other participants to sign by clicking Invite to Sign and selecting their emails/names.
Create a signature that’s built in to your workflow to edit mark picture and get PDFs eSigned in minutes. Say goodbye to the piles of papers on your desk and start saving money and time for extra essential duties. Selecting the airSlate SignNow Google extension is an awesome handy option with plenty of advantages.

How to sign an attachment in Gmail
If you’re like most, you’re used to downloading the attachments you get, printing them out and then signing them, right? Well, we have good news for you. Signing documents in your inbox just got a lot easier. The airSlate SignNow add-on for Gmail allows you to edit mark picture without leaving your mailbox. Do everything you need; add fillable fields and send signing requests in clicks.
How to edit mark picture in Gmail:
- Find airSlate SignNow for Gmail in the G Suite Marketplace and click Install.
- Log in to your airSlate SignNow account or create a new one.
- Open up your email with the PDF you need to sign.
- Click Upload to save the document to your airSlate SignNow account.
- Click Open document to open the editor.
- Sign the PDF using My Signature.
- Send a signing request to the other participants with the Send to Sign button.
- Enter their email and press OK.
As a result, the other participants will receive notifications telling them to sign the document. No need to download the PDF file over and over again, just edit mark picture in clicks. This add-one is suitable for those who like concentrating on more important things instead of wasting time for nothing. Boost your day-to-day routine with the award-winning eSignature service.

How to eSign a PDF file on the go without an application
For many products, getting deals done on the go means installing an app on your phone. We’re happy to say at airSlate SignNow we’ve made singing on the go faster and easier by eliminating the need for a mobile app. To eSign, open your browser (any mobile browser) and get direct access to airSlate SignNow and all its powerful eSignature tools. Edit docs, edit mark picture and more. No installation or additional software required. Close your deal from anywhere.
Take a look at our step-by-step instructions that teach you how to edit mark picture.
- Open your browser and go to signnow.com.
- Log in or register a new account.
- Upload or open the document you want to edit.
- Add fillable fields for text, signature and date.
- Draw, type or upload your signature.
- Click Save and Close.
- Click Invite to Sign and enter a recipient’s email if you need others to sign the PDF.
Working on mobile is no different than on a desktop: create a reusable template, edit mark picture and manage the flow as you would normally. In a couple of clicks, get an enforceable contract that you can download to your device and send to others. Yet, if you truly want an application, download the airSlate SignNow app. It’s comfortable, quick and has an intuitive design. Experience smooth eSignature workflows from the office, in a taxi or on an airplane.
How to sign a PDF file employing an iPad
iOS is a very popular operating system packed with native tools. It allows you to sign and edit PDFs using Preview without any additional software. However, as great as Apple’s solution is, it doesn't provide any automation. Enhance your iPhone’s capabilities by taking advantage of the airSlate SignNow app. Utilize your iPhone or iPad to edit mark picture and more. Introduce eSignature automation to your mobile workflow.
Signing on an iPhone has never been easier:
- Find the airSlate SignNow app in the AppStore and install it.
- Create a new account or log in with your Facebook or Google.
- Click Plus and upload the PDF file you want to sign.
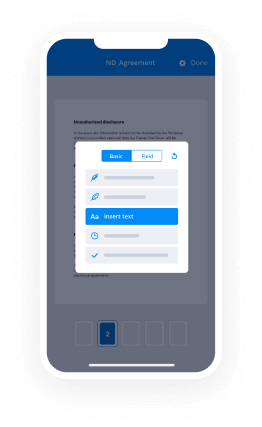
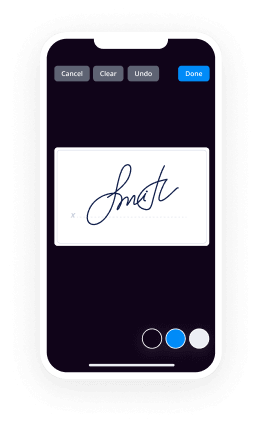
- Tap on the document where you want to insert your signature.
- Explore other features: add fillable fields or edit mark picture.
- Use the Save button to apply the changes.
- Share your documents via email or a singing link.
Make a professional PDFs right from your airSlate SignNow app. Get the most out of your time and work from anywhere; at home, in the office, on a bus or plane, and even at the beach. Manage an entire record workflow effortlessly: make reusable templates, edit mark picture and work on documents with partners. Turn your device right into a powerful organization instrument for closing offers.
How to eSign a PDF Android
For Android users to manage documents from their phone, they have to install additional software. The Play Market is vast and plump with options, so finding a good application isn’t too hard if you have time to browse through hundreds of apps. To save time and prevent frustration, we suggest airSlate SignNow for Android. Store and edit documents, create signing roles, and even edit mark picture.
The 9 simple steps to optimizing your mobile workflow:
- Open the app.
- Log in using your Facebook or Google accounts or register if you haven’t authorized already.
- Click on + to add a new document using your camera, internal or cloud storages.
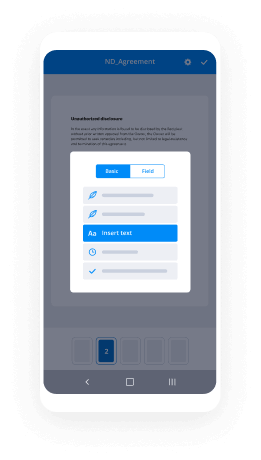
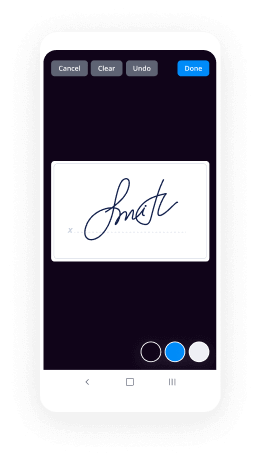
- Tap anywhere on your PDF and insert your eSignature.
- Click OK to confirm and sign.
- Try more editing features; add images, edit mark picture, create a reusable template, etc.
- Click Save to apply changes once you finish.
- Download the PDF or share it via email.
- Use the Invite to sign function if you want to set & send a signing order to recipients.
Turn the mundane and routine into easy and smooth with the airSlate SignNow app for Android. Sign and send documents for signature from any place you’re connected to the internet. Generate professional PDFs and edit mark picture with a few clicks. Come up with a perfect eSignature workflow using only your mobile phone and boost your total efficiency.
Get legally-binding signatures now!
What active users are saying — edit mark picture


Edit mark picture
hey guys k1 from camp production welcome back to my channel or welcome if you are new before we get to in this video you can go check out my store the link will be in the description there is a lot of free stuff free preset also a lot of discounts going on there you can check it out the link will be in the first line in description yeah have fun so in Instagram you get a lot of inspiration by great artist and one of the artists that I really like his work is mark singer man he's an amazing artist by creating his own style and if you notice in his photos he really pumped the photo with a lot of vibrance and a lot of orange and teal and a lot of overlay like it's amazing it just incredibly amazing alright so in this tutorial I'm going to show you how you can create a similar style that he has and the purpose of this video is not to totally go copy his style no but the opposite is go create your own style with it I'm going to show you some tools that he used so you can create your style by using these tools so that's the purpose of the video and and I'll start for myself I get inspired by a lot of photographers a lot of artists that's no shame but the shame is to copy his style his the exact style also link his instagram down below you can go check it out you can follow him and yeah so pretty much like that stay tuned and let's jump to the Photoshop okay guys so they are in Photoshop and the first thing first I want to go to filter then Camera Raw filter in contrast all the way down minus 100 because I want to make this butter flat before I work on it and the purpose of making it flat is very good for color grading and then bring back the contrast back after color grading so pretty much like that the idea is to make your photos flat before you start color grading so now I'm going to click OK alright so now we made our main background too flat so I'm going to ctrl J command J the background layer so after that I want to go to work on his skin if you zoom in we have a lot of spot over here so I'm gonna go to Spot Healing Brush tool and make sure you click on counter Network type of Spot Healing Brush and make sure it's normal and also the harness is kind of like a 120 and just basically paint over the spot that you have how much that's it I'm gonna speed up a lot of it to save your time you all right so now art is as you can see this is before after removed a little bit of spot over his face so now what is coming it's basically retouching part which is really important for me so only after it just its original layer two times and I'm gonna rename top layer with it sure and this one with low blow layer much like that I'm gonna hide the texture layer and going to filter noise we have doesn't scratch in doesn't scratch make sure you go with the radios that don't blur too much so the purpose of going to using doesn't scratch is blur but not too much blood like make sure you still have the edge of his eyes pretty much here I think number nine is really good for me basically you have a different photo and it depends your photo if you have a close-up portrait you will go with more radius so all you have to remember is to not blur out too much click okay and remember this exact number that you put it on this is number nine click OK okay now I'm gonna unhide the texture layer and texture layer we're going to use we have here image section and then we are going to apply image and then make sure you match with LowE lair click on invert and then all you have to do is just change the blending mode to add and also make sure the scale is to click OK and now all you have to do just change the normal length to one your light okay so now we basically didn't do anything we just we just created a method called frequency separation and all you have to do now is go to click on the low layer and then go to lasso tool here and make sure you put feather on 15 or something like 20 so you can get a smooth edge around it all right so now we're gonna zoom in and just select the double art here filter then go to blur Gaussian blur and make sure you put the same exact number that you put it on the dust and scratch which is a nine for me okay and do the same process for the rest of the part of area of his skin and only after this just to not all you have to do is just go to halt alt ctrl F on your keyboard because you don't have to basically do the same process go to filter - blur again all you have to just do to do this shortcut I guess okay so basically like that which I'm doing that right now all right I like that all right so I think we're done with retouching his face um now what I'm going to do is basically you for after you can see the different I'm going to mesh all of this layer with holding ctrl alt shift and then click on e on your keyboard to create a learn that contain all the layer below so let's rename it with retouch it yeah we touch it alright so now we're going to filter Camera Raw filter and I want to basically I want to go granting filter is gradum filter and granion filter make sure you click on reset call a local christian ii basically receive all the adjustment we said okay not reseed you know just like here make sure you click on the right side and just bring down a little of the exposure and also do the same thing for the yeah left side and right side and now we're going to get back to the main adjustment here I'm going to use tone curves here okay now I'm going to bring back a lot of the contrast with a tone curve here I'm going to make a three point here so I'm gonna basically this is a shadow contrast so I'm going to bring down this a little bit something like that not too much I'm gonna add a little bit outside a little highlight okay it's pretty much like that and then we're going to SL which is grayscale in a shell we have blue I think we're going to bring down some blue here so basically it's turning as you can see this is like very bluish it's gonna turn it to something like CN here which is really cool on the background it's gonna make orange until look and same for the Aqua I guess yeah same pretty much for the Aqua and also we have a red I'm gonna add some red something like around plus then it's gonna change the skin tone and also don't mess up the orange it's really it's gonna pick the skin tone so we have yellow I guess okay I'm gonna bring down some like bring down some yellow something like minus 35 and now we have saturation I want to add some saturation to aqua and the background also to some blue in the background it does really make a lot of change I'll also want to add some like saturation to the yellows yeah so pretty much like that and then we're going to use lemonade in lemonade's basically can control the brightness and darkness of the any color in the photo I might go add a load of red and a little the orange which does bright a lot of her skin yeah pretty much like that alright now I'm going to effect had a lot of effect here so I'm like bring out something like um which does actually add something to the round of the photo and here we have camera calibration camera coalition we have blue primary I'm gonna bring down the huge summer-like -40 and then at some hue on red primary which does make a really beautiful orange until here so someone like that gonna pronounce a little saturation alright so pretty much like that I think before after before after it's a really huge different in one section which is Camera Raw filter if you zoom in a little bit you're gonna notice it's kind of out of focus you know I shot with 85 millimeter one point or samyang which is a manual mood focused system so it was kind of hard for me to focus on his exact I I'm gonna add some sharpening something like wrong 100 yeah it's way too much I think it's worth it because you get basically all the detailed back I'm not gonna add lemon ace I'm just gonna click ok and here we go boom I stuff that I'm going to there and then I'm going to work on a process called awesome burn I'm gonna rename it burn okay so okay after this just shift and backspace on your keyboard click okay then just change normal blend - overlay and then we have here two tools called dodge and burn tool which is basically in Dodge tool you're gonna paint over the brightness area on his face much like it is this kind of area here make sure the exposure was something like 20 so you don't get too much exposure over his face yeah much like that I'm gonna zoom in more I'm gonna paint over inside his eye line which does really make a lot of friend it's really cool yeah if you zoom back you can see the difference it's really cool alright so pretty much like that now what I'm going to do I'm going to use a burn tool but I'm not gonna I'm not gonna try to add too much burn tool here just a simple on his birth here you can also paint over the background okay pretty much like that I'm going to add some touch tool to the image so here the before and after after the dodging burning tool it's a simple difference but it's really cool now I'm gonna use a one of my overlay here alright so as you can see this is my light package overlay the link will be in description if you're interested to get all of these light you get around 20 light 20 high-resolution light in my case I'm going to use this one I think is pretty good for this particular image all I have to just drag it and grab it into your main photo and just change the normal blend to screen and boom okay but don't go too much like lights it's gonna make just like a simple things here okay pretty much like that and yeah and now if you notice from the background here we have some bouquet but in case if you want to add more bouquet to the background here I have a bouquet overlay package basically this is the bouquet over light package the link will be in description if you're interested to get it in my case I'm going to click on this one I'm gonna open this one and all I have to do is just basically select one of the bulky here in my case I'm going with this one okay also make sure you select it with lasso tool and only after this just click on V on your keyboard that's on your V just move it something like that and just move it to your main image okay and I all you have to do is just change the normal blend to screen and boom okay so we got the bouquet but okay it's not really realistic so we want to make it realistic by reaching the size of it pretty much like that I'm gonna turn the place like that and now I'm gonna create a group here I'm gonna call a rename it with ooh yeah anyway um I click on the main layer and then just just basically locate it just like that it's really cool yeah all right so enough for that I'm gonna in the position someone like that lets can see and if you if you don't know how to duplicate the layer all you have to do is just ctrl J command J basically just hit it and move around a little bit pretty much like that it's very easy it's very cool all right I'm gonna do the same thing I'm gonna make it something like here but these will be a kind of single ones yeah much like that I had an idea I'm gonna me one kind of here like an overlay here something like that and I'm gonna make it on the top layer and now so we have the group of these small or bulky overlay I'm gonna control to merge all of the overlay ctrl alt ctrl e then in the normal blend screen again and boom now the reason I did that because I want to blur out a little bit of the bouquet in the background so make it more realistic pretty much like that think someone like yeah 9 or 10 to be great ok click OK and then I'm gonna get back to the main of bouquet here the big bouquet I'm gonna add some blurred but too much more something like pretty much around 100 click OK and boom okay all right so if you're interested to get these overlay the link will be in the description and after all these adjustment after all these process I want to go to granny map in granny map we have a lot of preset but the coolest and the my favorite one of all time is this one which is kind of a bullet and orange color click OK and then just bring down the opacity then change the blend mode to overlay but don't go with too much a pasty something like you know 15 or something like that yeah just don't go way too much with a pasty alright before after yeah pretty much like so now what I'm going to do basically I'm going to create another layer that contain all the layer below with holding ctrl alt shift and E I'm gonna get back to the Camera Raw filter in Camera Raw filter I'm gonna bring down some vibrance here and I'm gonna add some contrast okay so this is a different before after it add more contrast and gonna have bring down a lot about 5 mins more vibrant okay alright uh I really like it click OK and here's the before after for now um one thing I want to do here is on a basically duplicate my light layer here so all I have to do is just to bring it to the top because we're already made the layer that contain all the layer below so if you just bring this to the top it will basically duplicate it again and I'm gonna add some blur to the layer something like yeah pretty much 90 yeah so yeah pretty much like I guess so now all afterwards I just want to add a little grain with camera filter so we're going to get back to effect here it's gonna add some grain if you zoom in it really make the photo really nice so I really like it okay and I'm just mad Anna please dress a little bit not too much okay and we have shadow gonna bring up the little the shadow yeah so pretty much like that add a little highlight around plus then add some clarity here we have summer-like round plus 33 click OK again and boom so we got the result and I'm just gonna reduce more of the light here okay so that's it before after before after I hope you liked this tutorial if you did make sure you give a big thumbs up also subscribe for more upcoming tutorials and also comment down below if you want to suggest a photographer to make a tutorial about or a you know anything in your mind just comment down below and I'll see you in the next video take care [Music]
Show moreFrequently asked questions
How can I generate a PDF and make it signable?
How do I use my saved electronic signature on more PDFs?
Can I create a doc and add an electronic signature?
Get more for edit mark picture with airSlate SignNow
- Peg Portrait Party Invoices electronically signing
- Peg Portrait Party Invoices electronically signed
- Peg Consultant Invoice eSignature
- Peg Consultant Invoice esign
- Peg Consultant Invoice electronic signature
- Peg Consultant Invoice signature
- Peg Consultant Invoice sign
- Peg Consultant Invoice digital signature
- Peg Consultant Invoice eSign
- Peg Consultant Invoice digi-sign
- Peg Consultant Invoice digisign
- Peg Consultant Invoice initial
- Peg Consultant Invoice countersign
- Peg Consultant Invoice countersignature
- Peg Consultant Invoice initials
- Peg Consultant Invoice signed
- Peg Consultant Invoice esigning
- Peg Consultant Invoice digital sign
- Peg Consultant Invoice signature service
- Peg Consultant Invoice electronically sign
- Peg Consultant Invoice signatory
- Peg Consultant Invoice mark
- Peg Consultant Invoice byline
- Peg Consultant Invoice autograph
- Peg Consultant Invoice signature block
- Peg Consultant Invoice signed electronically
- Peg Consultant Invoice email signature
- Peg Consultant Invoice electronically signing