eSign Holiday Party Invitation Made Easy
Award-winning eSignature solution


Do more on the web with a globally-trusted eSignature platform
Outstanding signing experience
Reliable reporting and analytics
Mobile eSigning in person and remotely
Industry rules and compliance
Esign holiday party invitation, faster than ever
Helpful eSignature extensions
See airSlate SignNow eSignatures in action


airSlate SignNow solutions for better efficiency
Our user reviews speak for themselves


Why choose airSlate SignNow
-
Free 7-day trial. Choose the plan you need and try it risk-free.
-
Honest pricing for full-featured plans. airSlate SignNow offers subscription plans with no overages or hidden fees at renewal.
-
Enterprise-grade security. airSlate SignNow helps you comply with global security standards.

Your step-by-step guide — esign holiday party invitation
Employing airSlate SignNow’s electronic signature any organization can accelerate signature workflows and sign online in real-time, providing a greater experience to consumers and workers. Use esign Holiday Party Invitation in a few simple steps. Our mobile apps make operating on the run feasible, even while offline! eSign signNows from any place worldwide and complete deals quicker.
Keep to the stepwise guideline for using esign Holiday Party Invitation:
- Sign in to your airSlate SignNow account.
- Locate your needed form in your folders or import a new one.
- Open the document adjust using the Tools menu.
- Drag & drop fillable boxes, type text and eSign it.
- Add several signees by emails and set up the signing sequence.
- Indicate which users can get an signed doc.
- Use Advanced Options to limit access to the template add an expiration date.
- Click Save and Close when finished.
Additionally, there are more extended functions accessible for esign Holiday Party Invitation. Include users to your common digital workplace, view teams, and track cooperation. Millions of people all over the US and Europe agree that a system that brings everything together in a single cohesive digital location, is what businesses need to keep workflows performing easily. The airSlate SignNow REST API enables you to embed eSignatures into your application, internet site, CRM or cloud. Check out airSlate SignNow and get faster, easier and overall more effective eSignature workflows!
How it works
airSlate SignNow features that users love


See exceptional results esign Holiday Party Invitation made easy

How to submit and eSign a document online
Try out the fastest way to esign Holiday Party Invitation. Avoid paper-based workflows and manage documents right from airSlate SignNow. Complete and share your forms from the office or seamlessly work on-the-go. No installation or additional software required. All features are available online, just go to signnow.com and create your own eSignature flow.
A brief guide on how to esign Holiday Party Invitation in minutes
- Create an airSlate SignNow account (if you haven’t registered yet) or log in using your Google or Facebook.
- Click Upload and select one of your documents.
- Use the My Signature tool to create your unique signature.
- Turn the document into a dynamic PDF with fillable fields.
- Fill out your new form and click Done.
Once finished, send an invite to sign to multiple recipients. Get an enforceable contract in minutes using any device. Explore more features for making professional PDFs; add fillable fields esign Holiday Party Invitation and collaborate in teams. The eSignature solution supplies a protected workflow and operates based on SOC 2 Type II Certification. Make sure that all your records are guarded and that no one can take them.
How to eSign a PDF file in Google Chrome
Are you looking for a solution to esign Holiday Party Invitation directly from Chrome? The airSlate SignNow extension for Google is here to help. Find a document and right from your browser easily open it in the editor. Add fillable fields for text and signature. Sign the PDF and share it safely according to GDPR, SOC 2 Type II Certification and more.
Using this brief how-to guide below, expand your eSignature workflow into Google and esign Holiday Party Invitation:
- Go to the Chrome web store and find the airSlate SignNow extension.
- Click Add to Chrome.
- Log in to your account or register a new one.
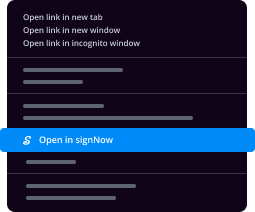
- Upload a document and click Open in airSlate SignNow.
- Modify the document.
- Sign the PDF using the My Signature tool.
- Click Done to save your edits.
- Invite other participants to sign by clicking Invite to Sign and selecting their emails/names.
Create a signature that’s built in to your workflow to esign Holiday Party Invitation and get PDFs eSigned in minutes. Say goodbye to the piles of papers sitting on your workplace and begin saving money and time for more important duties. Picking out the airSlate SignNow Google extension is a great handy choice with many different advantages.

How to sign an attachment in Gmail
If you’re like most, you’re used to downloading the attachments you get, printing them out and then signing them, right? Well, we have good news for you. Signing documents in your inbox just got a lot easier. The airSlate SignNow add-on for Gmail allows you to esign Holiday Party Invitation without leaving your mailbox. Do everything you need; add fillable fields and send signing requests in clicks.
How to esign Holiday Party Invitation in Gmail:
- Find airSlate SignNow for Gmail in the G Suite Marketplace and click Install.
- Log in to your airSlate SignNow account or create a new one.
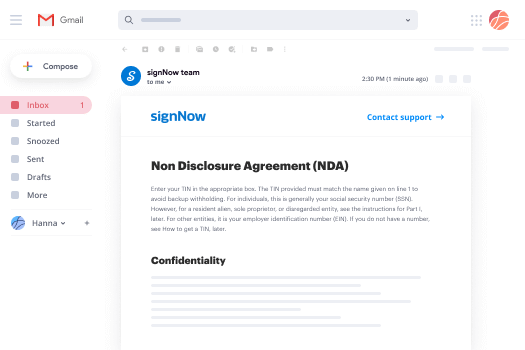
- Open up your email with the PDF you need to sign.
- Click Upload to save the document to your airSlate SignNow account.
- Click Open document to open the editor.
- Sign the PDF using My Signature.
- Send a signing request to the other participants with the Send to Sign button.
- Enter their email and press OK.
As a result, the other participants will receive notifications telling them to sign the document. No need to download the PDF file over and over again, just esign Holiday Party Invitation in clicks. This add-one is suitable for those who choose working on more valuable tasks rather than burning time for absolutely nothing. Improve your daily monotonous tasks with the award-winning eSignature application.
How to eSign a PDF on the go without an application
For many products, getting deals done on the go means installing an app on your phone. We’re happy to say at airSlate SignNow we’ve made singing on the go faster and easier by eliminating the need for a mobile app. To eSign, open your browser (any mobile browser) and get direct access to airSlate SignNow and all its powerful eSignature tools. Edit docs, esign Holiday Party Invitation and more. No installation or additional software required. Close your deal from anywhere.
Take a look at our step-by-step instructions that teach you how to esign Holiday Party Invitation.
- Open your browser and go to signnow.com.
- Log in or register a new account.
- Upload or open the document you want to edit.
- Add fillable fields for text, signature and date.
- Draw, type or upload your signature.
- Click Save and Close.
- Click Invite to Sign and enter a recipient’s email if you need others to sign the PDF.
Working on mobile is no different than on a desktop: create a reusable template, esign Holiday Party Invitation and manage the flow as you would normally. In a couple of clicks, get an enforceable contract that you can download to your device and send to others. Yet, if you really want an application, download the airSlate SignNow mobile app. It’s comfortable, quick and has an intuitive interface. Enjoy easy eSignature workflows from your office, in a taxi or on an airplane.
How to sign a PDF file having an iPad
iOS is a very popular operating system packed with native tools. It allows you to sign and edit PDFs using Preview without any additional software. However, as great as Apple’s solution is, it doesn't provide any automation. Enhance your iPhone’s capabilities by taking advantage of the airSlate SignNow app. Utilize your iPhone or iPad to esign Holiday Party Invitation and more. Introduce eSignature automation to your mobile workflow.
Signing on an iPhone has never been easier:
- Find the airSlate SignNow app in the AppStore and install it.
- Create a new account or log in with your Facebook or Google.
- Click Plus and upload the PDF file you want to sign.
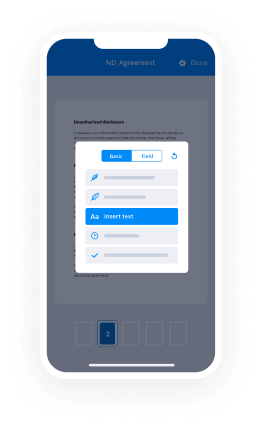
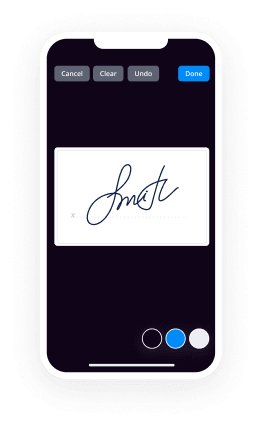
- Tap on the document where you want to insert your signature.
- Explore other features: add fillable fields or esign Holiday Party Invitation.
- Use the Save button to apply the changes.
- Share your documents via email or a singing link.
Make a professional PDFs right from your airSlate SignNow app. Get the most out of your time and work from anywhere; at home, in the office, on a bus or plane, and even at the beach. Manage an entire record workflow seamlessly: build reusable templates, esign Holiday Party Invitation and work on PDFs with partners. Turn your device right into a effective organization tool for closing offers.
How to sign a PDF Android
For Android users to manage documents from their phone, they have to install additional software. The Play Market is vast and plump with options, so finding a good application isn’t too hard if you have time to browse through hundreds of apps. To save time and prevent frustration, we suggest airSlate SignNow for Android. Store and edit documents, create signing roles, and even esign Holiday Party Invitation.
The 9 simple steps to optimizing your mobile workflow:
- Open the app.
- Log in using your Facebook or Google accounts or register if you haven’t authorized already.
- Click on + to add a new document using your camera, internal or cloud storages.
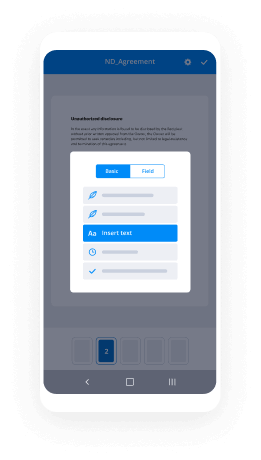
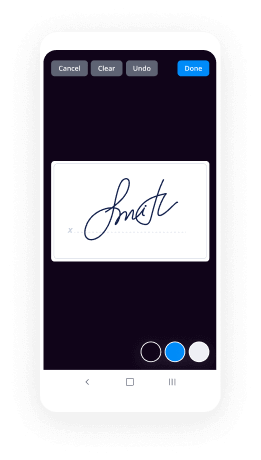
- Tap anywhere on your PDF and insert your eSignature.
- Click OK to confirm and sign.
- Try more editing features; add images, esign Holiday Party Invitation, create a reusable template, etc.
- Click Save to apply changes once you finish.
- Download the PDF or share it via email.
- Use the Invite to sign function if you want to set & send a signing order to recipients.
Turn the mundane and routine into easy and smooth with the airSlate SignNow app for Android. Sign and send documents for signature from any place you’re connected to the internet. Build professional-looking PDFs and esign Holiday Party Invitation with a few clicks. Put together a faultless eSignature workflow with only your mobile phone and boost your overall efficiency.
Get legally-binding signatures now!
What active users are saying — esign holiday party invitation


E signature professional birthday party invitation
hello everyone we'll come back to ingenious creations and sedate Satori I'm going to show you a simple way how to make your own invitations you can print this out in any local printing shop or you can print at home and in today's video I'm going to show you how to make this using Microsoft Word and of course I'll do a separate video on how to do it in silhouette studio so the first thing that you have to do is open up your Microsoft Word and as you all know I'm with my previous tutorials I always go to file I go to save as and I will go to save document as word 97-2003 document it's just because I like working on that mode and then you're going to write the name of your file and you're going to click on save once you click on save you're going to go to a page layout click on orientation and landscape now you can make your invitations 5 by 7 or 7 by 5 I'm going to make mines 5 by 7 and that's why I have mines in landscape mode so 2 could fit going this way but if you want to do this 7 by 5 then you will leave it on portrait mode okay so once it's on landscape I'm gonna go to insert you're going to go to shapes you're gonna click on the rectangle make any size rectangle on your screen make sure it's selected go to the format tab on your height you're going to type 7 on your width you're going to type 5 so that is the template actually for your invitation 7 by 5 if you're doing it the other way around which will be the height will be 5 and then your width will be 7 which your rectangle will look like this then leave your page on portrait mode ok but I'm doing the 7 by 5 okay once that is done now this is totally up to you depending on the theme that you are doing I'm going to quickly design one for you guys and Polly you could grab some tips from here but again is totally up to you depending on the theme that your customer actually for or if you're doing this for personal use okay so you're going to make sure you click on your shape you're going to make sure you're on the format tab and you're gonna go to shape fill and you're gonna pick any of those colors from right here or if you don't want no solid colors you will go to pick a format shape fill picture and then you're going to click on a background of your choice to find backgrounds you will go just to Google and look up a background that you would like and save it to your computer I have a whole separate tutorial on how to save images to your computer like I said all you have to do is go to Google and let's say you want to denim background you will search denim background you will find whatever you like click on it and then from here you will right click and save to your computer ok so I want a small banner on top of here and what I just explained to you that is to fill your entire rectangle that is not to put individual images that is two different things so when you click on the rectangle and you go to the format tab in shape fill that's to fill your rectangle now to add individual images you're going to unselect your rectangle you're going to go to the insert tab you're going to go to picture and from here this is where you add your individual images so I saved a birthday of flag banner P&G when you save P&G that means is a transparent background image okay so I'm gonna go for where I saved it click on it click on insert and then it's gonna be behind this so while it's selected I'm gonna go to the format tab wrap text in front of text this is a PNG image you don't see no white background okay and that's what you need to look for and you'll do the same process and you will save it to your computer you're going to size it and this is just me designing you don't have to add this it depends on the theme that you are doing these circles around your image that's what you used to size your images okay okay there you go that's my foundation now I'm also going to add another image so insert picture insert wrap text in front of text size it to the size you want this little green button here you can rotate your images now I don't want my wanted sign in front of my flag so I'm actually going to click on my flag and on the format tab it says bring forward bring to front so my flag could actually be in front of my wanted sign then I'm going to bring another image insert picture look for I want like a little cowboy now these images I did not get from Google I got from mujika clip arts she has her own website we are actually affiliated with her and you can they she has a pretty good sale going on right now so you can go ahead and go and over and buy some clip arts again bring two from wrap text in front of text she has a whole bunch of beautiful clip arts and this is her website here I know they have a sale right now this one actually right now it's a dollar it's called the cowboy clip or wild wild west cute cowboy clip art and you get all these images now because we are affiliated we have our own discount code so when you go pay in the actually for discount code typing the word and Reena capital A and B are I and a all capitalized and you get an extra 20% for your entire purchase and you could use that code throughout whenever you make any purchases you could always use that code and you get a 20 extra 20 percent off discount okay so go ahead and over and it's called Mushka clipart characters they'll get back to the tutorial so size him up okay now I'm going to start inserting fonts so you see how easy it is so you will go to insert you will go to word our is a that says word arts you're gonna click on it click on word art you're going to start looking for your font that you would like and you go download free fonts from dafont.com I have a separate tutorial for that as well so I'm going to select a font and then you're gonna start typing then you will click on OK go to format wrap text in front of text then you're gonna go to shape fill fill it in with whatever color you would like go to shape outline no outline and start adding your font wherever you would like now I'm going to speed this process up so this video won't be so long [Music] just if you're wondering the font for this one is called P shaded okay and then now I want to put a line right under the six so you're gonna go to insert you're gonna go to shapes you're gonna click on the line and you're gonna hold down your Shift key and you're going to put the line where you want it to be when you press down the shift key it makes your line stay straight okay you're gonna let it go you're gonna go to format tab shape outline select the color that you would like your line to be when you're in the shape outline it also says weight click on the weight you want if you want a thicker line and then go back to shape outline it says dashes and I'm going to click on the dashes so I can look like that okay [Music] [Music] [Music] [Music] [Music] [Music] [Music] you you alright guys I designed a quick and simple invitation now you need to group all this together and then you're going to copy and paste it so when you will see me have two of these so I just click on this star copy and paste it to make another one when I wanted to use the same font I will just copy and paste it and then I will edit that same font and stuff like that okay so that's always doing the same for the lines I was copying and pasting so I don't have to keep doing the same steps now you're going to click on the rectangle you're going to click the shift hold down the shift key and select everything that you have on your screen okay you're going to right-click and group and group together and I think I didn't group some stuff so there's an undo button right here the arrow just undo hold down your Shift key and see what you did in group that right-click group and group it together now that you have everything grouped together you are going to and I actually want in my voice to touch down but it's fine cuz it's just a source so right-click copy right-click and paste all the background didn't group okay so we gotta go back undo undo and hold down your Shift key and click on your clear so don't get frustrated if some stuff might not group okay copy and paste all right so there you go so don't get frustrated guys but I know a lot of you guys get frustrated saying walking group you know how to carefully hold down that Shift key and try to select everything that's on your screen and then you're done from here if you don't have a printer at home you can save this as a PDF file remember at the beginning I had saved this as a different mode but that's just so I could have a word art but now if I don't have a printer at home I will have to go to file I will have to go to save as and then from here where it says save as type I'm going to click where it says PDF you need to make sure you're saving this as a PDF file if you're going to print somewhere else that is not on your own home or if you're sending this to a customer and they are printing themselves you have to save this as a PDF file because if they don't have Microsoft Word everything here will change the fonts the characters a lot of stuff is going to change now if you are printing at home then there's a print preview a magnifying glass right here that is called the print preview you are going to select that and you're going to see how everything is looking on the page you need to make sure that everything is inside of your page okay so this is a print preview from here you need to make sure that your printer is selected and where it says printer properties you're going to select that and me personally I owned a work for 7720 printer and then I like to print on premium presentation paper Matt Switzer's right here I'm going to click OK and one setting click OK and then I'm ready to print I'm going to print this on glossy paper and I'm going to show you how it looks ok ok I just printed them and cut them out this is how it looks I'm going to show you the paper that I used I love the Office Depot brand Premium brochure flyer paper now this is only 50 pounds the higher the number the thicker the paper you need to make sure that the paper that you use it is compatible with your printer I have an inkjet printer this works for both but that's the number one mistake that I see that people use the paper that doesn't belong to your printer this is a glossy a by 11 50 pound we can go higher than this if you want your invitations to be thicker this one is not not so thick for invitations but it works just fine okay you can find a photo paper anywhere Walmart staples OfficeMax office depot I mean Amazon and stuff like that now your envelopes it needs to be a seven size and it will fit your 5 by 7 invitation perfectly in here once you put your invitation in your envelope you can create your own custom sticker and put on the outside so maybe like a little cowboy sticker and put it right here and then you'll write the information that hooda in the invite is 4 ok so if you haven't subscribed to my youtube channel yet please go ahead and subscribe and click on the notification bell so you can be notified when I upload all my other videos and thank you so much we have reached 20,000 subscribers I really appreciate it if you don't follow me on Facebook and Instagram it is and jeana's creations and my personal website is ingenious creations calm if you would like to purchase anything for me you can message me through Facebook and Instagram or you can email me and ingenious creations at yahoo.com also if you haven't joined my facebook crafting group it is called ingenious creations crafting lounge and we have over I think we have like 2k members now there and you can post anything you want you can go alive in there you can ask as many questions there I also go live I try to go live at least once a week there and if you have any questions or answer if you have any questions I will answer for for you online or you can see me work behind the scenes and stuff like that ok so I hope everyone's having a blessed day and I'll talk to you guys later if you have any questions you can always comment down here and if you have any other suggestions of tutorials you want me to do for you guys also comment down below okay so I'll talk to you guys later bye bye
Show moreFrequently asked questions
How do I eSign a document before sending it?
How can I add a personal signature to a PDF?
How do I electronically sign and date a PDF?
Get more for esign Holiday Party Invitation made easy
- Print signature service Arbitration Agreement Template
- Prove email signature Free Oregon Rental Lease Agreement Template
- Endorse eSign First Aid Risk Assessment
- Authorize digital sign Free Raffle Ticket
- Anneal signatory Internet Service Agreement Template
- Justify eSignature Asset Management Agreement
- Try digisign Multi Sectional Resume
- Add Liquidating Trust Agreement electronic signature
- Send Travel Agency Proposal Template signed electronically
- Fax Summer Camp Certificate electronically sign
- Seal Sponsorship Letter electronically signing
- Password Real Estate Purchase Agreement mark
- Pass Food Service Contract Template signed
- Renew Lease/Rental Agreement autograph
- Test Alumni Chapter Annual Report digital sign
- Require 1099-MISC Form initial
- Send proof electronically signed
- Accredit petitioner digital signature
- Compel guest countersignature
- Void Rental Receipt Template template countersign
- Adopt patent template sign
- Vouch Itinerary Planner template electronically signing
- Establish Business Quote template eSign
- Clear Consignment Agreement Template template eSignature
- Complete Food Allergy Chart template autograph
- Force Freelance Recruiter Agreement Template template digisign
- Permit Basketball Camp Registration template electronic signature
- Customize Computer Service Contract Template template signed electronically