eSigning Psd Made Easy
Award-winning eSignature solution


Get the robust eSignature features you need from the solution you trust
Select the pro platform created for professionals
Configure eSignature API with ease
Collaborate better together
Esigning psd, in minutes
Cut the closing time
Keep important information safe
See airSlate SignNow eSignatures in action


airSlate SignNow solutions for better efficiency
Our user reviews speak for themselves


Why choose airSlate SignNow
-
Free 7-day trial. Choose the plan you need and try it risk-free.
-
Honest pricing for full-featured plans. airSlate SignNow offers subscription plans with no overages or hidden fees at renewal.
-
Enterprise-grade security. airSlate SignNow helps you comply with global security standards.

Your step-by-step guide — esigning psd
Employing airSlate SignNow’s eSignature any organization can speed up signature workflows and sign online in real-time, delivering an improved experience to clients and workers. Use esigning psd in a couple of easy steps. Our mobile apps make operating on the run achievable, even while off-line! Sign contracts from any place in the world and complete tasks in no time.
Keep to the step-by-step guideline for using esigning psd:
- Log on to your airSlate SignNow profile.
- Locate your document within your folders or import a new one.
- Open the document and make edits using the Tools menu.
- Drop fillable areas, add text and sign it.
- Add multiple signers using their emails and set the signing order.
- Choose which individuals can get an executed version.
- Use Advanced Options to limit access to the document add an expiry date.
- Tap Save and Close when completed.
Additionally, there are more enhanced capabilities open for esigning psd. Include users to your common workspace, view teams, and monitor collaboration. Millions of consumers across the US and Europe agree that a system that brings everything together in one cohesive digital location, is the thing that companies need to keep workflows working easily. The airSlate SignNow REST API allows you to embed eSignatures into your app, internet site, CRM or cloud storage. Check out airSlate SignNow and enjoy faster, easier and overall more efficient eSignature workflows!
How it works
airSlate SignNow features that users love


See exceptional results esigning psd made easy

How to fill in and sign a document online
Try out the fastest way to esigning psd. Avoid paper-based workflows and manage documents right from airSlate SignNow. Complete and share your forms from the office or seamlessly work on-the-go. No installation or additional software required. All features are available online, just go to signnow.com and create your own eSignature flow.
A brief guide on how to esigning psd in minutes
- Create an airSlate SignNow account (if you haven’t registered yet) or log in using your Google or Facebook.
- Click Upload and select one of your documents.
- Use the My Signature tool to create your unique signature.
- Turn the document into a dynamic PDF with fillable fields.
- Fill out your new form and click Done.
Once finished, send an invite to sign to multiple recipients. Get an enforceable contract in minutes using any device. Explore more features for making professional PDFs; add fillable fields esigning psd and collaborate in teams. The eSignature solution supplies a safe process and runs according to SOC 2 Type II Certification. Make sure that your information are protected and therefore no person can edit them.
How to eSign a PDF template in Google Chrome
Are you looking for a solution to esigning psd directly from Chrome? The airSlate SignNow extension for Google is here to help. Find a document and right from your browser easily open it in the editor. Add fillable fields for text and signature. Sign the PDF and share it safely according to GDPR, SOC 2 Type II Certification and more.
Using this brief how-to guide below, expand your eSignature workflow into Google and esigning psd:
- Go to the Chrome web store and find the airSlate SignNow extension.
- Click Add to Chrome.
- Log in to your account or register a new one.
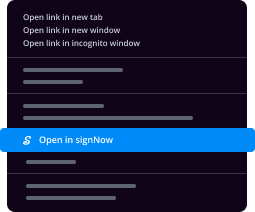
- Upload a document and click Open in airSlate SignNow.
- Modify the document.
- Sign the PDF using the My Signature tool.
- Click Done to save your edits.
- Invite other participants to sign by clicking Invite to Sign and selecting their emails/names.
Create a signature that’s built in to your workflow to esigning psd and get PDFs eSigned in minutes. Say goodbye to the piles of papers sitting on your workplace and start saving time and money for extra crucial duties. Selecting the airSlate SignNow Google extension is an awesome convenient decision with lots of advantages.

How to sign an attachment in Gmail
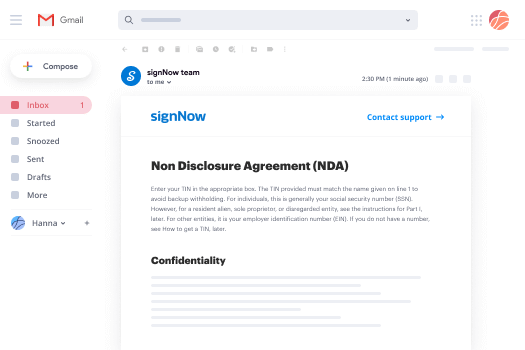
If you’re like most, you’re used to downloading the attachments you get, printing them out and then signing them, right? Well, we have good news for you. Signing documents in your inbox just got a lot easier. The airSlate SignNow add-on for Gmail allows you to esigning psd without leaving your mailbox. Do everything you need; add fillable fields and send signing requests in clicks.
How to esigning psd in Gmail:
- Find airSlate SignNow for Gmail in the G Suite Marketplace and click Install.
- Log in to your airSlate SignNow account or create a new one.
- Open up your email with the PDF you need to sign.
- Click Upload to save the document to your airSlate SignNow account.
- Click Open document to open the editor.
- Sign the PDF using My Signature.
- Send a signing request to the other participants with the Send to Sign button.
- Enter their email and press OK.
As a result, the other participants will receive notifications telling them to sign the document. No need to download the PDF file over and over again, just esigning psd in clicks. This add-one is suitable for those who choose working on more valuable goals as an alternative to wasting time for practically nothing. Improve your day-to-day monotonous tasks with the award-winning eSignature service.
How to sign a PDF template on the go with no mobile app
For many products, getting deals done on the go means installing an app on your phone. We’re happy to say at airSlate SignNow we’ve made singing on the go faster and easier by eliminating the need for a mobile app. To eSign, open your browser (any mobile browser) and get direct access to airSlate SignNow and all its powerful eSignature tools. Edit docs, esigning psd and more. No installation or additional software required. Close your deal from anywhere.
Take a look at our step-by-step instructions that teach you how to esigning psd.
- Open your browser and go to signnow.com.
- Log in or register a new account.
- Upload or open the document you want to edit.
- Add fillable fields for text, signature and date.
- Draw, type or upload your signature.
- Click Save and Close.
- Click Invite to Sign and enter a recipient’s email if you need others to sign the PDF.
Working on mobile is no different than on a desktop: create a reusable template, esigning psd and manage the flow as you would normally. In a couple of clicks, get an enforceable contract that you can download to your device and send to others. Yet, if you really want an application, download the airSlate SignNow mobile app. It’s comfortable, fast and has a great design. Enjoy effortless eSignature workflows from the business office, in a taxi or on an airplane.
How to sign a PDF file using an iPad
iOS is a very popular operating system packed with native tools. It allows you to sign and edit PDFs using Preview without any additional software. However, as great as Apple’s solution is, it doesn't provide any automation. Enhance your iPhone’s capabilities by taking advantage of the airSlate SignNow app. Utilize your iPhone or iPad to esigning psd and more. Introduce eSignature automation to your mobile workflow.
Signing on an iPhone has never been easier:
- Find the airSlate SignNow app in the AppStore and install it.
- Create a new account or log in with your Facebook or Google.
- Click Plus and upload the PDF file you want to sign.
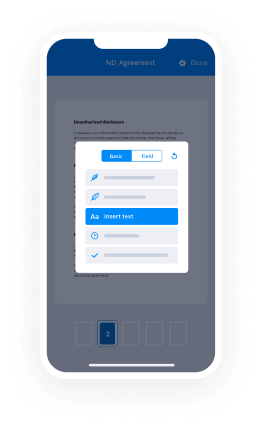
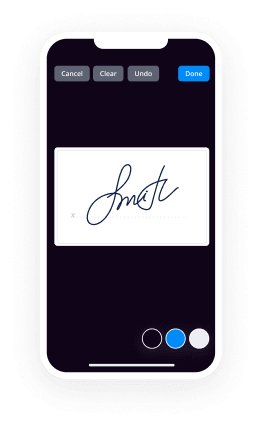
- Tap on the document where you want to insert your signature.
- Explore other features: add fillable fields or esigning psd.
- Use the Save button to apply the changes.
- Share your documents via email or a singing link.
Make a professional PDFs right from your airSlate SignNow app. Get the most out of your time and work from anywhere; at home, in the office, on a bus or plane, and even at the beach. Manage an entire record workflow seamlessly: build reusable templates, esigning psd and work on PDF files with business partners. Turn your device into a potent business for executing contracts.
How to eSign a PDF file taking advantage of an Android
For Android users to manage documents from their phone, they have to install additional software. The Play Market is vast and plump with options, so finding a good application isn’t too hard if you have time to browse through hundreds of apps. To save time and prevent frustration, we suggest airSlate SignNow for Android. Store and edit documents, create signing roles, and even esigning psd.
The 9 simple steps to optimizing your mobile workflow:
- Open the app.
- Log in using your Facebook or Google accounts or register if you haven’t authorized already.
- Click on + to add a new document using your camera, internal or cloud storages.
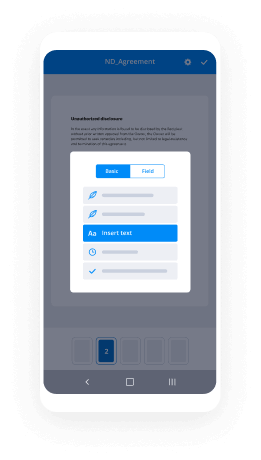
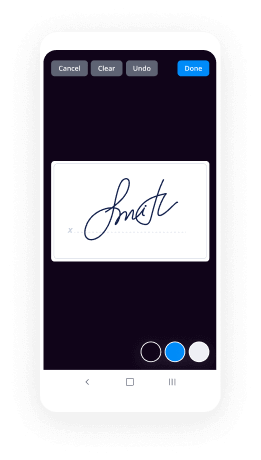
- Tap anywhere on your PDF and insert your eSignature.
- Click OK to confirm and sign.
- Try more editing features; add images, esigning psd, create a reusable template, etc.
- Click Save to apply changes once you finish.
- Download the PDF or share it via email.
- Use the Invite to sign function if you want to set & send a signing order to recipients.
Turn the mundane and routine into easy and smooth with the airSlate SignNow app for Android. Sign and send documents for signature from any place you’re connected to the internet. Create good-looking PDFs and esigning psd with just a few clicks. Assembled a faultless eSignature process using only your smartphone and improve your total productiveness.
Get legally-binding signatures now!
FAQs
-
How do you make a PSD?
Launch airSlate SignNow Photoshop. Any version of Photoshop will support the creation of PSD files. Open an image file. Most Photoshop projects begin with a base image. ... Add a layer to your photo. Go to the \u201cLayer" menu and select "Add New Layer\u201d. ... Add a filter to your photo (optional). ... Save your PSD file. ... Resume editing your PSD. -
What is meant by PSD to HTML?
PSD stands for Photoshop Document. HTML means Hyper text Markup Language. ... and when you convert that PSD file into a markup language like HTML it's called PSD to HTML. it's like kind of first you draw your idea of a webpage in Photoshop and then you convert it to a browser supported file. -
How can I convert PSD to JPG without Photoshop?
Choose the JPEG format that you need. That's it. Many tools available in psd to jpg without photoshop. Open it with Picassa or OpenOffice and then 'save as' jpg file. -
How do I convert PSD to HTML?
Step 1 \u2013 Have all the Key Components of a PSD Design. ... Step 2 \u2013 Know Your Tools. ... Step 3 \u2013 Getting the PSD Files Ready for Conversion. ... Step 4 \u2013 Start with Simple Starter Layout. ... Step 5 \u2013 Work on Each Section Elaborately to Mark Up the HTML. ... Also Read. -
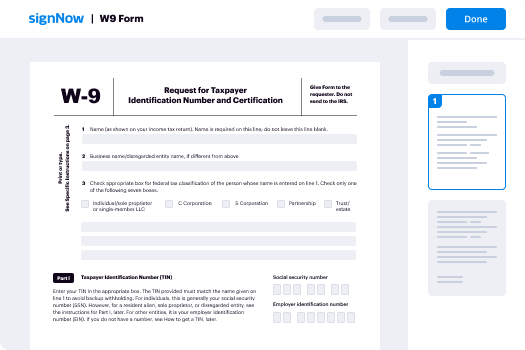
What is PSD file format used for?
A . PSD file is a layered image file used in airSlate SignNow PhotoShop. PSD, which stands for Photoshop Document, is the default format that Photoshop uses for saving data. PSD is a proprietary file that allows the user to work with the images' individual layers even after the file has been saved. -
What is PSD template?
PSD template is a graphic project created with airSlate SignNow Photoshop. This software works perfectly for the design-to-code process. The folder with template contains. PSD files which can be opened with airSlate SignNow Photoshop and, sometimes, airSlate SignNow Photoshop Elements. -
How do I fill a template in Photoshop?
Suggested clip Filling in Template in Photoshop - YouTubeYouTubeStart of suggested clipEnd of suggested clip Filling in Template in Photoshop - YouTube -
How do I download PSD files in Photoshop?
Suggested clip Free PSD File download - 10 websites For Free PSD ... - YouTubeYouTubeStart of suggested clipEnd of suggested clip Free PSD File download - 10 websites For Free PSD ... - YouTube -
What is the meaning of PSD?
A . PSD file is a layered image file used in airSlate SignNow PhotoShop. PSD, which stands for Photoshop Document, is the default format that Photoshop uses for saving data. PSD is a proprietary file that allows the user to work with the images' individual layers even after the file has been saved. -
What is PSD file?
PSD file is a layered image file used in airSlate SignNow PhotoShop. PSD, which stands for Photoshop Document, is the default format that Photoshop uses for saving data. PSD is a proprietary file that allows the user to work with the images' individual layers even after the file has been saved. -
What does PSD stand for in psychology?
Post-stroke depression (PSD) has a negative impact on rehabilitation outcomes, and affects functional recovery, cognitive function and the quality of life of stroke survivors. -
How do I use PSD files?
Double-click the full PSD file in the Browse Panel to open it in Detail view. ... Click Layers to open the Layers panel. ... Double-click a layer to open it and do any of the following: ... Click Save or Save As. -
How do I use a PSD template?
Suggested clip PHOTOSHOP: How to use templates - YouTubeYouTubeStart of suggested clipEnd of suggested clip PHOTOSHOP: How to use templates - YouTube -
Can I open a PSD file without Photoshop?
1. GIMP. GIMP should honestly be your first stop when trying to open and edit a PSD file for free. Not only is it the best free alternative to Photoshop, but it's available across Windows, Mac, and Linux, so you can learn it once and use it on all of your systems.
What active users are saying — esigning psd


Esigning psd
now that we've finalized our design a bit what we want to do is create responsive screen designs in this example we'll be creating responsive screens for a default desktop and also a default tablet now there are a few steps to accomplish this and they're relatively simple the first thing we want to do is we want to create our default screen now for responsive CSS you're going to need to basically replicate all the content for each individual target screen so please note you will end up with a lot of folders and a lot of layers which will equate to a longer export time now what we want to do is basically group all our content and create this as our default screen so let's go ahead and let's add the screen tag and let's call this our desktop layout now basically this is the layout that will be rendered when we're on a desktop and what it will do is basically use the PSD size as the actual default document size so right now we have it at 1200 so the default screen size that it's targeting is 1200 now let's add an additional tablet layout so what we want to do is basically duplicate the group and let's make this 780 or let's actually make it 700 for our target screen and this will be tablet layout now the next step is basically just hide the desktop layout this way it's not visible and the easiest way to do this is to open up guide kit and what we want to do is replace the guides on the current document this way what we can do is have a more clear view of to exactly where elements will be placed when we're designing our tablet screen so what we can do is basically create two columns and let's just hide the others now because we know that our actual document size for our tablet is going to be 700 we can actually just move the guide to the 700 region and what this will do is this will actually give us an idea as the where content should be spaced within the tablets itself so let's go ahead and let's just modify the content now if we go into the folder you'll see that we still have our exact same folder structure and we want this but what we're going to do is we're going to now edit each individual page and the actual header and footer on its own so let's just make the index page visible now because our content is going to be held within this region what we want to do is basically shift our header over the next step let's go ahead and let's modify the footer let's change the layout of the footer slightly now because we're using dynamic height where the folder is positioned is irrelevant it's just basically what the contents of that folder is so let's shift this up let's change the background size slightly let's actually move some of these elements so what we want to do is we want to take the actual contents of the footer not the background itself and let's just slide them over a bit yeah why not let's go with this and let's actually just move the etched lines and the copyright just shift these down let's change the size of both of these lines let's actually just move some of these pages let's align it actually now that I look we should actually align the edge content with this as well let's just move some of these individual page links let's align them all sent to them all maybe align this to the left of the actual paragraph actually no you know what you're the designer you design it the way you want okay so let's assume that this is the footer design that we want for our tablet let's just change the background again now if we go back to the individual page content let's change exactly where this title is located let's maybe change the size of it we go let's reposition this this image we want to resize this image and let's possibly change the size of the background as well now it's irrelevant where we actually place our our fix to change the content well that's actually be at the left or right but what we want to do is basically ream our jiin it for the actual tablet what this will do is cut the content here and then show the footer so this is going to be our design for our index page now again it's irrelevant where you have the footer place it'll basically recalculate that in the output so let's close our folders and let's modify another page oops let's go to the about us so our title actually I believe we made it fifty five in the other so we can make this possibly fifty five oh no this actually fits let's just change the position slightly our content let's align it with the about us text itself now you'll note that this is not paragraph text so we cannot resize it as we would like basically what you're going to have to do now is rerender it actually so we're going to have to change either the size of the content which possibly will be faster if we just change the font size rather than retyping all the information and then let's just realign it and let's change some of the icon sizes oh those are individual elements okay let's change both of these sure let's do it all at once so this is the button on the icon there the button on the icon there that said these two objects let's just resize them artex hopefully okay great this is paragraph text such as reposition our actual content so let's assume that it might be longer or let's cut it here actually you it's real in this to the left position let's go ahead let's just change the process now you can see our footer already we're going to have to change its location just so we're able to see the additional content so let's just do that really quick let's just nudge that down a bit more well actually the page we should still be able to see within this region so let's just go ahead and resize the last section of the aboutis so I want the process to begin here this image let's change the size of it realign it a bit change the size of that so line that and let's change our text size let's align that it's not these down a bit and let's change the background size so what will happen is our process content will end here and the footer will begin here so again because we're using dynamic sizing it's irrelevant where we actually place the individual elements as long as they're contained in folders so let's go ahead let's close our folders and let's go and let's edit the last contact page so our message it's does it fit well fit let's go with it okay so let's realign our actual contact form you okay so let's put the form I guess below the actual contact information I believe that we have some elements that are skipped or locked the s of the folder so we can't drag that so just going to have to unlock that first now let's move the form below let's move the map a little bit down lower and let's change the actual size of this text let's reposition it and let's place where we want our actual fix to basically clear the content so let's assume this is our contact form designed for our tablet so what we've done in essence is we've created our target screen for our tablets and relayed out each individual element in our design what this will do is basically give us a new design for a target screen that we've denoted and in this case we've denoted the actual the tablet screen size up for 700 let's just actually take a look at each page again so this is our index this is our bonus and then this is our contact so let's go ahead and let's export this and let's go you once the export is complete we can take a look at our responsive html5 output now once we open the page you'll see off the bat the design looks off this is actually reflective of our tablet layout so if we go through some of the other pages you'll note again this is our tablet layout and again our tablet layout for the about Us page you'll also see that the button the actual text it's a bit larger than the area now if we go back to our Photoshop design you'll see that what happened within our tablet layout what we did originally was we actually shrunk the buttons and let's just take a look at them really quick we change the size of the buttons but we didn't actually change the font size so what we can do really quick as we can actually just respectively do this let's go down to twelve or fourteen let's keep that and let's go fourteen with this text object as well now because we rescaled it we don't have to worry about the visuals exactly because it will be recalculated in the output with export kit now the next basic visual error that we had was our tablet layout was basically placed on top of our desktop layout and you'll note this really quick here so you'll see that our tablet is on top of our desktop now a rule of CSS is that you have to actually define your largest screen size first so what this will do is basically if we just move the desktop layout on top of tablet this will actually give us the correct rendering now respectively if we wanted to create another mobile layout so let's just go ahead and do that just per se so let's say this was targeting a 280 what we would want to do is move this mobile layout under the tablet layout this will ensure that each of your responsive designs and your target screens are rendered correctly so let's just remove that mobile layout and let's save this so again we have to make sure that our desktop layout is the first folder and then we respectively do each individual layout afterwards going from top down so the largest first going down to our smallest so if we were to re export again now once our export is complete we can just take a look at the response of html5 and you'll see that now we have our full desktop layout and let's just go through the pages once more so you'll see that it renders all the elements correctly now you might not really quick that we don't have the maps this is because we didn't actually include it in our custom head we should have but we didn't we're just actually demonstrating just the responsive design by itself so let's go and now let's actually change the screen size just to test the responsiveness so our secondary was tablet so you can see this is our tablet design and note the footer that it actually changed the design as per our actual Photoshop PSD there's nothing assumed in responsive layouts what you design is what it actually uses and you'll see that it did change the button now to reflect the new font size that we gave it and our contact page layout and again we didn't add the actual script and CSS link tags but you know if we did it would actually just render directly so this is a responsive PSD design to css3 and html5 using export kit
Show moreFrequently asked questions
How do I eSign a document before sending it?
How do I sign a PDF contract?
How do I sign and email back a PDF?
Get more for esigning psd made easy
- Print signature service VAT Invoice Template
- Prove email signature Delivery Driver Contract
- Endorse eSign Wedding Photography Quotation
- Authorize digital sign Nanny Contract
- Anneal signatory Real Estate Purchase Agreement
- Empower electronically signed General Summer Camp Packing List
- Try digisign Social Media Press Release
- Add Commercialization Agreement eSign
- Send Photography Proposal Template eSignature
- Fax CCW Certificate autograph
- Seal Hardship Letter electronic signature
- Password Sales Agreement signed electronically
- Pass Plumbing Contract Template electronically sign
- Renew Commercial Lease Agreement electronically signing
- Test Web Development Progress Report mark
- Require OPM 71 Form signed
- Send gawker signature
- Accredit undersigned initial
- Compel heir digital sign
- Void Design Quote Template template esigning
- Adopt log template digisign
- Vouch Colorado Rental Agreement template electronic signature
- Establish Printing Quotation template countersign
- Clear Compromise Agreement Template template sign
- Complete Patient Medical History template electronically signing
- Force Real Estate Agency Agreement Template template initials
- Permit Power of Attorney Form template eSign
- Customize Wedding Photography Contract Template template eSignature