Establish Company Field with airSlate SignNow
Award-winning eSignature solution


Do more on the web with a globally-trusted eSignature platform
Standout signing experience
Robust reporting and analytics
Mobile eSigning in person and remotely
Industry regulations and compliance
Establish company field, faster than ever before
Handy eSignature add-ons
See airSlate SignNow eSignatures in action


airSlate SignNow solutions for better efficiency
Our user reviews speak for themselves


Why choose airSlate SignNow
-
Free 7-day trial. Choose the plan you need and try it risk-free.
-
Honest pricing for full-featured plans. airSlate SignNow offers subscription plans with no overages or hidden fees at renewal.
-
Enterprise-grade security. airSlate SignNow helps you comply with global security standards.

Your step-by-step guide — establish company field
Adopting airSlate SignNow’s electronic signature any organization can enhance signature workflows and eSign in real-time, giving a better experience to consumers and staff members. establish company field in a few simple actions. Our handheld mobile apps make work on the run feasible, even while off the internet! Sign documents from any place in the world and close up deals faster.
Follow the stepwise guideline to establish company field:
- Log in to your airSlate SignNow profile.
- Locate your document within your folders or upload a new one.
- Open the document and make edits using the Tools list.
- Place fillable fields, type text and eSign it.
- Add multiple signers via emails configure the signing sequence.
- Choose which individuals will get an completed copy.
- Use Advanced Options to restrict access to the record and set up an expiry date.
- Press Save and Close when done.
Additionally, there are more advanced functions open to establish company field. Include users to your collaborative digital workplace, browse teams, and monitor collaboration. Millions of people all over the US and Europe agree that a system that brings everything together in a single unified digital location, is exactly what businesses need to keep workflows performing smoothly. The airSlate SignNow REST API allows you to integrate eSignatures into your app, website, CRM or cloud storage. Try out airSlate SignNow and get faster, easier and overall more efficient eSignature workflows!
How it works
airSlate SignNow features that users love


See exceptional results establish company field with airSlate SignNow
How to fill out and eSign a PDF online
Try out the fastest way to establish company field. Avoid paper-based workflows and manage documents right from airSlate SignNow. Complete and share your forms from the office or seamlessly work on-the-go. No installation or additional software required. All features are available online, just go to signnow.com and create your own eSignature flow.
A brief guide on how to establish company field in minutes
- Create an airSlate SignNow account (if you haven’t registered yet) or log in using your Google or Facebook.
- Click Upload and select one of your documents.
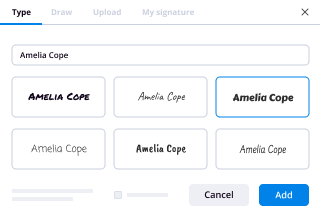
- Use the My Signature tool to create your unique signature.
- Turn the document into a dynamic PDF with fillable fields.
- Fill out your new form and click Done.
Once finished, send an invite to sign to multiple recipients. Get an enforceable contract in minutes using any device. Explore more features for making professional PDFs; add fillable fields establish company field and collaborate in teams. The eSignature solution gives a secure workflow and runs in accordance with SOC 2 Type II Certification. Make sure that your records are guarded and that no person can take them.
How to eSign a PDF file in Google Chrome
Are you looking for a solution to establish company field directly from Chrome? The airSlate SignNow extension for Google is here to help. Find a document and right from your browser easily open it in the editor. Add fillable fields for text and signature. Sign the PDF and share it safely according to GDPR, SOC 2 Type II Certification and more.
Using this brief how-to guide below, expand your eSignature workflow into Google and establish company field:
- Go to the Chrome web store and find the airSlate SignNow extension.
- Click Add to Chrome.
- Log in to your account or register a new one.
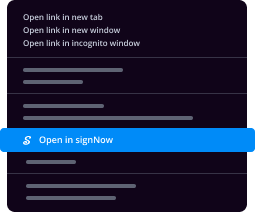
- Upload a document and click Open in airSlate SignNow.
- Modify the document.
- Sign the PDF using the My Signature tool.
- Click Done to save your edits.
- Invite other participants to sign by clicking Invite to Sign and selecting their emails/names.
Create a signature that’s built in to your workflow to establish company field and get PDFs eSigned in minutes. Say goodbye to the piles of papers on your desk and start saving money and time for additional essential duties. Selecting the airSlate SignNow Google extension is a great handy option with a lot of benefits.

How to eSign an attachment in Gmail
If you’re like most, you’re used to downloading the attachments you get, printing them out and then signing them, right? Well, we have good news for you. Signing documents in your inbox just got a lot easier. The airSlate SignNow add-on for Gmail allows you to establish company field without leaving your mailbox. Do everything you need; add fillable fields and send signing requests in clicks.
How to establish company field in Gmail:
- Find airSlate SignNow for Gmail in the G Suite Marketplace and click Install.
- Log in to your airSlate SignNow account or create a new one.
- Open up your email with the PDF you need to sign.
- Click Upload to save the document to your airSlate SignNow account.
- Click Open document to open the editor.
- Sign the PDF using My Signature.
- Send a signing request to the other participants with the Send to Sign button.
- Enter their email and press OK.
As a result, the other participants will receive notifications telling them to sign the document. No need to download the PDF file over and over again, just establish company field in clicks. This add-one is suitable for those who like concentrating on more important goals instead of burning up time for practically nothing. Increase your daily compulsory labour with the award-winning eSignature platform.
How to eSign a PDF on the go with no application
For many products, getting deals done on the go means installing an app on your phone. We’re happy to say at airSlate SignNow we’ve made singing on the go faster and easier by eliminating the need for a mobile app. To eSign, open your browser (any mobile browser) and get direct access to airSlate SignNow and all its powerful eSignature tools. Edit docs, establish company field and more. No installation or additional software required. Close your deal from anywhere.
Take a look at our step-by-step instructions that teach you how to establish company field.
- Open your browser and go to signnow.com.
- Log in or register a new account.
- Upload or open the document you want to edit.
- Add fillable fields for text, signature and date.
- Draw, type or upload your signature.
- Click Save and Close.
- Click Invite to Sign and enter a recipient’s email if you need others to sign the PDF.
Working on mobile is no different than on a desktop: create a reusable template, establish company field and manage the flow as you would normally. In a couple of clicks, get an enforceable contract that you can download to your device and send to others. Yet, if you want a software, download the airSlate SignNow mobile app. It’s secure, fast and has a great interface. Experience easy eSignature workflows from your business office, in a taxi or on a plane.
How to sign a PDF utilizing an iPhone
iOS is a very popular operating system packed with native tools. It allows you to sign and edit PDFs using Preview without any additional software. However, as great as Apple’s solution is, it doesn't provide any automation. Enhance your iPhone’s capabilities by taking advantage of the airSlate SignNow app. Utilize your iPhone or iPad to establish company field and more. Introduce eSignature automation to your mobile workflow.
Signing on an iPhone has never been easier:
- Find the airSlate SignNow app in the AppStore and install it.
- Create a new account or log in with your Facebook or Google.
- Click Plus and upload the PDF file you want to sign.
- Tap on the document where you want to insert your signature.
- Explore other features: add fillable fields or establish company field.
- Use the Save button to apply the changes.
- Share your documents via email or a singing link.
Make a professional PDFs right from your airSlate SignNow app. Get the most out of your time and work from anywhere; at home, in the office, on a bus or plane, and even at the beach. Manage an entire record workflow effortlessly: generate reusable templates, establish company field and work on documents with business partners. Turn your device right into a potent organization tool for executing offers.
How to sign a PDF file Android
For Android users to manage documents from their phone, they have to install additional software. The Play Market is vast and plump with options, so finding a good application isn’t too hard if you have time to browse through hundreds of apps. To save time and prevent frustration, we suggest airSlate SignNow for Android. Store and edit documents, create signing roles, and even establish company field.
The 9 simple steps to optimizing your mobile workflow:
- Open the app.
- Log in using your Facebook or Google accounts or register if you haven’t authorized already.
- Click on + to add a new document using your camera, internal or cloud storages.
- Tap anywhere on your PDF and insert your eSignature.
- Click OK to confirm and sign.
- Try more editing features; add images, establish company field, create a reusable template, etc.
- Click Save to apply changes once you finish.
- Download the PDF or share it via email.
- Use the Invite to sign function if you want to set & send a signing order to recipients.
Turn the mundane and routine into easy and smooth with the airSlate SignNow app for Android. Sign and send documents for signature from any place you’re connected to the internet. Generate professional-looking PDFs and establish company field with just a few clicks. Put together a perfect eSignature workflow with only your mobile phone and boost your general efficiency.
Get legally-binding signatures now!
FAQs
-
How can I start my own company?
Step 1: Do Your Research. ... Step 2: Make a Plan. ... Step 3: Plan Your Finances. ... Step 4: Choose a Business Structure. ... Step 5: Pick and Register Your Business Name. ... Step 6: Get Licenses and Permits. ... Step 7: Choose Your Accounting System. ... Step 8: Set Up Your Business Location. -
Can you start a business with no money?
Starting a business with no money is possible. You have an idea for a business, except you don't have any money to start it. Lack of capital is a common excuse for failing to start a business. As stated by some business assignment help experts, if you have sufficient capital you can have a plan for your business. -
How can I buy a business with no money?
Suggested clip Buy a business with no money? How to Buy a Business - How to ...YouTubeStart of suggested clipEnd of suggested clip Buy a business with no money? How to Buy a Business - How to ... -
How do I start my own engineering company?
Work out what you have to offer to the market, and make sure there is a niche for your company. Define your value proposition before you create your engineering consulting business plan. Think of it as the starting point from which you will develop the firm. Write it down and make your value proposition your mantra. -
Can engineers start their own business?
Engineers are inherently problem solvers, so what better way to put your skills to use than as a consultant? ... A consulting business is one of the best small business ideas to start as it can be run from home and started on a low budget. The fact that you can use your previous skills and relationships is also a big plus. -
How much does the owner of an engineering firm make?
The national average salary for a Business Owner/Engineer in the United States is $98,318 per year or $47.27 per hour. Those in the bottom 10 percent make under $75,000 a year, and the top 10 percent make over $127,000. -
Can a non Engineer own an engineering firm?
Can an unlicensed person own an engineering business? An unlicensed person cannot be the sole owner of an engineering business offering civil (including structural and geotechnical), electrical, or mechanical services.
What active users are saying — establish company field


Related searches to establish company field with airSlate airSlate SignNow

Integrate company field
hi I'm Hector Garcia CPA an advanced QuickBooks ProAdvisor and I work with a lot of different type of companies but one of the industries will support heavily is the field service industry when we think of field service we think of contractors construction companies and any type of business that sends their employees or a significant amount of resources on-site to perform the work outside of their own home office so in field service management we think about certain pain points are significant such as employee time tracking understanding where these employees are and where these resources are located scheduling these jobs and matching them against completion dates job costing to understand the cost of labor materials and all these other resources allocated in a job by job basis estimating the jobs for the customers I'm creating these contracts for the customers to sign on the road or to sign off completion dates and in some cases the logistics around scheduling the resources and the fleet now let's go into QuickBooks Online and let's search for applications that will be optimal to solving some of these pain points we're going to go ahead and click on the apps button on the Left navigation bar and on the search box we can search things like scheduling and you will see a couple of apps that show up on their scheduling you can search things like job costing and you will see some of the apps that show up under that search query you can search time tracking you will see some of those apps now it may be easier instead of searching by function to search by category so we can click on the Browse category button we can actually search down to field service management so if you look at field service management estimating and bidding time tracking project management those are typically the categories that help solve some of the pain points for these industries we're going to go ahead and click on field service management and let's take a look at the two apps that we're going to review on this video one of it is going to be jobber so we're gonna review Java mostly for landscaping appliance repair any companies that sends field technicians on-site to customers homes or commercial locations to perform some sort of technical or repair job and the other app is going to be under the project management category which is Noah file which is a perfect app for contractors and construction companies that want to track the construction activities with QuickBooks Online combined for this demo of Java which will take about 12 minutes we're first gonna do an app setup overview and sync settings then we're going to talk about managing clients and properties then we'll move on to managing work such as entering new project requests and quotes that will turn some of those quotes into jobs and ultimately into invoices we'll move on to doing some time tracking then receiving a customer payment and then getting a bird's-eye view with the calendar view to manage your schedule finally we'll talk about how Java and QuickBooks Online work together I will see some examples of the Java transactions inside QuickBooks Online it is important to note that we're activating this new application from the end-user or clients perspective if you're an accounting professional and you want to activate a new application you may need to log in with administrative access to be able to activate a new app to a company file let's go ahead and click on jobber and we're gonna click on get up now once we set up Java and connect it to QuickBooks a couple of things that you need to know on the Left navigation bar you're gonna see the dashboard you're gonna see the calendar view you're gonna see the client list and there also is this concept of properties which we'll talk about briefly then we'll have work which are basically the jobs will have management which is mostly for settings and the timesheet section on the top right we're gonna see the QuickBooks logo and we can click on sync in settings and we can check that our job is fully connected to QuickBooks now one really peace is the preference inside job you can actually choose whether or not you want to sink customers products and services invoices and timesheets in other words you can choose to use jobber as a completely separate application that doesn't talk to your accounting system or you can choose to enable all these features and essentially use jobber to create your jobs create your invoices and then you'll only be using QuickBooks mostly for the banking the expense management and the accounting side now let's start by going into clients and managing our clients so here in the clients section I'm gonna go ahead and click on clients we're gonna see a list of customers that we also have inside QuickBooks Online that were synced with jobber on top of the Quick Books Inc I can also import my client list from Excel or any other type of client list I may already have and I can create new clients simply by clicking on the new client button on the top right I'm gonna create a new client and once I'm done entering the information I'll go ahead and click on create client and you will see a new client I'm gonna go back and click on the client section and we're gonna see all of our three clients if we switch over into QuickBooks click on the sales section and customer section we will see the new client that was created from Java now Java also has this concept of properties properties would be best known as the jobs or locations within the clients that were managing jobber is very properly driven not so much client driven because it's making the assumption that most of the work is being done at a physical location and Java really tries to solve a lot of the logistics and scheduling issues having to do with these type of companies so creating these properties and these locations are very centric to the whole job or set up so we're gonna click on properties and notice that that one customer that we created has a default property created we're gonna go ahead and click on new property we're gonna select the temir associated with that property and then we're gonna type in address and click on create property perfect we see the clients name and the property name if I click back into clients I can see all of my active clients and if I click on properties I will see all the properties attached to the active clients now let's move on to work I'm gonna go ahead and click on work in the world of work we're gonna have a couple of things we're gonna have requests quotes jobs invoices and expenses I'm gonna start with the requests the best way to think of a request this would be an inquiry from new potential client so somebody says that they want you to go check out the property so you can quote a job best thing to do is to start with a request let me go ahead and click on request I will click on client name and I can either create a new client or use an existing client that I may have on my database I'm gonna go ahead and select an existing client you will notice that automatically the property the default property will be populated if you have multiple properties you will have the option to change it and choose the correct one with the request title I'm gonna go ahead and put that they want to quote to redo the entire backyard so we just give that a title notice that there's an option that says uncited assessment required that allows me to tell the software to go ahead and schedule maybe an hour or two whatever it takes for one of my estimators to go on site so I'm gonna go ahead and click on on and then I'm gonna go ahead and schedule it so I'll select some date I'll select the time and then under team I'll assign the team member right now I only have one team member I'm gonna go ahead and select that one then I can choose whether or not I want the team member to receive an email reminding them of that assessment that we have scheduled and/or we can also add an additional reminder if I wanted to we can scroll down on their internal notes and that any notes we want any specific notes that are pertinent to the job you also have the ability to drag and drop any files pictures files that you may have in your computer that are pertinent to the job so that would be very useful so at this point we usually we link the job to a quote or an invoice or anything like that it's actually a brand new request so we're gonna keep working through the workflow of this one and we're gonna go ahead and click on save requests once the request is completed it goes into your database of permanent requests if I click on request again I'm gonna see that one request that is sitting there in my list so let's now assume that we went on site we quoted a job and we're gonna go ahead and close the request and turn that into a quote so we're gonna go ahead and click on the request we could scroll down and add some additional notes pictures whatever we want and then we're gonna click on actions convert to quote all the information from the job translates over to the quote we can add the description we wait the opportunity to just kind of give it a priority so let's say we're gonna give it five stars because we're pretty sure the customer is gonna say yes then we're gonna scroll down and select the service that we're gonna provide so let's say for example I'm quoting this customer eight hours at $150 an hour and there it is twelve hundred dollars we add our notes we can scroll down and click on save quote after that's done we can either print the quote save it as a PDF or email it to our client one of the great things about this app is if you're using a tablet and your own site with your clients you can actually collect a signature approval for these quotes right on-site and your client can sign and can even get an email acknowledgement that they have approved the job so once the quote is an approved status we can simply just convert this into a job so we can schedule it so we're gonna go ahead and click on convert to job at this point we can choose whether it's a one-off job or recurring job for those monthly contracts or some of these companies do I'm gonna go ahead and schedule it us a one-time job and assign it to a team member scroll down and click save job now have it on the list of active jobs when I go back and click on work and we can see a dashboard of everything that's going on right we can see what how many jobs are active and what the next visit is for those active jobs we can see if there's any open invoices we can see if there any jobs that have been completed that have not been invoiced yet and any jobs that have been put on hold for one reason or another we're gonna go back into jobs we're gonna select this active job let's say we completed the job but we had some changes in the job so we're gonna click on their items and we can actually modify it and let's say it took us an extra hour and the customer is okay with pain that so we can actually modify that even if the job goes under or over the original estimate so we'll click on save then we'll scroll up click on actions collect the clients signature that the job was completed at that point click on actions and close the job once the jobs being closed we can complete the visit hidden close job and then finally the job goes into the requiring invoicing status letting you know that because you completed the job you probably should invoice your client so we're going to go ahead and click on generate invoice we could add some additional notes if you wanted to and then click on save and invoice and at that point we can choose to print it or email it to our client so the other things that we can do with Jabra is time tracking I'm gonna go ahead and click on timesheet on the left hand side and we can either do it for a particular week or a particular day I like my start time my end time and click on save after all the team members have done their timesheets we can click on management click on approve timesheets you will see all the time entries for every single employee that we can click on approve and that timesheet entry will be sent into QuickBooks let's move on to receiving payments so we're going to go back into clients we're gonna select our customer that we have an open balance for notice that the invoice is under awaiting payment status we can click on that invoice and click on collect payment select the method in which the customers paid us change the if they partially paid us that's also pretty common said like the date of the payment and then we'll click on save we can see the history of our invoice and a partial payment so let's move on to the calendar view we're going to go ahead and click on week or you can get to see exactly how we have a week scheduled and this will be based on team members so if we had multiple team members multiple trucks multiple fleets you're gonna see all the scheduling for across all your team members and you can also filter the ones that you want to see and the ones you don't want to see now the feature that I like is we can click on filters customize calendar colors and we can actually color code a different color to a different team member so for example we're gonna make Carlos this dark blue and we're gonna make Hector pink so what click okay we go back to the calendar and we'll know exactly who's scheduled for each job ok let's move on to QuickBooks Online to see exactly how the workflow between Java and QuickBooks Online works we click on the sales section customers we're going to notice that we have one customer here with an open balance if we actually click on that customer and we look at the transactions we can click on invoice we can see the exact same invoice that we created in Java all transferred into QuickBooks we can also see the partial payment we click on payment we can see the seven hundred and fifty dollar partial payment that was received in Java so in a nutshell you really don't have to be creating invoices or payments in QuickBooks Online if you're using Java to manage for your job quotes invoicing and payments from your customers also if we go to our timesheets we're gonna click on weekly timesheet we're gonna select our employee we're going to notice that information from the timesheet in Java also gets transferred into QuickBooks so if you use QuickBooks payroll you'll be able to track time from your field people in job or transfer QuickBooks and then you say the QuickBooks payroll module to complete your payroll in a nutshell Java is gonna be a great app for any companies that do in-home services or on-site services in commercial locations where they have a fleet employees resources being deployed and they want to be able to schedule their jobs track their time invoice them get signatures on-site and remind other team members of their scheduling okay let's talk about Noah fie nullify for contractors is an app that you can add to QuickBooks Online in order to manage your entire contractor or construction type business this demo of Noah Phi will take about 15 minutes first we'll talk about the setup and general overview then we'll discuss managing contracts and jobs then we'll discuss creating a bid or an estimate for a customer we'll talk about time tracking will track some purchase orders and bender bills will also track open invoices and customer payments then we'll look at job scheduling and finally we'll look at the workflow between no fi and QuickBooks Online so we know exactly what the transactions look like once they're synced it is important to note that we're activating this new application from the end-user or clients perspective if you're an accounting professional and you want to activate a new application you may need to log in with administrative access to be able to activate a new app to a company file in order to add notify we're gonna click on the apps button in the left navigation bar then we're going to search no Fi and click on no fi for contractors then we're gonna click on get up now and during the setup process know if I will ask you a set of questions that it requires in order to sync no fi way QuickBooks and also understand how the two applications will talk to each other for example you need to map your construction revenue accounts with your QuickBooks chart of accounts and you also need to map your materials accounts your subcontractor accounts and your labor accounts no if I will keep track of all those costs for you and then it will post them into quickbooks online so you can track profitability by project in both no Fi and in QuickBooks so let's start with a general overview so when you first log in to notify you're gonna see a left navigation bar we're gonna start with the dashboard that's where we'll tell you all the active jobs and bids with their valuation that you have pending on their contract jobs you're gonna see all the jobs that you have created as active jobs in Time Tracker you can simply just add your time entries for each of your employees and which jobs the time is allocated to under purchases you can actually create purchase orders or have Noah file automatically create the purchase orders for you when the jobs are created on their bills you can create new bills and import bills from QuickBooks that are allocated or not to jobs and in this module you can actually choose which bills go to each job or leave them unallocated on their invoices you're gonna see all of the jobs that have outstanding invoices and in scheduling you're gonna be able to see your schedule of the jobs and schedule new ones you can also track internal projects to make sure you stay on budget on the top right you will be able to take on clients and see your entire client list and under vendors you can see your entire vendor list both the client list and the vendor list sync with QuickBooks Online so let's move on to contract jobs and let's create a job we're gonna click on add new contract job we're gonna give it a name second-floor remodel and we're gonna pick an existing client from our client list or we can create a new one let's go ahead and pick XYZ client then know if I will ask you what type job is this and you're gonna have three choices you're gonna have a fixed-price job you're gonna have a fixed price with AI a billing and a cost plus job in a nutshell if you have priced a job without concerning with the specific line item details of the cost you would use a fixed price job if you're working with government or general contractors you're probably gonna need to do a ia billing which basically shows the progress of each phase of the job and the percentage of completion as it pertains to the way you invoice and then cus plus slash other is for a more customized type of billing process let's go ahead and pick fixed price aaaa building which is actually one of the most common for contractors then you will have three choices for job costing style you can have a simple job costing style where basically you add all the materials labor to the job without specifically tracking individual line items of it then you're gonna have the advanced job costing which allows you to job cause individual line items within the project and then we're gonna have the professional version which actually requires you to create a budget for those items and then track the expenses to it that last option is necessary if you need to pull a working progress report a working progress report requires you estimate your cost in the line item level in order for you to understand exactly what is the percentage of completion of each phase of the job we'll go ahead and pick that one and click on save job so now we're in the edit mode of the job itself we're gonna go ahead and create the first phase and click on add job phase we'll call this one removal of carpet will estimate how much was spend in materials then we click on enable labor and now we're gonna estimate how much we're going to spend in labor and then we click enable subcontractors if we're gonna use a third party as part of our face of the job so let's say we're going to pay a subcontractor to throw away the old carpet that we're removing so I'll put two hundred and fifty dollars now we have a budgeted cost for that face of the job of nine hundred and fifty at this point we're not really concerned too much with the sales price we're just planning for the cost components I'll go ahead and click on Save Changes and I'll click on add job phase on the second job phase we'll call it new floors then we'll estimate the materials cost estimate labor and let's say we don't have subcontractors so I would not click on subcontractors for that one now here where it says labor I can actually click where it says add role a resource and I can specifically assign one team member that's configured ain't no Fi so we can track this at the team member level they'll make up with their hours and know if I will track based on the hourly cost our total cost go ahead and click on Save Changes notice in the top how your budget for the job is being calculated and it split off based on subcontractors labor or materials it's not one more face and we'll call it paint all rooms for materials will estimate 2500 for labor will estimate 1500 and they say we're also gonna get a subcontractor involved to throw away some of the debris so we'll do 300 on their labor we'll select the employee that we're assigning to the job and other subcontractors we can actually choose the specific subcontractor from a vendor list and and know if I will actually create a purchase order for that subcontractor on the new subcontractor setup screen you can actually upload any contracts pictures or any data that you want the contractor to see once we submit the information directly to the subcontractor from no Fi so go ahead and click on save now we can scroll up and see exactly the status of the job perfect so now we got the job budgeted for just under $10,000 we will scroll all the way down and click on switch to active mode that means that we're calling this job as active and ready to go once the job is created we can actually create a bid or the estimate to the customer so we're gonna click on create' bit you can actually choose whether you want your customer to see all the faces or disregard their faces themselves we'll go ahead and leave the face as as part of our bidding process and we'll hit continue so here's what we enter the details of the job so let's say we're estimating this job to be starting in November first we're going to enter a flat rate for a carpet removal we'll put there 1500 for the new floors instead of using a flat rate will use a markup rate so we'll mark this one up 20 percent and we'll mark this one up thirty percent perfect and let's say for painting all the rooms will enter a flat fee of five thousand dollars here and effectively we're using a combination between markup percentage or a dollar amount that we came up with ourselves you're gonna see the bid summary here at the bottom and you have multiple output styles so you can actually show the line items or highlight items let me show you each one so I'm going to click on display line items and click on preview and this way your customer I can see that 3 faces and the sales price for each of the faces I'm gonna show you when we hide the subtotals per line item and click on preview where your customer can still see the three faces but they will only see one lump sum value then once we're done we can click on send out for signature we can customize the text that our customer is gonna get via email click on send email your customer will receive an email with the proposal they can view it in PDF format they can print it sign it send it to you manually or they can click on a built in link where they can electronically sign the approval of the project so they can click on accept in sign type their name click on submit each signature and once you go back in to notify you will see that job as active next thing we're gonna do we're gonna do some time tracking so I'm going to click on time tracker I'm going to click on enter time I'm gonna click on new activity select the job and select the specific face inside the job and enter the number of hours spent on the job click on save and submit then I'm going to click on review time we'll get a bird's-eye view of all of our employees how many hours they worked on each project and accumulated cost based on the time period of the time tracking that we're reviewing ok we're gonna move on to purchases you will see all the purchase orders that were automatically created from no Fi based on how we plan the cost of each of the projects we can also create a new purchase order from scratch simply by selecting the vendors name the dollar amount the job and click on verify & submit we can click on view history and see all of our open purchase orders the dollar amounts the PIO number the vendor name and items associated with it we can actually click on any of these purchase orders and click on send email to subcontractor type the contract subcontractors name click on send email and your subcontractor will receive the purchase order on the next step we can click on manage active purchase orders select any purchase order that we have received the bill for click on create bill for Pio and a new bill with accounts payable will automatically be created for you just enter the vendors invoice number and click on verify & submit you can at that point select whether or not you want that bill to go into QuickBooks and then click on submit if you click on manage bills you will see all of the open bills dollar amounts subcontractor name and the jobs that they belong to you can mark any of these bills paid simply by clicking on record payment and you can choose whether or not this bill has already been marked paid from QuickBooks or if you're gonna mark it pay from notify and send that payment information into QuickBooks then we click on record payment and the bill comes out of our managed bills report now let's click on invoices and we get to see all of our outstanding invoices to create an invoice we're gonna click on add the new invoice select the job and then in the invoice we can pick how much we want to invoice from each face of the job so we can pick and choose depending on the conditions of the job once we select how much we want to invoice we click on preview PDF and we are what is best known as an AIA billing document that actually contains a full schedule of all the faces job completed to date and how much is being invoiced in this specific application of payment of course the type of job that you will be doing and the billing style will affect how the invoice or application of payment looks like if you were to pick some of the simpler job costing and billing methods those invoices will look more similar to a QuickBooks invoice we'll go ahead and click on verify and finalize and click on confirm every invoice will give you a summary schedule of your Billings the values and the amount of the payment that is due on that specific payment schedule you can email it to your client at that point you can also receive payments straight from this screen so we can click on record payments we can select the dollar amount that we're receiving a payment for we can choose whether or not this payment has already been recorded in QuickBooks and if that's the case there's no need to record it in no Fi because QuickBooks will send that payment information in the next sync otherwise if we're recording the payment for the first time inside no a fight we have to make sure to click send to QuickBooks and click on record payment now let's move on to scheduling in the scheduling screen you can see which jobs have been scheduled for which dates you can also click on add new allocation select the job select the date and the time click on add new allocation and you will see that resource scheduled you can also look at the scheduling by resource so we're gonna click on resource day and we're gonna add allocation for that same resource or that same employee to work on a different job and click on add new allocation finally let's look at what the no fi transactions look like inside QuickBooks Online when I click on QuickBooks I'm going to click on the recent transactions button and look at all the transactions that were created I'm going to click on this invoice here and this invoice was created inside notify information of a percentage of completion item name and description will all flow through the sync any payments that were received in know if I will translate over to QuickBooks you can change any of the details in the in the payment in the QuickBooks ID if you want but normally if you're receiving the payments and notify all the information that you need should be coming in through the sync one of the real wonderful features is you can actually create a bill inside of QuickBooks so I'm gonna select a vendor here and I'm gonna select any of these categories dollar amount and select a specific customer if I do this on the next no fi sync the bill will come up as an unallocated bill that then you can allocate to a specific job so if I click on bills I can see it right here this was the bill that was created inside QuickBooks Online I can click on that bill and click on allocate to job and I can select a specific job pertaining to that bill and then click on save so you actually get the full flexibility of being able to create certain transactions and no fi to sink into QuickBooks and certain transactions into QuickBooks to sink into no Fi in summary who is no fi for any construction or contractor type of business will benefit from no fi greatly you'll be able to create jobs estimate those car tract purchase orders for the vendors associated with those costs track time and estimate labor costs for that job track open invoices and payments open bills and payments schedule your jobs and resources and also track internal jobs that don't have revenue associated with it but you want to use the same control mechanism to budget and keep expenses in track now to compare the two apps no fi and Java it's a little bit difficult because Noah fie is geared towards a type of business that focuses a great deal on line item expense budgeting and tracking whereas jobber focuses a lot more in the logistics and scheduling plus is geared more towards on-site residential and commercial type of service in a nutshell if you are in a business that's on the field service industry whether it's construction or on-site services you will benefit greatly from adding any of these two apps into quickbooks online some of the pain points that these apps solve is scheduling and resource planning coding and estimating jobs time tracking and job costing and syncing customer and vendor information with QuickBooks in real time
Show moreFrequently asked questions
How do I add an electronic signature to a PDF in Google Chrome?
How can I add an eSignature to a PDF so that others can sign it?
How you can sign a PDF using a digital signature?
Get more for establish company field with airSlate SignNow
- ESignature jpg
- Prove electronically signed Simple Photography Agreement
- Endorse digisign Real Estate Development Proposal Template
- Authorize electronically sign Hotel Business Plan Template
- Anneal mark Training Evaluation
- Justify esign Hogwarts Express Ticket
- Try countersign Sublease Agreement
- Add Consulting Agreement byline
- Send Interior Design Contract Template esigning
- Fax Professional Letter of Recommendation digisign
- Seal Client Progress Report signature service
- Password Accounting Proposal Template countersign
- Pass Employment Verification Letter sign
- Renew Music Tour Itinerary initials
- Test Hotel Receipt eSign
- Require IT Consulting Agreement Template eSignature
- Print heir signatory
- Champion company email signature
- Call for caller signature
- Void Hold Harmless (Indemnity) Agreement template esign
- Adopt Labor Agreement template signature block
- Vouch Reservation Template for Gala template signature service
- Establish Restaurant Gift Certificate template email signature
- Clear Landscaping Services Contract Template template signatory
- Complete Work Completion Record template initials
- Force Equipment Purchase Proposal Template template electronically signed
- Permit Corporate Resolution Form template byline
- Customize Durable Power of Attorney template esigning