Flash Dropdown Field with airSlate SignNow
Do more online with a globally-trusted eSignature platform
Standout signing experience
Reliable reporting and analytics
Mobile eSigning in person and remotely
Industry regulations and compliance
Flash dropdown field, quicker than ever before
Useful eSignature extensions
See airSlate SignNow eSignatures in action
airSlate SignNow solutions for better efficiency
Our user reviews speak for themselves


Why choose airSlate SignNow
-
Free 7-day trial. Choose the plan you need and try it risk-free.
-
Honest pricing for full-featured plans. airSlate SignNow offers subscription plans with no overages or hidden fees at renewal.
-
Enterprise-grade security. airSlate SignNow helps you comply with global security standards.

Your step-by-step guide — flash dropdown field
Leveraging airSlate SignNow’s eSignature any company can enhance signature workflows and eSign in real-time, delivering a better experience to customers and staff members. flash dropdown field in a couple of easy steps. Our handheld mobile apps make operating on the go feasible, even while offline! Sign signNows from any place worldwide and close up trades in no time.
Follow the walk-through instruction to flash dropdown field:
- Log on to your airSlate SignNow account.
- Locate your record in your folders or upload a new one.
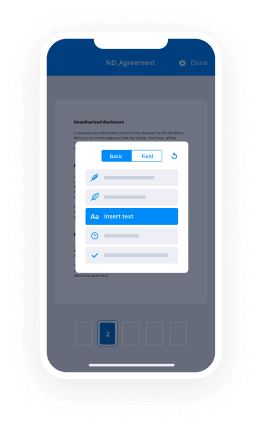
- the document adjust using the Tools list.
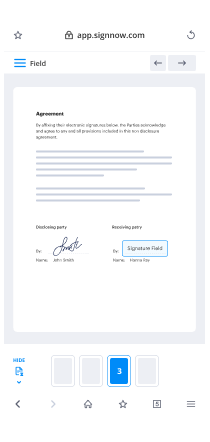
- Place fillable boxes, type text and sign it.
- List several signees by emails and set up the signing order.
- Choose which recipients can get an executed doc.
- Use Advanced Options to restrict access to the template and set up an expiry date.
- Tap Save and Close when done.
Furthermore, there are more extended functions available to flash dropdown field. Include users to your shared work enviroment, view teams, and monitor teamwork. Millions of users across the US and Europe concur that a system that brings everything together in a single holistic workspace, is the thing that companies need to keep workflows functioning easily. The airSlate SignNow REST API allows you to integrate eSignatures into your application, website, CRM or cloud storage. Try out airSlate SignNow and get quicker, smoother and overall more efficient eSignature workflows!
How it works
airSlate SignNow features that users love
See exceptional results flash dropdown field with airSlate SignNow
Get legally-binding signatures now!
What active users are saying — flash dropdown field
Flash dropdown field
you hello and welcome to this video tutorial brought to you by vidcom today we're gonna take a look at creating an actionscript 3.0 drop down menu this menu should be pretty easy to create it's gonna take a little time to set up but once we have it set up you can pretty much take it and edit it and there's a lot of it's very editable so it's very cool that way and you can see here basically we roll over a button while our output menu or output panel excuse me is telling us a you're selecting home but home underscore MC that's the name of that movie clip so every time we do that it's basically telling us what we were selecting when I roll over the portfolio button we get our drop-down menu and when I roll out obviously it goes away and then the rest of our buttons also just let us know a you're selecting you know this button so all of that can be useful later on if we want to create other drop-down menus you're going to see how that's going to become useful for us and you know we can really do anything at that point with this menu so we're gonna create this menu from scratch so I'm going to go file new and create a new flash file ActionScript 3.0 is what we are using the first thing we want to do is come over to the properties panel choose the edit button here to the right-hand side of our size options and we're going to make this 800 wide we're going to keep the 400 high frame rate will stay at about 30 frames per second with a background color of white well the first thing we want to do with our menu first I'm just going to Center it here I'm holding on the spacebar when you hold down the spacebar it automatically flips you over to your hand tool which allows you to drag your Flash movie anywhere you want as far as repositioning your view of it what we want to do is rename our first layer we're going to name it ends we want to create those rounded ends here and you may be thinking eh well I can just use the rectangle primitive tool around a rectangle tool whatever and create it well not really because the way we're doing this I just prefer to create two quick circles that are basically going to sit on either end and basically lay the buttons in between so what I'm going to do is grab my oval tool I'm going to set my foreground color to black because that's probably what yours is probably a solid color we'll add the gradient in a moment I'm just going to draw a circle it can be any size any shape we're going to take care of the resizing here in the properties panel but no there is no stroke to this oval just a fill I want the width to be 50 and I want the height to be 50 I want the X&Y to be zero or setting the X&Y to zero you can see it just pops it right up in that top corner but I hit Z which is my zoom tool what I'm going to zoom in on this circle and I'm going to select it again I'm going to open up my color panel right here window color and I'm just going to fill this with a plain black to white gradient it's a linear gradient not the radial gradient so just the straight gradient like so now I'm going to hit my F key which is the hotkey for your gradient transform tool and cs4 is located underneath the free transform tool so gradient transform and with this object selected I'm going to grab this little circular point here outside of the circle it's top right corner I'm going to rotate this around so it's running straight up and down now what I want to do is zoom out a little because I want to grab the center square point here and pull it straight off what that's going to do is spread my gradient out right now you can see the gradient just runs with black going from starting at one line to white at the other so if we pull this apart you can see it really our circle almost looks like it's just solid gray now however I pull this up and I'm pulling up by just selecting that center point there pull it up because you were lightening up our oval and I want a little bit more of a color change there so I'm going to compress this gradient a little more a little more yet drag it down a little bit and there we go that looks like a pretty good gradient right there Ziqi we now have our first shape what I want to do next is I'll zoom in a touch to start and I just want to copy this commander control C and command shift or ctrl shift V to paste it in place and let's just shift it over a little bit okay so you can see we have a copy of this now what I want to do is set the X of this to the width of our stage minus the width of this so 750 should be good because our stage is 800 across and these are 50 across you can see it pops it right into that exact corner perfect now that I have that I'm going to select these two circles hit f8 which is going to convert them to a symbol I'm going to name them MC oh it's just Nayla Madam's why not MC and notice I have the registration point set to the top left corner not quite as important with these circles but it's going to be pretty important when we start creating our buttons as far as you being able to follow along and align the same way I'm aligning so we're going to be working with that registration point in the top left corner hit OK and we have our first movie clip we're to create a new layer now I'm going to name this buttons what we're going to do is we're going to create these buttons one button at a time and we're going to five buttons here and then we're going to convert each individual button to a movie clip and then group them all together into one big movie clip and that's what's going to sit here so maybe it would be better if we just go ahead and create it instead of me trying to explain it to you so here's we're going to do draw out a rectangle again any size any color it doesn't matter no stroke I'm going to resize this because I want there to be five buttons and I already know that I'm gonna have a 25 pixel buffer on either side of my stage here I know that I really am working with 750 pixels of width so for five buttons we need these buttons to be 150 pixels wide and let's make them well fifty tall since that is what our circles here are and now that I have this selected here what I want to do is get that same exact gradient that I have in these circles and this can be a little tricky because you see if price uh well I need a double click inside of here if I use my eyedropper tool which is right here and select that you can see it automatically gives me the gradient I need but not only is giving me the gradient it's giving me that positioning remember we use that gradient transform tool to position the gradient within that circle so it's giving me that I'm going to come back here to scene one and I'm just going to fill my shape but look what happens the shape disappears well the shape really didn't disappear it's there it's just filled with white because if you remember our bottom line of our gradient ends right about here so everything after that is white so really before we go filling this we should really align this shape with the top of the stage so is on the same exact x or excuse me y a coordinate point as our circles here so what we want to do is just select this go window align and check to stage and just say align with the top of the stage there we go and to keep things simple here I'm going to fill this with black or really anything else do this green just as you can see it so now that we have that I'm going to come back into here I'm going to grab my eyedropper again an eye drop for that we're going to come back here to scene one grab the paint bucket tool and just fill that shape and you can see what we have is an exact copy of that gradient something that's going to mesh up perfectly with our ends so now we've created this button I can move it wherever I want now we can go realigning them later what I want to do is convert this to a movie clip so with this button selected we just want to hit f8 which is going to bring up our convert to symbol dialog box and we're going to name this MC button base because this is really going to be within the actual movie clip which is our button again the same movie clip even though we're calling it a button the type of symbol is a movie clip registration top left corner hit OK and we're gonna double click inside of this guy and in here we're just going to double click this layer we're going to call this button bass and we're gonna create a new layer for some text we're gonna grab the text tool and with the text tool we're going to start with the color black but we're going to recolor our text in just a moment we want to do is start with the longest word in our menu and I happen to know here because I've got a little note in front of me I have five buttons going into this menu bar as I mentioned before a one for home one for portfolio one for contact one for about us and one for media so out of those five words the longest didn't mean to do that the longest of them is the word portfolio so the first thing we do here now when I place this text I can immediately see that it's dynamic text we want to play static text so make sure you're using static text and we can just type the word portfolio I'm going to type in all caps so you can not cap lock caps lock on or just hold the shift key portfolio and another important thing is make sure you Center this type we want to do that because we're going to be changing this in each button so we want this to be aligned to the center of each button so what we're going to do is select this right here in the format section align Center see it aligns it right to the center we're going to drag this over and just roughly Center it in the middle of our button there we go very nice we're to change the color here to sort of a medium gray that's nice Arial bold we could probably get away with 14-point let's try that and maybe that's a little too big let's go with 13 that's pretty good so we'll stick with 13-point Arial bold and just a medium gray here me / dark-gray really I'm going to double click on this layer and name it txt for text and we can lock up that lower layer because we're really not going to have to access that and we don't want to accidentally select it when we're coming into this later on to edit each individual buttons you know give it a different label so I'm going to double click anywhere to get back to the root level of my timeline where I have my you know rounded edges and my first button now that I have this button I'm going to delete it so just select it and delete it you may be thinking why in the world did you just delete it well the reason is over here on my library I still have a copy of it right here MC button base and what I want to do is drag out five of these so I'm going to drag out one I'm going to drag out two I'm going to drag out three and four and five now the reason I just deleted that is for a very simple reason I don't want to accidentally you know make some sort of edit to my base button this is you can think of this as our master button if we ever need to create more of these buttons in maybe later on down the road this flash project or we need it for reference later on we're always going to have that we're not going to accidentally mess it up so what we're going to begin doing here is selecting each of these buttons right clicking on it and instead of moving off screen I'm going to compare to modify symbol duplicate symbol and we're going to give this a new name we're going to call this MC home so there we go we have our first button I can double-click inside of this double-click on the text and just type out the word home in all caps go back and you can see that because it's its own movie clip you know none of the other movie clips are changed whereas if I were just to come in here and rename this home you can see all the other movie clips change so that's the reason we duplicate our symbol portfolio again and what we want to do here is select the portfolio button modify symbol duplicate symbol and we're going to name this MC port short for portfolio and then for this guy select it modify symbol duplicate symbol and we're going to do this with all of these buttons this is going to be a contact button so double-click inside it there select that text contact all right next up modify symbol duplicate this is going to be MC about and we're going to change the text to a simple label of about space us double click to get back to the root level and last but not least our media button modify symbol duplicate symbol and we're going to name this MC media get inside of there and media in all caps very nice double click to get back to the our original level here and what we need to do now is align all these buttons get them lined up between our rounded edges and then convert the whole mess of buttons to a symbol so here's how we're going to do that we're going to select this first guy and I'm going to set his X to 25 because that's going to be 25 pixels off the left side of our stage and the Y to 0 it's gonna bring it all the way up to the top media happens to be the last button I already know the Y needs to be 0 needs to be all the way at the top but the X has to be the width of the stage minus 200 so we're going to set this to 600 up not 600 my mistake mathematic error there it's actually going to be 625 so 2 width of the button plus that 25 from the edge there so there we are we're lined up what I can do now is select all 3 of these buttons set their Y to 0 it's going to set the Y of the top one to zero so really what we can do is just align them all to the top but let's take it time we're just gonna come in here and set all the Y's to zero and I'm going to select all four buttons I'm going to lock up the ends layer so I don't accidentally select the ends and just select all this stuff and I'm going to go window align and in addition to aligning options here we have this whole section of the panel dedicated the distribution so we're going to distribute these right here distribute the horizontal Center and I have to stage checked on we don't want that checked on when this checked on obviously as you just saw it's going to distribute them evenly across the stage we don't want that we want them to be evenly distributed from the furthest outside point to you know from from outside point to outside point essentially and I do this you can see it lines them all up very nicely in accordance with the two outer buttons that we set just a moment ago so we now have what looks like a solid line of buttons we're going to select all these buttons and we're going to group them into a movieclip urn f/8 and we're going to say MC navbar now note here - movie clip registration top left if we hit OK the next up is going to be giving this movie clip and instance name so we're going to name it navbar underscore M C and we need to go inside of this now and give each of our buttons in here instance names as well so I'm going to name home we're just going to go simple just going to say home underscore MC and portfolio is going to be port underscore MC and so on and so forth about us just about underscore MC contact I think you get the point and last but not least media underscore MC so there we go we've just given all of our buttons and our navigation bar and instance name so we can now talk to them a via ActionScript the next thing we want to do is create a new layer and we're going to name this layer clicker and I'm calling this layer clicker it's really going to be our drop-down menus are going to be inside of this layer as well so we'll probably change the name of this layer later but for now we're just setting up something to click on so later on after we create our drop-down menus the movie clip containing the drop-down menus is going to essentially be hidden here in the flash authoring tool because nothing's going to be showing initially so we we just wanna have something we can click on so later on down the road if we come in here we need to work on it we just have something there we can double click on to access our menus so I'm going to grab my rectangle tool and just draw out a big rectangle I'm actually going to make it the size of this stage which is 800 by 450 X and Y to 0 and I'm going to give it sort of a brighter color maybe of a nice bright green here and I f/8 to convert that to a symbol and I'm going to call this MC clicker or actually no I'm not going to name that MC clicker I'm going to name this MC dropdowns cuz I have to remember that we're keeping drop-down menus within this so we don't want to confuse ourselves later on down the road as I almost just did there so now we're going to double click to get inside of this drop-down menu movie clip and we're just gonna select the entire green a square and I'm going to hit Q which is the hotkey for the free transform tool I'm going to pull it straight down so we just have a thin green bar across the base of this movie clip and I'm going to name this layer deselect it I'm going to double click on that layer and I'm going to name that layer clicker so we now have something we can click on because really our drop-down menus are going to be hidden but the problem we're gonna run into here is this clicker here you can see I'm gonna hit ctrl enter command return it shows up across the bottom that's a big problem and if this is our movie our final finished movie or final finished product drop down menu whatever we can't have that showing up so one of two things we can do is just get rid of it before we finally publish the movie or as I'm going to do here I am just going to hit f8 to convert to a symbol and I'm going to name this MC clicker and I'm gonna give it an instance name of clicker underscore MC and I'm going to add a new layer above this layer name it a s for ActionScript I'm going to open up my ActionScript panel that will be f9 it's a hotkey and I'm just going to say hey well first I'm gonna place a stop action there because we're going to have some animation in just a moment so throw that stop action there just to get us started and we're going to say clicker underscore MC dot visible space equal space balls so this is going to do when this action script is run by flash this clicker is going to disappear so when we publish the movie control-enter you can see it is in fact gone beautiful again you don't have to get rid of it that way you can just get rid of it and when you're done working on the movie I tend to like to keep something there to click on but you know however you want to do it it's no big deal that's just one sort of way you can work around it maybe not the most elegant way to work around it but if it works it works so now that we're inside of this let's begin constructing our menus after all this is the movie clip that's going to contain all of our drop-down menus these drop-down menus flip back over the other document here for just a quick moment of reference these drop down menus if you look at the menu are really just all these buttons that I've stacked on top of each other so we're going to do is we're going to create the button and to build our drop-down menu we're just gonna stack these buttons on top of each other and place a frame around them when that frame is rolled over well that drop-down menu goes away so really really simple easy to do maybe a little time consuming but again once you get it set up it's no big deal so let's come back to the file we're working on and to create a new layer and I'm going to call this layer portfolio menu looks like portfolio menu because it's the menu for our portfolio here so the first thing we want to do is grab the rectangle tool draw a rectangle any size we're going to resize do it exact wins the width being 200 and the height let's try 25 maybe 25 is a little small yeah you know almost sick with 25 so what I'm going to do here is I need to fill this with a color so we're going to fill it with let me grab the color panel here I've got some hexadecimal codes written down x decimal codes are just these hex codes here you can see when I roll over it says X that's the code that tells what color is going into sad shape I'm going to say f2 f2 f2 I'm gonna hit the enter key and you can see I've got a very light gray I now want to stroke this so I'm going to grab the ink bottle tool which is located underneath the paint bucket tool and I'm going to drop a stroke onto it you can see that there is actually a very light gray stroke I don't know what color yours is but just if you move up to the edge of the rectangle you can see you get that sort of rounded semicircle at the base of your cursor when you see that double-click and you will select just the stroke now that we've selected just the stroke over here on the color panel make sure you're working on the stroke color by just clicking that little pencil and the color we want is in fact si si si si si si if the enter key and you should have a different color you can see here if I wanted green I can make it green I however no I don't want green I want that nice light gray so there we go we have our nice light gray and there is the color of our initial button and next up we want to select this button we've just created and hit f8 to convert it to a symbol here however we are converting this to a button symbol so we're going to name this BTN not see because the button symbol drop-down button there we go that's a descriptive it off hit okay and we're going to double click to get inside of this button now that we're inside of the button the first thing I want to do is hold down my alt or option key and drag this initial keyframe here over to the hid state there we go now that we have frames on the up over and down and a keyframe over on the hid state we're good to go I do want to add a keyframe to my over state however so I'm going to do is I'm going to alt drag the Upstate to the over state holding the Alt key from the Mac Toby option now that we've done that I'm going to select the fill color and we want to edit this color ok so just the fill color make sure we're working with a fill color here and I want this color to be let's try something a little darker let's go ee-ee-ee-ee hit tab or excuse me hit enter to fill that yeah there we go that's pretty nice just slightly darker you can see there's how it starts out and well don't take control enter and you can see we roll over it just is just a little bit darker so that's very nice and now that we've done that we want to create a new layer in here let's just name this layer button create a new layer in here for our text double-click and name it text or txt whatever you want and this text grab the text tool and drop some text in here we're going to start by we're just going to say web design and I know because it's such a light gray you can barely see that so over here in the properties panel you move the color panel only way over here on the text properties panel select color and we're going to choose a nice dark gray maybe cz let's cccccc which is that same exact gray as our our stroke there so that works very nicely I want to the size of this to be 12 points however nothing bigger than that and this is going to be formatted aligned to the left so here on the format align to the left and you know leave it a little a little off of the left hand side of our button so there we go we have our first button set up and you can see the over and down States the text just stays the way it is we want to make sure we don't place keyframes on the over or down States as long as we just have it only up state when we to edit these buttons will only have to edit one little field of text and it will automatically edit the over and down States so we're not going to have to worry about that that's going to make for a button that's pretty easy go in and change as we need so I'm going to double click now to come back to our drop-down menu and here is my first button great now that I have my first button I'm gonna do what I did before with these buttons I'm just going to delete it so there we go and I'll bring up the library by double-clicking that tab and I'm going to drag out let's go with six buttons I'm going to say one here if I can't drag it out there we go one and two don't worry about aligning an we're going to take care of all of that later 2 3 and X 4 5 and last but not least number 6 all right now that we've done these I'm going to show you how to do the first one I'm going to you know do that same exact modify symbol duplicate symbol and we're going to name this BTN web DES for web design you need okay and I'm going to double click inside of this and I'm going to select the text field and I'm going to leave it as web design there we go double click out of it I really didn't need to go in there at all but I wasn't thinking for a moment all right I'm going to do the same thing with this one so I'm going to go modify symbol duplicate symbol and this one's going to be BTN logo des so we're going to logo design double click inside of here and select that text and just select a web part and all caps just type logo there we go and come back out here to the main menu and now for these last four buttons I'm actually going to pause the video and do them to keep from boring you alright so we're back you can see I have all of these buttons named you may want to take a moment pause the video here maybe and copy them up you know just whatever they can be a whatever your buttons you know wherever you want them to be no big deal so here we have them the first thing I'm going to do is select all of these buttons and go window align and I'm going to make sure I don't have to just to stage checked on so I'm going to align the left edge of all these objects there we go very nice and I'm going to close the align panel what I'm going to do now is ooh min and I'm going to do this part by hand I'm just going to grab these guys and I'm going to nudge them straight up until they meet now look at this see because I have a 1 pixel stroke on each button I get this thicker stroke in between the buttons so what I want to do is once I get them nudged up to each other I just want to hit my up arrow key once to just nudge them up a little further and that doesn't quite do it there we go just so there's only one line there in between the buttons so nudge this guy close and then come in and bring them up tight just like that you can see how it only looks like there's one line there there we go and grab both of these guys I'm holding down shift and the up arrow key which really isn't necessary but it's kind of a habit grab this last button here and just nudge this guy right up and into place so now we have a very nice little compact drop down menu we've created the next thing we want to do is just select all these guys and set the y2 let's say 51 that's going to bring it right up there beneath our drop-down menu and the next thing we want to do is create a new layer down here in our timeline who didn't want to do that let's bring this guy up a little bit so we can bring our timeline up a little bit so we can see what we're working on down here we want to add a new layer and we're going to name this layer double click on it and just name it portfolio frame this is the button that is going to you know stretch itself around this menu and maybe even another thing we want to do is just select all of our buttons here and just set the X to 175 now the reason I'm doing that is because that's 150 which is the width of our home button plus 25 which is the width of our rounded edge so this is going to be right at the edge of our portfolio button so when we set up our little rollover for this portfolio button it's going to line up nicely with the edge of our drop-down menu so now that we've done that's when it compare to the portfolio frame and begin drawing a just basically roughing in a thin border around this so how am I going to do that well the first thing I'm going to do is get rid of my stroke and I'm going to use a color that's very easy to see let's take a bright blue here and I'm just going to draw a nice thin rectangle we don't want it to be too big just a nice thin rectangle like so drag it right up it should snap right to the bottom of our menu we're going to alt and drag out a copy of that hit the Q key and rotate it all right so I've got one oh don't want to do that I have the one side of my menu but hold down my Alt key and drag a copy right over the other side now that we have that I'm going to bring this guy right over attach them to the side of our drop-down menu like so we just want to be pressed right up against the side there we go and now we want to do is draw a basically we're going to cut this right here so I'm going to draw a selection over and you can see that I can just take that bit right off of there and I'm going to hit Q and I'm going to hold my shift key and rotate it so it lays flat on its side drag this guy right up to right there and I'm gonna hold down my Q key and I'm going to make sure the width here is set to 50 because if we recall correctly these buttons are 200 wide where's our buttons up here are only 150 so we have 50 extra pixels whoops I messed that up accidentally enter to thee as my value here in the height which is why I flattened out like that I'm going to drag that right over and we're going to duplicate this hold down the Alt key and I'm gonna hit Q we're going to rotate this make it go straight up and down set this right on top here and last but not least we're going to grab a big chunk of this right here make sure I deselect those buttons hold down my Alt key and just duplicate that chunk of that side hold down my Q key again shift to rotate it just like so V key to grab my selection tool and we're going to make this come right across the top here hold down or hit Q again excuse me and just drag that right over to make it meet up with our other blue part of the frame now that we've done this we can just select these bits that are sticking out you can see just select that top bit the Delete key to get rid of that we're not really going for a perfectly clean look we don't need to be worried about it being perfectly clean but you know just cleaning up some of the junk left behind you can see there we go let's grab these two on the bottom delete them and grab this guy right here and delete him so there we go we've got a nice little frame which wraps itself neatly around both our button and our drop-down menu so now that I have this I'm going to select it and notice all those objects have automatically been meshed together I'm going to select this and I'm going to convert this to a button symbol as well I'm going to f/8 and I'm just going to call this BTN porch because remember this is a frame for the portfolio port frame however we will be able to take this and reuse it for other drop-down menus if need be so I'm gonna hit ok and I'm gonna double click inside of this button because as things stand when we get back out of it for a second as things stand we're going to see this blue border obviously when we publish this movie so we need to make that disappear but we still want it to act as a button region when somebody rolls over this thin area of the flash stage we want something to happen so double click to get inside of that button symbol and just simply don't hold at all don't hold down ctrl shift nothing like that just grab this keyframe and drag it right over to the hid state you can see what that does it takes everything off of the up over and down States and only gives us a hit area so essentially this is a button that contains nothing but a button area so there's nothing you can see which is great when I double click away you can see it's turned into this very light aqua color when you see that you know you've successfully created a hit area so now we've done that we're ready to start scripting this drop down menu let's get this drop down when you set up so it just appears on one keyframe right out here so I'm actually going to come out to frame 20 right click insert frames and I'm going to drag these two keyframes portfolio frame and portfolio menu right out here to frame 10 and I'm going to place a keyframe above them I'm going to hit f6 which places a keyframe and I'm going to place two things on this frame I'm going to place a stop action and I'm also going to place a frame label so let's throw the stop action on the first hit f9 and just type the word stock and I'll close that right up and with this frame selected you can see I have here on my properties panel label this is the name of the label we want this name to be the same as the instance name of our portfolio button up here if I recall correctly we name that port underscore MC this can be very important because this is how we're going to use ActionScript is to automatically pick which one of these key frames to go to depending on which button is rolled over it's going to keep us from having a ton of script to write up for each individual drop down menu so now that we've done that select two frames these two immediate frames after these key frames okay just like that right-click and say insert blank keyframe so they're our drop-down menu appears for one frame and when this portfolio frame is rolled over we need this to basically go back to frame 1 in essence making all of that stuff just disappear so we're going to come back here at f9 and before we do that I need to give this button an instance name we're going to name this pork frame underscore BTN and come back here to our actions hit f9 and we're going to save poor frame dot add event listener open parenthesis and we're going to say mouse event a mouse event just like that dot mouse underscore over and we're going to execute the function go up or we're going to say go back because really that's what we're doing is going back to frame 1 go back F close parenthesis semicolon and here the function is function go back F and it is an event Mouse event and close parentheses : the word void open curly bracket enter enter or return twice close curly bracket in the up arrow key now in here we're simply going to say go to and stop open parenthesis 1 close parenthesis semicolon so when this frame is rolled over just go back to frame 1 and stop just sit there on frame 1 so great let's head back to the root level of our timeline writing scene 1 up here and we're going to add well number 1 let's change the name of this layer to drop-down will really dropdowns is what it should be add a new layer for ActionScript name it a s and what we want to do is open up our actions panel and the first thing we're going to do is add that little rollover effect by creating a glow using ActionScript so it's just creating a glow filter so we can say bar and we're going to call this nav BTN there we go BTN glow and this is a glow filter and is equal to a new you guessed it blow filter say open parentheses and we have a bunch of options here because his tooltip really is quite long matter of fact that goes off of my recorded screen here so the first thing we need is color now the first thing you need to do when you're punching in colors here is say 0 X and I have to know the color that I want is nine nine nine nine nine nine so there's a color got that out of the way what's the Alpha of this color well in actionscript 3.0 remember we have from zero to one so we're going to say about 50% which would be 0.5 after that we have the blur along the x-axis we're going to say blur at 15 and or you don't actually blur it zero along the X we're going to say 15 along the Y and after that we have the strength which we're going to say is 1 and after that we have the quality we're going to say 2 and after that you want it to be an inner glow this is just true or false if you say false it's going to be an outer glow on the button I want it to be an inner glow so I'm going to say true and finally we have knockout and this is going to be false okay so close parenthesis and semicolon to finish that off we now have a glow filter which we can apply to our buttons so let's set that up so when a buttons rolled over this glow filter shows up when it's rolled out the glow filter goes away so how do we do that well the first thing we're gonna say is navbar underscore MC I believe that was my instance name yes navbar underscore M C dot add event listener and we're listening for a mouse event the mouse event we're listening for is mouse underscore over just as a moment ago we were for that frame and we're going to say nav over app so when a mouse rolls over our nav bar we want it to do something now this is that close parenthesis semicolon after that I'm going to select that entire line of code commander control C go down and paste it in below and basically we want this to do the same exact things we're listening for a mouse out that's out in all caps and the function we want to trigger is nav out F so there we go we are now going to create our first functions let me say function try to spell function correctly and here I'm going to say nav over F and this is an events : it's a mouse event close the parentheses : and the word void open curly bracket enter returns work twice close curly bracket up arrow key now here's where we're basically going to say event dot target dot Filters space equal space open open bracket I believe yes open bracket we're going to do that BTN glow with a capital G closed bracket and a semicolon so we need to just duplicate this so we have a function as nav out so I'm going to duplicate this and move down command or control V are going to say nav out and this is going to be event target dot filters equal and we're going to leave these brackets blank so I'm going to check to make sure I have no errors here and it contains no errors let's check to see what happens here notice the way I'm doing this is just event thought target dot filter so basically whatever movie clip within this nav bar movie clip that I target that's what I want this filter to be applied to so this is one of the advantages to actionscript 3.0 and the display list in general so control enter command return and we have a an error we have an access of an undefined property okay I must have made a simple spelling mistake pork frame yes I know exactly what I did let's get back into here that doesn't have to do with the script we just put in has to do with the script we did before double-click on this clicker and in here our portfolio frame the name of it is portraying underscore BTN here in the actions I have port frame make sure you spell your instance names correctly it will save you lots of time so we're going to save this go back to our initial point of entry here control enter command return and look at that when I roll over the buttons they each have this nice little subtle inner inner glow excuse me applied to them great so now that we've done that we're ready to set these things up to trigger the drop-down menu setting this up in ActionScript is a breeze when you select the ActionScript layer hit f9 and basically we're going to add this a little bit of code right here beneath the nav over so here's we're going to say we're going to say navbar underscore MC dot set child set child index so what we're looking for there we go so we're setting child index here we're going to say open parenthesis and the child that we're going to be setting is going to be event dot target which as we learn a moment ago is really the child or the movie clip within this movie clip that we are rolling over there is the event that target as and in the word movie clip with a capital m and then a capital C for clip that it spells one word comma and the index is going to be one so open it close parenthesis semicolon alright that's the first step the next thing we need to say is drop that's not I don't remember what my instance name of this is here oh I don't have an instance name we need to give our drop-down menus movie clip and instance name so we're going to say drop menus underscore MC there we go and go back to ActionScript def 9 we're going to say drop menus underscore MC dots go to and stop we already have a stop action on our frame or that keyframe but we're just as I go to in stock open parenthesis and the frame we want to go to is at that frame label and remember we named that frame label the same as the instance name of the portfolio button so all I have to do is say hey remember that child that we just set the index of the index of it to one I want you to grab that child the name of that child the index name of that child so here's we're going to say we're going to say nav bar underscore MC dot get child at and the index level here is going to be one and there is a dot name so the name of the child within this nav bar movie clip that is at the next level here one so I'm going to close that off of the closed parenthesis and a semicolon one last line of code I'm just going to throw in a simple trace statement that's going to say hey we are rolling over once I get input in the Trey statement you open and close quotes we are rolled over dot dot and after the parentheses I'm going to hit space + space nav bar underscore MC dot get child at level being 1 and dot name so we're gonna say we were rolled over and then it's going to give us the instance name of the button we roll over let's just quickly check to make sure we have no errors and it contains no errors hit f9 to close that up and commander control enter and when I roll over home look at the output panel says we are rolled over home underscore MC when I roll over portfolio you can see the drop down menu shows up when I roll out it goes away about us contact and media so there you go all of that prep work and it was a bit of prep work you can see here I didn't quite align photography correctly but you can see all that prep work pays off in the end we have a very sharp simple easy to edit easy to use drop-down menu and you can go ahead and select any of those individual buttons now and link them to different parts of the Flash movie different frames a keyframe for whatever you can link them to files that you want to download just link right to the URL you can link them to other pages obviously again right there to the URL of your page using that navigate to URL or command so that's it that is how you create a simple drop-down menu here in flash with actionscript 3.0 I know it's a bit of work I know it's a bit of time but once you create one like I have right now you can really go ahead and copy it and copy a lot of stuff over to new projects obviously copying the code and things like that go in and you know you have a lot of power over how the drop down menu looks so just go ahead have fun with it create one and once you've created one you basically created them all you know at least for this particular drop that menu so if you need to use it for multiple projects that's no big deal you don't think go and spend you know an hour creating your drop down menu which really once you start creating these drop down menus you should be able get them thrown together and you know 15 20 minutes no big deal and that is how you create this drop down menu using ActionScript 3.0 in flash cs4 I thank you for sticking with me it's been a little bit of time it's taken to do this but this is uh hopefully you've learned a lot through this tutorial and I hope you've enjoyed it thank you very much for watching please go check out the site that's www.viki um
Show moreFrequently asked questions
How do I add an electronic signature to a PDF in Google Chrome?
How can I eSign a form or contract in Word?
How can I have someone sign on a PDF file?
Get more for flash dropdown field with airSlate SignNow
- Print electronically sign Taxi Receipt
- Prove electronically signed House Rental Lease Agreement
- Endorse digisign Website Maintenance Proposal Template
- Authorize electronically sign Real Estate Agency Agreement Template
- Anneal mark Performance Improvement Plan
- Justify esign Contractor Quote
- Try countersign Notice of Intent to Vacate
- Add Consulting Agreement initial
- Send Interior Design Contract Template signature
- Fax Letter of Recommendation for Student email signature
- Seal Client Progress Report digital signature
- Password Exclusive Distribution Agreement Template electronically signed
- Pass Horse Bill of Sale byline
- Renew Music Tour Itinerary esign
- Test Restaurant Receipt signature block
- Require Compromise Agreement Template signature service
- Print heir digi-sign
- Champion company signed
- Call for vacationer mark
- Void HIPAA Business Associate Agreement template electronically sign
- Adopt Labor Agreement template countersignature
- Vouch Reservation Template for Gala template digital signature
- Establish Restaurant Gift Certificate template signed
- Clear Landscaping Services Contract Template template digi-sign
- Complete Work Completion Record template esign
- Force Equipment Purchase Proposal Template template digital sign
- Permit Corporate Resolution Form template initial
- Customize Durable Power of Attorney template signature


