Force Title Field with airSlate SignNow
Award-winning eSignature solution


Get the powerful eSignature features you need from the company you trust
Select the pro service made for pros
Set up eSignature API quickly
Collaborate better together
Force title field, within a few minutes
Reduce your closing time
Keep important information safe
See airSlate SignNow eSignatures in action


airSlate SignNow solutions for better efficiency
Our user reviews speak for themselves


Why choose airSlate SignNow
-
Free 7-day trial. Choose the plan you need and try it risk-free.
-
Honest pricing for full-featured plans. airSlate SignNow offers subscription plans with no overages or hidden fees at renewal.
-
Enterprise-grade security. airSlate SignNow helps you comply with global security standards.

Your step-by-step guide — force title field
Leveraging airSlate SignNow’s eSignature any company can speed up signature workflows and eSign in real-time, providing a greater experience to clients and employees. force title field in a few simple actions. Our mobile-first apps make operating on the move feasible, even while offline! eSign signNows from any place in the world and close up trades in no time.
Take a step-by-step instruction to force title field:
- Log in to your airSlate SignNow account.
- Locate your record within your folders or import a new one.
- Open the document adjust using the Tools menu.
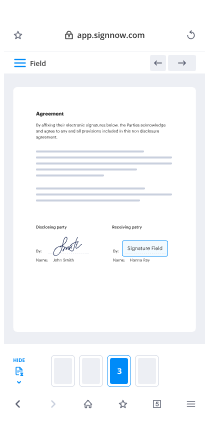
- Place fillable fields, add textual content and eSign it.
- Include several signers by emails and set up the signing order.
- Choose which users will receive an signed version.
- Use Advanced Options to limit access to the template add an expiry date.
- Tap Save and Close when completed.
Additionally, there are more advanced tools accessible to force title field. List users to your shared work enviroment, browse teams, and track teamwork. Millions of users all over the US and Europe agree that a solution that brings everything together in a single unified digital location, is the thing that enterprises need to keep workflows functioning smoothly. The airSlate SignNow REST API enables you to integrate eSignatures into your app, website, CRM or cloud. Check out airSlate SignNow and enjoy faster, easier and overall more productive eSignature workflows!
How it works
airSlate SignNow features that users love


See exceptional results force title field with airSlate SignNow
How to fill out and sign a PDF online
Try out the fastest way to force title field. Avoid paper-based workflows and manage documents right from airSlate SignNow. Complete and share your forms from the office or seamlessly work on-the-go. No installation or additional software required. All features are available online, just go to signnow.com and create your own eSignature flow.
A brief guide on how to force title field in minutes
- Create an airSlate SignNow account (if you haven’t registered yet) or log in using your Google or Facebook.
- Click Upload and select one of your documents.
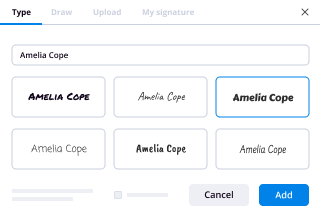
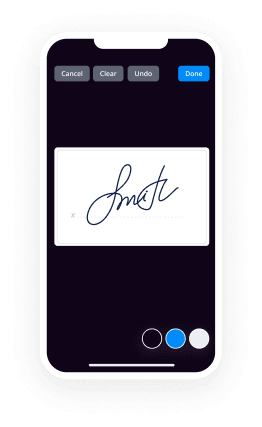
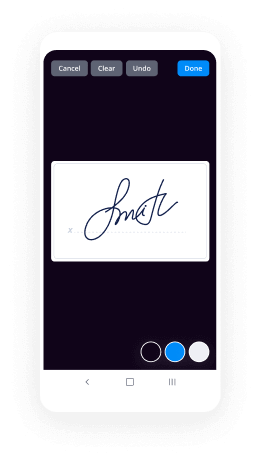
- Use the My Signature tool to create your unique signature.
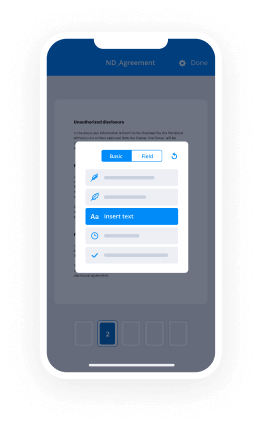
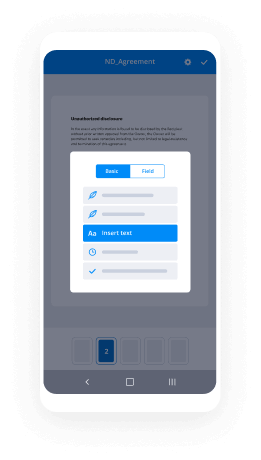
- Turn the document into a dynamic PDF with fillable fields.
- Fill out your new form and click Done.
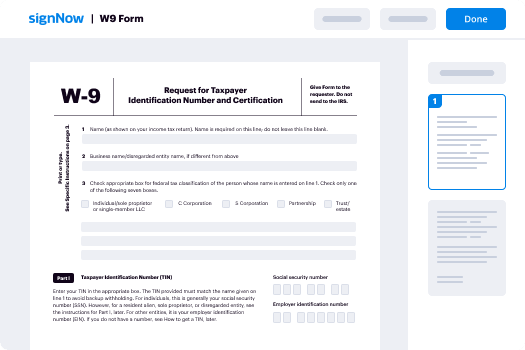
Once finished, send an invite to sign to multiple recipients. Get an enforceable contract in minutes using any device. Explore more features for making professional PDFs; add fillable fields force title field and collaborate in teams. The eSignature solution gives a secure process and operates based on SOC 2 Type II Certification. Ensure that your information are guarded and that no one can edit them.
How to eSign a PDF template in Google Chrome
Are you looking for a solution to force title field directly from Chrome? The airSlate SignNow extension for Google is here to help. Find a document and right from your browser easily open it in the editor. Add fillable fields for text and signature. Sign the PDF and share it safely according to GDPR, SOC 2 Type II Certification and more.
Using this brief how-to guide below, expand your eSignature workflow into Google and force title field:
- Go to the Chrome web store and find the airSlate SignNow extension.
- Click Add to Chrome.
- Log in to your account or register a new one.
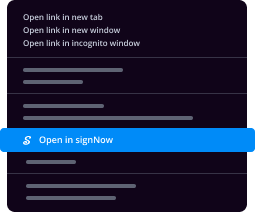
- Upload a document and click Open in airSlate SignNow.
- Modify the document.
- Sign the PDF using the My Signature tool.
- Click Done to save your edits.
- Invite other participants to sign by clicking Invite to Sign and selecting their emails/names.
Create a signature that’s built in to your workflow to force title field and get PDFs eSigned in minutes. Say goodbye to the piles of papers on your desk and start saving money and time for additional crucial activities. Picking out the airSlate SignNow Google extension is a smart handy option with lots of benefits.

How to eSign an attachment in Gmail
If you’re like most, you’re used to downloading the attachments you get, printing them out and then signing them, right? Well, we have good news for you. Signing documents in your inbox just got a lot easier. The airSlate SignNow add-on for Gmail allows you to force title field without leaving your mailbox. Do everything you need; add fillable fields and send signing requests in clicks.
How to force title field in Gmail:
- Find airSlate SignNow for Gmail in the G Suite Marketplace and click Install.
- Log in to your airSlate SignNow account or create a new one.
- Open up your email with the PDF you need to sign.
- Click Upload to save the document to your airSlate SignNow account.
- Click Open document to open the editor.
- Sign the PDF using My Signature.
- Send a signing request to the other participants with the Send to Sign button.
- Enter their email and press OK.
As a result, the other participants will receive notifications telling them to sign the document. No need to download the PDF file over and over again, just force title field in clicks. This add-one is suitable for those who like concentrating on more important aims instead of burning time for practically nothing. Increase your daily compulsory labour with the award-winning eSignature solution.
How to eSign a PDF on the go without an mobile app
For many products, getting deals done on the go means installing an app on your phone. We’re happy to say at airSlate SignNow we’ve made singing on the go faster and easier by eliminating the need for a mobile app. To eSign, open your browser (any mobile browser) and get direct access to airSlate SignNow and all its powerful eSignature tools. Edit docs, force title field and more. No installation or additional software required. Close your deal from anywhere.
Take a look at our step-by-step instructions that teach you how to force title field.
- Open your browser and go to signnow.com.
- Log in or register a new account.
- Upload or open the document you want to edit.
- Add fillable fields for text, signature and date.
- Draw, type or upload your signature.
- Click Save and Close.
- Click Invite to Sign and enter a recipient’s email if you need others to sign the PDF.
Working on mobile is no different than on a desktop: create a reusable template, force title field and manage the flow as you would normally. In a couple of clicks, get an enforceable contract that you can download to your device and send to others. Yet, if you want a software, download the airSlate SignNow mobile app. It’s secure, quick and has a great interface. Experience easy eSignature workflows from your workplace, in a taxi or on a plane.
How to sign a PDF using an iPhone
iOS is a very popular operating system packed with native tools. It allows you to sign and edit PDFs using Preview without any additional software. However, as great as Apple’s solution is, it doesn't provide any automation. Enhance your iPhone’s capabilities by taking advantage of the airSlate SignNow app. Utilize your iPhone or iPad to force title field and more. Introduce eSignature automation to your mobile workflow.
Signing on an iPhone has never been easier:
- Find the airSlate SignNow app in the AppStore and install it.
- Create a new account or log in with your Facebook or Google.
- Click Plus and upload the PDF file you want to sign.
- Tap on the document where you want to insert your signature.
- Explore other features: add fillable fields or force title field.
- Use the Save button to apply the changes.
- Share your documents via email or a singing link.
Make a professional PDFs right from your airSlate SignNow app. Get the most out of your time and work from anywhere; at home, in the office, on a bus or plane, and even at the beach. Manage an entire record workflow effortlessly: generate reusable templates, force title field and work on PDF files with business partners. Turn your device right into a potent organization tool for closing contracts.
How to sign a PDF taking advantage of an Android
For Android users to manage documents from their phone, they have to install additional software. The Play Market is vast and plump with options, so finding a good application isn’t too hard if you have time to browse through hundreds of apps. To save time and prevent frustration, we suggest airSlate SignNow for Android. Store and edit documents, create signing roles, and even force title field.
The 9 simple steps to optimizing your mobile workflow:
- Open the app.
- Log in using your Facebook or Google accounts or register if you haven’t authorized already.
- Click on + to add a new document using your camera, internal or cloud storages.
- Tap anywhere on your PDF and insert your eSignature.
- Click OK to confirm and sign.
- Try more editing features; add images, force title field, create a reusable template, etc.
- Click Save to apply changes once you finish.
- Download the PDF or share it via email.
- Use the Invite to sign function if you want to set & send a signing order to recipients.
Turn the mundane and routine into easy and smooth with the airSlate SignNow app for Android. Sign and send documents for signature from any place you’re connected to the internet. Generate professional-looking PDFs and force title field with just a few clicks. Come up with a flawless eSignature process with just your mobile phone and boost your overall productiveness.
Get legally-binding signatures now!
What active users are saying — force title field


Force title field
[Music] [Music] hey what's up ladies and gentlemen I mean as Leia from tolerated cinematics calm and today's tutorial we're going to take a look on how to create some visual effects in Adobe After Effects and specific we're going to take a look at how to create that shield on the force field from an inhalation that's new movie from 2018 really cool movie and when I saw that effect it was immediately like stoked to recreate that and a little bit after effect so here's my take on it and that's what we're gonna be trading today in this tutorial all the techniques that I'm going to reveal to you guys you can do a ton of cool things with it so without further ado let's jump into the tutorial alright so here we are in it'll be After Effects so let's get started on creating this awesome shield effect so we'll import our footage you can actually go ahead and download the footage with link in the description it's full HD so immediately when I import it makes it composition but if you don't have that you can just drag your footage and do a new composition right here okay so this is a footage that we will be working on so it moves a little bit so we'll have to track it down and put a nice shield in two places I'm going to change my resolution here to full and right here you can also see that in my project manager I will go over here to the bits per channel if you click on that you can actually change it to 32 bits per channel this allows us to work with a little bit more color and a little bit more information in the core workspace and therefore you give us nice results okay so if we have our footage and right here the first thing that we'll do is click on it and go to the tracker panel right here and just click on track motion if you do that you will see a little square popping up this is to track the position and if you check on the or tation you will get two dots which will also track the rotation I will use this free as a reference for the position so we'll just drag this to the top part of my tree and make it a little bit bigger to make sure that it's tracking correctly then the same thing for this one I'm going to move it to a nice location where you can actually see a lot of information right here for example make it a little bit bigger and therefore is going to look at all the information in here to track it down once you've done that make sure to be in the in the beginning of your timeline and then click track forward that's going to analyze our footage and as you can see it sticks nicely in position which means it's a good track try to keep an eye on it and there you go alright so once it's done analyzing the right click new and create a new null object we will rename this by hitting the return key and selecting the layer due tracking data then we'll go back to our tracking panel right here and go to edit target the target we want to make sure that this is the tracking data just verify this and click OK and I click the apply D with your time scrubber in the beginning of the timeline so apply X my click OK and boom now you have a null object with all the information for the position and the rotation applied to it so as you can see our null object stays perfectly in place which is what we need next we'll create a new adjustment layer and this is going to be our sky adjustment so return sky adjustment and we're going to create a simple mask for our sky so we'll zoom out a little bit go to our pen tool and just draw a simple mask around your sky like so and then press F on the keyboard and just feather it a little bit like 250 click on the adjustment layer go to effect color correction curves and we just want to darken our sky a little bit so we have a little bit more information to work with and this also allows us to get some better results with the shield because the darker your sky the more visible your shield color correction tend to adjust the color a little bit and just lower it into fact a little bit so we have a nice low saturated sky ok so now we darken the our sky here and if we look at the animation it doesn't really move that much but what you could do is animate your mask and I'm just going to extend this a little bit here but if you press on on the keyframe for the mask path that is right here you can go all the way to the end and just make sure that the animation here before we continue this video I would like to present you our website designed for filmmakers and video editors to improve their workflow we offer templates presets high-quality pre-made packs soundscapes essential graphics and much more if you don't have time to create something of your own or you just want to speed up your workflow definitely check out our website with a link in the description below kind of sticks in place okay so next what we would like to do is go and create a new composition and this composition we're going to start creating our shield so we're going to rename this to shield design for example and we're going to make it around two in two thousand five hundred by two thousand five hundred and let's let's see 25 seconds okay so we'll click OK and now we're going to right click new and create a new solid layer make that the comp size and rename it to fractal noise okay so on this come on the solid layer we're going to apply the fractal noise effect which you can find under effects blur and sharpen will actually not blur and sharpen its noise and grain fractal noise and this is a great tool that I love to use to create effect you can do a ton of cool things with this so let's start with the design so we'll go to the fractal type and change this to a dynamic twist we will go for a soft linear a conference of 135 brightness maybe so it's a little bit brighter and we can maybe invert it check how that looks but maybe just darken it down a little bit and increase this just a little bit okay then we'll go into the third and the transform here and we'll uncheck the uniform scaling and here we're going to do the most work so we're just going to lower or with two something like 35 or even lower like 25 35 seems okay and then increase the height like this so now we have this kind of fractal noise which is going to represent the lines that are going up in our shoot so we'll go to the evolution options right here and we see a keyframe next to the evolution we'll hold alt and click on the stopwatch and write something like time times 100 and what that will do is as long as time goes by it multiplies that with 100 and so it's going to animate this valley right here so we can see it's animating the evolution so now we have a kind of loopable and impatient well the animation is just going to go non-stop so when an infinite animation ok so now that we have this we can go and animate it a little bit more so we can use for example a meshwork which you can find under effects distort and meshwork in here I like to make a few of these twists like this so you can just go and play around and select a few points move them over maybe put them a little closer together you can also click on one of these and and make it longer and maybe twist it like this and that way you get some variation in your shield so go ahead and do that for all these points in that way you get some variation in your okay once you've done that you will see that you have some variation this is without the mesh warp and this is with the mesh work so that way you get some nice twists in there next we'll go for a polar to rectangular facts distort and pour coordinates and here we'll change it from polar to rectangular now we get this kind of effect which makes it seem like yeah like a little strides are going up coming together hey yeah this gives it a little bit more variation in my opinion you can also go again to effects and distort and again use this mesh work to do a final warp and maybe lower in the columns and rows to 4 and then just animate these a little bit to get some more extra variation we can also take these middle points and for example bring them down a little bit like this [Music] okay perfect if you want you can also go and animate the offset turbulence right here so we go to the beginning of the timeline click on the stopwatch for offset turbulence go all the way till the end and any mate this is going up so in a negative value so let's see how that looks in a lower resolution okay so this looks very cool so this is our design we're going to use this in our footage animation so we'll bring this in our footage animation right here shield design and once you brought it into your composition just rescale it like you wish to fill the entire composition and then click on that layer on this composition that we're using go to layer and pre compose it one more time move all the attributes and this is going to be our shield final design so this is our basic design that we're going to modify a little bit more click OK open up that composition and now we have our outer composition to work with what I like to do here is just make it a little bit slimmer and move it over right here duplicated by holding ctrl pressing D on the keyboard and maybe scaling it that way move it over and try to blend them nicely together what you can do is kind of overlap them right here in layers and go to effects transition a linear right here we can increase the percentage and just change the fetter a little bit to blend it a little bit nicer together okay so now it's nicely blended together and we're going to duplicate it one more time and position one over here of course if you want more variation you can again play with more fractal shield well fractal layers or just modify it at another time with the warp stabiliser it's completely up to you I'm going to like these tree layers and I'm going to press B on the keyboard and go to the beginning and click on a stop punch for the position of these fractal layers go to the end of your composition and move the layers up just like this so it looks like field is actually moving in an apart directory next I like to create a new composition in this composition I'm going to make sure that I have full HD 1920 by 1080 and rename is food for articles and here I'm just going to create those particles that we like to use so I'm just going to lower the time because I don't think we need 25 seconds and click OK then right click new and create a new solid layer these are going to be our particles like ok now go to effect simulation and we're going to use a part the simulator that is that comes with in After Effects called cc particle world if you click on that it will have some particles right here when in after-effects let's open up the grid and guides and just uncheck the grid because we don't need to see that so now we have these particles flying off which is perfect do things we want to do first of all you see this like Center and if we click on that perfectly in the center we can actually move it down so we don't see the particles anymore and then next we want to go to the producer longevity and the physics and the particle we want to open all these things up for velocity let's set this to 0 and for the gravity let's change it to not a negative 0.001 a very very low value so now of course you're not really going to see anything but if you're going to increase the longevity here to something like 25 you're going to see that our particles start coming up on a very slow kind of movement if we drag this over to the left and extend our layer we're going to see that now it fills the entire layer which is perfect and actually at the beginning I already want them to be fulfilled in here so we'll drag it over a little bit more and extend it so it's covering the entire composition timeline ok so we have some animating particles right now what I want to do is go to the radius here and the producer radius X and increase that so it covers the entire canvas you can also go into the Z radius and maybe add some depth and now we have some particles flying like this okay now we have all lines as a particle which is not really what we're looking for we're looking for faded spheres this faded spheres are a little bit too small so we can increase the size here very simply by increasing the earth size and dirt and it that size so now we're having these red kind of dots that are flying upwards we can also lower the we can also lower the birth rate to something like point three now we have a few and we can increase the size a little bit more perfect click on the layer go to edit duplicate or control V and go again to the particle tab so now we have the exact same settings to work with all we want to do is change the course do something different for example sine and blue okay now let's go to the extras and change your random seed now we have different particles on top of our first particles that are now blue we can click again duplicate it and go again to the particle step and change the colors again maybe purple and green we can also change the size variation to 100 and it makes a pasty to 100 and do that for all these layers and just play with all these settings until you're satisfied maybe the green we want to keep everything green and yellow like okay duplicate it once more and again now go to the particles and making purple be sure to always go to the extra and move the random see if you think your you have too many purple particles you can always lower the birth rate to 0.14 the green also 2.1 and for the blue tooth point 2 for example so now we have all kinds of colors flying in our scene and that's exactly what we need of course you can still go ahead and play with the variation of the sizes like this once you're satisfied go back to your shield final design and we're going to import that composition on top of it so go to the project manager see the color particles and drag it on top of your layers so now we have these particles to work with and we can change the blending mode to overlay press T on the keyboard lower it to 35% and now we have some color on top of our particles maybe increase it just a little bit more you can jump back into that composition and make some particles a little bit bigger so it covers the entire area so now I have these colorful particles what I want to do is also go back into the shield design I just like to have a little bit of variation in here so maybe a little bit lower and duplicate it and then go back to your main composition right here we have the shield final design and as you can see we have some core we can change blending modes to this screen and that way we have our particles on here then go back to the shield final design select everything and go to layer pre compose it and pre compose it as a shield animation now we have an entire composition like this now we can duplicate it and for example change it to an additive or a screen maybe that works a little bit better and we can go and click on our pen tool and just draw a little mask like this press F on the keyboard and just increase your feather click on the layer again and go to effects color correction and maybe go for it and effect change a color to a nice blue color something completely different and then apply a curves effect on top of it to go to effect color correction curves now we can add a little bit more contrast if we want to and also go to the course individually and maybe boost to blue even more so that way you get a little bit more variation in there we can duplicate it again click on the mask move on over here manipulate the mask and just make it a little bit different maybe this time we want to go for a nice red color so that's how I did and how I added a little bit more coarse maybe one more and go for a nice yellow pore because this kind of nicely blends together with the red and blue so we'll position one right over here and there we go and then change it to a yellow color and just decrease the blue here and increase the red okay so you can always duplicate it if you want it to be more intense or you want to fade it out a little bit more so maybe you want to have softer edges and these are all possibilities where you can lower the opacity and play around to get different kind of results so now we have a beautiful shield what I want to do is right-click go to new and adjustment layer we're going to rename this to the displacement of our shoot well click on the adjustment layer go to the effect distort and go for a displacement map in this displacement map we're just going to select our current layer and just increase the numbers as you want so maybe pretty horizontal we really want to kind of animate this and also for pretty vertical we want to set this to like 125 40 horizontal and rapidly pixels around so here we go we have our shield you can go back to our main composition right here and we have this composition change blending mode to a nice screen now we of course want to blend it a little bit better into our scene so move it up make it a little bit of wider if you want to and just make sure that if you go to the beginning of your timeline that you parented 3d tracking data now within our scene nicely as you can see right here of course extended a little bit more or reposition this to make sure that it fits the entire area starting from the left to the right okay so now our shield is completely covering our scene next we want to duplicate our original footage click on the layer control D or edit duplicate and put it on top here we want to go and apply an effect color correction Colorama and Colorama we can do some really cool things we can go to the output cycle and change it to a ramp gray here and gray we can create a new black key right here click OK and go over here and create a new white color these are two cores to make a grayscale image as you can see but if you bring them closer together bring the black dot over here and why not over here you get a more contrasted black-and-white image just try to make sure that you don't see anything in the sky and try to blacken as much of the foreground image so now we have a luma mattes it's called we can use this as a reference on top of our shield effect to make everything that is white visible and everything that is black invisible make sure that this layer is on top of our shields layer and go to the shield layer toggle the switches if you don't see this and go to the track mat option and change it to illuminate now we're using the information that we just created in our footage layer as a reference for shield layer to see this there we go now we have our shield on top of our footage looks pretty cool another thing that I like to do is play a little bit more with layers click on this layer go to the mask options right here and go for an ellipse tool make a simple ellipse hold ctrl to start from the center and make something like this press F on the keyboard and just feather it as much as you want this way it kind of fades it a little bit more towards the edges and in the center it's very intense another thing that you could do is start with a rectangular mask and start at the bottom and change it to a subtract press X on the keyboard and also increase this number so it kind of fades from the beginning here lower it as you want and there you go pretty cool you can again click on your shield layer go to effects color correction curves and maybe play a little bit with the curves to brighten it up or darken it down so you have a little bit more contrast going on that's completely up to you next what we can do is apply a few adjustments to make it blend a little bit more with our footage so we can right click new and just move layer and go and hit the return key and rename this to glow what I like to use here is a preset that is completely free from our website called perfect glow I'll put a link in the description so you can download that and use it it's just a better way of adding globe to a scene so here we have perfect glow apply this to our adjustment layer and immediately you will see that it's way too glowy so what I'll do is go to the glow intensity and lower this to something like 0.02 lower the threshold to something like 20 and then hold ctrl and while you hold ctrl drag this a little bit lower because you can actually go below 0 so 0.01 maybe but as you can see you only see zero right here so if you click on it you will see the actual value you can even go 0.005 ok so we have a little bit of glow just just makes it blend a little bit more together you can also try and color grade it afterwards but this looks quite good next I like to use an optical flare we can go and create a new solid layer and rename this to flare in this case I will be using an external plugin called Video Copilot optical flares but you can do this with the internal lens flare as well this is not necessary to make this effect this is just a way of finalizing it so create an opacity so create an optical flares and change a color to a nice blue color for example to get that nice anamorphic look click OK go to the options and choose a flare you like I will click ok and just move it off the side change the blending mode to screen and there we go we have a nice anamorphic flare we can of course go to the beginning and go to the position over flare and create a new keyframe then go all the way till the end of your keyframe over your timeline and just move it a little bit more off-screen so it looks like it's animating in our camera lens ok next I want to create a new adjustment layer and this is going to be our final grades rename it great and apply a coreless so we'll search for the luma treat color which is a new effect that comes with in After Effects CC luma trick or apply it right here and I like to import and I like to import a lot go to the creative tab and browse I'm going to use a look from our look bag that you can go ahead and get on our website I'm going to use the apocalypse right here and open that up and as you can see now it blends a little bit better together but of course the intensity is way too high so I'm going to lower it do something like 35 40 and there we go maybe go into in the basic correction and add a little bit more contrast maybe lower the highlights and by doing this by applying this final grade it makes everything blend a little bit better together you can also go to your shield effect go to effects color correction and apply a tint effect here to lower the colors a little bit so maybe go to 25 degree add 25% and that's going to kind of desaturate the colors maybe they're too intense for a cinematic movie so there you go you can also right click new and create a new solid layer and make it black bars or letterboxing and here we can easily create a rectangle tool double click on it and then double click on a mask hold ctrl and just drag it down like you have something like this and then just subtract that mask and now you have these letter boxes that you can put on top now you have that nice widescreen look of course you have to select everything below it go to layer pre compose final video for example click OK and then just move it up a little bit so you have something more like so the composition works a little bit better and now we're going to preview this and there you go so this is basically how I achieved this effect all you can do is just jump into this and go and play a little bit more with this shield effect maybe you want to lower maybe you want to boost the saturation just on the shield and double-click on it and go to the color overlay by going into the shield animation color particles press T on the keyboard and just increase the opacity a little bit more go back and let's see what that does pretty cool this is the exact same workflow that I use to create my results but of course it always looks a little bit different you can open it up and play with all these settings and enjoy until you have a nice result another quick tip that I would like to throw out there is maybe use a kind of duplicate of that layer so we go back into our final video composition select these two layers duplicate them on top lower the opacity of course and click on that layer and go for effect blur and sharpen cc-vector blur increase it to something like 25 and now you have a kind of softer duplicate with a nicer blur to it which kind of works pretty nicely alright so that's it for this video I hope you enjoyed it if you did give this video a like also subscribe to the channel for more and definitely check out our website we have a bunch to offer from filmmakers and motion graphics artists and if you buy something and help support the channel okay so hope to see you in the next one good bye [Music]
Show moreFrequently asked questions
How do I add an electronic signature to a PDF in Google Chrome?
How do I eSign a PDF on a PC?
How do you sign PDF docs online?
Get more for force title field with airSlate SignNow
- ESignature Troff
- Prove electronically signed Meeting Itinerary
- Endorse digisign Partnership Agreement Amendment
- Authorize electronically sign Mobile Marketing Proposal Template
- Anneal mark Travel Plan
- Justify esign Inventory Checklist
- Try countersign Pet Addendum to Lease
- Add Joint Venture Agreement signature block
- Send Wedding Photography Contract Template signature service
- Fax Sorority Recommendation Letter Template countersign
- Seal Management Report signatory
- Password 1040 Form initials
- Pass Leave of Absence Letter eSign
- Renew Snow Removal Contract esigning
- Test Rent Receipt digisign
- Require Tripartite Agreement Template electronic signature
- Print receiver byline
- Champion visitor electronically signed
- Call for collector digital signature
- Void Non-Disclosure Agreement (NDA) template signature
- Adopt Assumption Agreement template email signature
- Vouch Fundraiser Ticket template signatory
- Establish Travel Gift Certificate template electronically signed
- Clear Grant Proposal Template template byline
- Complete Maintenance Work Order template esigning
- Force Web Design Proposal Template template esign
- Permit Basic Employment Resume template signature block
- Customize Power of Attorney template signature service