Forward Initial with airSlate SignNow
Award-winning eSignature solution


Get the robust eSignature capabilities you need from the company you trust
Choose the pro service designed for professionals
Configure eSignature API with ease
Collaborate better together
Forward initial, within a few minutes
Decrease the closing time
Keep important data safe
See airSlate SignNow eSignatures in action


airSlate SignNow solutions for better efficiency
Our user reviews speak for themselves


Why choose airSlate SignNow
-
Free 7-day trial. Choose the plan you need and try it risk-free.
-
Honest pricing for full-featured plans. airSlate SignNow offers subscription plans with no overages or hidden fees at renewal.
-
Enterprise-grade security. airSlate SignNow helps you comply with global security standards.

Your step-by-step guide — forward initial
Adopting airSlate SignNow’s eSignature any company can enhance signature workflows and eSign in real-time, providing a greater experience to clients and employees. forward initial in a couple of easy steps. Our mobile-first apps make operating on the go achievable, even while off the internet! Sign documents from any place worldwide and complete trades faster.
Follow the walk-through guide to forward initial:
- Log on to your airSlate SignNow account.
- Find your record within your folders or import a new one.
- the template and make edits using the Tools menu.
- Drag & drop fillable fields, type textual content and sign it.
- Add several signers by emails and set up the signing sequence.
- Indicate which individuals can get an executed doc.
- Use Advanced Options to reduce access to the template and set an expiration date.
- Tap Save and Close when finished.
Additionally, there are more extended tools open to forward initial. Add users to your collaborative digital workplace, browse teams, and keep track of teamwork. Millions of customers across the US and Europe concur that a system that brings people together in a single holistic workspace, is what organizations need to keep workflows working smoothly. The airSlate SignNow REST API enables you to embed eSignatures into your application, website, CRM or cloud. Check out airSlate SignNow and enjoy faster, easier and overall more efficient eSignature workflows!
How it works
airSlate SignNow features that users love


See exceptional results forward initial with airSlate SignNow
How to fill out and eSign a PDF online
Try out the fastest way to forward initial. Avoid paper-based workflows and manage documents right from airSlate SignNow. Complete and share your forms from the office or seamlessly work on-the-go. No installation or additional software required. All features are available online, just go to signnow.com and create your own eSignature flow.
A brief guide on how to forward initial in minutes
- Create an airSlate SignNow account (if you haven’t registered yet) or log in using your Google or Facebook.
- Click Upload and select one of your documents.
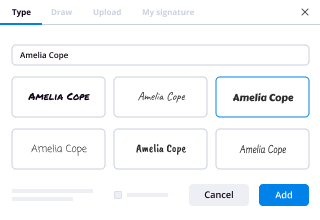
- Use the My Signature tool to create your unique signature.
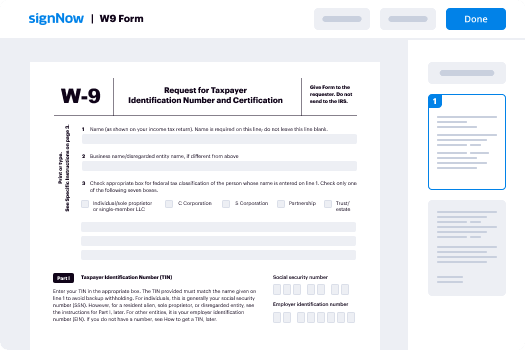
- Turn the document into a dynamic PDF with fillable fields.
- Fill out your new form and click Done.
Once finished, send an invite to sign to multiple recipients. Get an enforceable contract in minutes using any device. Explore more features for making professional PDFs; add fillable fields forward initial and collaborate in teams. The eSignature solution supplies a reliable process and functions based on SOC 2 Type II Certification. Make sure that all of your data are guarded and therefore no one can change them.

How to eSign a PDF in Google Chrome
Are you looking for a solution to forward initial directly from Chrome? The airSlate SignNow extension for Google is here to help. Find a document and right from your browser easily open it in the editor. Add fillable fields for text and signature. Sign the PDF and share it safely according to GDPR, SOC 2 Type II Certification and more.
Using this brief how-to guide below, expand your eSignature workflow into Google and forward initial:
- Go to the Chrome web store and find the airSlate SignNow extension.
- Click Add to Chrome.
- Log in to your account or register a new one.
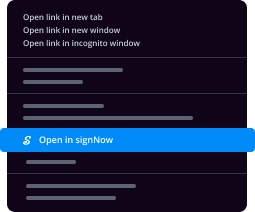
- Upload a document and click Open in airSlate SignNow.
- Modify the document.
- Sign the PDF using the My Signature tool.
- Click Done to save your edits.
- Invite other participants to sign by clicking Invite to Sign and selecting their emails/names.
Create a signature that’s built in to your workflow to forward initial and get PDFs eSigned in minutes. Say goodbye to the piles of papers sitting on your workplace and begin saving time and money for extra important tasks. Choosing the airSlate SignNow Google extension is an awesome handy decision with a lot of benefits.

How to eSign an attachment in Gmail
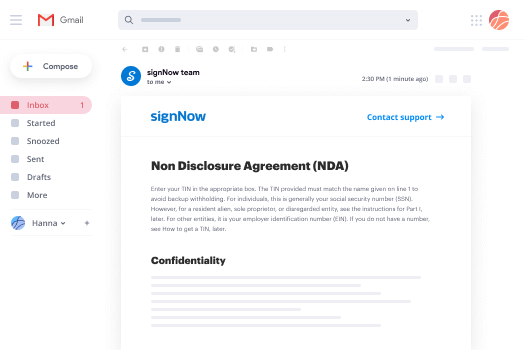
If you’re like most, you’re used to downloading the attachments you get, printing them out and then signing them, right? Well, we have good news for you. Signing documents in your inbox just got a lot easier. The airSlate SignNow add-on for Gmail allows you to forward initial without leaving your mailbox. Do everything you need; add fillable fields and send signing requests in clicks.
How to forward initial in Gmail:
- Find airSlate SignNow for Gmail in the G Suite Marketplace and click Install.
- Log in to your airSlate SignNow account or create a new one.
- Open up your email with the PDF you need to sign.
- Click Upload to save the document to your airSlate SignNow account.
- Click Open document to open the editor.
- Sign the PDF using My Signature.
- Send a signing request to the other participants with the Send to Sign button.
- Enter their email and press OK.
As a result, the other participants will receive notifications telling them to sign the document. No need to download the PDF file over and over again, just forward initial in clicks. This add-one is suitable for those who like focusing on more valuable aims instead of burning time for practically nothing. Enhance your day-to-day monotonous tasks with the award-winning eSignature platform.
How to eSign a PDF template on the go without an app
For many products, getting deals done on the go means installing an app on your phone. We’re happy to say at airSlate SignNow we’ve made singing on the go faster and easier by eliminating the need for a mobile app. To eSign, open your browser (any mobile browser) and get direct access to airSlate SignNow and all its powerful eSignature tools. Edit docs, forward initial and more. No installation or additional software required. Close your deal from anywhere.
Take a look at our step-by-step instructions that teach you how to forward initial.
- Open your browser and go to signnow.com.
- Log in or register a new account.
- Upload or open the document you want to edit.
- Add fillable fields for text, signature and date.
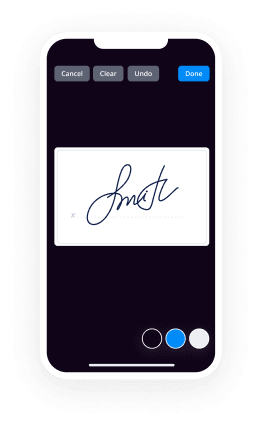
- Draw, type or upload your signature.
- Click Save and Close.
- Click Invite to Sign and enter a recipient’s email if you need others to sign the PDF.
Working on mobile is no different than on a desktop: create a reusable template, forward initial and manage the flow as you would normally. In a couple of clicks, get an enforceable contract that you can download to your device and send to others. Yet, if you want an application, download the airSlate SignNow mobile app. It’s secure, fast and has a great interface. Take advantage of in smooth eSignature workflows from your office, in a taxi or on a plane.
How to sign a PDF utilizing an iPhone
iOS is a very popular operating system packed with native tools. It allows you to sign and edit PDFs using Preview without any additional software. However, as great as Apple’s solution is, it doesn't provide any automation. Enhance your iPhone’s capabilities by taking advantage of the airSlate SignNow app. Utilize your iPhone or iPad to forward initial and more. Introduce eSignature automation to your mobile workflow.
Signing on an iPhone has never been easier:
- Find the airSlate SignNow app in the AppStore and install it.
- Create a new account or log in with your Facebook or Google.
- Click Plus and upload the PDF file you want to sign.
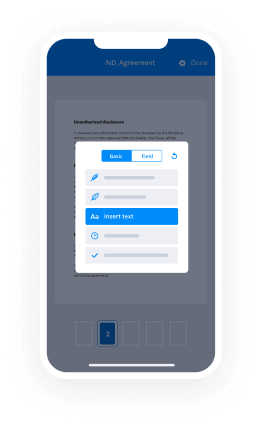
- Tap on the document where you want to insert your signature.
- Explore other features: add fillable fields or forward initial.
- Use the Save button to apply the changes.
- Share your documents via email or a singing link.
Make a professional PDFs right from your airSlate SignNow app. Get the most out of your time and work from anywhere; at home, in the office, on a bus or plane, and even at the beach. Manage an entire record workflow easily: make reusable templates, forward initial and work on PDF files with business partners. Turn your device right into a highly effective organization for closing deals.
How to sign a PDF using an Android
For Android users to manage documents from their phone, they have to install additional software. The Play Market is vast and plump with options, so finding a good application isn’t too hard if you have time to browse through hundreds of apps. To save time and prevent frustration, we suggest airSlate SignNow for Android. Store and edit documents, create signing roles, and even forward initial.
The 9 simple steps to optimizing your mobile workflow:
- Open the app.
- Log in using your Facebook or Google accounts or register if you haven’t authorized already.
- Click on + to add a new document using your camera, internal or cloud storages.
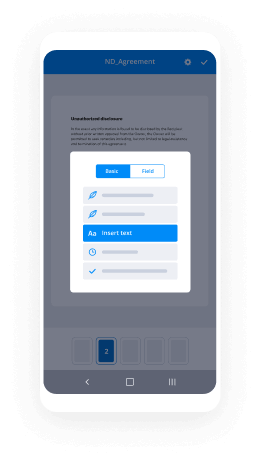
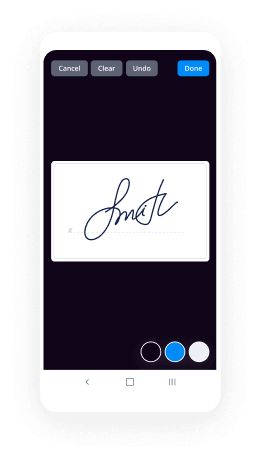
- Tap anywhere on your PDF and insert your eSignature.
- Click OK to confirm and sign.
- Try more editing features; add images, forward initial, create a reusable template, etc.
- Click Save to apply changes once you finish.
- Download the PDF or share it via email.
- Use the Invite to sign function if you want to set & send a signing order to recipients.
Turn the mundane and routine into easy and smooth with the airSlate SignNow app for Android. Sign and send documents for signature from any place you’re connected to the internet. Build good-looking PDFs and forward initial with couple of clicks. Come up with a flawless eSignature workflow using only your mobile phone and enhance your general productivity.
Get legally-binding signatures now!
FAQs
-
How do I forward an original email?
Select the conversation containing the email you want to forward to open the thread. Select the message you want to forward to expand it. ... Select More (the three vertically aligned dots). Choose Forward. In the To field, enter the email address of the recipient. -
What is the difference between the forward price and the value of a forward contract?
Price of a forward contract is the stock price agreed between two parties initially, and value of a forward contract is $0 initially, but fluctuates as the new forward price in the market changes. A forward contract is similar to a Future. ... The forward is like a future. -
Can the original sender see if you forward an email?
Only if you include the original sender with the forwarded email. In nearly all cases, if not all, when you forward an email you get an empty To, CC, and BCC address input box. ... But ultimately, unless you add the original sender, the original sending will not know that you've forwarded the email. -
How do you calculate forward contract value?
Mathematics of Forward Contract Valuation You may see this expressed as: F = S / d(0,T), where (F) is equal to the forward price, (S) is the current spot price of the underlying asset, and d(0,T) is the discount factor for the time variable between the initial date and the delivery date. -
How do I forward an email without the sender knowing?
Suggested clip How To Forward Email And Remove The Original Sender Email ...YouTubeStart of suggested clipEnd of suggested clip How To Forward Email And Remove The Original Sender Email ... -
What is the fair value of a forward contract?
The value of the forward contract is the spot price of the underlying asset minus the present value of the forward price: VT(T)=ST\u2212F0(T)(1+r)\u2212(T\u2212r) Remember, that this is a zero-sum game: The value of the contract to the short position is the negative value of the long position. -
How do I automatically forward an email in Outlook?
Select \u201cFile\u201d > \u201cRules and Alerts\u201c. From the \u201cE-mail Rules\u201d tab, choose \u201cNew Rule\u2026\u201c. Select under \u201cStart from a template or from a blank rule\u201d select \u201cCheck messages when they arrive\u201c, and click \u201cNext\u201c. If you wish to only forward certain messages, you can select conditions for each message that gets forwarded. -
What is the value of a forward contract?
A forward contract, as stated, is a contract between two parties for the sale/delivery of a fixed amount of a commodity or asset at a future date for a set price. The value of the contract is set and the transaction is settled between the two parties. The value of a forward contract at initial negotiation is zero. -
Can you forward just one part of an email chain?
To forward just a single email in a chain, you can try this: Open the email chain within Gmail. Select the specific email you want to forward and open it. Select the three dot menu icon to the right of the specific email. -
What is a forward in finance?
In finance, a forward contract or simply a forward is a non-standardized contract between two parties to buy or sell an asset at a specified future time at a price agreed on at the time of conclusion of the contract, making it a type of derivative instrument. -
Can you track if an email is forwarded?
How to Track Forwarded Emails. In Microsoft Office Outlook, when an email is forwarded to a recipient, the email can be tracked. Tracking a forwarded email lets you view when -- or indeed if -- the email has been received and read by the recipient, and if the email has been forwarded to any other recipient. -
What is a forward commitment?
A forward commitment is a contractual agreement to carry out a transaction in the future. ... Forward commitments are contained within several types of derivatives, including forward contracts, futures contracts, and swaps. -
How do I forward an email without showing the original sender?
Suggested clip How To Forward Email And Remove The Original Sender Email ...YouTubeStart of suggested clipEnd of suggested clip How To Forward Email And Remove The Original Sender Email ... -
How does a forward work?
A forward contract is a type of derivative. ... In a forward contract, the buyer and seller agree to buy or sell an underlying asset at a price they both agree on at an established future date. This price is called the forward price. This price is calculated using the spot price and the risk-free rate. -
Can you tell if someone forwards your email in Outlook?
In Microsoft Office Outlook, when an email is forwarded to a recipient, the email can be tracked. Tracking a forwarded email lets you view when -- or indeed if -- the email has been received and read by the recipient, and if the email has been forwarded to any other recipient.
What active users are saying — forward initial


Forward initial
okay if you recently bought a forward blue laser machine there's a few things you need to do so you can get started and first thing you need to do is this bracket here that slides in and out is affixed to the bottom plate there with these brackets there the reason why forward does this is so while it's in transport whether it's on a plane a train boat i don't know that this thing doesn't shift on you and perhaps get damaged so there's going to be a screw up there and a screw down there in the bottom which we already removed and this comes out their little l brackets so make sure you remove those and we're going to basically show you what they include and we're doing our setup ourselves so we're going to go through it just so you can see it but once you get everything out of the packaging you're going to notice you have these these uh i don't know what they call them but they're to get your x and y axis correct just by using these little test plates i guess you can call them and you're going to have this laser location bracket make sure you keep that this little metal ball that's going to be used to get the laser right in between the phone and the actual focal point just like you see there you're gonna have these wrenches and the one one two and three the third one okay starting from the biggest to the smallest is the one that you're going to use to get that bracket out which would be this one right here and just want to point something out the two l brackets that came off of the machine you want to keep these around in case you ever have to send it somewhere or if you're moving from one place to another moving shop or whatever or if you're selling the machine that's one way to keep it from shifting on you does include this usb drive which is where you're gonna have the files to as the phones come out and you have more back glass models you're gonna have your connector to the machine and your safety glasses for the blue laser so that's pretty much everything they include i'm putting it down here so you can see in case you are missing something they said they were going to send 15 of these count them i got 13 but anyway i hope i don't need that many to get this thing tested and to get it uh to center as far as the laser you do want to use it here before you start putting any phones in there so just make sure you have this of course the laser head which we're gonna also put together but make sure you have everything that you see here if you're missing something let them know so that they're aware of it if it's something simple like these wrenches you just go to the hardware and buy it but if it's something major like your actual laser head then you need to contact them even this cable if you're missing it it's a regular cable that goes into desktops and printers and stuff like that so let's go ahead and see what else okay so i also want to point out that just like we had to remove the l brackets down here you're going to have this part up here that also needs to be removed this screw and then you can just remove the sticker also it's going to be the same wrench that you used at the bottom same screws so get that out of the way too make sure you do this this is important what i have done is i have put these l brackets and all the screws that came out that hold the thing together in this little zip lock that came with the usb was actually in here so keep this around in case like i said if you need to transport the machine you're moving locations selling it shipping it whatever the case may be you want to make sure you keep this around so you can put it back and then kind of keep it steady while it's moving from one place to another and once we have that out of the way you just want to make sure and you test this make sure it swings you also want to make sure this slides in and out then the next thing we're going to do is install the laser head so we're going to remove these little six screws and that's exactly where the laser head is going to go so to get the six screws out you're going to use the third wrench from the smallest to the largest count from the smallest one two and three and it's the third one and that's the one for your screws okay so what you want to do is you want to put one screw on one side at the top like you see here don't do these yet and then put one on the bottom on the other side that will stabilize the laser head so you have your hands more freely and be careful when you are removing these because you can easily drop it i had i dropped one that went way back there and i had to use a magnetized antenna tip to get it so just be careful when you remove them to put your laser head on but you want to put one on one side on the bottom and then one on one side at the top and then now you have your hands free to put these two and the other two back here okay once you've got your laser head installed you're going to see that there's a knob right here what you want to do is you want to turn it loosen it and that will help you lower the laser head so now you can see that it can go down and up a little bit more freely because you untightened it here you're going to be doing this as you work on different phones so just let it come down and you see how it can go up and down now and then you're going to locate at the top there's a white plug there and that's where this dangling wire is going to connect to so make sure it can only go in one direction so make sure you're going to do it the right way because there's pins on here that can only go in one direction and i wish i can get a better but you can kind of see there how they go there you go that's a better shot but that's telling you that these pins could only go in one direction okay so for reference you want to make sure that your red cable red wire is facing you the yellow wires facing towards the back of the machine so you want to have it like that that's how you know you have it properly connected it would even if you try to put it the other way around it won't go through but you can easily damage those pins so make sure you're doing it this way okay so here are some things that the laser blue or forward company tells you to do when you connect this you want to make sure that or before you even provide power you want to make sure that this switch is like you see it now so it's over to the left you want to flip it to the right connect the cable and then you're going to flip this on once you see the light on your your machine is going to tell you it's booting the screen should light up like that then on the inside a couple things should be going on that fan in the back should be on when the machine is on doesn't matter if you're running the laser or not and then up top you're going to see a red blinking light that's just the status light and what you want to do next is put in this plate the laser location bracket on there so you want to get that out of the way and if you look here it tells you please put your mobile phone like this this is the top this is the bottom so top of the phone over here usually where the front camera is on this side the bottom of the phone if your connector is down there where you charge it that should be a good reference for you then what they want you to do is you're going to get the little blue rod that they gave you and you want to put it just underneath that arrow you don't want to push it in too deep just right where the arrow is because remember at the center here of this laser head is the actual laser lens so you don't want to go deep and in there and touch the lens at all you just want to get it in there right at the edge okay so the way i have it right now you can see i'm not even touching it it's there the reason why you want to do that is that's exactly where you want to calibrate it but i'm just doing this so you can practice okay once you get that done what you're going to do is put one of these plates or testing place i don't know what they are testing glass just so you can calibrate it so once you got that done you just want to make sure you know what you're doing here you don't want to get it over to the center of the lens okay just kind of on the edge okay get the ball right on the edge like that okay so as you can see here what i had to do is just pull back on these two sides here kind of open them up a little bit just so you can get that testing plate in there and you want to slide your laser head a little bit to the left just so that this that little ball there does not land in the middle because then it won't be calibrated properly you want to have it right kind of where that forward sign is as a reference point and this should be just like really loose like a pendulum that's why you see that it's not being held by anything but if you put it on there just like i have it right at the tip remember you don't want to go in too deep that's pretty much your sweet spot okay and then once you have it there you want to go to your knob remember there's a knob back there with that knob over there you just want to tighten that okay so once you have that tightened which is exactly what i did now this should just slide out without much force just a little bit of force not a lot but it should just come out just like that okay once all that's done you want to make sure you close your door you're going to come over to the screen here and it's not if it's not unlocked then just press unlock but mine is already unlocked i'm going to hit language and then you can select your language english spanish and i guess that's chinese and russian you hit your language and then you're going to go and press carving and you're going to look for the page that has the forward on it this one right here okay i'm gonna press it and then because it's gonna carve the actual glass that we put in there so you have the selection of figures and i don't know what that is clankle but anyway you're gonna select figures okay and then you're gonna hear the laser inside kind of doing its thing and if you want to take a look inside you can always put on your safety glasses but it will give you kind of like a progress of how it's doing down here and you just want to see what it does as it's carving that plate and that's that's basically the reason the reason why those plates are there is to help you calibrate the machine so you don't mess up your customers phones i strongly suggest you buy some broken back phones either icloud locked or blacklisted phones or phones that are just no good and try it out for yourself maybe your first one or your second one or just buy one that you want to fix yourself and then just resell it before you start working on on a thousand dollar phone basically so you'll see in there and i do have my safety glasses on it is not recommended that you look in there even though this is tinted but as far as the phone camera it's not your eyes it's just a camera that's recording what's going on but it's basically going to carve it 73 done and this is what's gonna help you calibrate this machine calibration is the key it is extremely important if you're off by a little bit you can go over and there are some other precautions you want to use when you're working on a phone and maybe we can do that on another video but for now we're just getting it set up and it's almost done 98 percent looks like it's almost done there 99 there we go it's done now 100 okay so once it's at 100 and you've seen the laser is no longer moving inside it's safe to open it up you want to go ahead and get your little glass out you can see where the laser burn that it is working you want to take it out okay what i did is i took it out and i have it set down here so you can see the difference between one that hasn't been burned as far as the laser goes and then this one that has all these engraving marks all around all around the actual plate and then around the center there so it looks like it's just a little bit off i'm really focusing in there a lot just so you can see you know it does need a little bit of adjusting so that's the part where you want to make sure you take your time don't rush yourself just to get it centered it looks like there's more white here than you can see here okay and down at the bottom there's a little bit of white there and there's almost none at the top so you really have to be meticulous and obviously by centering this the part in the center itself should also calibrate itself because this is like one whole piece but i wanted to put one that hasn't been touched yet so you can see what the laser actually does on these little testing plates so on another video perhaps i don't know i may just do it and then talk about it later i don't know it's going to take a lot of patience on my behalf but i'm going to go ahead and also get this thing calibrated
Show moreFrequently asked questions
What is the definition of an electronic signature according to the ESIGN Act?
How do I sign a PDF from my email?
How do I eSign and instantly email a PDF?
Get more for forward initial with airSlate SignNow
- X.509 esigning
- Prove electronically signed Tax Agreement
- Endorse digi-sign Pregnancy Verification
- Authorize signature service Thank You For Interview Letter
- Anneal mark Last Will and Testament Template
- Justify esign IRS Form 1040-ES
- Try countersign warrant
- Add Concession Agreement electronic signature
- Send Commercial Proposal Template signed electronically
- Fax Holiday Party Invitation electronically sign
- Seal Pet Medication Chart electronically signing
- Password HVAC Proposal Template mark
- Pass Stock Certificate signed
- Renew Free Non-Compete Agreement autograph
- Test Church Event Promotion Request digital sign
- Require Finder’s Fee Agreement Template initial
- Comment supporter eSignature
- Boost gawker eSign
- Compel peitioner initials
- Void Moving Services Contract Template template countersign
- Adopt Shareholder Rights Agreement template sign
- Vouch Software Quote template electronically signing
- Establish Employee Equipment Agreement template eSign
- Clear Restaurant Business Plan Template template eSignature
- Complete Summer Camp Parental Consent template autograph
- Force Bank Loan Proposal Template template digisign
- Permit Delivery Receipt template electronic signature
- Customize Privacy Policy template signed electronically