Initials Itinerary Planner Made Easy
Award-winning eSignature solution


Do more on the web with a globally-trusted eSignature platform
Standout signing experience
Trusted reports and analytics
Mobile eSigning in person and remotely
Industry regulations and conformity
Initials itinerary planner, faster than ever before
Useful eSignature add-ons
See airSlate SignNow eSignatures in action


airSlate SignNow solutions for better efficiency
Our user reviews speak for themselves


Why choose airSlate SignNow
-
Free 7-day trial. Choose the plan you need and try it risk-free.
-
Honest pricing for full-featured plans. airSlate SignNow offers subscription plans with no overages or hidden fees at renewal.
-
Enterprise-grade security. airSlate SignNow helps you comply with global security standards.

Your step-by-step guide — initials itinerary planner
Leveraging airSlate SignNow’s electronic signature any company can enhance signature workflows and sign online in real-time, providing a better experience to clients and staff members. Use initials Itinerary Planner in a couple of easy steps. Our mobile apps make work on the go achievable, even while off-line! eSign signNows from any place worldwide and close up deals in no time.
Take a step-by-step instruction for using initials Itinerary Planner:
- Log in to your airSlate SignNow profile.
- Locate your document within your folders or upload a new one.
- Open the document and make edits using the Tools menu.
- Drag & drop fillable areas, add text and sign it.
- List numerous signees by emails and set up the signing sequence.
- Indicate which recipients will receive an signed version.
- Use Advanced Options to restrict access to the document and set an expiration date.
- Click on Save and Close when finished.
In addition, there are more enhanced capabilities open for initials Itinerary Planner. List users to your common workspace, browse teams, and monitor collaboration. Numerous users across the US and Europe recognize that a solution that brings people together in one holistic workspace, is exactly what businesses need to keep workflows functioning efficiently. The airSlate SignNow REST API allows you to integrate eSignatures into your application, internet site, CRM or cloud storage. Check out airSlate SignNow and enjoy faster, easier and overall more efficient eSignature workflows!
How it works
airSlate SignNow features that users love


See exceptional results initials Itinerary Planner made easy
How to fill out and eSign a document online
Try out the fastest way to initials Itinerary Planner. Avoid paper-based workflows and manage documents right from airSlate SignNow. Complete and share your forms from the office or seamlessly work on-the-go. No installation or additional software required. All features are available online, just go to signnow.com and create your own eSignature flow.
A brief guide on how to initials Itinerary Planner in minutes
- Create an airSlate SignNow account (if you haven’t registered yet) or log in using your Google or Facebook.
- Click Upload and select one of your documents.
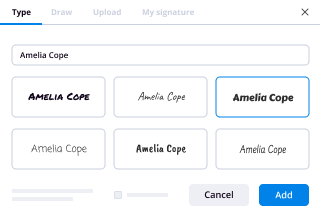
- Use the My Signature tool to create your unique signature.
- Turn the document into a dynamic PDF with fillable fields.
- Fill out your new form and click Done.
Once finished, send an invite to sign to multiple recipients. Get an enforceable contract in minutes using any device. Explore more features for making professional PDFs; add fillable fields initials Itinerary Planner and collaborate in teams. The eSignature solution supplies a protected process and functions based on SOC 2 Type II Certification. Ensure that all of your data are protected so no person can edit them.
How to eSign a PDF template in Google Chrome
Are you looking for a solution to initials Itinerary Planner directly from Chrome? The airSlate SignNow extension for Google is here to help. Find a document and right from your browser easily open it in the editor. Add fillable fields for text and signature. Sign the PDF and share it safely according to GDPR, SOC 2 Type II Certification and more.
Using this brief how-to guide below, expand your eSignature workflow into Google and initials Itinerary Planner:
- Go to the Chrome web store and find the airSlate SignNow extension.
- Click Add to Chrome.
- Log in to your account or register a new one.
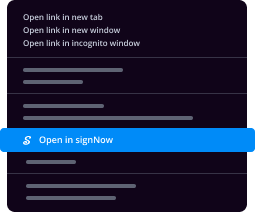
- Upload a document and click Open in airSlate SignNow.
- Modify the document.
- Sign the PDF using the My Signature tool.
- Click Done to save your edits.
- Invite other participants to sign by clicking Invite to Sign and selecting their emails/names.
Create a signature that’s built in to your workflow to initials Itinerary Planner and get PDFs eSigned in minutes. Say goodbye to the piles of papers sitting on your workplace and begin saving money and time for extra important tasks. Selecting the airSlate SignNow Google extension is a great convenient option with a lot of advantages.

How to sign an attachment in Gmail
If you’re like most, you’re used to downloading the attachments you get, printing them out and then signing them, right? Well, we have good news for you. Signing documents in your inbox just got a lot easier. The airSlate SignNow add-on for Gmail allows you to initials Itinerary Planner without leaving your mailbox. Do everything you need; add fillable fields and send signing requests in clicks.
How to initials Itinerary Planner in Gmail:
- Find airSlate SignNow for Gmail in the G Suite Marketplace and click Install.
- Log in to your airSlate SignNow account or create a new one.
- Open up your email with the PDF you need to sign.
- Click Upload to save the document to your airSlate SignNow account.
- Click Open document to open the editor.
- Sign the PDF using My Signature.
- Send a signing request to the other participants with the Send to Sign button.
- Enter their email and press OK.
As a result, the other participants will receive notifications telling them to sign the document. No need to download the PDF file over and over again, just initials Itinerary Planner in clicks. This add-one is suitable for those who like focusing on more important goals instead of burning up time for practically nothing. Improve your daily compulsory labour with the award-winning eSignature application.

How to sign a PDF file on the go with no mobile app
For many products, getting deals done on the go means installing an app on your phone. We’re happy to say at airSlate SignNow we’ve made singing on the go faster and easier by eliminating the need for a mobile app. To eSign, open your browser (any mobile browser) and get direct access to airSlate SignNow and all its powerful eSignature tools. Edit docs, initials Itinerary Planner and more. No installation or additional software required. Close your deal from anywhere.
Take a look at our step-by-step instructions that teach you how to initials Itinerary Planner.
- Open your browser and go to signnow.com.
- Log in or register a new account.
- Upload or open the document you want to edit.
- Add fillable fields for text, signature and date.
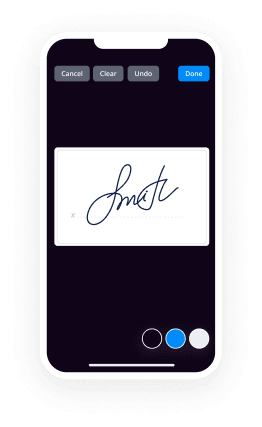
- Draw, type or upload your signature.
- Click Save and Close.
- Click Invite to Sign and enter a recipient’s email if you need others to sign the PDF.
Working on mobile is no different than on a desktop: create a reusable template, initials Itinerary Planner and manage the flow as you would normally. In a couple of clicks, get an enforceable contract that you can download to your device and send to others. Yet, if you really want a software, download the airSlate SignNow mobile app. It’s comfortable, fast and has a great interface. Take advantage of in easy eSignature workflows from your business office, in a taxi or on an airplane.
How to sign a PDF utilizing an iPad
iOS is a very popular operating system packed with native tools. It allows you to sign and edit PDFs using Preview without any additional software. However, as great as Apple’s solution is, it doesn't provide any automation. Enhance your iPhone’s capabilities by taking advantage of the airSlate SignNow app. Utilize your iPhone or iPad to initials Itinerary Planner and more. Introduce eSignature automation to your mobile workflow.
Signing on an iPhone has never been easier:
- Find the airSlate SignNow app in the AppStore and install it.
- Create a new account or log in with your Facebook or Google.
- Click Plus and upload the PDF file you want to sign.
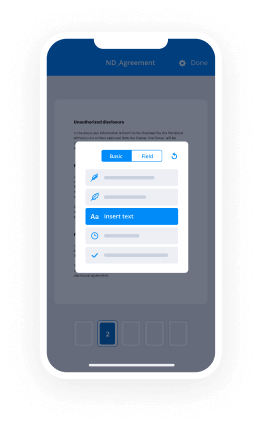
- Tap on the document where you want to insert your signature.
- Explore other features: add fillable fields or initials Itinerary Planner.
- Use the Save button to apply the changes.
- Share your documents via email or a singing link.
Make a professional PDFs right from your airSlate SignNow app. Get the most out of your time and work from anywhere; at home, in the office, on a bus or plane, and even at the beach. Manage an entire record workflow easily: create reusable templates, initials Itinerary Planner and work on documents with business partners. Turn your device right into a potent business instrument for executing contracts.
How to sign a PDF file taking advantage of an Android
For Android users to manage documents from their phone, they have to install additional software. The Play Market is vast and plump with options, so finding a good application isn’t too hard if you have time to browse through hundreds of apps. To save time and prevent frustration, we suggest airSlate SignNow for Android. Store and edit documents, create signing roles, and even initials Itinerary Planner.
The 9 simple steps to optimizing your mobile workflow:
- Open the app.
- Log in using your Facebook or Google accounts or register if you haven’t authorized already.
- Click on + to add a new document using your camera, internal or cloud storages.
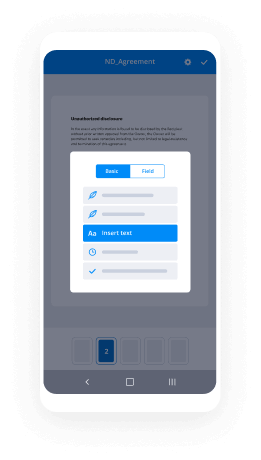
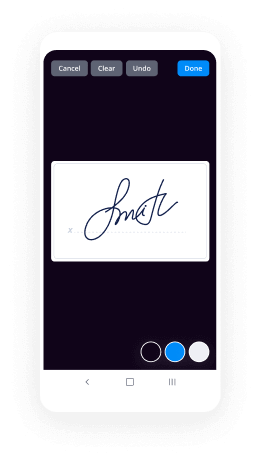
- Tap anywhere on your PDF and insert your eSignature.
- Click OK to confirm and sign.
- Try more editing features; add images, initials Itinerary Planner, create a reusable template, etc.
- Click Save to apply changes once you finish.
- Download the PDF or share it via email.
- Use the Invite to sign function if you want to set & send a signing order to recipients.
Turn the mundane and routine into easy and smooth with the airSlate SignNow app for Android. Sign and send documents for signature from any place you’re connected to the internet. Build professional PDFs and initials Itinerary Planner with a few clicks. Put together a perfect eSignature workflow with only your smartphone and improve your overall productiveness.
Get legally-binding signatures now!
FAQs
-
How do you write an itinerary?
Do provide a brief summary of the city(s)/country and the sights. Do provide links for additional information about the city, country, sights, restaurants, hotels. Do provide as many relevant maps as possible. Do provide names and places written in the local language. -
How do I write a tour itinerary?
Break out the highlights first. Remember that most people scan websites rather than read them \u2014 not everyone wants to consume a lot of text. ... Keep it descriptively simple. ... Strong verbs sell tours. ... Tell them where they'll sleep. ... If you use symbols, make their meaning clear. ... Does my enthusiasm show? -
How do you write a tour description?
Know what makes your experience unique and different from other tours in the same destination. ... Capture your highlights. ... Write a brief summary of the tour. ... Use keywords to boost your SEO value. ... Avoid the use of cliched "atmospheric" adjectives. -
How do you create an itinerary in Word?
Suggested clip How to Make a Trip Itinerary Using Microsoft Publisher : Microsoft ...YouTubeStart of suggested clipEnd of suggested clip How to Make a Trip Itinerary Using Microsoft Publisher : Microsoft ... -
How can I make my itinerary more attractive?
Name your products and use adjectives. Come up with words that explain in short terms what your travel product is all about. ... Add customer reviews and testimonials. ... Add high-quality photo and video content. -
How do you create an itinerary for travel example?
Passenger full names as they are listed on their passports. Bus dates & times. Bus numbers or route names. Frequent traveler program # Amount you paid for tickets ahead of time and any receipts or confirmations you received. -
How do I make a travel itinerary?
Gather travel documents and information. Round up all the information related to your upcoming trip. ... Open a blank document in a text editor or word processor. This is where you are going to write your itinerary. ... Divide your itinerary into sections. ... Drop information into sections. ... Proofread and double-check your work. -
How do I create a travel itinerary map?
Create a Map. Go to google.com/mymaps. ... Title Your Map. In the box in the upper left hand corner, click on Untitled Map. ... Add Points of Interest. ... Add Notes. ... Add Photos. ... Add More Places. ... Customize with Icons. ... Organize with Layers.
What active users are saying — initials itinerary planner


Signature camp trip planning
today I'm going to talk about how I plan our routes our next location and I'm going to show to show you how to use RV trip wizard since that is the tool I use to keep me organized so when I first started planning our trips are deciding where we were gonna stay I was really nervous I was really scared I was gonna screw it up although I don't really know what you can screw up or I was gonna pick some campgrounds that were just really bad but everybody ends up in a crappy campground every now and then so really it's not a big deal if it's not a place that you like or if it's something you don't like about it you can leave whenever you want so today I'm gonna show you step-by-step how I plan our routes and what I do to make sure I keep us on track so the first thing I always do is I choose a final destination and I know that sounds really weird because we're full timers so really we don't have a final destination because there's no end in sight but for travel purposes I usually choose a destination that's usually fixed like an RV rally or something that we can't change the date on so for this example I'm going to use higley flow state park and this state park was where we spent the week with Phil's mom and we actually planned it and made reservations almost six months ahead of time to make sure we could get in because they fill up pretty quick as a lot of state and national parks do we were actually in San Antonio when I booked these reservations which means I had to figure out how I was actually gonna get there so what is my route gonna be from San Antonio to Higley flow State Park which is an upstate New York so once I've chosen my final destination for a specific route then I choose major waypoints along the route and these can be anything from somewhere you've always wanted to see or for family members and for this route I chose to visit my mom in Georgia to visit her son in Virginia and to go ahead and hit up Boston along the way and I also wanted to leave some time after Boston so we can harvest hosts around the New England area so those are my major waypoints so once I have waypoints decided then I start doing some deeper research so I will go to all states or a compendium and I'll do my in this initial search and my initial search is always for my favorite campgrounds and these are going to be Army Corps of engineer campgrounds or military campgrounds and if there are none available in the area where I want to go then I move to my next search in that search is going to be for national state county or city parks I love them because they're usually inexpensive even though they usually don't have full hookups they also usually have a lot of space you're not all on top of each other like a private campground so that's my next filter now if I can't find anything in those then I move on to my last option which is private campgrounds once I find campgrounds that I'm interested in whether their military RV parks Army Corps of engineer parks or state parks it doesn't matter once I find some I'm interested in then I start going to their web sites and I look and see what what kind of hookups they have what's their price I look at their map and pictures and see if it's a campground I'm interested in going to if it is then from there I go to all stays camp Indian my trip wizard and Google and I look at reviews reviews can tell you a lot about a campground that those pictures that they glam up don't tell you now at this point if it's a campground I want a book then I go ahead and book that Waypoint so that's gonna give me four campgrounds along the six-month route where I have defin definitely need to be at and usually it's because we're gonna be visiting people or it's a campground that it's hard to get into now as far as the next step you can do this however you want to do it when we first started out on our full-time adventure I was booking every single campground up to three to six months ahead of time but once we hit the road I was finding that we wanted to stay longer in some places or we talked to a local or even a subscriber that would say hey make sure you hit up this place or you're gonna want to check this out and we would want to stay in places longer even take detours out of certain cities and because I had booked us strictly there was no room for spontaneity so I started canceling reservations which of course cost us money so I learned really quick not to be so strict with the destinations between the waypoints so the way I usually do it for these gaps is I'll first look for harvest so sour boon duckers welcome because with these if you have a subscription you can stay for free with boon duckers welcome you can stay multiple nights but harvest host is usually one night so I always check and see if any of these are available on the route because in the long run they save me money and they keep me under budget and I'll slowly book these as we move along sometimes I book one day in advance and sometimes I'll book a week or so in advance but these are very fluid and and it allows us to be spontaneous and stay longer or shorter in places as we move along now sometimes when you're booking you have specific needs pop up sometimes you need to do work on the generator or RV maintenance or doctor's appointments are even our guest sometimes he needs to be groomed or he has an appointment with the vet and when we were headed up to Phil's mom's house he was a mess he hadn't had a haircut in ages and we really needed to get him to the groomer so when we decided it was time for gizmo to go back to the groomer we were in Cooperstown New York and I knew we had to go further north up to Colton New York I looked at my route and then I did a search for pet smarts in the area and I saw which one would actually be convenient for us to go to and so the next thing I did is I made a mental list of all of our needs we needed to be less than 30 minutes from Petsmart Fergus full hookups because we've been boondocking for about six weeks and we had a lot of chores to do including laundry I also wanted to keep it less than 40 bucks a night to stay on budget and we needed it about 30 minutes or less from a major grocery store so we could stock up on groceries and prepare for our next week of boondocking so after searching the route I did find a campground that met all of these needs so it's called J&J campground you see it on the map there it had everything we needed and it turned out to be a decent Campground so when you're on the road especially full-time things are gonna pop up and it's really easy to incorporate them into your route or are on your way to your next campground so now you know my steps to how I choose destinations and how I find campgrounds next I'm gonna show you how I put this into RV trip wizard because I'm telling you without it I would be completely lost so the first thing you're gonna do is log into your account once you log in whether you're doing the 30 day trial or you've actually purchased the app the first thing it's going to want you to do is settings so the box is gonna come up and you're just gonna go through it this is going to allow you to put your dimensions into the program of course I don't remember what hours are exactly so I'm just gonna guess at what they are so we are 35 feet we weigh about 28,000 pounds and we use diesel and our fuel capacity I think is a hundred gallons and then we get about nine point four I think miles per gallon and yes we are carrying propane and then we're gonna go to our routing preferences now something to know about RV trip wizard is you can get turn-by-turn directions from this as well you can use it as a planner and also as a GPS with all your settings in it so that's why it's asking your routing and you're driving preferences so you can click any of these on here that you choose and that's all I'm gonna put here for now average speed we will say to use routing estimates and what that's gonna do it's going to be based on what the speed limit is for the roads you're on and then if you go further you can see you're driving radius now as you're planning this is a great tool to figure out how far you want to drive but you can put driving radius of say three hours per day or you can put a max distance so just for this purposes we'll say 300 miles is the most I want to drive in a day now you can also go to the next tab which is expenses if you want to put these in you can and I usually leave these off because I don't use our beach trip wizard as a an estimator of my camping but you can include these if you want so next you're going to save your settings once you're in your program you're gonna start a new trip so we're going to name this video example and the date you're gonna choose is the date that your trip is actually gonna start so if you're planning something for six months from now that will be the date you choose we're just gonna say August the first my starting location is going to be flight Creek cider mill and orchard because that is in Cooperstown and that's where this is gonna start now your initial trip settings will be saved here if you want to change something you can or you can keep them the same just by hitting save settings so as you can see on the screen this is gonna start you out in Cooperstown are close to it at Cooperstown which is where we were when this started now our ending place you can go straight up here it's going to be higly flow State Park and we'll click on that and then we are going to show more details there is a lot here you can see for all these campgrounds you can see an overview which will include their website you can also see what features is there whether they have electric or water and then you can read reviews about the campground if you like so but in order to add it to your trip you're gonna hit add trip and then decide how many nights are staying we were there for seven nights and then this button here let you know where it's gonna end up in your trip so this is going to be our last stop so I'm leaving that as is and then I'm adding it to my trip so now you can see as i zoom out here this will show my starting point as well as my ending point now the thing that I don't like about RV trip wizard which I have been assured they will be changing is the fact that you can only put your campgrounds in here consecutively so if there is a gap it doesn't know that there's a gap and for me there was a gap of three days in between Cooperstown and higly flow State Park so what I did was I chose a location somewhere in between as a buffer so let's use Watertown and we're gonna click on that and then I am just going to add it to my my stops as if I was going there and it's three nights and instead of the last stop I'm gonna add it here after Cooperstown and then what I'll do is I'll go in and make changes so all you have to do is highlight your stuff hit the pencil and then you can go in and make whatever changes you want so I'm gonna add this I'm actually gonna call it a blank and I know it's I know that's my placeholder or you could call it will call it placeholder and it's three nights and then we'll save it now one thing you can do to keep you on track is if you go in and edit here you can put what the date is supposed to be so as you're moving things around in between it won't get confusing and you can actually see it's sitting here and then you can also change this if you wanted to what I normally do is I'll put the name and then what it is so this one was a harvest host so I'll add that in so at the end of the year it's really easy for me to go back and see how many times I saved with harvest host or a private campground or State Park are all that stuff it's really easy to look and tell what it is now you can see this holds your route and shows you the direction you're going so once you figure out what your placeholder is gonna be for me it was J&J campground type it in here and that was in Mexico New York then I can add it in and substitute it for my place holder so go to more details and you can see it pops up here we stayed there for three nights and then you're gonna I'm gonna go down and I'm gonna add it in after my Cooperstown visit and then I'm simply gonna come over here and delete my placeholder so that just added it in for me and one thing I like to do is I'd like to go in in my comments and I like to put something about the campground so this one's gonna be full hookups and it was only 35 bucks a night and it was cash-only all right so it's super simple to add that in and of course you can add as many campgrounds as you like and you can just keep adding them so let me show you some of the features with RV trip wizard they have over 17,000 different campgrounds and it's anything from BLM to private campgrounds state parks military all of them are in here for example we're in Pensacola we stayed at Oak Grove campground which is a military RV park so you can see here Oak Grove military phantom I wanted to choose that one I can so it has a ton of info in here so let's just pop around I'll show you some of the features first of all when you first start using if you need help you can take a tour which I just clicked on here and this is going to actually guide you through and it's a demo and show you everything I'm showing you and you can simply go through and it will really help you so let's go back to my open trip another thing you can do is you can hit help if you have any specific questions it'll help you there and if you're at an RV park that's not listed an RV trip wizard you can hit this missing park and add it in and they will look and see about adding it to their database now they are not affiliated with any campground campgrounds don't have to pay to join they just want it to be as thorough as possible so let's go up to your wrench which are your trip tools and you can see it offers all kind of things you can do for this specific trip you can export it to excel you can print it you can adjust your settings which is talking about your RV dimensions and all that you can also send it to your GPS so check this out you can send it to a Garmin I ran McNally so these are your turn by turn GPS directions and that RV trip wizard can set up for you based on your RV which is really cool this is a new feature that they've recently added and it's very cool all right so you can also email your itinerary to friends you can export it to a calendar so here's the turn-by-turn I was I knew about that you can download or this goes to your to your Garmin or your GPS so let's move on and go across the top so if you want to do a brand new trip this is the button you would choose I have several trips in here and you can see here that I have a couple of trips I'm currently using this is my heading east that's a trip that we're currently in now my winner of 19 to 20 that's me starting to plan will be in Florida this winter and I have started booking some places and I have my waypoints in and that's about it and then you can see your archived trips and I really love that they stay in here and they don't delete when you're done that you can go back and look at them all right so this is your search bar where you can search for your campgrounds and then here as you can see I keep turning this off and on these are actually campgrounds in the area so if you just want it to pop up and you want to search here for campgrounds you can do that as well so you can click on one and then go to more details and then learn about this campground and now I use this mainly for reviews I love to read reviews before I decide on which campground I want to use so I'm going to turn this off for now this tab will apply filter so depending on what kind of campground you're looking for you can filter it within your search so when you add your features you can see here you can choose your campground types commercial private and if you vie more city parks County Parks now you can see some of these are kind of faded now these are not actually available in my search area but if you were in other areas it would have all these including BLM County Parks u.s. Forest Service all of these are in their database and you can choose what filters you have say I only want state parks and preserves so I can hit that and that will be the filters for this current RV park search now also in here is points of interest if you want fuel to show up you can hit that and your gas all the gas stations RV parked our RVs can go to will pop up as well as rest areas let's hit some of these so you can see them on the map let's do breast areas and then parks let's see what we want to choose here so we're going to choose commercial and city parks so that's all that will show up on our search when we do our searches so show parks and you can see what's going to show up now simply by going to this top tab here and turning your campgrounds on and off showing your a point of interest that will turn them on and off and as well as your hazards so you can see here the the bridges will show up but if I don't want to see them or I don't need to see them I can simply turn them off once we move over to this bar this is where your name will be because it's your account and if you click down you can find your default settings again this is your general and your RV info for your height and your size next under that is your account so you can edit your account as far as your address your billing information all that here's another Help button in case you're having trouble finding something your tour is also here so it's another place that you can click to take the tour now what's great about this is this button here it says what's new so anytime there's changes within this app you can look here and it's gonna tell you exactly what's new and what's changed so it's always going to keep you up to date as they make improvements in the program and then of course this is where you log out so I'm going to show you an example of one of my old trips let's start with the maiden voyage so this was our very very first trip that we took and you'll see here let me make all the campgrounds go away this was our first route and you can see all of the stops that we made and this is the trip where I've booked everything months in advance so I have this whole trip planned out it started May the 12th when we hit the road through July 3rd is when we got back to San Antonio and I had everything planned out you can see that it saves it and I can go back to it whenever want if there's a campground that I love that I want to go back to I can find it here and that's one of the things I really like about this program so that is it in a nutshell for RV trip wizard if you have any questions for me please drop them in the comments below if you have a program that you're currently using for your trip planning are your routing that you really love please let us know about that as well in the comments I will put links for RV trip wizard below in case you want to check it out like I said they do have a 30-day free trial also why I have you here I'm going to show you something really quick a lot of people have talked about the map that I put up showing all the places we've been and it's a really simple free google map application and I'll show you real quick how to use it all you do is click onto Google Maps you're gonna go to these little menu bars on the side and you're gonna go down to your places and then hit maps now if you don't have any of your own maps you're gonna go down here to create map and when you click on that you can just start typing things in but I as you can see have several Maps already this is the you me and the RV map and these are all the places that we've been to so far and what I really like about this is the overlay so you can see I have 2018 which I can take off or put back on 2019 and then must see these are places that people have told me about subscribers have told us that we can't miss and we have to see and I'll add those on as well but I'll show you really quick we can add something to the map so we're gonna open in my maps which is gonna take us to the actual area where you can make changes and then we'll add something in so let's put we'll just put Chicago Illinois because eventually I will be going there because my daughter's there so we'll just add that in so the next thing you'll do is add to map and then you can change this to read whatever you want and this is another place I'll put if it's a harvest host our Boone Dockers welcome or whatever and then I'll save it and here you can change and have this whatever you want now I have specific codes for me that I like but you can make it whatever you like so for me harvest host is always this color and then I'll choose an icon based on if it's a winery or brewery and we'll just say this one's a brewery and that's all there is to it now you can see it here and it's saved over here so I can preview it and it's gonna show show cago now on there as well and there's my Chicago so I can dismiss we can collapse the legend and here is my new bat so this is really simple it's free anyone can do it and it makes a really cool map to show where you've been I hope this video is helpful for you as you start your RV trip planning it can be a little overwhelming when you first get started but after you've done it for a while you'll realize it's very simple and you're gonna develop your own rhythm and your own way of doing things that's gonna work perfectly for you make sure you hit that like button and make sure you subscribe and I will see you on the road you
Show moreFrequently asked questions
How can I eSign a contract?
How can I easily eSign and email a PDF?
Where should I sign in a PDF?
Get more for initials Itinerary Planner made easy
- Autograph on apple
- Prove electronically signing Website Strategy Audit Proposal Template
- Endorse digi-sign Subcontractor Agreement Template
- Authorize signature service Proprietary Information Agreement
- Anneal signatory Cruise Itinerary
- Justify eSignature Business Purchase Agreement
- Try initial Engineering Proposal Template
- Add Rights Agreement sign
- Send Request for Proposal Template electronically signing
- Fax Missouri Bill of Sale mark
- Seal Website Evaluation eSignature
- Password Manufacturing Contract autograph
- Pass Commercial Photography Contract Template digital sign
- Renew Warranty Deed signed electronically
- Test PC Voucher electronically sign
- Require Advertising Agreement Template countersignature
- Comment patron esign
- Boost vacationer digi-sign
- Compel acceptor signed
- Void Formal Letter Template template initials
- Adopt termination template eSign
- Vouch Invoice Template for Translation template eSignature
- Establish Musical Ticket template digisign
- Clear Salvage Agreement Template template electronic signature
- Complete Event Press Release template signed electronically
- Force Construction Contract Template template countersign
- Permit Discount Voucher template sign
- Customize Photography Session Contract Template template electronically signing