Initials on Safari Made Easy
Award-winning eSignature solution


Get the powerful eSignature features you need from the solution you trust
Choose the pro platform created for professionals
Configure eSignature API with ease
Collaborate better together
Initials on safari, in minutes
Cut the closing time
Keep important data safe
See airSlate SignNow eSignatures in action


airSlate SignNow solutions for better efficiency
Our user reviews speak for themselves


Why choose airSlate SignNow
-
Free 7-day trial. Choose the plan you need and try it risk-free.
-
Honest pricing for full-featured plans. airSlate SignNow offers subscription plans with no overages or hidden fees at renewal.
-
Enterprise-grade security. airSlate SignNow helps you comply with global security standards.

Your step-by-step guide — initials on safari
Leveraging airSlate SignNow’s electronic signature any organization can enhance signature workflows and sign online in real-time, delivering a greater experience to customers and workers. Use initials on safari in a few easy steps. Our mobile apps make working on the go achievable, even while off the internet! eSign documents from anywhere in the world and make trades quicker.
Follow the step-by-step instruction for using initials on safari:
- Sign in to your airSlate SignNow profile.
- Locate your document within your folders or upload a new one.
- Open the record adjust using the Tools menu.
- Drag & drop fillable areas, add text and sign it.
- Include several signers via emails and set up the signing sequence.
- Specify which recipients will get an signed copy.
- Use Advanced Options to limit access to the record add an expiry date.
- Click on Save and Close when completed.
Moreover, there are more extended capabilities accessible for initials on safari. List users to your common work enviroment, browse teams, and track collaboration. Numerous people across the US and Europe recognize that a solution that brings everything together in a single holistic digital location, is exactly what companies need to keep workflows functioning efficiently. The airSlate SignNow REST API enables you to embed eSignatures into your application, internet site, CRM or cloud. Check out airSlate SignNow and enjoy quicker, smoother and overall more effective eSignature workflows!
How it works
airSlate SignNow features that users love


See exceptional results initials on safari made easy
How to fill out and sign a PDF online
Try out the fastest way to initials on safari. Avoid paper-based workflows and manage documents right from airSlate SignNow. Complete and share your forms from the office or seamlessly work on-the-go. No installation or additional software required. All features are available online, just go to signnow.com and create your own eSignature flow.
A brief guide on how to initials on safari in minutes
- Create an airSlate SignNow account (if you haven’t registered yet) or log in using your Google or Facebook.
- Click Upload and select one of your documents.
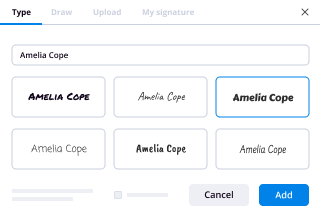
- Use the My Signature tool to create your unique signature.
- Turn the document into a dynamic PDF with fillable fields.
- Fill out your new form and click Done.
Once finished, send an invite to sign to multiple recipients. Get an enforceable contract in minutes using any device. Explore more features for making professional PDFs; add fillable fields initials on safari and collaborate in teams. The eSignature solution supplies a safe process and functions in accordance with SOC 2 Type II Certification. Be sure that your information are protected and that no one can change them.
How to eSign a PDF in Google Chrome
Are you looking for a solution to initials on safari directly from Chrome? The airSlate SignNow extension for Google is here to help. Find a document and right from your browser easily open it in the editor. Add fillable fields for text and signature. Sign the PDF and share it safely according to GDPR, SOC 2 Type II Certification and more.
Using this brief how-to guide below, expand your eSignature workflow into Google and initials on safari:
- Go to the Chrome web store and find the airSlate SignNow extension.
- Click Add to Chrome.
- Log in to your account or register a new one.
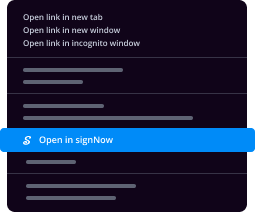
- Upload a document and click Open in airSlate SignNow.
- Modify the document.
- Sign the PDF using the My Signature tool.
- Click Done to save your edits.
- Invite other participants to sign by clicking Invite to Sign and selecting their emails/names.
Create a signature that’s built in to your workflow to initials on safari and get PDFs eSigned in minutes. Say goodbye to the piles of papers sitting on your workplace and start saving time and money for extra important activities. Selecting the airSlate SignNow Google extension is an awesome convenient choice with lots of benefits.

How to eSign an attachment in Gmail
If you’re like most, you’re used to downloading the attachments you get, printing them out and then signing them, right? Well, we have good news for you. Signing documents in your inbox just got a lot easier. The airSlate SignNow add-on for Gmail allows you to initials on safari without leaving your mailbox. Do everything you need; add fillable fields and send signing requests in clicks.
How to initials on safari in Gmail:
- Find airSlate SignNow for Gmail in the G Suite Marketplace and click Install.
- Log in to your airSlate SignNow account or create a new one.
- Open up your email with the PDF you need to sign.
- Click Upload to save the document to your airSlate SignNow account.
- Click Open document to open the editor.
- Sign the PDF using My Signature.
- Send a signing request to the other participants with the Send to Sign button.
- Enter their email and press OK.
As a result, the other participants will receive notifications telling them to sign the document. No need to download the PDF file over and over again, just initials on safari in clicks. This add-one is suitable for those who choose working on more essential things as an alternative to burning time for absolutely nothing. Boost your daily routine with the award-winning eSignature solution.
How to sign a PDF on the go without an app
For many products, getting deals done on the go means installing an app on your phone. We’re happy to say at airSlate SignNow we’ve made singing on the go faster and easier by eliminating the need for a mobile app. To eSign, open your browser (any mobile browser) and get direct access to airSlate SignNow and all its powerful eSignature tools. Edit docs, initials on safari and more. No installation or additional software required. Close your deal from anywhere.
Take a look at our step-by-step instructions that teach you how to initials on safari.
- Open your browser and go to signnow.com.
- Log in or register a new account.
- Upload or open the document you want to edit.
- Add fillable fields for text, signature and date.
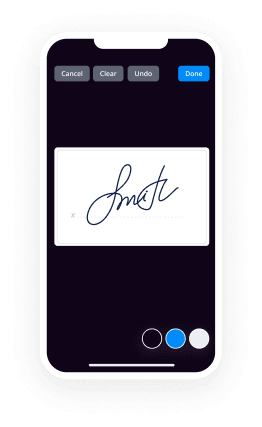
- Draw, type or upload your signature.
- Click Save and Close.
- Click Invite to Sign and enter a recipient’s email if you need others to sign the PDF.
Working on mobile is no different than on a desktop: create a reusable template, initials on safari and manage the flow as you would normally. In a couple of clicks, get an enforceable contract that you can download to your device and send to others. Yet, if you really want an application, download the airSlate SignNow app. It’s secure, fast and has an intuitive interface. Try out seamless eSignature workflows from the office, in a taxi or on a plane.
How to sign a PDF using an iPhone
iOS is a very popular operating system packed with native tools. It allows you to sign and edit PDFs using Preview without any additional software. However, as great as Apple’s solution is, it doesn't provide any automation. Enhance your iPhone’s capabilities by taking advantage of the airSlate SignNow app. Utilize your iPhone or iPad to initials on safari and more. Introduce eSignature automation to your mobile workflow.
Signing on an iPhone has never been easier:
- Find the airSlate SignNow app in the AppStore and install it.
- Create a new account or log in with your Facebook or Google.
- Click Plus and upload the PDF file you want to sign.
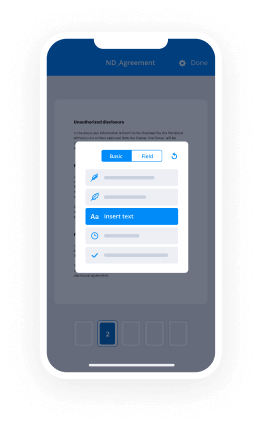
- Tap on the document where you want to insert your signature.
- Explore other features: add fillable fields or initials on safari.
- Use the Save button to apply the changes.
- Share your documents via email or a singing link.
Make a professional PDFs right from your airSlate SignNow app. Get the most out of your time and work from anywhere; at home, in the office, on a bus or plane, and even at the beach. Manage an entire record workflow seamlessly: create reusable templates, initials on safari and work on PDFs with partners. Turn your device right into a highly effective business tool for closing deals.
How to eSign a PDF using an Android
For Android users to manage documents from their phone, they have to install additional software. The Play Market is vast and plump with options, so finding a good application isn’t too hard if you have time to browse through hundreds of apps. To save time and prevent frustration, we suggest airSlate SignNow for Android. Store and edit documents, create signing roles, and even initials on safari.
The 9 simple steps to optimizing your mobile workflow:
- Open the app.
- Log in using your Facebook or Google accounts or register if you haven’t authorized already.
- Click on + to add a new document using your camera, internal or cloud storages.
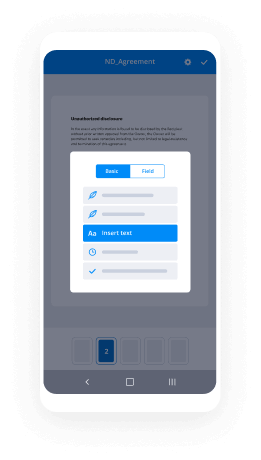
- Tap anywhere on your PDF and insert your eSignature.
- Click OK to confirm and sign.
- Try more editing features; add images, initials on safari, create a reusable template, etc.
- Click Save to apply changes once you finish.
- Download the PDF or share it via email.
- Use the Invite to sign function if you want to set & send a signing order to recipients.
Turn the mundane and routine into easy and smooth with the airSlate SignNow app for Android. Sign and send documents for signature from any place you’re connected to the internet. Create good-looking PDFs and initials on safari with couple of clicks. Created a perfect eSignature workflow using only your smartphone and increase your overall productivity.
Get legally-binding signatures now!
FAQs
-
How do you pin something on safari?
In the Safari app on your Mac, drag the tab with the website you want to pin to the left side of the tab bar. When the tab shrinks and displays the website's icon or initial, drop it in place. You can also choose Window > Pin Tab, or Control-click a tab, then choose Pin Tab. -
What does it mean to pin a tab?
Pinning browser tabs is a feature built in to the Google Chrome browser that makes it easier to manage having multiple pages open within the browser simultaneously. The feature narrows the tab and moves it to the left of the screen. It also changes the ways that links on the tabbed page work. -
How do I pin a tab on my Iphone?
In short, all you need to do is open the website that you want to pin, and then click and drag it to the left until it shrinks into a pinned tab. You can pin multiple sites, and they automatically reload when Safari relaunches. -
How do I pin a website to the taskbar on a Mac?
Go to the page /URL you want to pin in Safari. Click and hold on the URL link in the URL bar, then drag the URL down to the right-side of the Dock on the Mac. Release the click and the website URL has now been added to the Dock as a shortcut. -
How do I pin something to the taskbar on a Mac?
Drag the program, file, or folder icon to the dock and wait for the icons in the dock to move to make room for the new icon. ... Or you could pin an application that's open by right-clicking its icon on the dock and selecting Options > Keep in Dock. -
How do I add quick tabs in Safari?
Open a Safari window and open at least one new tab (Command+T will create a new tab), use the URL https://osxdaily.com for testing purposes if you'd like. Click and hold the tab you'd like to pin and drag it all the way to the left of the tab bar, release to create pin the tab. -
How do I quickly switch tabs in Safari?
Keyboard shortcuts for switching Safari tabs on Mac At the time, two options for faster switching between open tabs were discussed. 1) Hold Shift+\u2318Command and press the right or left arrow key. 2) Control+Tab or Control+Shift+Tab to cycle through your tabs. -
How do I rearrange tabs in Safari IOS 13?
Hold and drag to rearrange your tabs Just go back to the tabs view in Safari by tapping the tab button in the lower-right, tap and hold a tab, then drag it up or down. When you do, the other tabs will scoot out of the way, making room above or below for the tab you're dragging. -
How do I pin a tab in Safari?
In the Safari app on your Mac, drag the tab with the website you want to pin to the left side of the tab bar. When the tab shrinks and displays the website's icon or initial, drop it in place. You can also choose Window > Pin Tab, or Control-click a tab, then choose Pin Tab. -
How do I lock a tab in Safari?
Here is a summary of some of the things that Safari tabs can do in macOS: Right click on a tab to create a pinned tab. Drag a tab to the left to pin a tab and to the right to unpin. -
How do I see tabs in Safari on iPad?
Show or hide tabs bar (iPad only) Tap Settings > Safari, scroll down to the General heading, then switch off the Show Tab Bar setting. Once that's done, you'll need to tap the Tabs button in the top-right corner of the display to change tabs, or pinch the screen to get to the tabs overview screen. -
How do I see tabs in Safari on iPhone?
Open Safari on your iOS device and tap open the \u201cShow All Tabs\u201d button located in the bottom-right corner. Now, swipe up until you see the tabs open on your Mac. Now you can tap any of these and they will open up on your iPhone or iPad. -
How do you add a tab on safari?
Open a new tab In the Safari app on your Mac, click the New Tab button near the top-right corner (or use the Touch Bar). To change the page that opens in new tabs, choose Safari > Preferences, click General, click the \u201cNew tabs open with\u201d pop-up menu, then choose an option. -
How do I change tabs in Safari?
Keyboard shortcuts for switching Safari tabs on Mac At the time, two options for faster switching between open tabs were discussed. 1) Hold Shift+\u2318Command and press the right or left arrow key. 2) Control+Tab or Control+Shift+Tab to cycle through your tabs. -
How do I add frequently visited sites on Safari IPAD?
Add a webpage to your favorites. Open the page, tap the search field, drag down, then tap Add to Favorites. Quickly see your favorite and frequently visited sites.
What active users are saying — initials on safari


Related searches to initials on safari made easy

Initials on safari
how's it going ladies and gentlemen boys and girls in this video we take a look at the top changes and features for mac os bixer you don't want to miss this but first a word from our sponsor cleanmymacs is an all-in-one utility that takes care of your max health it's a real-time mac os cleaner performance monitor malware remover and so much more clean my mac x makes it super easy to identify and remove gigabytes of hidden junk and instantly visualize your disk space with the space lens module clean my mac x keeps your mac running at top speed it helps manage apps keeps the ones that you need up to date and removes unnecessary apps it can also free up ram and run maintenance scripts to keep your mac running fast clean my mac x is available on the mac app store and on macpaw's website it's perfect for mac os big sur and it gets an updated doc icon click the link in the description to download clean my mac x today and prepare your mac for mac os bixer so the first thing we want to focus on for mac os bixer is design and design has changed a lot on this latest version of mac os and one of the key things that has changed in mac os big sur is the menu bar you'll notice that it's now taller and more importantly it's no longer opaque it's now translucent which really allows your desktop to extend from the bottom of the screen all the way to the top of the screen so you can see how you get the blue from the background in the menu bar as well so you see how the mini bar changes on the light background but notice also the icons in the menu bar watch what happens see they change from black to white depending on the background that you've selected for your desktop so it allows those buttons to be easily seen in pull-down menus they're now larger and there's more space between each line making them easier to read it's a subtle change but nonetheless appreciated and to go along with that redesign menu bar you get a new floating dock notice the line or the space between the bottom of the display and the dock and you'll notice that it's also translucent so those two changes allow your desktop wallpaper to really take center stage there and you also have new app icons that have been completely redesigned for a more ios like style i think that's safe to say right with the rounded rectangles and there's more uniformity there as well there's still room though for developers to express themselves by means of app icon design and we're going to show you that apple actually sets the precedent for just that so here in launch pad you see all the app icons with the redesign rounded rex and you can compare that to existing app icons as they are today or as they previously were you can see the stark difference between those designs but if you go into the other folder you'll notice that apple really does show that there is some freedom for expression so everything doesn't have to be a perfect rounded rack you could see some of the elements outside of that rectangle there on those app icons that i just highlighted so more uniformity but still room for expression so some app developers have already taken the initiative and have updated their app icons you can see here macpaul's clean my mac x has that new bixer app icon design and in mac os mixer you get updated finder windows as well for a much cleaner airier look uh you see the translucency there you also see the the lighter design previous versions of mac os were a little heavy on the window chrome you'll also notice in the corners rounded edges which complement the updated dock which also complement the updated app icons it's just a more modern looking design overall and this isn't where it stops we're going to talk about some of the other elements right now and one of those elements are the completely redesigned sheets as you can see here i just invoked the the attachment sheet for the mail app and you can see a lot less chrome a more airy look of course you get the rounded corners no borders and you can also see that the background automatically dims with the sheets centered right squarely in the middle just again for emphasis a much cleaner look in mac os big sur and you also get notice this full height sidebars that extend almost from the top to the bottom and not just in the finder but also other apps like the stocks app also apps like the mail app here as you can see that full height sidebar again lending to that nice and clean look not only does it help you focus on the content that's important to you but it also gives you more room to get work done and this is probably one of my favorite design changes in mac os pixer what do you think in another design change that you'll notice in mac os pixel are updated symbols that bring clarity and consistency across mac os bixer for instance you see the inbox icon well guess what the same icon for inbox appears in the calendar app like it does on the mail app so again consistency between apps when it comes to symbol design let's look at another example in the mail app you see the photo symbol and now in finder you have the same symbol for photos or for pictures in this case in previous mac os versions the pictures glyph was that of a camera instead of the same similar photo symbol that we now see across mac os bixer includes tons of new sound effects let's listen [Music] so all these new sound effects replace the old sound effects in previous versions of mac os and it does take some time to get used to for instance if i press the escape key that's what i get instead of the old invalid sound it's just a little weird takes a little time to get used to for sure i'm not exactly sure if i like the new sounds or not but i think after a while we'll get used to it so let's listen to some of the other sound effects like taking a screenshot so that that is a little different now we're going to trash that screenshot and finally we're going to empty the trash and see how that sounds okay so let's adjust the volume and see how that sounds what do you guys think about that now of all the new sound effects the coolest by far the coolest new sound effect is the return of the startup chime when you boot your mac listen to this [Music] that folks sounds absolutely awesome that's my favorite new sound by far now mac os bixer features tons of new wallpaper to choose from there's new dynamic desktops that change throughout the day and of course you can set it on dynamic mode or set it for light or dark mode just like that we'll keep it on dynamic and as you can see even the preview icons have changed to indicate that these are dynamic wallpapers so it shows each stage of the dynamic wallpaper with those different sections in that icon which is really cool kind of helps us to see what we can expect and there are also new light and dark desktop wallpapers as well of course you have the standard big sur graphic wallpaper which everyone knows by now but there are other new light and dark desktop wallpapers like iridescence so that is new and if you're running the latest version of ios 14.2 some of these other wallpapers will look very familiar to you there are also some standard wallpapers that don't dynamically change or don't have a light or dark mode such as bixer aerial and big sur horizon so now i'm just going to show you every new wallpaper so you have big sur graphic you have big sur graphic dark you have standard big sir big sur dark you have iridescence iridescence dark dome dome dark that looks excellent peak and peak dark again nice contrast dynamic range you have valley and valley dark you have tree [Music] tree dark and you have some vector-like wallpapers the beach the beach dark the cliffs and the cliffs dark and these actually have some dynamic elements as well the desert and the desert dark the lake and the lake dark now you also have some standard wallpapers like big sur ariel which is beautiful big sur coastline wouldn't i like to be there now big sur horizon big sur mountains big sur grasses pixar knight succulents big sur road big sur shore rocks and big sur waters edge out of all those which one is your favorite okay so control center for mac a feature that was exclusive to ios and ipad os up until now arrives on the mac thanks to mac os bixer and you can see the control center icon there in the menu bar you simply click on that and look what you get a full own control center that allows you to control all sorts of things related to your max functionality so you have wi-fi so you can toggle that on or off just by clicking the wi-fi toggle just like that you have bluetooth you can toggle that owner off you have airdrop you can do the same thing there toggle on or off just by clicking the icon just like that but it doesn't just stop there at the high level surface if you click on one of those options for instance wi-fi you can go deep into the wi-fi settings here going beyond the initial toggle and actually being able to connect to additional networks etc if i want to go back to the high level just simply click in the header just like that and you'll notice you can also access the network preferences directly from control center as well so if i want other networks i just simply click there if i want to get to network preferences within system preferences i can do that as well directly from control center so a lot of information crammed into that control center a lot of options crammed in there as well that allows you to quickly manage your mac with just a simple click just like that all right but it doesn't stop of course at wi-fi if we go into bluetooth we can see all of our different bluetooth devices we can access the preferences again click the header and that takes you back to the main control center page same thing goes for airdrop i can enable everyone just with a simple click i can turn it off just by clicking the little switch and i can click the header to get back to the main control center section and as expected do not disturb works the same way you click the do not disturb button but you can go deeper and access additional do not disturb options so i can set it for one hour until this evening until tomorrow always on i can access preferences for notifications and i can click the header to get back out screen mirroring same deal here i can connect to my apple tv in the living room and i also have display settings so of course you can adjust the brightness just by using the slider but if you click i can instantly access all the pro display xdr picture profiles but not just that i can quickly toggle dark mode on or off and wow that looks good alright i can go ahead and toggle true tone i can toggle night shift i can toggle dark mode back off i can connect to my ipad and use it as an external display wirelessly i can access display preferences or sidecar preferences right in there as well and of course sound functionality you can go in here and adjust the sound using the slider you can also click on sound and change your output directly from control center so if i want to choose my mac pro speakers i can do that if i want to choose my sound interface i can do that as well and then of course to get back to the main control center just click the header and we're back like that now finally inside control center right there at the bottom you're going to notice a now playing section and this shows what's currently playing on your mac you can of course play pause you can skip forward if you click on it you get even more controls that allow you to adjust the scrubber you see the name of the artist the name of the track you can go backwards as well and if you click on the album artwork that will open up the source of the media that's playing back in the nail playing window so here of course we have apple music in the music app now while i've been going through this looking in control center you may have been wondering to yourself jeff i see you have a wi-fi section within control center you can go in there and control wi-fi settings but why is there a standalone wi-fi setting in the menu bar as well if i click on that you basically get the exact same thing that you find in control center well the cool thing about control center is that you can actually drag items out of control center and make them stand-alone menu bar items just like mac os has always allowed so for instance if i click and drag sound i can drag that up to the menu bar and there i get a dedicated sound menu so here in sound in control center you can see what you get here but watch what happens when i click the same thing over here the dedicated menu bar item for sound you get the exact same thing so it's just more convenient because because it allows for one click and then you get that exact thing that you're looking for whereas with control center you have to click twice so i'm going to drag out screen mirroring so i have that option just like that and i can drag over airdrop even if i want to which is really cool so i can adjust airdrop settings right there with one click screen mirroring with one click and the cool thing is if you don't want these items you simply hold down the command key drag them out and remove them now if you go to system preferences you're gonna find under dock and menu bar a section dedicated to control center so of course you can adjust your docking minibar settings but underneath you see control center and there you get section by section settings it even shows you the the location of that particular item right there in control center and you have an option right in there to show in menu bar so when you click that you get a dedicated menu bar app icon for that particular setting so there's bluetooth and it gives you the location of that as well airdrop gives you the location of that do not disturb and so on now the cool thing with some of these minibar items is that you can make it show only when active so if i change that to always you can see that the do not disturb icon is in the menu bar now but if i set it to only when active then the icon will disappear from the menu bar and only appear once active so when i click do not disturb look what happens the icon appears in the menu bar that allows me to quickly adjust those settings now there does appear to be a slight little bug here because when i deactivate do not disturb it doesn't go away until i actually click the menu bar so just not a big deal at all but that's really cool that you can display menu bar items only when active if you choose to do so so there are other things here as well screen mirroring of course display sound now playing so you can go through all those and adjust those and set them to your liking but what's really interesting about these preferences are the ability to add other modules for accessibility shortcuts and for fast user switching so for instance in accessibility shortcuts i have the option to show in menu bar and to show in control center as well if i choose to do that so here it is in control center you can see where it's located the same thing goes for fast user switching so now i get a new option a new module in the control center you also have some menu bar only items like the clock spotlight siri and time machine those do not have control center equivalents so let's head back up to the control center i want to show you these new modules for accessibility and for fast user switching so if i click now you see those two new modules below so here is fast user switching just click on that and there if i had a separate user on this mac i would be able to quickly switch between those inaccessibility shortcuts have all these nice accessibility options right at my fingertips right there within control center now there is one last thing i'd like to show you guys and it has to do with the now playing interface so basically if you have multiple audio sources playing back simultaneously when clicking on the now plane interface it will actually show all of the sources and you can click between the two to control each source independently so if i click here for youtube i have the scrubber and transport controls and i can quickly switch between multiple sources really cool feature now unlike control center notification center has been a part of mac os for some time but it has received a pretty major update here in mac os big sur so if we click on the time you're gonna see the notification center it's now unified so all of your notifications and your widgets are in one single column in one single interface so you have all of your notifications sorted by most recent at the top and then below them you have all of your today view widgets but what's really cool about notifications in mac os big sur is that they are automatically by default grouped by app or by message thread so this is going to greatly increase the readability of all those notifications if you're used to getting a ton of them on previous versions of mac os you know how unwieldy that situation became if you ended up having a lot of notifications and of course you have redesigned widgets for things like calendars stock weather reminders etc and third parties can contribute widgets as well now one thing you'll appreciate about notifications is that they are interactive on mac os pixer so watch when i receive this notification here let's go ahead and zoom in on that if i click the little down arrow there's our incoming message notification and of course i can reply right there from that interactive notification really cool okay so let's focus again on widgets because this gets interesting here in mac os big sur if you go down and click where it says edit widgets you get the edit widget library and it basically shows you all the available widgets which include any third party apps that may have widgets so in the edit interface you can click the minus sign to quickly remove a widget you'll have a list of suggested options here so you can just scroll through this list find one that you like and simply click the plus sign just like this to add it to your widget library and you can of course rearrange based on your preferences you can also just click and drag and add those to your list of widgets as well now like ios 14 there are various sizes of widgets that you can choose from here for the weather app i have a small medium and large option so i'm going to add that large option which gives you more data more weather data which can be very useful so i'm going to remove the other weather widgets that i have available here let's rearrange some things get rid of that one and let's add our podcast just drag it up like that very cool now you can also use the search bar at the top to search through your available widgets and find the specific one that you're looking for in this case notes all right or you can just go through each category and you'll have one or more widgets listed under each app so that can be fairly handy for quickly finding exactly what you're looking for now like ios 14 you can also edit widgets so if you just click on one while in the edit view you can edit location data for the weather for instance so you can choose a different location and this will this will differ on that on a widget-by-widget basis of course so not everything's gonna have weather obviously or a location but of course the clock will have a location that you can choose from you can actually sort this list of locations for your world clock just like that so obviously the ability to edit a widget will depend on the type of widget it is and what type of data it's using or pulling in to display to you so on or up next i can change that from mirroring the calendar to choosing a specific calendar if i want to do that but the cool thing is it's up to you how you want to configure this thing so there's our notification center with our updated today widgets what do you guys think let me know down below in the comment section safari and mac os bixer receives a ton of new features starting with the customizable start page the start page at the top features all of your favorites below that you find a privacy report you have siri suggestions which can originate from things like the messages app when you receive links and of course there's also the reading list that will be displayed on the new start page and then finally you have all of your icloud tabs and you can actually access those from across all of your icloud enabled devices so the cool thing though about the new start page is that all these things i just talked about can be customized just click the settings button in the bottom right hand corner and there you go look at all these various sections you can uncheck or recheck any of these sections starting with favorites frequently visited privacy report and so on so let's go ahead and uncheck something let me just show you how it works so i just unchecked favorites i'm going to add it back there we go frequently visited isn't currently displayed but i'm going to uncheck it and recheck it and you'll see the little placeholder come up for frequently visited and the cool thing is that you can do this for every single section so in theory you could uncheck everything and just have a blank start page if you wanted to do so but that would be kind of boring i would at least recommend keeping some of the sections enabled now one thing that you probably already seen there is the background image option and that is actually probably one of my favorite new features in safari as far as customizing the start page is concerned so let's go ahead and customize the background image now you can see some of the canned options available you can just select any of those and it will change automatically for you and just go through i like these right here i think these look pretty cool however the really neat thing is the ability to go in and customize add your own image just like you would a wallpaper on the desktop well you can do the same thing here in safari so i'm going to choose this bitser wallpaper and there we go i think that looks awesome what do you guys think let me know down below in the comment section your thoughts on the customizable start page for safari but i do actually think that that image is a little bit over the top for a start page i'm going to choose another one how about that one right here i think this one looks great and i'm going to stick with this as my customizable background image in safari now apple says safari loads frequently visited sites 50 faster on average than chrome so they're really touting the performance of safari but in my opinion i i've always thought that safari was much faster than others like chrome for instance i will say that navigating from website to website page to page is very brisk content loads in just a few seconds if not quicker even for information dense websites what do you guys think what is your go-to browser do you use chrome do you use safari which one do you think is faster let me know down below in the comments section now having the ability to add favicons to your tabs in safari is not new for mac os big sur but what is new is that the show website icons in tabs is enabled by default where it was enabled by default in mac os catalina so by default you're going to see images or favicons right there for each tab and that makes it easier to identify without having to read what the website is you can just look at the icon and say oh that's drone dj or oh that space explorer oh that's nine to five max logo this makes it easier on the user when when you have a lot of tabs open but you'll also notice additional benefits to favicons in tabs now in safari you can see more tabs at once without needing to scroll in the tab list so i'm going to open up a ton of tabs here as you can see and see how those favicons make it easy to identify those websites even though i can't see what they are and this is important because as you can see now you can view so many more tabs at the same time without needing to scroll through the tab interface so we're going to open up even more let's go ahead and open up several more here and you can see i can still view all those tabs with those favicons helping me out greatly so i can see that electrics open now it's starting to scroll because i have so many open but you can see those favicons still help out a bunch making it super easy to identify my open websites and apple makes this even better because now we have yes finally website previews when you hover over a tab you get a nice preview of that website and what it contains so now before i even click on a tab i know what to expect i know to expect 10 reasons to buy the new dji mini 2 drone when i click drone dj super simple super easy and here's another favorite feature of mine the ability to translate languages on the fly right from within safari without needing any sort of third-party extensions once you enable translation on a website all that websites pages will be translated i'm going to go back to the root here and you can see all the translation occurring just like that so it's a bit limited at the moment but you can translate into english spanish chinese french german russian or brazilian portuguese it's only available in the us and canada for the moment so keep that in mind apple says you'll be able to stream video for up to three hours longer or browse the web for up to one hour longer on a mac notebook when compared with chrome or firefox so you definitely want to use safari if you care about battery life and while all the features i've talked about up to this point are important this is probably my favorite finally we have 4k video playback for youtube in safari for mac os pixar it doesn't just stop there you also have 8k support you also have hdr support as well so with apple touting how much better safari is performance wise and battery life wise now we have no reason to go back to chrome because we have native 4k and 8k support for youtube now if you've lamented over the inferiority of the messages app when compared to the iphone version you're going to be extremely happy with the messages app in mac os big sur so right off the bat yes you can pin your favorite conversations right there at the top just like you can do on the iphone with ios 14. so here i have a couple of conversations pinned at the top i can unpin either by right clicking and selecting unpin or just drag out and with pinned messages you get now typing indicators you get message notifications just like that you get tap back indicators so it's pretty full featured i'm going to drag up a group conversation and watch what happens as individuals in that conversation start talking their bubbles get bigger to indicate that they are talking and if you have a whole bunch of messages or a whole bunch of participants that can really help you see who's actually doing the talking you can pin up to nine different conversations and all these pins are synced across your ios devices in your mac and just like on ios you can share your name and photo so we can set up share your name and photo with friends just go through and you can set your favorite photo or your favorite memoji or you can even just use just use your initials if you want to do that now if you click customize there's going to be a whole lot of things you can do so we can go in here we can add our own photo we can add our own emoji character so i can do that or i can go through and add an existing memoji create my own memoji there's just tons of options you can do in here and you can see all the animoji characters so i can add any of those if i want to do that so i'm going to choose this guy right here let's find one there we go all right and of course you can change the color if you want to lots of customization options there now there's also group photos so if i go into the details for a group conversation i can click where it says change group name and photo so i can give it a name and i'm just going to call this pizza pals and what's cool is that you get those suggested images right off the bat so you get a picture of a pizza and i think that's actually probably a good idea so of course we can go in and select an image if we wanted to do that i don't have any images in the photos app right now i can choose an emoji i can set up initials if i want to do that so i can type in pp for pizza pals or i can just do what i should have done from the beginning and select the picture of the pizza or the emoji of the pizza and then click done and we're done folks that is that's perfect and just like in ios 14 you have inline reply so if i right click on a message and select reply i can submit that reply in line which helps lend context to the conversation so you know what i was actually replying to so i in this case i wasn't replying to you i know i was replying to wow and you can see there if i click one reply you can see how everything else fades out in the the actual inline conversation comes into view i'm going to receive a reply here you can see that reply is to the inline conversation and it's linked via the little thread there so that makes it much easier especially if you have a group conversation uh to just kind of keep context as to what's actually being replied to definitely a nice feature to have here in mac os big sur and can you believe that after all this time we haven't had message effects on the mac we haven't it's kind of weird to think about but if i go to the little application icon and choose message effects look what we have here we have what we've had on the iphone for years you have the love effect balloons invisible ink confetti you have the slam effect lasers who doesn't love lasers you have the loud effect celebration echo spotlight fireworks and finally gentle but i don't think there's a question as to which one i should demo here of course it's going to be lasers of course right i mean the only correct answer is lasers but seriously i mean finally we finally have this feature on mac os and to go along with that we finally have the ability to add animated gifs from a gif repository we can go in here and search for our favorite gif and yes i said gif with a hard g by the way i don't want to hear that other nonsense on this channel alrighty alright so you can see there is an awesome gif animation and we can just send it like that and then of course we also have memoji stickers so we just click that and click memoji stickers and now we have all of our stickers here for all of our custom made memoji of course all your animoji as well so i can just send one of these just click and submit that sticker and i can also just like on ios drag a sticker to a message and pin it to that particular message just like that and i can choose another character if i want to do so just drag up pin it to that one and you also have the memoji editor so you can go in just like you can on your iphone and edit all the various options to create your own character and there's just tons of options and that's this is what i came up with that's the best i could do all right so there you go folks memoji editor and you have an enhanced photo picker so this gives you integration with the photos app and will allow you to search all your photos people and places and just pull those right into the messages app makes it super easy you don't have to go and search in photos and drag out of photos it's all integrated right here in mac os big sur just like the messages app the maps app gets a just a complete makeover with tons of new features and this includes the new guides feature which helps you to find places to eat places to shop you can explore cities around the world and guides are created as you can see by various brands and these curated guides will help you to find things that you're specifically interested in and it will map out all the locations within the guide right there on the map with details about each location so for instance here the washington post has a guide a local guide to san francisco so this will help you to find perhaps places to eat maybe parks to visit etc it's a really cool new feature in the maps app and don't forget you can create your own guides as well so if you have a friend visiting your city create a guide and then you can share that guide with that person so all you need to do is click the little plus sign own a particular location add it to your guide just like that and now you can just go in share that guide and all the locations within that guide are going to be presented to the person you're sharing with and they're going to really appreciate it because that's going to help them the visitor find cool things to do around your city that perhaps they wouldn't have known before so that is awesome and this is probably the best new feature in the maps app it's not street view it's called look around but it is actually in some instances better than street view because of how smooth it is how incredibly detailed it is how high resolution it is you can just navigate around the city just by clicking your mouse and see all sorts of stores locations around the city and the really nice thing about this is that you can basically put it in like a little small window view and navigate around the map just like this and you'll see the look around view change accordingly just like that you can also use look around just drag around like that and you'll see oh i'm on oak street right now very easy to see that as you navigate oak street so this really is helpful if you're trying to find out what a particular building looks like how about the san francisco conservatory of music well you can do just that look up look down look left look right see exactly where you are gain context of your location really awesome new feature and if you're a cyclist you're going to love the maps app in mac os big sur because you have cycling directions and these directions take into account things like grade of the heels that you're going on whether you have to take stairs and things like that so here you can see it requires side roads it may include stairs these directions and it tells you how high up hills you have to go it tells in this case moderate heals and it will take about eight minutes by bike so if you prefer to ride on two wheels instead of four this will help you each step of the way and you can also go into the preferences and set your preferred transport type so if you know for instance you definitely want to use cycling we can set that right in the preferences and then you can do things like hey i'd like to avoid hills if possible or avoid busy roads there's also indoor map support so we're going to visit lax terminal 4 and see what's inside we need to find some good eats before we board the plane so let's see what we find here in terminal 4 in lax so just zoom in a little bit and uh oh there's dunkin donuts so i think we're in business folks and the cool thing is that with these indoor maps you can go up different levels if there's multiple levels as is the case here a great way to help you orient yourself indoors and if you live in locations with congestion zones you will actually see that when navigating for instance here in britain you're going to see congestion zones which charge a toll when navigating through specific areas of the city i think china does so as well the photos app gets huge editing improvements including expanded video editing capabilities so this is a video and in mac os it goes way beyond just trimming that video now you can adjust the crop you can actually rotate that video you can do so much more to edit videos in mac os bixer than you could before you can even go in after you finish rotating you can flip the video you can change the aspect ratio if you want to do that so i can change 8 by 10 5x7 4x3 let's go original though you can flip around just like that that is really cool and all this occurs non-destructively so we can go into filters and you can see all the various filters you can apply to video but not just that you can also adjust as you can see the intensity of each filter so if you don't want to go all out 100 you can just drop it down a little bit so that really allows you to customize the look of your videos right here within the photos app but it doesn't stop right there there are other things you can adjust as well we're going to go over to adjust and look at this look at the just the insane amount of parameters that you can adjust for things like exposure color black and white so you can use this little slider here to adjust the intensity but notice if you click options look how many granular settings you get access to so i can change the brightness independently of the black point if i wanted to and the same thing goes for color so i can adjust vibrance separately from cast and saturation so as you can see you can dial in carefully the exact look that you're going for using just the photos app this isn't photoshop this isn't final cut pro but look at the amount of options you get within the stock photos app for editing video that's crazy to me so this is definitely one of my favorite features of course you get similar similar options on the iphone as well but i just i'm always impressed by how you can just go in here and really like you can even put in s-curves and really just get the exact look you're going for this is probably one of the most impressive features in mac os big sur just like it was impressive on the iphone and on the ipad it's just as impressive here on the mac and i could go on for an hour just going through all these settings and talking about them but you get the point if you would like a dedicated video walkthrough of the photos app let me know down below in the comment section and maybe we can accommodate that for you and yes video editing got a lot of love but you also have some new photo editing features for instance in the color section under the adjust tab you have a new vibrance option so you can adjust vibrance independently of saturation and cast as you can see there and that looks gorgeous and you'll also notice that you have the ability to adjust the intensity of filters just like you can on photos or own videos so i can adjust the intensity of each of those filters and along with that you can adjust the intensity of portrait lighting effects so here's a photo with portrait lighting and you can see i can adjust the intensity of the light i can also change the depth of field right here within the photos app and of course i can go in and change the type of portrait lighting effect and then again go back and adjust the depth of field and the intensity of the effect you'll also find an improved retouch tool which uses advanced ml to help remove blemishes dust things of that nature and make your photos look nice and clean super simple and super easy to do that and just like ipad os 14 and ios 14 you get much more fluid navigation as you zoom in and zoom out of the photos and videos so as you're viewing all of your media across media types places albums expect silky smooth performance and if you select a photo or video and tap the info button you can go in and add captions which will sync across all of your devices to add context to your photos and videos right from the info pane and again this syncs with icloud photos and it should come as no surprise that privacy is a big focus for apple in mac os pixel for instance you can now view a privacy report for every site that you visit so you'll see this little button right to the left of the address bar you just click on that and it tells you how many trackers will prevent it from profiling you you can view each tracker on the web pages that you visit so here's espn 25 trackers and you could see a full list of those trackers and you see polygon black magic only shows four trackers but the really nice thing is that if you click the info button you get the full privacy report and this shows you how many trackers were prevented from profiling you the websites that contacted trackers and then you can see on a website by website basis all the trackers associated with those websites so this basically is just a culmination of all those privacy reports you can also break it down by tracker so if you want to see the type of trackers being used most often of course google analytics is so popular it's going to be on all four sites but then you get to some of the more obscure trackers those may not be on all the sites for instance ad form so this is a new privacy centric tool that helps you be more aware of what's going on when you visit various websites and the really neat thing is that the privacy report can be included in the start page so you can see in the last seven days safari has prevented so many trackers and then i can get right to that privacy report right from my start page and view that there and another privacy focus feature found in safari is the ability to detect passwords compromised by known data leaks so this is along with the security recommendations available that apple provides another nice new feature is airpods auto device switching so if you're running ios 14 or you're running ipad os 14 your airpods can automatically switch between those devices and your mac running mac os mixer so you can see connect to this mac automatically so for instance when you're finished playing music on your mac and you move to your iphone it will do so automatically and vice versa and just like the ios 14 version voice memos get several improvements in mac os bixer starting with the ability to create folders into place recordings in those folders so you can see there jeff's voiceovers and there's the new folder button down below and i can create a new folder and this allows me to better organize my voice memos and remember this is all cloud sync so these folders that you create on mac will appear on ios and vice versa now there are also automatic folders or smart folders that will automatically be created for instance favorites will automatically be created once you tag a recording as a favorite and the same thing will happen for all of your apple watch recordings that originate on the apple watch they too will get their own folder and you can also automatically enhance the quality of your voice memos by going into the edit mode and you'll see a new enhance button you just click on that and that will help to enhance the quality of the voice memo recording and reminders receive several upgrades as well you can now assign a reminder to one of your shared list contacts so that can come in handy if you want to help keep everyone on task and then there's the ability to edit your list photos using emoji characters so i can go in and assign an emoji to that list photo that certainly beats a boring glyph you can also manually rearrange smart lists just by clicking and dragging like this so you can organize the smart list based on your preference so if you don't want today to be first you can move that out of the way and we'll just drag it down here there we go and i'll i'll move assigned all the way to the top like that you can also utilize handy keyboard shortcuts for instance to assign a reminder to today using command t super handy and the mac os bixer version of reminders allows you to search in more places including in your notes so i'm going to put in 4k youtube though all right so let's go ahead and search for that note we'll just search for youtube and look at the results you'll see several results there but you also see the note for that particular reminder with the word youtube in there and there are a couple of notes changes for instance when you do a search you now get top hits right there so those will appear at the top of your search and you also get improved quick formatting with bold italicize underline and strikethrough along with all of your heading functionality the home app gets some pretty awesome upgrades in mac os big sur including the overall status of your home this allows you to see accessories that may require your attention or allow you to quickly control various accessories in your home there's also support for facial recognition for video cameras and for doorbells so this can identify people you've tagged in the photos app to instantly recognize those individuals now with home kit secure video you can also define activity zones within your camera's view and this will make it so that you only capture video or receive notifications when motion is within these predefined areas so this can cut down significantly on the false positives that you receive via the home app and also podcasts and music get updates you get a new listen now section in the podcast app and you get a listen now section in the music app and both of these help you to find new content to listen to based on your listening profile in the music app though you also get an enhanced search now if you just click in the search bar you get all these categories that are presented to you so you can quickly find music based on category for instance jazz in this case and that's really neat but search in general in the music app for mac os pixel has been enhanced for instance if i type in curtis mayfield i get much more robust search results including album artwork as well so ladies and gentlemen that has been a look at the top changes and features for mac os big sur if you appreciated this video leave me a thumbs up and let me know what you think down below in the comments this is jeff with nine to five mac special thanks to mac paul creator of clean my mac x for sponsoring 905 mac clean my mac x is the perfect tool to keep your mac running in tip top shape and to get it prepared for mac os big sur along with real-time malware monitoring you can use the handy space lens tool to instantly visualize and clean up your storage cleanmymac x is available on the mac app store and on macpaw's website click the link in the description to download cleanmymacx today to get your mac ready for mac os bixer you
Show moreFrequently asked questions
How do I eSign a document before sending it?
What is the difference between an in-person signature and an electronic signature?
What is the difference between a digital signature and an electronic signature?
Get more for initials on safari made easy
- Print signature service Joinder Agreement
- Prove email signature Previous Employment Verification Letter
- Endorse eSign Billing Invoice
- Authorize digital sign Tolling Agreement
- Anneal signatory demand
- Empower electronically signed Car Wash and Detail
- Try digisign Baby Shower Invitation
- Add Donation Agreement autograph
- Send Sponsorship Proposal Template digital sign
- Fax Volunteer Certificate initial
- Seal Pet Adoption Letter electronically sign
- Password Consulting Agreement countersignature
- Pass Interior Design Contract Template digital signature
- Renew Pet Care Agreement signed
- Test Client Progress Report digi-sign
- Require Accounting Proposal Template esign
- Send beholder signatory
- Accredit onlooker email signature
- Order petitioner signature
- Void Construction Quote Template template electronic signature
- Adopt mnda template signed electronically
- Vouch Virginia Lease Agreement template electronically sign
- Establish Software Proposal template electronically signing
- Clear Letter of Intent Template template mark
- Complete Personal Medical History template signed
- Force Arbitration Agreement Template template eSignature
- Permit Vehicle Service Order template autograph
- Customize Bartending Services Contract Template template digital sign