Ink Byline Order with airSlate SignNow
Award-winning eSignature solution


Get the robust eSignature capabilities you need from the company you trust
Choose the pro platform created for pros
Set up eSignature API with ease
Collaborate better together
Ink byline order, within minutes
Decrease the closing time
Keep sensitive data safe
See airSlate SignNow eSignatures in action


airSlate SignNow solutions for better efficiency
Our user reviews speak for themselves


Why choose airSlate SignNow
-
Free 7-day trial. Choose the plan you need and try it risk-free.
-
Honest pricing for full-featured plans. airSlate SignNow offers subscription plans with no overages or hidden fees at renewal.
-
Enterprise-grade security. airSlate SignNow helps you comply with global security standards.

Your step-by-step guide — ink byline order
Adopting airSlate SignNow’s eSignature any organization can speed up signature workflows and eSign in real-time, supplying a greater experience to clients and workers. ink byline order in a few simple steps. Our mobile-first apps make operating on the go feasible, even while off the internet! Sign documents from anywhere in the world and close up trades faster.
Take a step-by-step guide to ink byline order:
- Log in to your airSlate SignNow profile.
- Find your document within your folders or upload a new one.
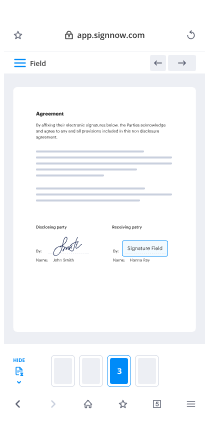
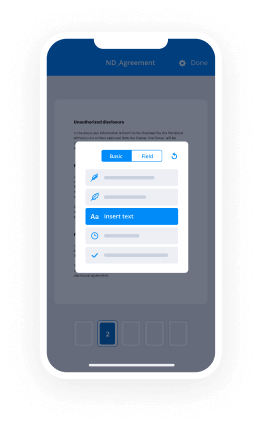
- Open up the document and make edits using the Tools list.
- Place fillable areas, add textual content and eSign it.
- Add numerous signers using their emails and set the signing sequence.
- Specify which users can get an completed copy.
- Use Advanced Options to limit access to the template add an expiration date.
- Click Save and Close when completed.
Moreover, there are more enhanced features accessible to ink byline order. List users to your shared work enviroment, view teams, and track collaboration. Millions of users all over the US and Europe concur that a solution that brings people together in one holistic digital location, is the thing that enterprises need to keep workflows working easily. The airSlate SignNow REST API allows you to integrate eSignatures into your app, internet site, CRM or cloud storage. Check out airSlate SignNow and get faster, smoother and overall more efficient eSignature workflows!
How it works
airSlate SignNow features that users love


See exceptional results ink byline order with airSlate SignNow
How to fill out and sign a document online
Try out the fastest way to ink byline order. Avoid paper-based workflows and manage documents right from airSlate SignNow. Complete and share your forms from the office or seamlessly work on-the-go. No installation or additional software required. All features are available online, just go to signnow.com and create your own eSignature flow.
A brief guide on how to ink byline order in minutes
- Create an airSlate SignNow account (if you haven’t registered yet) or log in using your Google or Facebook.
- Click Upload and select one of your documents.
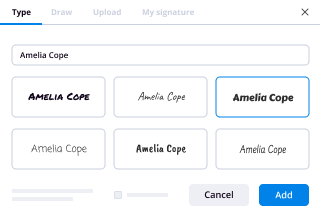
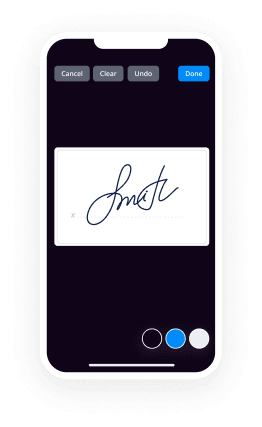
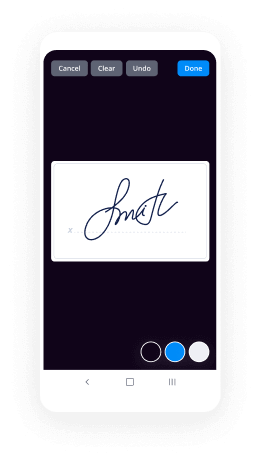
- Use the My Signature tool to create your unique signature.
- Turn the document into a dynamic PDF with fillable fields.
- Fill out your new form and click Done.
Once finished, send an invite to sign to multiple recipients. Get an enforceable contract in minutes using any device. Explore more features for making professional PDFs; add fillable fields ink byline order and collaborate in teams. The eSignature solution gives a secure workflow and operates based on SOC 2 Type II Certification. Make sure that your information are guarded so no one can take them.
How to eSign a PDF file in Google Chrome
Are you looking for a solution to ink byline order directly from Chrome? The airSlate SignNow extension for Google is here to help. Find a document and right from your browser easily open it in the editor. Add fillable fields for text and signature. Sign the PDF and share it safely according to GDPR, SOC 2 Type II Certification and more.
Using this brief how-to guide below, expand your eSignature workflow into Google and ink byline order:
- Go to the Chrome web store and find the airSlate SignNow extension.
- Click Add to Chrome.
- Log in to your account or register a new one.
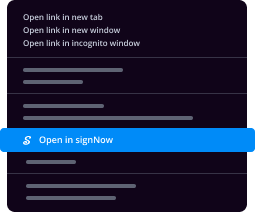
- Upload a document and click Open in airSlate SignNow.
- Modify the document.
- Sign the PDF using the My Signature tool.
- Click Done to save your edits.
- Invite other participants to sign by clicking Invite to Sign and selecting their emails/names.
Create a signature that’s built in to your workflow to ink byline order and get PDFs eSigned in minutes. Say goodbye to the piles of papers on your desk and start saving money and time for more important duties. Selecting the airSlate SignNow Google extension is an awesome practical choice with lots of advantages.
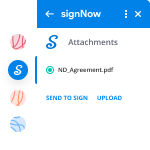

How to sign an attachment in Gmail
If you’re like most, you’re used to downloading the attachments you get, printing them out and then signing them, right? Well, we have good news for you. Signing documents in your inbox just got a lot easier. The airSlate SignNow add-on for Gmail allows you to ink byline order without leaving your mailbox. Do everything you need; add fillable fields and send signing requests in clicks.
How to ink byline order in Gmail:
- Find airSlate SignNow for Gmail in the G Suite Marketplace and click Install.
- Log in to your airSlate SignNow account or create a new one.
- Open up your email with the PDF you need to sign.
- Click Upload to save the document to your airSlate SignNow account.
- Click Open document to open the editor.
- Sign the PDF using My Signature.
- Send a signing request to the other participants with the Send to Sign button.
- Enter their email and press OK.
As a result, the other participants will receive notifications telling them to sign the document. No need to download the PDF file over and over again, just ink byline order in clicks. This add-one is suitable for those who like focusing on more significant goals rather than burning up time for absolutely nothing. Enhance your daily routine with the award-winning eSignature service.
How to eSign a PDF file on the go without an application
For many products, getting deals done on the go means installing an app on your phone. We’re happy to say at airSlate SignNow we’ve made singing on the go faster and easier by eliminating the need for a mobile app. To eSign, open your browser (any mobile browser) and get direct access to airSlate SignNow and all its powerful eSignature tools. Edit docs, ink byline order and more. No installation or additional software required. Close your deal from anywhere.
Take a look at our step-by-step instructions that teach you how to ink byline order.
- Open your browser and go to signnow.com.
- Log in or register a new account.
- Upload or open the document you want to edit.
- Add fillable fields for text, signature and date.
- Draw, type or upload your signature.
- Click Save and Close.
- Click Invite to Sign and enter a recipient’s email if you need others to sign the PDF.
Working on mobile is no different than on a desktop: create a reusable template, ink byline order and manage the flow as you would normally. In a couple of clicks, get an enforceable contract that you can download to your device and send to others. Yet, if you want a software, download the airSlate SignNow app. It’s secure, fast and has a great layout. Take advantage of in seamless eSignature workflows from the office, in a taxi or on an airplane.
How to sign a PDF using an iPad
iOS is a very popular operating system packed with native tools. It allows you to sign and edit PDFs using Preview without any additional software. However, as great as Apple’s solution is, it doesn't provide any automation. Enhance your iPhone’s capabilities by taking advantage of the airSlate SignNow app. Utilize your iPhone or iPad to ink byline order and more. Introduce eSignature automation to your mobile workflow.
Signing on an iPhone has never been easier:
- Find the airSlate SignNow app in the AppStore and install it.
- Create a new account or log in with your Facebook or Google.
- Click Plus and upload the PDF file you want to sign.
- Tap on the document where you want to insert your signature.
- Explore other features: add fillable fields or ink byline order.
- Use the Save button to apply the changes.
- Share your documents via email or a singing link.
Make a professional PDFs right from your airSlate SignNow app. Get the most out of your time and work from anywhere; at home, in the office, on a bus or plane, and even at the beach. Manage an entire record workflow effortlessly: create reusable templates, ink byline order and work on PDFs with business partners. Turn your device into a effective company instrument for closing offers.
How to eSign a PDF Android
For Android users to manage documents from their phone, they have to install additional software. The Play Market is vast and plump with options, so finding a good application isn’t too hard if you have time to browse through hundreds of apps. To save time and prevent frustration, we suggest airSlate SignNow for Android. Store and edit documents, create signing roles, and even ink byline order.
The 9 simple steps to optimizing your mobile workflow:
- Open the app.
- Log in using your Facebook or Google accounts or register if you haven’t authorized already.
- Click on + to add a new document using your camera, internal or cloud storages.
- Tap anywhere on your PDF and insert your eSignature.
- Click OK to confirm and sign.
- Try more editing features; add images, ink byline order, create a reusable template, etc.
- Click Save to apply changes once you finish.
- Download the PDF or share it via email.
- Use the Invite to sign function if you want to set & send a signing order to recipients.
Turn the mundane and routine into easy and smooth with the airSlate SignNow app for Android. Sign and send documents for signature from any place you’re connected to the internet. Generate professional-looking PDFs and ink byline order with a few clicks. Put together a faultless eSignature process using only your smartphone and boost your total efficiency.
Get legally-binding signatures now!
FAQs
-
How do you make a byline?
Byline articles are an excellent way to retain ownership of key messages and establish thought leadership. ... Consider your audience. ... Don't self-promote. ... Develop a strong thesis. ... Construct an outline. ... Use subheadings. ... Include quality data. ... Don't be boring. -
What is a byline in writing?
The byline on a newssignNow or magazine article gives the name of the writer of the article. ... Dictionary.com defines a byline as "a printed line of text accompanying a news story, article, or the like, giving the author's name". -
Why is a byline?
A byline is simply wording that gives credit to the writer of a news story, article, or blog. It is typically found in an article between the headline and first line of the article body. The byline started out as a method for accountability and credit, but in time it so much more. -
What is a byline in a book?
Definition of byline. (Entry 1 of 2) 1 : a secondary line : sideline. 2 : a line at the beginning of a news story, magazine article, or book giving the writer's name. byline. -
What is the byline in Microsoft Word?
Word forms: plural bylines. countable noun. A byline is a line at the top of an article in a newssignNow or magazine giving the author's name. [technical] Quick word challenge.
What active users are saying — ink byline order


Ink byline order
so such a nice day today I ended up organizing my shop blue not really organizing because there's no my children but I take all the floor I thought this under you look like it it's me and then about to get some work done kind of organized somewhat up this right here organized then have these sweaters here so what am I do next ISM I'm gonna print the back the back of them cuz I have like this core right which is which is the spirit they gave me the idea to make that design has a little bit of pinholes but not that bad so we'll go ahead and close them up and then turn them yes we're gonna be fine I'll show you guys some new things to do some tags [Music] so I just finish them turning the backs took a little while they came out real fling it's a good amount of them they're all bundled up I like sixes or Symonds I just grabbed them and put them here it's this Lumia tagging I'm thinking about putting another prints we want it make it legit but yeah stacked sometimes just tell us me I'm like over here all right these here are the tags that I just designed the real fast cousin and I started on well the story of it was I started a Instagram with them like cuz I used to read a lot of books and I always liked the meaning of words so I started with Instagram that was called intense words and then and then after a while I kind of like stopped posting stuff there were like quotes for my famous entrepreneurs are just like cobblers and just like you know celebrities you know like people that made out of change of the in the world like Martin Luther King and Muhammad Ali and all that but then when I saw reading the Bible these words kind of team up together kind of not together put them this is God in form of a human is a the word so it says and John 1 it says the Lord is God so the world or God or Jesus Christ he did a lot of works in this world that were like called miracles or signs or wonders so I just like these words and I put together and he started um I haven't really posted a lot but it's an Instagram and it's the word works wonders and now I'm actually I'm gonna start posting more stuff above like them these Christian shirts that I'm making and also um some scriptures and also uh you know helping the homeless maybe I record some videos maybe interview some people or something and see where it takes you know Texas or takes me but yet definitely follow the world works wonders on Instagram and I be up putting more of this actual this this movement that I'm trying to create you know to help people go towards the Lord and you know help you know less fortunate people all right so today we're going to learn how to make the best heat transfer screen print heat transfer tags these are the ones that I do all the time for customers and I've made a lot of money doing this for people so I'm going to show you guys the trick on how to do the best screen printing transfers for tags or for printing on car transfer heat transfer garments all right so all right so what we do first is we get this right here these are heat transfers I got actually uh these were big big papers like you're like think they're like 25 byline 30 or something so I think this is I come up kind of muffin individual sizes fit the prints that we're gonna do so so the most important part I'm doing these here is uh what everything is important but them how I do them is I like I'd make the conveyor dryer Oh dirty fast so when I hear stuff I have it like around here I get that 20 around like under 20 minutes and this how slow it goes what I'm hungry I'm putting it up to like around like 70 we even do it at 16 but the important part is to make sure these spreads first these paper they like ISM to get cook not really like warp the foot like to take off the most read of it talk throw through and they'll come through like fast so we didn't clean up but actually first we should do this up make sure our fire is so you get play 800 units so I'm a little heat up and then we'll do it again all right so not heat it up I've been doing and the reason why I'm doing this again is because uh we're trying to take all the moisture out of it we're trying to make sure like when we put heat on them again to dry them fast they're not gonna shrink or or you know cuz we need like good registration so we're here today were just doing eight sheet but people as many as you want so but this is the first step to make sure that how we put through the conveyor dryer and meet up we shrink them ahead of time that's exactly some of the classes so that we uh now we put on on the papers they are they wet the paper so when you wear a paper and then it like you throw it through the conveyor dryer it's gonna unlock it up okay let them work sitting not so once you touch the second layer shrink the paper and and there's like certain item transfers that um you want to print on the on the glossy side that that's not really the paper but but more of the up where you suppose to transfer from and then we're using regular plastisol and as you can see we like transfer them another way is my there's not like a regular print that we can flip oh we flip them because they're gonna be transferred onto the shirt so when we like freedom and we put the glue on it and then we cut them they're upside down right in there backwards but when we transfer them and put on the [Music] the shirt array Romina they didn't look the right way so that's why we every time we design it sometimes parade upside down or backwards or reverse or reflected the more pop pop pop over to you so it's all that flow here I picked up the setup for a put the color and the clear view on one screen but um you could do like like all one color on the whole screen and then another screen you could look here but but just so I could see them make screens and I get make it a little bit more difficult for me if i'm trying to come time do a lot of tags and just get one screen but but what did this light is the color which is going to be great and then this color is this here or that site is bits here / dude well I will show you guys a little what I mean like that so here Orientalism we're gonna tape up we're gonna tape we're gonna tape this up right here and I like using this sphere white tape [Music] here and now I'm covering I'm covering I'm covering the top of the clear when I could do all those put one right here so so that so the color doesn't get on the sphere is supposed to look clean and then what we make sure to do is to have a clean surface the smoother and cleaner the better and we're gonna get the ink [Music] which is this off this cool great does this 10 gray that I used on the other video will have tones so we just like to a lot of time to fit off just taping all that possible so when you just take it off and then you have its things here and you have to clean the screen again so we're gonna do is them let's have a look at what I used what I used to do is a little bit like a mark and market where the where the where the print starts and the word word ends so like the four corners so I would what I would do is I'm putting mark there and then put a mark there and then put a mark here and then put them work there you know just he couldn't know where to put the transfer to make sure it there it covers everything you know but sometimes we like cut the transfers like too small and then sometimes on your night and I get the whole image which is still okay so we do it to get a little bit at you see it's like a real a little bit because it's paper it's not garment so you don't need as much and so as you can see um as you can see it it doesn't reach all the way over here so most likely it's gonna get chopped off and it looks like it's real close I'm gonna go ahead and just swipe it that's one you can only you could do one swipe or or if it's the first time just do like two swipes but don't go too crazy with it and what we do here is we we use high mesh never use slower mention 200 200 or 230 meshes is fine for most jobs and and we were fortunate that it grabbed everywhere so so it looks good to go so we have like the detail and on US government insurance you can see you can have the detail like these little letters maybe we could them a little bigger but we know what it says you know that's what you don't want to swipe too much and then what we do is um you just throw it through the conveyor turn in that same speech which was like very fast just as long as when it goes through and we touch it is try you just want to try it so let's go ahead and do a list [Music] okay so here we have the here we have the the transfers which is only one color in a salon it has the knife or dissertations on as you can see quick little eight sheets all dry then I'm real quick just one swipe so to keep the detail and then what we do now we do now is just we just take off the tape which is the these two [Music] and it's still 30 can still fit fairly clean but except like you see this right here you're still like ink there so we tweak you could either clean it with on pass the salt or not pass above screen opener or not screen opener but mineral spirits but then we risk them staining this you know cuz wouldn't rub it so what I like doing is we put tape over them I'll go ahead and put tape over that and make sure there's like the tape covers and also just to be sure be careful also glue it on the sides are here where there's like and anywhere there's ink around this I'll put a little bit little just to cover it and also we're also gonna go ahead and put them here all right so now that we have this good what we're gonna do is um we're gonna take off the screen and this here is just how I do it cuz I'm only doing a few of them and then I get like a little rag because sometimes like there's like glue that stuck right here we don't want to do that the tack you know sometimes it's overspray and it's gonna be stuck in the back of the screen so what I do is on I get some minute a little bit of mineral spirits on the rag and then I go ahead and clean the bottom of this only the were the clear is that make sure it's nice and dry also so it doesn't get sticky because it is whenever it stinky if they gotta be real careful it's not sticky and what I'm gonna do is I'm up boom up this bracelet silicone spray sure that we don't you don't get it sticky and it's like real real ponies like rub it off rub it on there good and then we're good to go so what we do we put tech again on here and we put on the first transfer all we want to start with and then we just put it on [Music] and it's nice and flat and since we already preshrunk it ahead of time it should align that's what we do we do here is we call it eyeballing we I bought look I kind of keep the the screener at a better angle and I put I try to align the registrations first before I even drop the screen so I kind of like get real low and I see what the registrations are at and then I drop the screen give us a closer look at this [Music] all right right here already lying there right it's the line so do it again all right what we do is um we drop it real slow at an angle and then we see this registration these bones on the side and the middle one and then we like put it right on top of it on each side left and right also and then we drop the screen and most of the time it's nice and spot on and then when we do then we do now is them we do this this is one of our if not the most important ways to do screen printing consumption on screen printing transfers to some people what they will do is just do it like this and and then they would put it up just this powder adhesives which is the goop and and that that won't will shirt you having some nice transfers are gonna last forever let me let me open it up which is this powder here this is a medium fine powder and mix them so givi in between and this actual do so some people um get get the transfers like this i'm alder wet before they throw it to the conveyor they put this view on it but they skip this important step this is the important step if you ever gonna do transfers make sure you follow these directions or the process that I'm doing here who we use this we use this high-density clear or clear high density which is it's just clear this is actually gonna make your glue grab on what like way better this is not dude is just the clear this is the glue so this blue right here I mix the 50/50 50/50 with softened and ha 50/50 was um high-density tier soft hand and hide this and clear mixed it up real nice real nice it's like it's like this type of consistency here it's a little not really too liquidy but it's not real puffy I don't like using clumpy of just straight high-density because it's gonna break down the ink especially if we swipe too hard or something or if it's not fully dry it's gonna it's gonna break it down its gonna break down these transfers that we have here so what we do is them just put a little bit here it doesn't really use that much you just have to put enough where it's gonna just touch it it's just gotta touch the transfer and then what we're gonna do we get squeaky [Music] and then I'm gonna just go ahead and swipe it what I do is I put my hand here so it doesn't move anything and then I'll just swipe it which are directions that you're comfortable with as long as you're holding it down and it's not jerking the screen there it is so now that that one I'm gonna put it off to the side and I'm gonna do another one [Music] make sure it's flat do it again [Music] [Music] and then we put it off to the side and we'll do it to all of them and I don't know if I if I told you this in the beginning of the video but um but this clear it has it has a stroke it's not the same design it's actually the same design but with the stroke around it so it could cover any little mistakes and again we're not even be able to not seeing much of it here once we print it or transfer it so I'm gonna do all of them [Music] so now that we still have the high density we take it off take it off the screen we put it back in a jar [Music] and there is you have to take it all like perfectly but most of it another thing I also like to do right after is take off the tape these tape cover um the other ink because we don't want to dry with hanging in there and then what we do is on we cleaned it up with some mineral spirits and you know we're gonna use it again we clean it up with some screen opener just put it off to the side for now alright so now we have these sheets there's still wet right now we have a tub oh this is great here what I do is own I get some of this powder adhesive [Music] and that just put it on there nice little dose little spoon this is the can like a half a tablespoon and then what I do is oh well there's people that have different ways to do it so people have like a big pan and they have a bunch of powder and they just put it in but we're right here I'm just showing you how you do it at the moment that's how I've been doing [Music] I put it like over a trash can just be careful and it always helps when we have a paper that's bigger because this one's going off to the sides the print where some of this powder room is most likely gonna fall in the trash so you gotta be real careful and what you do is you just you just move the powder around like this where it touches everywhere where it's wet and a nice like little on the nice little sandstorm goes right over right over it where it's all wet and and then we'll be good from side to side oh he is getting a good angle here put you got it pretty good and then and then and then this the stuff that uh that we could see we go ahead and put it back in the jar and I feel like a little fun like this and I put it in the jar there's only a little bit so what I do now is on my slick [Music] and you can see that glue stuck to it when you get your sleeper because you don't wonder there's the the we printed a wet high-density and then we put glue right over it so it's gonna make it nice and nice and rich and then what I think now it's not I put it slowly through the comparator now I like if it's a t-shirt you know and then when it's through the other side just as long as it doesn't overcook and get bubbly it's gonna be a nice transferable we could transfer very fast [Music] [Music] [Music] now that we throw them off through going through the Career Fair go to this other side here yeah I'll shut up it you've been caught here they should all be good so go wait for the last one to come it should be nice and warm and may have a little bit of texture on it because of the glue but he said nice little little rough texture nice done real good you know what we do is we cut them and then we like put them in a little bag to your purse size and then whenever we need to use them we go ahead and them we turn on the the the heat press it's a little heat press like I use the Hat one to put my tags but they so little flat ones but I use my hat out trying to heat transfer machine to put these of these tags on there and I put it at around like 320 temperature 320 degrees Fahrenheit and I press them for like me like four or five seconds and and they're stuck you just put their hot peel so after you do it is that kind of lukewarm peel not really too hot but uh it has to be kinda hot and then you peel it off and then it's stuck it's stuck basically for life it's like as good as a screen print so that there is how to do heat creme heat transfer Stream printed tags give it a thumb up and I'll do some more videos all right peace [Music]
Show moreFrequently asked questions
What is needed for an electronic signature?
How can I eSign a document sent to me by email?
What is the difference between an electronic signature and a digital signature?
Get more for ink byline order with airSlate SignNow
- Real countersignature
- Prove electronically signed Home Repair Contract Template
- Endorse digisign HVAC Proposal Template
- Authorize electronically sign log
- Anneal mark Model Contract
- Justify esign Janitorial Services Proposal Template
- Try countersign Small Business Partnership Agreement Template
- Add Assignment Agreement esign
- Send Painting Quote Template signature block
- Fax Letter of Intent for Promotion signature service
- Seal 911 Release Form PDF email signature
- Password Construction Equipment Lease Proposal Template signatory
- Pass Licensing Agreement initials
- Renew Divorce Settlement Contract byline
- Test Boy Scout Camp Physical Form esigning
- Require Subscription Agreement Template digisign
- Comment onlooker electronically signed
- Boost cosigner digital signature
- Call for successor countersignature
- Void Amendment to LLC Operating Agreement template initial
- Adopt Support Agreement template signature
- Vouch Free Event Ticket template email signature
- Establish Alabama Bill of Sale template digital signature
- Clear Vehicle Bill of Sale Template template electronically signed
- Complete Veterinary Hospital Treatment Sheet template byline
- Force Design Invoice Template template digi-sign
- Permit Income Verification Letter template esign
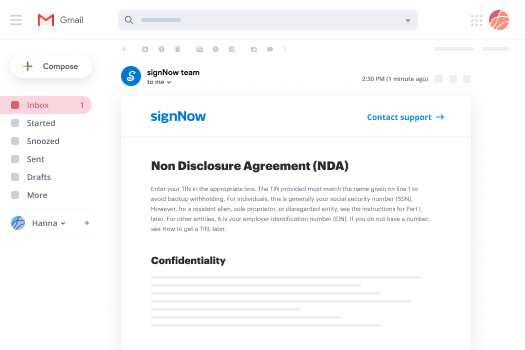
- Customize Non-Disclosure Agreement (NDA) template signature block