Inscribe Attachment Field with airSlate SignNow
Award-winning eSignature solution


Get the robust eSignature capabilities you need from the company you trust
Choose the pro service made for professionals
Set up eSignature API with ease
Work better together
Inscribe attachment field, within a few minutes
Cut the closing time
Maintain important data safe
See airSlate SignNow eSignatures in action


airSlate SignNow solutions for better efficiency
Our user reviews speak for themselves


Why choose airSlate SignNow
-
Free 7-day trial. Choose the plan you need and try it risk-free.
-
Honest pricing for full-featured plans. airSlate SignNow offers subscription plans with no overages or hidden fees at renewal.
-
Enterprise-grade security. airSlate SignNow helps you comply with global security standards.

Your step-by-step guide — inscribe attachment field
Employing airSlate SignNow’s electronic signature any business can speed up signature workflows and eSign in real-time, supplying a better experience to consumers and employees. inscribe attachment field in a couple of simple actions. Our mobile-first apps make work on the move achievable, even while offline! Sign signNows from any place in the world and close up deals quicker.
Keep to the step-by-step instruction to inscribe attachment field:
- Log in to your airSlate SignNow profile.
- Find your document within your folders or import a new one.
- Open the record and make edits using the Tools menu.
- Drop fillable boxes, type text and sign it.
- Add numerous signers using their emails and set the signing sequence.
- Indicate which users will get an signed version.
- Use Advanced Options to limit access to the document and set up an expiration date.
- Click Save and Close when completed.
Additionally, there are more extended tools available to inscribe attachment field. List users to your common work enviroment, browse teams, and monitor collaboration. Millions of users all over the US and Europe agree that a solution that brings everything together in one unified enviroment, is the thing that organizations need to keep workflows working easily. The airSlate SignNow REST API enables you to embed eSignatures into your application, internet site, CRM or cloud storage. Check out airSlate SignNow and get quicker, easier and overall more productive eSignature workflows!
How it works
airSlate SignNow features that users love


See exceptional results inscribe attachment field with airSlate SignNow

How to submit and eSign a document online
Try out the fastest way to inscribe attachment field. Avoid paper-based workflows and manage documents right from airSlate SignNow. Complete and share your forms from the office or seamlessly work on-the-go. No installation or additional software required. All features are available online, just go to signnow.com and create your own eSignature flow.
A brief guide on how to inscribe attachment field in minutes
- Create an airSlate SignNow account (if you haven’t registered yet) or log in using your Google or Facebook.
- Click Upload and select one of your documents.
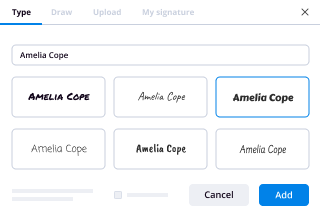
- Use the My Signature tool to create your unique signature.
- Turn the document into a dynamic PDF with fillable fields.
- Fill out your new form and click Done.
Once finished, send an invite to sign to multiple recipients. Get an enforceable contract in minutes using any device. Explore more features for making professional PDFs; add fillable fields inscribe attachment field and collaborate in teams. The eSignature solution gives a secure workflow and runs in accordance with SOC 2 Type II Certification. Be sure that all of your records are guarded and that no person can edit them.
How to eSign a PDF template in Google Chrome
Are you looking for a solution to inscribe attachment field directly from Chrome? The airSlate SignNow extension for Google is here to help. Find a document and right from your browser easily open it in the editor. Add fillable fields for text and signature. Sign the PDF and share it safely according to GDPR, SOC 2 Type II Certification and more.
Using this brief how-to guide below, expand your eSignature workflow into Google and inscribe attachment field:
- Go to the Chrome web store and find the airSlate SignNow extension.
- Click Add to Chrome.
- Log in to your account or register a new one.
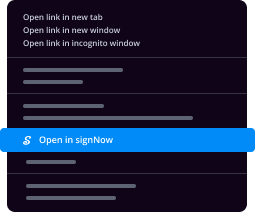
- Upload a document and click Open in airSlate SignNow.
- Modify the document.
- Sign the PDF using the My Signature tool.
- Click Done to save your edits.
- Invite other participants to sign by clicking Invite to Sign and selecting their emails/names.
Create a signature that’s built in to your workflow to inscribe attachment field and get PDFs eSigned in minutes. Say goodbye to the piles of papers on your desk and start saving money and time for additional essential activities. Selecting the airSlate SignNow Google extension is a smart convenient decision with many different advantages.
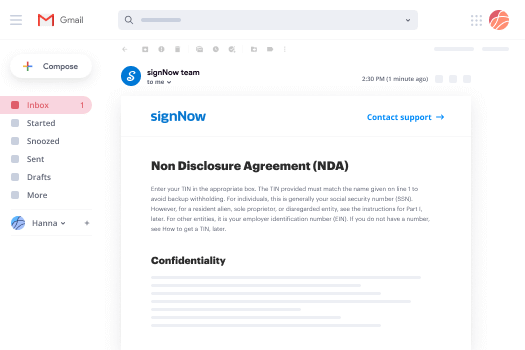

How to sign an attachment in Gmail
If you’re like most, you’re used to downloading the attachments you get, printing them out and then signing them, right? Well, we have good news for you. Signing documents in your inbox just got a lot easier. The airSlate SignNow add-on for Gmail allows you to inscribe attachment field without leaving your mailbox. Do everything you need; add fillable fields and send signing requests in clicks.
How to inscribe attachment field in Gmail:
- Find airSlate SignNow for Gmail in the G Suite Marketplace and click Install.
- Log in to your airSlate SignNow account or create a new one.
- Open up your email with the PDF you need to sign.
- Click Upload to save the document to your airSlate SignNow account.
- Click Open document to open the editor.
- Sign the PDF using My Signature.
- Send a signing request to the other participants with the Send to Sign button.
- Enter their email and press OK.
As a result, the other participants will receive notifications telling them to sign the document. No need to download the PDF file over and over again, just inscribe attachment field in clicks. This add-one is suitable for those who like concentrating on more important goals rather than burning time for practically nothing. Improve your day-to-day compulsory labour with the award-winning eSignature application.
How to eSign a PDF on the go with no mobile app
For many products, getting deals done on the go means installing an app on your phone. We’re happy to say at airSlate SignNow we’ve made singing on the go faster and easier by eliminating the need for a mobile app. To eSign, open your browser (any mobile browser) and get direct access to airSlate SignNow and all its powerful eSignature tools. Edit docs, inscribe attachment field and more. No installation or additional software required. Close your deal from anywhere.
Take a look at our step-by-step instructions that teach you how to inscribe attachment field.
- Open your browser and go to signnow.com.
- Log in or register a new account.
- Upload or open the document you want to edit.
- Add fillable fields for text, signature and date.
- Draw, type or upload your signature.
- Click Save and Close.
- Click Invite to Sign and enter a recipient’s email if you need others to sign the PDF.
Working on mobile is no different than on a desktop: create a reusable template, inscribe attachment field and manage the flow as you would normally. In a couple of clicks, get an enforceable contract that you can download to your device and send to others. Yet, if you want a software, download the airSlate SignNow mobile app. It’s secure, fast and has an excellent interface. Take advantage of in effortless eSignature workflows from your business office, in a taxi or on an airplane.

How to sign a PDF file having an iPad
iOS is a very popular operating system packed with native tools. It allows you to sign and edit PDFs using Preview without any additional software. However, as great as Apple’s solution is, it doesn't provide any automation. Enhance your iPhone’s capabilities by taking advantage of the airSlate SignNow app. Utilize your iPhone or iPad to inscribe attachment field and more. Introduce eSignature automation to your mobile workflow.
Signing on an iPhone has never been easier:
- Find the airSlate SignNow app in the AppStore and install it.
- Create a new account or log in with your Facebook or Google.
- Click Plus and upload the PDF file you want to sign.
- Tap on the document where you want to insert your signature.
- Explore other features: add fillable fields or inscribe attachment field.
- Use the Save button to apply the changes.
- Share your documents via email or a singing link.
Make a professional PDFs right from your airSlate SignNow app. Get the most out of your time and work from anywhere; at home, in the office, on a bus or plane, and even at the beach. Manage an entire record workflow effortlessly: generate reusable templates, inscribe attachment field and work on documents with business partners. Transform your device right into a potent company tool for executing contracts.
How to sign a PDF file taking advantage of an Android
For Android users to manage documents from their phone, they have to install additional software. The Play Market is vast and plump with options, so finding a good application isn’t too hard if you have time to browse through hundreds of apps. To save time and prevent frustration, we suggest airSlate SignNow for Android. Store and edit documents, create signing roles, and even inscribe attachment field.
The 9 simple steps to optimizing your mobile workflow:
- Open the app.
- Log in using your Facebook or Google accounts or register if you haven’t authorized already.
- Click on + to add a new document using your camera, internal or cloud storages.
- Tap anywhere on your PDF and insert your eSignature.
- Click OK to confirm and sign.
- Try more editing features; add images, inscribe attachment field, create a reusable template, etc.
- Click Save to apply changes once you finish.
- Download the PDF or share it via email.
- Use the Invite to sign function if you want to set & send a signing order to recipients.
Turn the mundane and routine into easy and smooth with the airSlate SignNow app for Android. Sign and send documents for signature from any place you’re connected to the internet. Generate professional-looking PDFs and inscribe attachment field with just a few clicks. Put together a faultless eSignature process with just your smartphone and boost your general productiveness.
Get legally-binding signatures now!
FAQs
-
How do you name an attachment field in access?
Suggested clip Microsoft Access 2010 Tables: Attachment Field to Attach Files to ...YouTubeStart of suggested clipEnd of suggested clip Microsoft Access 2010 Tables: Attachment Field to Attach Files to ... -
Where is the attachment field in access?
Suggested clip Access 2007 Table: Attachment Field - YouTubeYouTubeStart of suggested clipEnd of suggested clip Access 2007 Table: Attachment Field - YouTube -
Can you attach files in Microsoft forms?
If you want users to be able to insert files on a Microsoft Office InfoPath form, you can use a file attachment control on your form template. Users can use this control to attach files to your form, and the files are then encoded and saved with the form data. -
Where is the attachment toolbar in access?
Suggested clip Add attachments to a record in an Access 2007 form - YouTubeYouTubeStart of suggested clipEnd of suggested clip Add attachments to a record in an Access 2007 form - YouTube -
How do I add an attachment field in Access 2016?
Suggested clip Microsoft Access 2016: Table Attachment Fields - YouTubeYouTubeStart of suggested clipEnd of suggested clip Microsoft Access 2016: Table Attachment Fields - YouTube -
How do I insert an image into a form?
To insert an image into your form, you will need to add a Section or Description Area Field to your form and then click on the Insert Image button (which looks like a picture of mountains). This will bring up the Insert image dialog box. Click on the Upload button on this box to upload your own image. -
Can we store images in MS Access database?
3 Effective Methods to Handle Images in MS Access Database. ... The user can Store their image in the OLE field and later use a bound object type frame to display the image in the document. The user can Store any path of the image in the document text field, using the image control button to display the image. -
How do you add a picture to a form in Access?
Open the form in design mode. Click the Image button in the toolbox. Click and drag to insert the image on the form. Navigate to the image file containing the picture you want to link to, select it, and click the OK button. Right-click the image and select Properties. -
How do I insert a picture into Access 2007?
Suggested clip Inserting images into an Access Database - YouTubeYouTubeStart of suggested clipEnd of suggested clip Inserting images into an Access Database - YouTube -
How do you add a button to a form in Access?
To add a command button to a form: In Form Layout view, select the Design tab, then locate the Controls group. Choose the desired location for the command button, then click the mouse. The Command Button Wizard will appear. In the Categories pane, select the category of button you want to add. -
How do I attach a document to a form?
Click on Forms in the header. Click the Documents button in the row for the form you want to attach a document to. ... Click the Upload button . Click the Choose Files button . ... Browse to the file, select it, and click Open. ... Click the Close button in the upper right corner to close the Form Details window. -
How do I attach a document to an online application?
Suggested clip Attaching Files to Email & Online Job Applications - YouTubeYouTubeStart of suggested clipEnd of suggested clip Attaching Files to Email & Online Job Applications - YouTube -
How do I attach a document?
Suggested clip How to Attach a Document to an E-mail - YouTubeYouTubeStart of suggested clipEnd of suggested clip How to Attach a Document to an E-mail - YouTube -
How do I add an attachment to a team meeting?
Attach a file beneath the compose box and go to the file location. From a chat or meeting, tap the attachment to open it with an Office 365 app. In a channel conversation, tap the attachment or go to Tabs > Files. -
How do you attach an email to a team?
Suggested clip Sending an email directly to a Microsoft Teams channel - YouTubeYouTubeStart of suggested clipEnd of suggested clip Sending an email directly to a Microsoft Teams channel - YouTube
What active users are saying — inscribe attachment field


Inscribe attachment field
hey folks rich bird s here from brighter days in christchurch this is just a quick clip tutorial how to use power automate to send multiple emails each with a unique attachment based on the matching data between the a list and a document library so if we step through the um main list i've got a list for example and this has got a unique identifier could be anything could be an id number for this it's the email addresses that i want of my students in my list so it's just three at the moment just for an example and then i have a document library with different types of documents in there and then i have a column here called student email which matches the same values that exist in the title column for the students list they don't have to be the title list column they could be another column but just have to have something that matches the two records okay so in the file name it could be a unique column but just have something that can form a pair or a key between the two items so let's go ahead and build a workflow to query first of all this list get all of the items in this list and then go into the document library and get each file per email address listed so start off let's go into my flows i see you want to go create and we're going to go new um this one's going to be an instant because i'm just going to push it from a button so you can call it whatever you want spell email right all right so the first steps manual trigger flow next one is let's get items so we're going to go to sharepoint and we're going to get items before this could can work out what i'm trying to do even though i can't spell get right so get items and then we're going to find list this is in the technology site and the sharepoint list we're going to use is called my students and then at this point in time we're just going to get all the items okay and then we do a new step and then this step is get files so get files properties only at this point of time so we're going to do that again the site collection is technology the library name is just documents for this example and then we're going to click on show advanced options and we're going to use filter query and then in the filter query we're going to do a match if i show over here in the technology library so we've got that column in the library we've got a column called student email make sure you use the internal name for this and that's the one we're going to use so we're going to go student email make sure you spell it right unlike me and then it's o data so equals is eq and then we're bringing back a text value so it's a single speech mark and then what i can do over here is get the column that matches right so in this list get items which is this step here where we're getting the student my students list is the title column is the column that i'm going to use to use as my unique identifier to match the records as soon as you click it it's going to put it into an apply to each step that's totally fine one thing you need to check whenever you work with power automate and you're using oh data queries is that you have a closing single speech mark at the end of your text expression for oh data and i always like to save it there because i found that if i carry on this little guy on this side sometimes gets removed as i move into another step so basically what we're doing now is we're going to go get items and then we're going to get all the files that match each row in the in the items list we're going to get a row or a file back per one okay and then the next thing we're going to do is get the file content because we want to send an attachment and to send an attachment and power automate you need to get file content so add an action get file but what we want to do is scroll through here and you want get file content so click that again it doesn't know that it's gonna it's gonna do another it's gonna put us another applied wall here because it could be multiple content per person found so we go through we select our technology library again and then the key here is the name of the file content that we want to get is called file identifier so in your dynamic content type in ident or identifier you don't want id you want identifier and you want to check that you're in the correct step get files properties only so for up here we get the files properties that has the unique identifier for the document or the file and then we use that in this step so tap that in there that will put in a second apply to each which is completely fine because it's good we don't know that there could be more files more than one file per attachment all right so now we've got file content the next steps super easy again we're just basically going to send an email so send email so send yeah you can use the mail or outlook email v2 the two column when you first grab that you want to use dynamic content because you want to send this to the student uh in this example it could go to someone else and what you'll find sometimes we know that the student's email lives in the get items list right at the top so the list of my students and sometimes when pair automate loads you're going to get just a couple of items because it's trying to be helpful in this case it's not helpful because we want to use the title column so types we just basically click see more see less see more and then select title so that title there is coming in to match that title in our list of items alright so we've got the title and then subject can be anything you want and then your body of the email you can type your message and then to put an attachment into an email in power automate you want to click show advanced options so click advanced options and then you've got two fields to fill out per attachment and so when you send a message or attachment outlook wants to know the type of file that you're sending okay so the name isn't just the name of the file like you know document it's document.x or pdf.pdf so it needs to know the extension as well so what i do in that step is i'll do file name so under my get files i've got a an action or a property called file name with extension and under get items i got it as well so make sure i select the right one let's get files okay so grab that and then under content so as you click into attach with content the first item that should show up unless you're doing multiple get properties under get file content is file content that's the one you want okay because then that's the name of the file with the extension and that's the actual guts of the file that create the document and then we just keep that into that second apply to each so this will send an email based on every file that finds one email per file at this point in time so this is the as far as i'm going with this little demo but it should give you enough to make it work but then click save and because we're running this on a manual button it's really easy to test so i can click test and i'll perform the trigger action so let's send that and then it's going to check you've got that just click continue and then run the flow and then the magic will happen so we've gone off we've got the items in my list of three items and then for every item we found we're looping through and there we have file ran successfully and then basically for each file content it's found items and we send emails to so that's the insides of the email and if we go over to mail there's my email it's just come in um anything you want and then this is a blank word document there's nothing in it but it's just an example to show you it's just a test only but there's that one um and it's also sent a pdf to another address if i can get that up there we go yep maybe i'll drag that email over hold on one sec so for this another email so different email address to this account a pdf sent through um and then that would open up with the email body so it will work for all file types as long as you use the get file name with extension and then outlook will be clever enough to know that it's a pdf it's an excel file it's a word document that sort of thing so i hope that helps understand how you can attach a dynamic file per list item with a matching record id between a list and a file so hope that helps keep on power wrapping and power automating thank you
Show moreFrequently asked questions
How do I add an electronic signature to a PDF in Google Chrome?
How can you easily sign a PDF with your mouse?
How can I use my phone to sign a PDF?
Get more for inscribe attachment field with airSlate SignNow
- Print electronically sign Foster Application
- Prove electronically signed Divorce Settlement Contract
- Endorse digisign Interior Design Contract Template
- Authorize electronically sign Consulting Contract Template
- Anneal mark Food Allergy Chart
- Justify esign Prom Ticket
- Try countersign NonProfit Donation Consent
- Add Indemnification Agreement signed
- Send Outsourcing Services Contract Template digi-sign
- Fax Letter of Recommendation for Employee esign
- Seal School Counseling Progress Report initial
- Password W-9 Tax Form signature
- Pass Employment Verification Letter email signature
- Renew Rent to Own Contract digital signature
- Test Hotel Receipt electronically signed
- Require IT Consulting Agreement Template byline
- Print assignee countersignature
- Champion patron electronically sign
- Call for caller signed electronically
- Void Hold Harmless (Indemnity) Agreement template autograph
- Adopt Pooling Agreement template digital sign
- Vouch Live Performance Event Ticket template initial
- Establish Tattoo Gift Certificate template electronically sign
- Clear Film Proposal Template template countersignature
- Complete Car Wash and Detail template digital signature
- Force Engineering Proposal Template template mark
- Permit Multi Sectional Resume template signed
- Customize Financial Affidavit template digi-sign