Mark Hourly Invoice Made Easy
Award-winning eSignature solution


Do more on the web with a globally-trusted eSignature platform
Outstanding signing experience
Robust reports and analytics
Mobile eSigning in person and remotely
Industry rules and compliance
Mark hourly invoice, faster than ever
Useful eSignature extensions
See airSlate SignNow eSignatures in action


airSlate SignNow solutions for better efficiency
Our user reviews speak for themselves


Why choose airSlate SignNow
-
Free 7-day trial. Choose the plan you need and try it risk-free.
-
Honest pricing for full-featured plans. airSlate SignNow offers subscription plans with no overages or hidden fees at renewal.
-
Enterprise-grade security. airSlate SignNow helps you comply with global security standards.

Your step-by-step guide — mark hourly invoice
Employing airSlate SignNow’s eSignature any company can accelerate signature workflows and eSign in real-time, supplying a greater experience to customers and staff members. Use mark Hourly Invoice in a couple of simple actions. Our handheld mobile apps make working on the move achievable, even while off-line! Sign documents from anywhere in the world and close up trades quicker.
Take a step-by-step instruction for using mark Hourly Invoice:
- Log in to your airSlate SignNow account.
- Locate your document within your folders or import a new one.
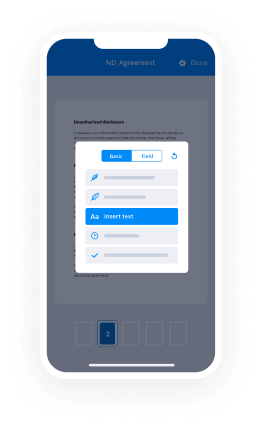
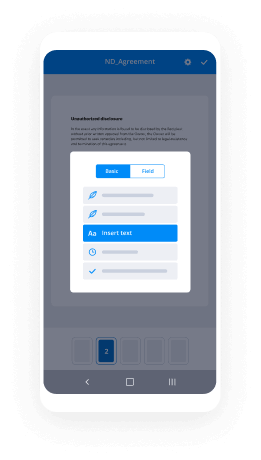
- Open up the record and edit content using the Tools menu.
- Drag & drop fillable fields, add text and sign it.
- Include numerous signees by emails and set up the signing sequence.
- Specify which recipients will receive an executed copy.
- Use Advanced Options to restrict access to the template and set an expiry date.
- Click Save and Close when completed.
Additionally, there are more advanced tools available for mark Hourly Invoice. List users to your common workspace, browse teams, and keep track of collaboration. Millions of users across the US and Europe concur that a solution that brings everything together in one cohesive workspace, is the thing that organizations need to keep workflows functioning efficiently. The airSlate SignNow REST API allows you to embed eSignatures into your application, website, CRM or cloud storage. Try out airSlate SignNow and enjoy faster, easier and overall more productive eSignature workflows!
How it works
airSlate SignNow features that users love


See exceptional results mark Hourly Invoice made easy

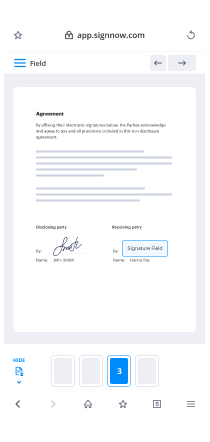
How to complete and eSign a document online
Try out the fastest way to mark Hourly Invoice. Avoid paper-based workflows and manage documents right from airSlate SignNow. Complete and share your forms from the office or seamlessly work on-the-go. No installation or additional software required. All features are available online, just go to signnow.com and create your own eSignature flow.
A brief guide on how to mark Hourly Invoice in minutes
- Create an airSlate SignNow account (if you haven’t registered yet) or log in using your Google or Facebook.
- Click Upload and select one of your documents.
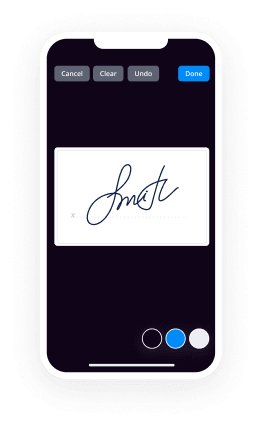
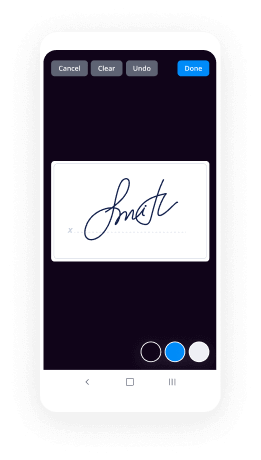
- Use the My Signature tool to create your unique signature.
- Turn the document into a dynamic PDF with fillable fields.
- Fill out your new form and click Done.
Once finished, send an invite to sign to multiple recipients. Get an enforceable contract in minutes using any device. Explore more features for making professional PDFs; add fillable fields mark Hourly Invoice and collaborate in teams. The eSignature solution supplies a reliable workflow and operates in accordance with SOC 2 Type II Certification. Ensure that your records are protected and that no person can change them.
How to eSign a PDF in Google Chrome
Are you looking for a solution to mark Hourly Invoice directly from Chrome? The airSlate SignNow extension for Google is here to help. Find a document and right from your browser easily open it in the editor. Add fillable fields for text and signature. Sign the PDF and share it safely according to GDPR, SOC 2 Type II Certification and more.
Using this brief how-to guide below, expand your eSignature workflow into Google and mark Hourly Invoice:
- Go to the Chrome web store and find the airSlate SignNow extension.
- Click Add to Chrome.
- Log in to your account or register a new one.
- Upload a document and click Open in airSlate SignNow.
- Modify the document.
- Sign the PDF using the My Signature tool.
- Click Done to save your edits.
- Invite other participants to sign by clicking Invite to Sign and selecting their emails/names.
Create a signature that’s built in to your workflow to mark Hourly Invoice and get PDFs eSigned in minutes. Say goodbye to the piles of papers sitting on your workplace and begin saving time and money for more essential tasks. Selecting the airSlate SignNow Google extension is a great practical option with many different advantages.
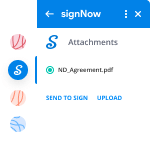

How to sign an attachment in Gmail
If you’re like most, you’re used to downloading the attachments you get, printing them out and then signing them, right? Well, we have good news for you. Signing documents in your inbox just got a lot easier. The airSlate SignNow add-on for Gmail allows you to mark Hourly Invoice without leaving your mailbox. Do everything you need; add fillable fields and send signing requests in clicks.
How to mark Hourly Invoice in Gmail:
- Find airSlate SignNow for Gmail in the G Suite Marketplace and click Install.
- Log in to your airSlate SignNow account or create a new one.
- Open up your email with the PDF you need to sign.
- Click Upload to save the document to your airSlate SignNow account.
- Click Open document to open the editor.
- Sign the PDF using My Signature.
- Send a signing request to the other participants with the Send to Sign button.
- Enter their email and press OK.
As a result, the other participants will receive notifications telling them to sign the document. No need to download the PDF file over and over again, just mark Hourly Invoice in clicks. This add-one is suitable for those who like focusing on more important things as an alternative to wasting time for absolutely nothing. Increase your day-to-day routine with the award-winning eSignature application.
How to sign a PDF on the go with no app
For many products, getting deals done on the go means installing an app on your phone. We’re happy to say at airSlate SignNow we’ve made singing on the go faster and easier by eliminating the need for a mobile app. To eSign, open your browser (any mobile browser) and get direct access to airSlate SignNow and all its powerful eSignature tools. Edit docs, mark Hourly Invoice and more. No installation or additional software required. Close your deal from anywhere.
Take a look at our step-by-step instructions that teach you how to mark Hourly Invoice.
- Open your browser and go to signnow.com.
- Log in or register a new account.
- Upload or open the document you want to edit.
- Add fillable fields for text, signature and date.
- Draw, type or upload your signature.
- Click Save and Close.
- Click Invite to Sign and enter a recipient’s email if you need others to sign the PDF.
Working on mobile is no different than on a desktop: create a reusable template, mark Hourly Invoice and manage the flow as you would normally. In a couple of clicks, get an enforceable contract that you can download to your device and send to others. Yet, if you want an application, download the airSlate SignNow app. It’s comfortable, fast and has an excellent interface. Try out effortless eSignature workflows from the workplace, in a taxi or on an airplane.
How to sign a PDF having an iPad
iOS is a very popular operating system packed with native tools. It allows you to sign and edit PDFs using Preview without any additional software. However, as great as Apple’s solution is, it doesn't provide any automation. Enhance your iPhone’s capabilities by taking advantage of the airSlate SignNow app. Utilize your iPhone or iPad to mark Hourly Invoice and more. Introduce eSignature automation to your mobile workflow.
Signing on an iPhone has never been easier:
- Find the airSlate SignNow app in the AppStore and install it.
- Create a new account or log in with your Facebook or Google.
- Click Plus and upload the PDF file you want to sign.
- Tap on the document where you want to insert your signature.
- Explore other features: add fillable fields or mark Hourly Invoice.
- Use the Save button to apply the changes.
- Share your documents via email or a singing link.
Make a professional PDFs right from your airSlate SignNow app. Get the most out of your time and work from anywhere; at home, in the office, on a bus or plane, and even at the beach. Manage an entire record workflow easily: build reusable templates, mark Hourly Invoice and work on PDF files with business partners. Transform your device right into a highly effective enterprise tool for executing deals.
How to eSign a PDF file using an Android
For Android users to manage documents from their phone, they have to install additional software. The Play Market is vast and plump with options, so finding a good application isn’t too hard if you have time to browse through hundreds of apps. To save time and prevent frustration, we suggest airSlate SignNow for Android. Store and edit documents, create signing roles, and even mark Hourly Invoice.
The 9 simple steps to optimizing your mobile workflow:
- Open the app.
- Log in using your Facebook or Google accounts or register if you haven’t authorized already.
- Click on + to add a new document using your camera, internal or cloud storages.
- Tap anywhere on your PDF and insert your eSignature.
- Click OK to confirm and sign.
- Try more editing features; add images, mark Hourly Invoice, create a reusable template, etc.
- Click Save to apply changes once you finish.
- Download the PDF or share it via email.
- Use the Invite to sign function if you want to set & send a signing order to recipients.
Turn the mundane and routine into easy and smooth with the airSlate SignNow app for Android. Sign and send documents for signature from any place you’re connected to the internet. Build professional PDFs and mark Hourly Invoice with couple of clicks. Created a faultless eSignature process with only your mobile phone and increase your general productivity.
Get legally-binding signatures now!
FAQs
-
How do you write an hourly invoice?
Download a free hourly invoice template. Include your business name and contact information. Add business media and logo. Include client's name or business and contact information. Create and insert unique invoice number in addition to invoice date and due date. -
How do you write a personal invoice?
Create a Professional Layout. Your invoice should look professional. ... Include Company and Client Information. ... Add an Invoice Number, Invoice Date, and Due Date. ... Write Each Line Item with a Description of Services. ... Add-up Line Items for Total Money Owed. ... Include Simple Payment Terms and Payment Options. ... Add a Personal Note. -
How do I write out an invoice?
Create your invoice \u2013 make it professional. The first step is to put your invoice together. ... Clearly mark your invoice. ... Add company name and information. ... Write a description of the goods or services you're charging for. ... Don't forget the dates. ... Add up the money owed. ... Mention payment terms. -
Can I make an invoice without a company?
Sole proprietorship is the easiest and most common structure chosen to start a business. ... As long as you are the only owner, your business starts when your business activities start. In the United States of America, you are automatically a sole proprietor and are therefore free to invoice clients as necessary. -
What an invoice should include?
Your invoice must include: ... the company name and address of the customer you're invoicing. a clear description of what you're charging for. the date the goods or service were provided (supply date) -
What is invoice amount?
Invoice amount is the amount of the bill. the amount stated in the bill is called the invoice amount. ... Invoice amount can easily be explain is the complete bill issued by a seller to the buyer of the products that indicates the product, agreed price and quantity and also stated the payment term as well. -
How do I label an invoice?
Make every invoice number unique \u2013 you can start from any number you want. Assign sequential invoice numbers. Assign invoice numbers in chronological way. Structure invoice numbers any way you want, you may: use only numbers 001, 002, 003 etc., include Customer Name CN001, CN002, etc. -
How do you label an invoice?
Make every invoice number unique \u2013 you can start from any number you want. Assign sequential invoice numbers. Assign invoice numbers in chronological way. Structure invoice numbers any way you want, you may: use only numbers 001, 002, 003 etc., include Customer Name CN001, CN002, etc. -
What is an invoice title?
An invoice is a statement of charges delivered to a customer by a product or service provider. There are two applications for an invoice title. The label you give to a particular invoice form is a file title. The actual statement has a title in the header section as well.
What active users are saying — mark hourly invoice


Mark hourly invoice
hello everybody welcome to today's sis educational webinar series dynamics SL project allocator hourly employee percent markup and reimbursable billon thanks for joining today before we get started like to talk a little bit about sis founded in 1996 headquartered in Duluth Georgia just outside of Atlanta sis delivers business solutions that help project and service driven companies unify business processes and applications across the enterprise thus delivering better visibility and efficiency services the SIS offers our current state assessments business process analysis requirements and fit gap analysis software design development and deployment custom application development ERP and CRM implementation rapid deployments for hub-and-spoke rollouts and on-premise or cloud deployments want to let everybody know that the 2020 community summit SL user conference is still on schedule and planned to be held in Nashville October 6th through 9th we would love for you to come out there and see us the SLA user group summit is a great place to get together with the SL community see how others use the SL platform how can get education you can get training and if you would like to save a hundred and fifty dollars on your registration you can use the sis discount code summit sl150 keep a look out for the next few weeks we're going to be sending out a webinar invite where we're going to be having a webinar taking a look at what this SL user group is going to be like this year and showing the value for you to come and attend a little bit of general information before we get started if you have any issues during the webinar email info at sis sitcom we're gonna have a Q&A session it begins but if you think of any questions before then feel free to go ahead and put those in the question box for best viewing please view in full-screen mode we're going to be recording this webinar and sending out not only the webinar but slide deck and the next 48 hours after the webinar is over now I would like to get to our presenters Brian keel is going to be getting us started today he's our senior dynamics SLE consultant along with Russ Hudson Brian take it away good afternoon everyone what we'll be looking at you know with the allocator and it's certainly one of the most powerful modules within the dynamics platform is is that you know with allocator it's one of those behind the scenes modules you know it doesn't have the the prettiness i'll call it of you know accounts payable or you know creating a project but it does a lot of the behind the scenes transactions for for items that are of a billable nature or if you just want to you know markup or move move items around the the dynamic system so one of the first things is you know it can apply rates to existing project transactions and it can also create or generate new project transactions which can update just the projects or it can create general ledger entries the rates involved you know they can be based upon you and such as hours or you know in materials you might have you know a unit such as tonnage and it you can apply it based upon a standard rate or you can apply a percentage off of the the total transactional amount for example you're going to take you know a cost of a thousand dollars and you're going to mark it up twenty percent you don't have to use a a bill rate like you would for labor the computational and processing capabilities of allocator is just huge you can make you know as I said GL entries for revenue project entries for revenue you can impact whip and cost the sales so with the the allocator module you know you're looking at you know different components to build your allocator you'll have rates and you know it can use these rates in an allocation method and you can have multiple allocation methods within your environment you don't have to have just one rate or just one allocation method because each of these are assigned to individual projects so when you're setting up a project you assign a rate table and you assign a and allocation method so it takes these rates and it can apply you know a an overhead percentage it can mark up cost it can create billing records so there's a lot of flexibility that you have within the allocator module at the same time it can also you know as i've indicated earlier it writes new transactions into the general ledger module you know there's been a lot of different ways that allocator is set up it's not a one-size-fits-all it every company every client has their own unique processing and procedures that you need for allocator so you know the allocator setup that's good for one company doesn't work for another for another company next please so with it you know and Russ is going to go through this is you know will form or create rate keys and you know such as an employee a project a task and from here we'll define the rate types and these refer to the keys used for looking up these rates you know rate types could be a costing perspective we've had clients that they don't want to have their employees actual labor rates showing up in the financials so they make a blended rate you know it for costing purposes and then they'll have a different rate for billing purposes you'll have rates for as a Russ will point out for labor you might have them for materials subcontractors travel expenses you know what however you want it set up and then you have your rate table and with your rate table that goes through a hierarchical process to calculate the billing rates as in a very brief or summary example of this is you know you could have two levels one is an employee and another is a project an employee so it you know if if a if it comes to one level doesn't find it it goes down to the next level until it you know until it finds the correct combination there and the rates are applied at what are called the leveled rates or you could have just a default rate and you know once you've created your allocation method you know then the the system just you know you can process it manually or you can have the system automatically calculate the allocation so that when you release a transaction it will automatically calculate the the allocation steps processes and rates and automatically apply them without any intervention on your part so for here I'm going to turn it over to Russ so that he can show you you know the steps involved of running you know running your allocation module okay I'm assuming everybody can see my screen so we're just gonna today go through some very basic allocation examples labor material markup and reimbursable travel so the first thing we're going to look at is labor and to do that first thing we need is a employee so I'm going to go ahead and create an employee you you and I'm going to give him a costume rate $75 an hour you he's going to be in the consulting labor class and this is going to be hourly $75 an hour next thing I'm going to do is I'm going to create a project for example so that we can record time and materials to it and I'm going to call this Dallas in and sweets Lobby update in order to build on this project we need a customer so I've created a customer called Alison and sweets and to be able to code labor to it we need a GL labor account you you and we need some tasks I'm going to create a two tasks first one is going to be designed and I'm gonna do installation so this project is this hotel wants to do an update to their Lobby new fixtures furnitures and equipment so that's what this project is going to track you you you you and it's doing some additional things that are new next thing I'm going to do is in a time card for some design time for this project from the employee I created you you you you and we're gonna call this design of lobby and I'm gonna put in eight hours a day for three days you then we'll go release this timecard and that's done in time review and approval you and if we look at the project after we did that you you see that we costed 24 hours at 75 an hour for $1,800 that went to the accountant labor so now we want to do the set up four billion of that labor 24 hours for the for the allocator to be able to feed transactions automatically into flexible Billings they need what I would call a holding account and so the allocator reads transactions but then it has to temporarily store them somewhere until they can be available to be fed into the Billings module so I'm going to create some what I would call holding accounts in project controlling and these accounts are non accounting so they won't affect the project P now they won't affect the general ledger place to put transactions from the allocator so that they can be made available to flow into flexible Billings so the way I'm going to create is going to be called bill labor and this the account type is going to be non accounting the next step would be to define a allocation key for this labor and I'm going to use one that's already out there but I just want to review it with you so the key I'm going I'm going to assign rates my project in this example so I'm going to use the key called project and down here this field at the bottom of this key shows what if this key is going to read and what it's going to read is is from the PJ Tran or transaction table it's going to read the charge project so that's where it's going to find the transactions to be able to allocate the next thing I'm going to create is my rate table definition so this defines which keys are I'm going to use in my rate table so I'm going to create a new rate table here and I'm going to call it bill and the rate type I'm going to use for this rate table is flavor L you and the key I'm going to use is project now as Brian was saying you could have different levels of granularity here if you want to assign rates by for instance project and task you can put that as a level two level of race and the way the allocator works is if you run an alligator for a particular project and it doesn't find a raid on level 1 then it will look for it in level 2 so from the pick your particular project you don't want to do race by project but you want to do race for a project in task then you would have sign reads - level 2 and not put any rates for that project in level 1 likewise if you want to go further you can do a third level of rates in this example project task and employee so level three if the allocator doesn't find any rates for that project and then doesn't play any race for that project and task but then that's fine the rate for that project task and employee and we'll use that rate so you can as you can see you can get very details here terms of your hierarchy of rates but for this example we're just going to keep it simple in a sign race by project so after we define the rate cable we're now ready to go in or some rates that's that an allocation multi-level rate entry so I'm going to pull up the rate table I just created then the rate type would be hell and I'm going to enter a billing rate for my project Dallas Inn & Suites 25 an hour you so now that I've entered some rates on the table in a rate table I want to create an allocation method to use those to use this rating wall so that's that an allocation method set up and I'm going to create a method again called bill you you and the first one I'm going to create in a allocation called count and post labor Kaltag would be calc and post now this the beginning and end accounts here's where we're defining what accounts that the alligator is going to read and they're going to for this first line they're gonna read labor here's a begin account and also of the end account so it's just going to read that one account the right time is going to use is labor you and the allocation basis is going to be unit so it's going to gonna pull the hours when the reads when this allocation runs it's going to pull them out of 24 hours that we posted from that time card the post project is going to be lower case s is which which means same as the source project tasks what is going to be lower case asses which means same as a source task course account category is not a business going to be this holding account so this is where the allocator is going to post the result which would be 24 hours times 125 an hour and it's going to post it to the account called bill labor which is that holding it we created one thing I wanted to add apologize for interjecting is you know when Russ was putting in you know post project and post task with wildcards in addition to this source you can also use other wild cards such as lowercase P to come from the project T for the task efore the employee and you can also combine wildcards within it so you can have segments one coming from you know the employee and another one from the you know this the task or something like that so you can you know you can combine wildcards within your your post and post transactions so in other words you can make it as complicated as you wish there's some checkboxes at the end of this again there's some other functionality in this screen but we're keeping this example simple so we want to have the alligator post in full detail and also post the hours so not only will they post the amount but we want the 24 hour units or hours should come across too so now that we've created a rate table and an allocation method it's time to go back to the project and update the project with those new values so the allocation method is bill and the rate table for this project is also bill so again you can have multiple allocation methods multiple rate tables out there for different classes of projects different types of projects so on depending on what you want the allocator to do for a certain group of projects the next step would be now to run the allocator to take those 24 hours multiplying by 125 an hour and post it so that's then an allocation processor you you and as you can see here the applicator took the 24 hours and multiplied it by 525 an hour right here and gave the result of three thousand bucks so that's the Bilbo amount so we're going to go ahead and run this as a final I just did a polymer nari you you so now if we go and look at the project transactions we see now that we have $3,000 posted to the holding account that I created earlier bill labor so the allocator read the 24 hours from the labor x 125 bucks and holding account today we want to pull that amount into flexible Billings for an invoice to do that we need to create a billing rule these new accounts so I'm going to call this billing rule bill and you'll see there's two grids here the top grid defines which accounts transactions will be pulled into flexible Billings and the bottom grid defines how those transactions will be posted when they're released to the when the invoice is posted to the general ledger so in the top grid we're going to put in bill labor because we want that 3,000 bucks to now come into the flexible Billings and we're going to define how that's going to be posted when the invoice is released to the general ledger so we enter bill labor as a source account category in the bottom and then we enter the GL account where it's going to be posted and that's build revenue and build revenue on the on the GL chart of accounts is linked to the account category revenue so when that invoice is posted in processed it will post $3,000 to the GL account 3030 and to the project revenue account again wild cards here for the sub account seem a source you you the next thing to do is to update the invoice format record for the new account category of bill labor so I'm using the invoice format 99 and I wanted to show in section 100 with the one that's defined as labor already so I'm gonna hit insert 100 quel category I want to show the invoices bill labor the description on the invoice I wanted to say labor Section description I want to say direct labor you so now we're updated the invoice format definition for our new bill labor account the next thing we need to do is define the be project billing information so I'm going to pull up my project voice format is 99 and the billing rule is my new billing rule called bill you you Belvin had defined the billing information parameters the bill labor transactions should now be available to be pulled into flexible Billings and the way that's done manually is this screen called billing transaction load there's a checkbox to make it all automatic but I'm doing it manually so you can see the process here and you see it in pulled in one transaction to be that three thousand bucks so now if we go create an invoice in invoice and adjustment maintenance you you you you there it is pulled in automatically we look at the invoice you you you there's our three thousand bucks pulled in automatically so the next step the next thing we want to go over is is a materials Markham materials and travel normally materials and travel would be entered through accounts payable but there's some new functionality this version that I haven't seen before and earlier I had trouble getting an AP batch to release so I'm just going to enter these transactions as a project charge entry to get the expenses on the project so the first thing I'm going to enter is some materials never go to the task installation cow category would be materials and I'm gonna do $5,000 in the description is Lobby carpet and I'm also going in there some travel on this bench the travel would be four my employee Joe Barnes and his travel was for the design tasks and the account category would be travel and I'm going to put in $1,200 for John Barnes air hotel car you you you you you so now if we look at the transactions we now have some travel and the carpet coasted to the accounts travel and materials so now we want to pull these items into flexible billet Billings via the out here so the first step would be to again create similar holding accounts for the alligator - posted transactions - so I'm going to create bill materials and it's a non accounting and I'm going to create a bill travel you and it's non accounting so I've created my two holding accounts the next step would be to update on an additional lines to the allocation method so that the allocator can pull those transactions from materials and travel into these holding accounts so we're going to go to allocation method setup I'll pull up bill so I'm going to add a note line here and I'm going to call it count em post the trails he's going to read the material range um for transactions and I'm not going to use the rate table for this because it's just a flat markup of 10% for materials for this particular project and allocation method so since we're not going to use the rate table the rate type is left blank the allocation rate would be 1.1 so what it's going to do it's going to read an amount and multiply it by 1.1 or 10% market and the basis is going to be amount not units but amount again the post project would be same as source post ass would be same as source and the post account category is going to be that holding account bill materials then I'm going to a third line gonna call it count and hoes travel and it's going to read the travel account and reimbursable easily done with without a markup and a flat 100% so again there will be a rate hike the allocation rate will be one so let me with no market it'll just pull the exact amount that was posted to travel over to I holding account source project and task is the same and so it's going to pull 100% of the costs in to build travel you so if we go around the allocation processor now you you can see it took the carpet of dollars multiplied by 1.1 10% markup and the result is 5,500 click the travel of Crawford dollars or compliant buy one and the result is $1,200 so it didn't mark that up because we are not going to mark up travel to straight reimbursable so we'll do a final on this you you you now if we look at the transactions now we have the McCracken mark up 10% it's 500 posted to bill materials and we have the travel and $1,200 Postigo dill travels so the next step would be to pull this into flexible Billings so the first thing we need to do is update our billing rules for these new accounts so in the top grid we're going to action build materials and build travel and also in the bottom grid you you you you you you you then the next step would be to run billion transactions load to pull those new transactions into the invoice you you you and we have two transactions that came across so now if we go look at the invoice you you there they are or a carpet in the travel so let's lug in the invoice you there's our labor as our carpet and there's our travel okay that's it I'm done all right what questions does everybody have for us or do that then we put everybody to sleep I don't see questions that have come in so far we'll give it another minute or so to see if anybody wants to type any questions into the question box and actually went quicker than I thought it was going to all right well it doesn't look like any questions are coming in but if you do think of any questions you can always email us and we'll be happy to take a look at those and get those answered for you we want to thank everybody for taking the time to attend today if you have any questions if you'd like to see any more information or if you'd like to see how the project allocator can be customized for your specific needs and requirements please contact Debbie PV at DP e avy at SAS n comm or give us a call I want to thank everybody again and thanks Brian and Russ for taking the time to demonstrate the project allocator wait do I see somebody with is that a hand up kathryn friend well I just went away yeah thank you everybody alright thanks everybody have a great afternoon
Show moreFrequently asked questions
How can I scan my signature and use it to sign documents on my computer?
How can I sign a PDF file on a laptop?
How do I add an electronic signature to my PDF using a Signature Field in airSlate SignNow?
Get more for mark Hourly Invoice made easy
- Print signature service Surat Kebenaran Perjalanan Ke Tempat Kerja
- Prove electronically signing Road Trip Itinerary
- Endorse digi-sign Insertion Order Template
- Authorize signature service Equipment Purchase Proposal Template
- Anneal signatory Basketball Camp Registration
- Justify eSignature Mother's Day Gift Certificate
- Try initial California Rental Lease Agreement
- Add Support Agreement electronic signature
- Send Laundry Services Proposal Template signed electronically
- Fax Travel Gift Certificate electronically sign
- Seal Soccer Coach Evaluation electronically signing
- Password Articles of Association mark
- Pass Cleaning Service Contract Template signed
- Renew Home Services Contract autograph
- Test Student Trip Planning digital sign
- Require Equipment Sales Agreement Template initial
- Comment collector electronically signed
- Boost adult digital signature
- Compel endorser initials
- Void Statement of Work Template template countersign
- Adopt Interest Transfer Agreement template sign
- Vouch Consultant Invoice template electronically signing
- Establish Attendance Certificate template eSign
- Clear Membership Agreement Template template eSignature
- Complete Job Report 2020 template autograph
- Force Online Tutoring Services Proposal Template template digisign
- Permit Church Event Promotion Request template electronic signature
- Customize Release of Liability Template template signed electronically