Oblige Byline Template with airSlate SignNow
Award-winning eSignature solution


Get the powerful eSignature features you need from the solution you trust
Select the pro platform designed for pros
Configure eSignature API with ease
Work better together
Oblige byline template, within a few minutes
Cut the closing time
Maintain sensitive data safe
See airSlate SignNow eSignatures in action


airSlate SignNow solutions for better efficiency
Our user reviews speak for themselves


Why choose airSlate SignNow
-
Free 7-day trial. Choose the plan you need and try it risk-free.
-
Honest pricing for full-featured plans. airSlate SignNow offers subscription plans with no overages or hidden fees at renewal.
-
Enterprise-grade security. airSlate SignNow helps you comply with global security standards.

Your step-by-step guide — oblige byline template
Leveraging airSlate SignNow’s electronic signature any organization can increase signature workflows and eSign in real-time, providing an improved experience to customers and workers. oblige byline template in a few simple steps. Our mobile apps make working on the go achievable, even while offline! eSign signNows from anywhere in the world and make trades in no time.
Follow the step-by-step guideline to oblige byline template:
- Log in to your airSlate SignNow account.
- Find your needed form in your folders or upload a new one.
- the record adjust using the Tools list.
- Drop fillable fields, add textual content and sign it.
- Include numerous signees by emails and set up the signing order.
- Specify which users will get an completed version.
- Use Advanced Options to reduce access to the document and set an expiry date.
- Click on Save and Close when finished.
Furthermore, there are more advanced tools available to oblige byline template. Include users to your collaborative workspace, browse teams, and track teamwork. Millions of users all over the US and Europe agree that a system that brings everything together in a single cohesive digital location, is what companies need to keep workflows performing effortlessly. The airSlate SignNow REST API allows you to integrate eSignatures into your application, internet site, CRM or cloud. Try out airSlate SignNow and enjoy quicker, easier and overall more effective eSignature workflows!
How it works
airSlate SignNow features that users love


See exceptional results oblige byline template with airSlate SignNow

How to complete and sign a document online
Try out the fastest way to oblige byline template. Avoid paper-based workflows and manage documents right from airSlate SignNow. Complete and share your forms from the office or seamlessly work on-the-go. No installation or additional software required. All features are available online, just go to signnow.com and create your own eSignature flow.
A brief guide on how to oblige byline template in minutes
- Create an airSlate SignNow account (if you haven’t registered yet) or log in using your Google or Facebook.
- Click Upload and select one of your documents.
- Use the My Signature tool to create your unique signature.
- Turn the document into a dynamic PDF with fillable fields.
- Fill out your new form and click Done.
Once finished, send an invite to sign to multiple recipients. Get an enforceable contract in minutes using any device. Explore more features for making professional PDFs; add fillable fields oblige byline template and collaborate in teams. The eSignature solution gives a secure process and works according to SOC 2 Type II Certification. Make sure that all of your records are protected and therefore no person can edit them.
How to eSign a PDF template in Google Chrome
Are you looking for a solution to oblige byline template directly from Chrome? The airSlate SignNow extension for Google is here to help. Find a document and right from your browser easily open it in the editor. Add fillable fields for text and signature. Sign the PDF and share it safely according to GDPR, SOC 2 Type II Certification and more.
Using this brief how-to guide below, expand your eSignature workflow into Google and oblige byline template:
- Go to the Chrome web store and find the airSlate SignNow extension.
- Click Add to Chrome.
- Log in to your account or register a new one.
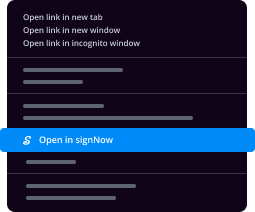
- Upload a document and click Open in airSlate SignNow.
- Modify the document.
- Sign the PDF using the My Signature tool.
- Click Done to save your edits.
- Invite other participants to sign by clicking Invite to Sign and selecting their emails/names.
Create a signature that’s built in to your workflow to oblige byline template and get PDFs eSigned in minutes. Say goodbye to the piles of papers on your desk and start saving money and time for extra essential tasks. Choosing the airSlate SignNow Google extension is a great handy choice with plenty of advantages.
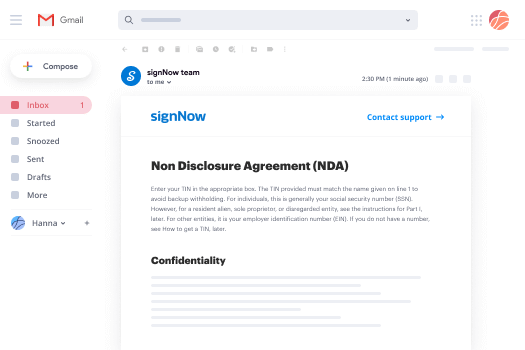

How to sign an attachment in Gmail
If you’re like most, you’re used to downloading the attachments you get, printing them out and then signing them, right? Well, we have good news for you. Signing documents in your inbox just got a lot easier. The airSlate SignNow add-on for Gmail allows you to oblige byline template without leaving your mailbox. Do everything you need; add fillable fields and send signing requests in clicks.
How to oblige byline template in Gmail:
- Find airSlate SignNow for Gmail in the G Suite Marketplace and click Install.
- Log in to your airSlate SignNow account or create a new one.
- Open up your email with the PDF you need to sign.
- Click Upload to save the document to your airSlate SignNow account.
- Click Open document to open the editor.
- Sign the PDF using My Signature.
- Send a signing request to the other participants with the Send to Sign button.
- Enter their email and press OK.
As a result, the other participants will receive notifications telling them to sign the document. No need to download the PDF file over and over again, just oblige byline template in clicks. This add-one is suitable for those who like concentrating on more important tasks as an alternative to burning up time for nothing. Boost your daily monotonous tasks with the award-winning eSignature service.
How to sign a PDF template on the go with no mobile app
For many products, getting deals done on the go means installing an app on your phone. We’re happy to say at airSlate SignNow we’ve made singing on the go faster and easier by eliminating the need for a mobile app. To eSign, open your browser (any mobile browser) and get direct access to airSlate SignNow and all its powerful eSignature tools. Edit docs, oblige byline template and more. No installation or additional software required. Close your deal from anywhere.
Take a look at our step-by-step instructions that teach you how to oblige byline template.
- Open your browser and go to signnow.com.
- Log in or register a new account.
- Upload or open the document you want to edit.
- Add fillable fields for text, signature and date.
- Draw, type or upload your signature.
- Click Save and Close.
- Click Invite to Sign and enter a recipient’s email if you need others to sign the PDF.
Working on mobile is no different than on a desktop: create a reusable template, oblige byline template and manage the flow as you would normally. In a couple of clicks, get an enforceable contract that you can download to your device and send to others. Yet, if you truly want an application, download the airSlate SignNow app. It’s comfortable, quick and has a great design. Experience seamless eSignature workflows from the business office, in a taxi or on an airplane.
How to sign a PDF employing an iPad
iOS is a very popular operating system packed with native tools. It allows you to sign and edit PDFs using Preview without any additional software. However, as great as Apple’s solution is, it doesn't provide any automation. Enhance your iPhone’s capabilities by taking advantage of the airSlate SignNow app. Utilize your iPhone or iPad to oblige byline template and more. Introduce eSignature automation to your mobile workflow.
Signing on an iPhone has never been easier:
- Find the airSlate SignNow app in the AppStore and install it.
- Create a new account or log in with your Facebook or Google.
- Click Plus and upload the PDF file you want to sign.
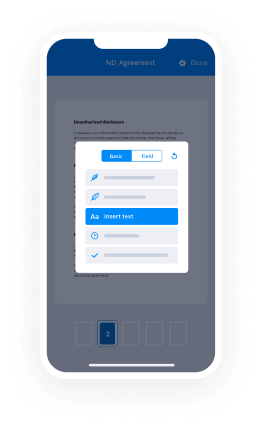
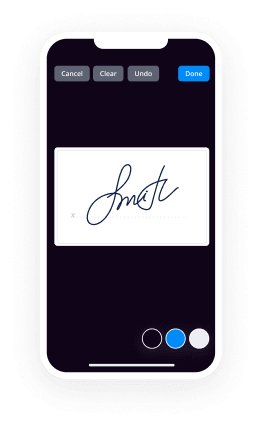
- Tap on the document where you want to insert your signature.
- Explore other features: add fillable fields or oblige byline template.
- Use the Save button to apply the changes.
- Share your documents via email or a singing link.
Make a professional PDFs right from your airSlate SignNow app. Get the most out of your time and work from anywhere; at home, in the office, on a bus or plane, and even at the beach. Manage an entire record workflow effortlessly: make reusable templates, oblige byline template and work on documents with business partners. Turn your device right into a powerful enterprise for executing contracts.
How to eSign a PDF file taking advantage of an Android
For Android users to manage documents from their phone, they have to install additional software. The Play Market is vast and plump with options, so finding a good application isn’t too hard if you have time to browse through hundreds of apps. To save time and prevent frustration, we suggest airSlate SignNow for Android. Store and edit documents, create signing roles, and even oblige byline template.
The 9 simple steps to optimizing your mobile workflow:
- Open the app.
- Log in using your Facebook or Google accounts or register if you haven’t authorized already.
- Click on + to add a new document using your camera, internal or cloud storages.
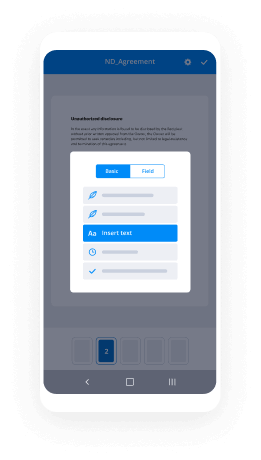
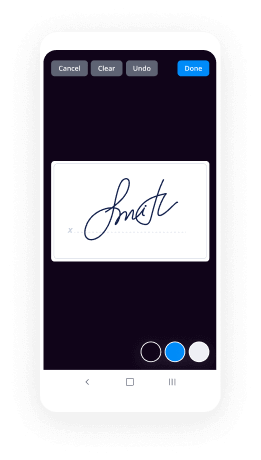
- Tap anywhere on your PDF and insert your eSignature.
- Click OK to confirm and sign.
- Try more editing features; add images, oblige byline template, create a reusable template, etc.
- Click Save to apply changes once you finish.
- Download the PDF or share it via email.
- Use the Invite to sign function if you want to set & send a signing order to recipients.
Turn the mundane and routine into easy and smooth with the airSlate SignNow app for Android. Sign and send documents for signature from any place you’re connected to the internet. Generate professional PDFs and oblige byline template with a few clicks. Assembled a perfect eSignature process with only your mobile phone and improve your total productiveness.
Get legally-binding signatures now!
FAQs
-
How do you write an byline?
Byline articles are an excellent way to retain ownership of key messages and establish thought leadership. ... Consider your audience. ... Don't self-promote. ... Develop a strong thesis. ... Construct an outline. ... Use subheadings. ... Include quality data. ... Don't be boring. -
What should a byline look like?
Bylines in NewssignNows and Other Publications Bylines on airSlate SignNow usually appear after the headline or subhead of an article but before the dateline or body copy. It's almost always prefaced by the word "by" or some other wording that indicates that the piece of information is the name of the author. -
What is the byline in Microsoft Word?
Word forms: plural bylines. countable noun. A byline is a line at the top of an article in a newssignNow or magazine giving the author's name. [technical] Quick word challenge. -
What is a byline in an essay?
A byline is a short paragraph that tells readers a little bit about the author and how to contact the author or read additional content by the author. In most online content, the author bio can be seen at the end of the article. -
How long is a byline?
As a general rule, you want to keep your bio to 2-3 sentences or 40-60 words. This gives you enough room to include the 7 components we'll talk about today without creating a wall of text that scares off readers. An author bio is sometimes confused with an author byline which is technically not the same thing. -
How do you write a good byline?
Byline articles are an excellent way to retain ownership of key messages and establish thought leadership. ... Consider your audience. ... Don't self-promote. ... Develop a strong thesis. ... Construct an outline. ... Use subheadings. ... Include quality data. ... Don't be boring. -
What is a tear out in a feature article?
NewssignNow Feature Article \u2013 Scaffold Paragraphs which elaborate on the lead/1st paragraph- with examples to support main idea. Tear-out. section \u2013 a. quote or piece. of information.
What active users are saying — oblige byline template


Related searches to oblige byline template with airSlate airSlate SignNow

Oblige byline template
today we'll work skill review one forward 2016 the first task for skill review 1 States create a document for the report design template and save the template as a Word document named sample in the geometric folder to create a new document from a template you must open the file tab once you select File you will then select new you're looking for a report design [Music] in your search box which yours should be at the top mine's gonna be in a different location because I working in Word 2019 a year old word 2016 you're gonna type in report design [Music] it brings up different templates and then when you're looking for is going to be report design blank once you select it you will then select create [Music] now you have opened the template is now time to save it as a Word document in the geometric folder to save this document you will open up file select save as locate your geometric folder [Music] here I see that I'm in the geometric folder my file name should be sample with a capital S the save as type should be Word document I'm going to select save [Music] and that's all forecast one rest next [Applause] [Music] [Applause] tasks to add the predefined sample to watermark to this document watermarks can be found under the tab design to your right you will find a watermark [Music] then I select it and then you're just gonna scroll down till you find sample - here it is [Music] [Applause] [Music] once you have found sample to selected [Music] [Applause] here you will see this the sample watermark has been added to the Word document that concludes tasks to press next [Music] task 3 found the word Australia in this document and replace it with Canada so we want to find a word and replace it with a different word here under the Home tab to your right I see the word fun if you'll click the arrow next to find you will then locate more options I'm sorry do not choose fun you want to click replace so under the word fine click replace now says find what we want to find the word Australia au s tra Li a we will replace it with Canada capital CA n ad 8 so again to find what box you're in type in Australia capital a u.s. tr-808 we replace it with canada capital c a in a da once you have that typed in you will then select replace all [Music] this is all done we've made two replacements so okay close the box and then next [Music] [Applause] [Music] tasks for apply the Arial font to the paragraph starting with confidential information so again the task states apply the Arial font to the paragraph starting with confidential information so here the top of this page I see confidential information so I'm going to highlight before it I'm gonna select and hold until the end of the paragraph once that paragraph is selected we're wanting to change the font here under the Home tab in the font group we'll open up our font options we're going to find Ariel [Music] area you're gonna select it it changes how the font looks on the screen that's all forecast for next task five create a left indent of one inch from for the confidential information paragraph so it says create a left indent of one inch for the confidential information paragraph so I'm going to select the confidential information paragraph again here enter it under the Home tab in the paragraph group we want to open up the dialog launch [Music] here I see that we have indentations and right now the left indentation is zero but the task wants the left annotation to be one inch [Music] [Applause] once you have one for the left indentation you will click okay it moves it over see on the document that's all forecast five next task six apply a double line spacing to the entire document so to apply a double line spacing to the entire document here to your right under the Home tab you'll see select once you click select you can then select all or you can also hold down control a to select all on your keyboard once all is selected you're gonna open up the paragraph launch here in the spacing group you want the line spacing to be double and select okay and that's all forecast six next task 7 insert a hyperlink to WWE telecom all the text fusion Tomo and car incorporated in the first paragraph so we need to find the text fusion Tomo incorporated within the first paragraph and highlight it [Music] once is highlighted just like in PowerPoint you can right-click on the highlighted section and add a link here or go to insert [Music] and been in the links group select link [Music] [Applause] from here on the left I know that I'm I'm adding a website so this should be selected is this ting file or well page here I see the text to display as fusion Tomo incorporated just as it stated in the task and the address we want people to go to once they click those words is WWF Eugene Tomo calm [Music] once you have that typed in you will select okay [Music] [Applause] [Music] [Applause] [Music] you'll see that the words you selected are now blue with an underline that means the link has been added select next task 8 on page 2 of this document insert a 3 by 4 table between the first and second paragraph set the table style to list table 1 light accent 3 so again on page 2 of this document we want to insert a 3 by 4 table between the first and second paragraph so let's go down to page 2 [Music] I see this break so I know this is page one this is page two [Music] so now that we're on page 2 I mean put my cursor between the 1st and 2nd paragraph so I'm gonna select right here [Music] [Applause] [Music] [Applause] with my cursory there I now need to insert a table so I'm gonna select the insert tab here at the top table open that up say again you have two options we want a three by four so that's that's a three by one that's a 3 by 2 3 by 3 3 by 4 this would add a 3 by 4 table that means 3 columns and four rows you can also click insert table here and change number of columns to 3 and number of rows to 4 again you just have two options both are correct once you add the table with then you to set the table style to list table one light accent 3 here under table tools under the under the design tab will open up the table style screw so notice these are playing tables grid tables if you scroll down you then will find the list tables so lists tables so this is let's have one light this table one light accent one this is gonna be accent - here's accent 3 this is a 1 the task is requiring so you're gonna select it [Music] that is all for task 8 you will now select next [Music] [Applause] [Music] task 9 insert the picture oranges located in geometric folder after the second paragraph on page two and then apply the artistic effect effect to line drawing so again we're going to insert a picture we know how to do that we did that in PowerPoint we're gonna insert the picture after the second paragraph on page two so let's scroll down to page two okay here's page two I also know this page to close over here on the left that says page 2 of 2 so again so on page 2 after the second paragraph I saw with my cursor right here under languages and then to insert a picture we need to open the insert tab there you will locate pictures we want to find the geometrics folder just as we did in PowerPoint once you locate the geometric folder you will then locate the pitcher oranges you will select a pitcher and then press insert [Music] [Applause] once the picture is inserted you now need to add the artistic effect line drawing under the picture tools tab under format to your left you will locate you will locate the artistic effect once you open artistic effect you will then hover until you find line drawing [Music] [Applause] [Music] here is line-drawing that's on the first road last option selected that is all for task 9 press next [Music] test ten apply a left tab stop to the yellow highlighted sections of this document set the stop at one we're going to apply a left tab stop to the yellow highlighted section of this document to do so you will need to highlight the yellow highlighted section once you have highlighted that section you will then open up the paragraph launch here under the Home tab [Music] once the box opens to your bottom left you will see tabs selected tab stop position should be one once your inner one you're gonna select okay and that concludes task 10 next notice the nothing changes before I press next nothing changed but the tab is set to one inch see how I just tapped over and it moved it for me so you just set the tab it didn't move anything but it is there for every year if you want to have later on next [Music] [Applause] at fusion Tomo and black bread is autocorrect first letter exemptions so I like to tell students that we're working for a company and they're obviously going to be typing the word fusion Tomo is one word multiple times in black bread and that's not in the dictionary and we don't want word to keep adding a little squiggly line underneath it because it's a term that we're gonna use quite a bit so we have to add an exemption to do so that's an option so we need to select file tab and then go to the bottom and select options [Music] once you select options we're talking about autocorrect to display autocorrect options you must select proofing once you select proofing you will then select autocorrect options to your right [Music] once you select autocorrect options you will then select exemptions [Music] once exemptions is selected you will then type infusion Tomo as one word F us o n t o mo once you type it in one word you will then select add and Vince type in black red one one word capital B la ck b or EI t [Music] [Applause] it's like add and then okay okay and don't forget that last okay for it to save completely that concludes task eleven select next [Music] tasks 12 create a continuous section that will contain only the yellow highlighted text and apply the moderate margarine setting to the yellow highlighted text to do so you need to put your cursor right here in front of the a of the highlighted text it's right here once your cursor is there you want to add a break breaks are located under the Layout tab [Music] fancy brakes and remember the task says create a continuous section so we're gonna add a continuous break slight breaks select continuous [Music] now you have added a continuous break but you don't know it so let me show you how you can see it if you go to the Home tab and select paragraph marks see there I see that my continuous break was added so now I need to put my cursor so I've broken the top the the beginning of the highlighted section from the top of the page but now I need to break it from the bottom of the page and to do so I put my cursor right here in front of pin consideration so put your cursor there select the Layout tab again select breaks and then you will select continuous [Music] so now I see that I have two continuous breaks this hop this yellow highlighted section is broken from the top and the bottom of the page so now you see you put your cursor anywhere between the breaks so I'm just going to add my pressure right here on past technology so now I need to apply the moderate margin setting so here under the Layout tab to my left I see margins I'm going to open that up and then I'm going slight moderate [Music] once you select moderate you'll see that the highlighted section has a moderate margin comes in so far over here comes in so far over here so you're done with task 12 and you're going to press next [Music] test 13 prevent a page break in the final paragraph of this document by keeping the lines together so prevent a page break in the final paragraph of this document let's scroll down and find the final paragraph here it is the final paragraph is general provisions and we see that part of its own page 1 and part of its own page 2 and we want to keep that paragraph together to make sure this document looks professional so you can either highlight this paragraph or you can just put your cursor anywhere within the paragraph or in front of it just make sure you're touching the paragraph and once you do so you want to select the paragraph launch here under the Home tab once you open that up here at the top you'll see line and page breaks select that and then we just want to put a checkmark next to keep lines together so again we put our heart we either highlight the paragraph or put our cursor within the paragraph we open up the paragraph launch at the top we then select the line and page breaks and we put a checkmark next to keep lines together select okay and now you can see that the paragraph is together on page two and that completes test thirteen next [Music] tasks 14 sort the data in the in the new table buy tons of apples and descending order here I see a table it contains countries and tons of apples to select it I'm gonna just press this little crosshair button right here make sure I have all of it table tools tab appears I'm gonna select the Layout tab and to my right I see sort so I'm going to select that [Music] says sort by right now is sorting by country see it's an alphabetical order right here in the sorted by country now what we want to change that two tons of apples so you're going to select this arrow just drop down select tons of apples and we want to be in in descending order so we're going to put select descending so we have sort by tons of apples in descending order select okay so now we see that China has the most apples and then it just goes down from there that's all for task 14 next [Music] tasks 15 add the motion quote text box to the first page of this document and enter the text an apple a day keeps the doctor away so again I'm adding this text box to the first page of the document which is where I am I'm not gonna click anywhere I'm not gonna do anything but I do want to add a text box and to add a text box we know that we want to select insert then to our right select text box and then we just want to scroll down here in alphabetical order we're looking for motion quote right here it is motion quote [Music] [Applause] [Music] we want to select it once selected you want to type in an apple a day keeps the doctor away period always check your own spelling so again we have an apple a day keeps the doctor away period click over here in the grey just make sure it holds I'm gonna select next a move on at a 16 [Music] tasks 16 create a two-column table from the list of countries on page 1 of this document autofit the table to the content and accept all other default settings so again I'm going to create a two-column table from the list of countries on page 1 so I'm going to scroll down save the table right here see this I'm gonna highlight from country all the way down to the number and now listen if you highlight this space in this bottom space that's incorrect because it's gonna create a table for that that line also so make sure when you highlight you just highlight like this you just only have the information so once you only have the information we want to insert a table so you're going to select the insert tab and drop open table and we want to convert this text into a table so you're going to select convert text to table [Music] for the autofit behavior it says autofit the table to the content so right here the second option autofit to contents you will then select ok have you now create a table that's all for test 16 next change the style the bulleted list of objectives in section 1.1 from a solid circle to checkmarks so let's find section 1.1 here it is now listen the biggest thing I see students do they try to select these bullets which is kind of difficult I don't know how I did it just right just in but I'm just know you don't have to select the bullets to change the bullets your cursor just has to be on the line I'm just gonna show you see how it's just that easy so again you can just highlight the sentences and you want shake mark bullets okay don't be trying to select the bullets too much work and that's all forecast 17 next past eighteen beginning with confidential information ad numbering to the remaining paragraphs in this document not including the signed by a line use the following numbering format one parentheses two parentheses through parentheses so I know that I'm beginning with confidential information so I'm going to put my cursor in front of confidential information now I'm gonna start highlighting all the way down to party because it says two remaining paragraphs of this document not including the sign ball on so here's a sign byline and I'm not going to include it [Music] so once you've highlighted this section I'm a zoom out show you what I've highlighted from confidential information all the way over to party we want to open up this numbering and we want to select this option just like it says instructions we do not want one in a period we want one with parentheses aligned to the left so goes in back in so you can see that's out okay so that's how your numbering should look one through eight select next [Music] that's 19 format only the yellow highlighted text to display as two equal columns with a line between so I know I need a sub select the highlighted section somewhere to highlight just the yellow highlighted section and I'm looking for columns so again remember if you don't know where columns is which is under the Layout tab you can type in columns right here Co L just like that you're going to see the exact same thing as going to layout columns now listen we know the task says to equal columns but it also says with align between so I don't see any option here that says line between which means the only thing we can do is select more columns just select more columns we know we want to car loans but look right here here's line between with a check mark there so now we have chosen to call to equal problems with a line in between we're gonna click OK [Music] looks good press next [Music] tasks 20 change the position of the footer on this page to 0.4 from the bottom there's multiple ways to go about working on a footer for me I'm gonna scroll down to the bottom to where the footer is located and I see the footer right here fusion Tomo and I'm just gonna double click so I am inside that box so once the the header footer tools open here to the right I say footer from bottom it's currently 0.5 they wants me to change the position of the footer on this page to 0.4 from the bottom something go right here click this arrow down one time 0.4 before you select next make sure you close out the header footer so again footer from bottom 0.4 close header and footer good job next task 21 add a custom tailored content to the top of this page use a formal format and show three levels so my cursor is already flashing here at the top of the page table of content is a reference so you will open the references tab to your left you will locate the table of contents I'm gonna select that now in the instructions for the task it says add a custom table of contents what does this a custom table of contents exactly what the task is asking us today that's what I found under a table of content so custom table of contents select it formats here in the general group the format state from template but here in the instructions it says the format should be formal so let's see if they have a formal open it up and they do area so you're going to select formal it states to show three levels show levels three so that's good select okay and that's all for task 21 next [Music] past 22 display continuous line numbers for this document display continuous line numbers for this document [Music] I'm gonna be honest with you I have not worked this one this year so let's see I'm gonna let the Help button help me let's see what it says click the Layout tab okay and the page setup group here we go so late to line numbers okay and then click continuous I says you know okay so now I see all the line numbers over here on our left so again we selected the Layout tab we select the line numbers and then we select it to continuous that's all for test 22 next TAS 23 insert page numbering at the top of each page of this document use the simple style playing number 3 insert page numbering so let's select the insert tab [Music] here in the header and footer group I see page number it's open that I know this says insert page numbering at the bottom so let's sleep bottom of page now I can't see the instructions plain number three so bottom of page plain number three right here you're gonna select it I don't know if it matters so I'm going to go ahead I've added the patient numbers I'm gonna close the header footer and then next go to 24 [Music] number 24 apply the parchment fill effect to this document so I want to fill the background of the page and to change the background how this paper looks you want to select the design tab once you select the design tab to your right you will see page color open it up I see fill effects and in my instructions I see apply the parchment fill effects to this document so I'm going to select fill effects [Music] [Applause] I know that parchment is a texture so here at the top select texture now I see everybody trying to hover wondering why nothing's appearing um for this specific section of word you have to click it and once you click it you see the names so you will just go through trying to find parchment here so that's the fourth row third one parchment so remember you can't hover you click and the name appears right here once you found parchment you're gonna select ok and then next we see this fancy color on the paper that's parchment Tass 25 demote the last item in the bullet list by one level so let's look at this bullet list here is the bullet list I see a bullet I see a bullet I say bullet another bullet here is the last one long term I'll put my cursor right there for a long time and what it means by demoting the last item in the bullet list by one that means adding an increase indent so right here under the Home tab and the paragraph group that arrow pointing to the right increase indent that's what you need to select [Music] I see how it moves over that's just a different tab a different bullet now that's all forecast 25 next task 26 encrypt the document with a password starship this is something we did in on PowerPoint to protect the file to encrypt it with the password you must select the file tab once you select File in the info group I see for take document nothing to protect the document needs a password so let's select protect document and I see encrypt with password we're gonna select that I'm going to type in starship all over case st AR shi P ok then we're gonna type it again st a rs8 P ok again it's now protected next [Music] cast 27 find the words two months in the first sentence of the term paragraph and add a comment containing the text two years so I know right here here's the term paragraph here's the words two months but if you didn't find it that quickly remember you can select the find a button here at the top right you can tuck type in two months to be once two months has typed over here it'll highlight it in the document something that makes it a little bit easier to find so I'm just gonna highlight two months and we know to add a comment you can go to insert comment right here or you go to review new comment a second option or you can right click [Music] new comment three different ways to add a comment you're gonna type in two years question mark now just like in PowerPoint in PowerPoint you have to click back on the slide to make sure the comment save it's the same thing you want to click back on the document to make sure it saves and don't forget that question mark two years question mark so again once you type it click back in the document it doesn't matter where just click back over here next [Music] they test 28 apply the outline view to this document and then delete the business developments paragraph leave the outline view open that's what everybody's forgetting leave outline view open so to view outline you of course select the View tab to your left and the views group you're gonna select outline that means we're viewing the outline view and now we want to delete the business developments paragraph so we're gonna scroll down find that business development spirograph here it is right here I'm just gonna select this document was it will highlight at all for me save me a step and get on my keyboard you can press backspace or delete I'm gonna press Delete it is gone I'm gonna leave the outline view open do not close it press next [Music] tasks 29 create a PDF XPS document from this document and publish the document in the geometric template folder as a word own five dot PDL do not open the file after publishing we have saved documents well in PowerPoint presentations as PDFs before and so we know we need to select the file tab in the file tab you can either go to save as or export but I like to choose save as so I'm going to select save as here under the file tab I'm gonna select the Jim matrix folder my file name should be word oh five and it is but my save as type should be PDL right here in the instructions video so I'm going to change this to a PDF so then it says do not open the file after publishing make sure this box is not checked because this would make you open it and view it after you save it so no check save so again your double check before I click Save you're in the geometric folder your file name is word oh five your save as type is PDF this box does not have a check safe and then next [Music] past 30 go to the boot mark name quote and create a right Indian of one-inch go to the bookmark name quote to go to a bookmark you have to find it so here under the Home tab to your right I see fun let's select the arrow next to find I'd then C go to and that's what the task states go to the bookmark so let's select go to here it says go to what you want to select bookmark the name of the bookmark is quote so you've already have quote over here so let's go to it select go to your cursor has now moved to the bookmark someone close out this box here my cursor flashes start the front of start you're going to open up the paragraph launch here I see the left indentation is 1 but I need the right indent right indent of 1 I need this right indentation to be 1 [Music] so I have a left and a right of one select okay [Music] and then next [Music] [Applause] [Music] Tass 31 ad 12-point spacing before paragraph 3 on page 1 so let's locate paragraph 3 here on page 1 that's one paragraph to paragraph 3 paragraph we're talking about the spacing before so I'll put my cursor right there in front of the cube open up that paragraph lunch I see the spacing group and I want the before spacing add 12 points of spacing before so we'll change this 12 it even gives you a preview what's gonna happen down here and then okay and that's all forecast 31 next [Music] Tass 30 to create a special hanging indent of 1 in page 1 paragraph 3 starting with quotations that are longer than and ending with a khutba : so let's find that sentence here it is now since it's really spelled out the words I know for sure I must highlight the whole sentence starting with quotations ending with : and I want to create a special hanging indent of 1 to do so you need to open the paragraph launch here and the indentations group I see special right now it's first type first line put I need a special hanging indent so let's open this up select hanging [Music] by one so let's change this 0.5 to 1 all right let's slaked ok you see now that this line is lined up with the paragraph below it that's all for task 32 next PATH 33 add 12 point spacing after paragraph 4 starting with start long quotations on a new and ending with this Microsoft Word template so again roll down now I'm gonna highlight starting long quotations all the way down to template so just like the previous tasks that asked you to add spacing before this one says spacing after same location open up the paragraph launch spacing after should be 12 [Music] and then select okay and that just changes the spacing between this line and this line just got a little bit larger so next task 34 watermark this was a we've already added a watermark on different tasks so we should know where the watermarks are apply the confidential one watermark to this document watermarks are located under the design tab but again if you did not remember you can even type in watermark same thing just gonna show the exact same information okay so here's watermarks to my right under the design tab we're looking for confidential one which is the first option select it we now see this fancy watermark in the back of this document this is confidential that's all for test 34 next test 35 insert the Austin header and enter fusion Tomo incorporated with a period as the document title so let's select insert at the top once you select the insert tab to your right I see a header so let's open up headers and we're looking for Austin because the the test states insert the Austin header it's a third option here once you open it a seat you see that it already has a header that says fusion tomone non-disclosure so I'm just gonna edit that to match what the task is requesting so I'll put my space a space between fusion Tomo I'm backspace out non-disclosure and replace it with a capital I in C period so I have fusion space Tomo space incorporated period so once you type it in give you all few seconds Fusion Tomo incorporate it with a period once you get done type and make sure you close out this header before you click next close header and footer top right close it and then next [Music] so task 36 create a new document from the sample tip template business report median theme so let's do that part first before we continue reading on so we know the templates are under fall so select the file tab we're adding a new template which is a Business Report median theme so remember you can search that I don't have to because I've worked it before I will for you though so Business Report median theme so open it up click it looks like this and click create so on to the second step of the task on page one enter fusion Tomo as the title fast see right here that this is the title right here so I'm just gonna type in fusion Tomo they're two different words fusion space come up and then it says add annual report to the subtitle text so my scroll down see where the subtitle is there it is right under the picture pipe in annual report if I can zoom out [Music] [Applause] okay so we have fusion Tomo here fusion space Tomo is a title here under the image we have annual report that's all for test 36 press next [Music] okay task 37 remove the header on page 2 so let's go down to page 2 here it is here's the header right there I'm just gonna put my cursor on this page make sure I'm there don't really matter where I'm gonna select the insert tab here to your right select header and then at the very bottom you'll find a remove header so you can you select the insert tab at the top to your right you'll locate header open that up and at the very bottom of that option you're gonna choose remove header so now the header is no longer here on page 2 next at the end of the document insert a horizontal line shape with a width set of a hundred percent relative to the margin so let's go down to the end of the document because instruction says at the end of the document I'll put my cursor right here why don't we insert a line shape select insert select shapes and then find line so you're gonna select the insert tab select shapes find the line shape [Music] once you selected little cross appears we're gonna click and hold and draw that line shape from the left to the right of the page you make it horizontal so left to right you got you have a horizontal line shape nail on your paper and you have two options one you can right click which is very difficult for some of you you gotta be right on that line to right click and when you do say you'll see more layout options if you're not comfortable with that look here under the format tab to the far right we see the size area open up that size lunch right now the width is absolute six point eight eight but I want to change that to relative 100 that's gonna be your relative 100% for your width set [Music] you're gonna select okay and then next [Music] [Applause] so task 39 at the end of the document insert the SmartArt art illustration named basic process and apply the style named sub you'll effect so let's go down to the end of the document but my cursor there was just cause you're looking at it doesn't mean that's where you are so now my cursor flashing I know I need to insert a SmartArt illustration named basic process and to do so you're gonna select the insert tab here at the top select smart art [Music] and now I'm looking for a basic process so I'm gonna not go through all the SmartArt so I'm gonna select process here on my left now the first one if I hover it's this basic process and that's someone we're looking for select it select okay so now I have my SmartArt but I need to add a subtle effect so right here that's a subtle sub go effect notice that i'm under the design tab of the SmartArt tools [Music] [Applause] [Music] select it and insulate next [Music] [Applause] [Music] insert a page break before market analysis summary section insert a page break before market analysis so let me scroll down and see if I can find market analysis another thing besides just roll my kids click find and let it find it for me so I don't have to read everything there it is here on page 3 something my cursor in front of it now that I found it and to insert a page break I'm going to select a layout cuz that's where the page breaks are select the Layout tab select breaks and in select page and what that's gonna do is gonna drop from the from the beginning of market analysis summary down to the next page [Music] there you go that's all forecast 40 next [Music] [Applause] [Music] [Applause] caste 41 change the brightness of the picture to 40% in the contrast of the pitcher to set to negative 40 percent so I know I'm working on this picture so let's selected sure I can grab it here we go change the brightness of the picture to 40 percent in the contrast of the picture to negative 40 so when I select the format tab under picture tools I selected the image let's look underneath his tab first let's see what this correction says I'm looking for a brightness the plus 40 and a contrast of negative 40 [Music] [Applause] [Music] [Applause] why I'm having a hard time with this guy's where's the plus 40 so that's plus 44 brightness negative 24 system there we go oh okay first row last option brightness plus 40% contrast negative 40% fragrance like that and then next Tass 42 save the text box is a building block in the tanks boxes gallery with the name signature so the text box they are talking about it's down here on page two here it is so make sure you select it your cursor is not not in the middle of it you have to have the whole thing at the outside of it um just say this is a building block you want to select insert to your right you want to open up quick parts mine says quick parts yours has a little icon you can hover over it it will say explore quick parts but once you find it you we know we want to save this text box to the quick part gallery so we're going to select that last option so you need to select the insert tab you find quick parts you select it and at the very bottom save selection the quick part gallery the name of it is signature capital s IG na tu our eat SiGe na tu art Pete the gallery as in the instructions it says text boxes so we're gonna open up this gallery right now it's quick parts we're going to change that to text boxes save in building box so right now you're saving option is building blocks and that's correct so you have signature text boxes built in building blocks insert content only + okay that's all forecast 42 next [Applause] past 43 apply the shade style colored outline blue accent 1/2 the text box on page 2 of this document so let's go down to page 2 let's locate this text box here it is and select it once we selected it drawing tools open appeared here at the top let's click this select format to the left in shape sales group I'm her whatever the second option and it says colored outline blue accent 1 that's exactly what I'm looking for so I'm gonna select it I now have a little blue outline box there we're gonna slate next move on to 44 [Music] number 44 says select the last sentence of the first paragraph beginning with for more information and add a comment of remove okay so here's the last sentence of the first paragraph right here for more information all the way through then then we know how to insert a comment I studied three ways earlier you can go to insert which is the way I'm gonna go select insert comment type in remove I have not worked this task um this year so I'm gonna put a period just in case I'm not positive it's correct but regardless know that once you type it click back in the document to save it and the next that period worked there we go past forty-five check the spelling and grammar of the Chasen document fix all misspellings in the document to check for spellings you need to select the review tab and to your left you'll see spelling and grammar far-left way over here first option and then once you select that over here to the right it says hey we found this word and I give me they give you four different options to replace it with we're just gonna choose the first one quotations we're gonna select change all and says hey this works misspell - you're replace it with this yes we do change all that says hey we've checked everything you're good to go so okay and then next [Music] tasks 46 and the proofing options remove the mark grammar errors as you type option for this document in the proofing options so let's go to file let's scroll down to the bottom and select options [Music] in the proofing options so it's select proofing in here I see mark grammar areas as you type we don't want it too so let's remove that check mark and make sure and click OK so again right here we just remove that check mark for mark grammar errors as you type no check there okay and the next number 47 add an EndNote containing the text mean comma space 2010 after the quote on the first line of page two so let's go down to page two here's the first line here's a quote put my cursor right there after it is flashing and about go back to my instructions add an EndNote containing the text mean comma space 2010 so we know an EndNote is a reference so we're gonna open their references tab we're gonna select insert EndNote because that's what we're doing and we're gonna type in a capital M lowercase e comma space 2010 once you type that in just as if you were typing a comment you need to click back in the document it doesn't matter where but to save it flat click back in the document don't forget that space a lot of you are saying miss Williams I'm missing this one and I say do you include a space can you click back in the document when you got done typing in you're like oh oh yeah so don't forget if you get that done press next [Music] [Applause] tasks 48 delete all of section 4.3 including the subsection and update the table of content to reflect the changes sonia find section 4.3 in the paper not on the table of content we're going to handle that in a minute so let's go down the last page here we go last page I see here on page 5 of 5 I see station 4.3 I also see the sub section so I'm going to highlight at all so again back to the instructions it says delete all of section 4.3 including the sub section so once you highlight it you need a backspace or press Delete on your keyboard make it go away so now let's go back into the table of content first page page 1 see I see that my table of contents still thinks there's a section down there but there's not deleted I deleted it so let's select the table of content let's update this table press update table it said do you want to update page numbers only no I want to update the entire table so select update entire table select ok now let's go down and see if is to go it is four point three is no more so that's all for test 48 next test 49 add a caption to the startup chart on page 2 that reads figure willing finances and position it below selected item so let's scroll down here let's find this chart there it is it's on page to add a caption so if you right click on this chart [Music] [Applause] you'll find insert caption of course there's other ways but to me this is the easiest way so you're gonna select insert caption so right now see the caption says fear one so I'm just gonna add a space in the top and finances elf I in a NCES so again figure 1 was already there all I added was a space and then I taught finances just as in the instructions the position is already set to below that's what it wanted so I'm just gonna select ok and now I see fear 1 finances appears below the chart [Applause] 50 and table of contents to the beginning of the document using the built-in automatic table one add a table of content I know a table of content is a reference so westlake the references tab to my left I see table of content and then I see automatic table 1 which is the first option [Music] [Applause] selected an asset a little content first next [Music] 51 without changing the file name say the open document as a PDF in the geometric folder optimized for minimum size do not open after publishing ensures the document is named word Oh 1 dot PDF so let's save this document as a PDF by opening the file tab let's select save as let's find that geometric folder so my file name is word oh one that's good my save as type should be PDL it says optimum optimize for a minimum size so this needs to be selected right here right now it's just optimize for standard we want to change that to minimize minimum minimum and this is doing at open after publishing make sure there's no check mark no nada and then you're gonna select save so make sure your file name is word oh one your savings time as PDF your optimized for is a minimum size and there is no checkmark next to open file after publishing save and then next [Music] past 52 customize the save options to embed fonts in the file all the embed characters used in the document note leave all other default settings unchanged so we know our options are under file select file at the bottom we're gonna select options sheer left options save options so let's select save embed fonts here at the bottom put check mark here only embed characters used in the document of the check mark here leave all other default settings unchanged we're not changing anything else so let's look at it so we went to file we went to options you select it save here to your left you put a check mark next to embed fonts in the file and a check mark right here for embed only the characters used in the document and then you're going to select okay that's all for task 52 next task 53 add a footer to the document using the built-in stylus add a footer so how do you insert a footer you select the tab insert to your right we know we're inserting a footer for a slight fitter you have a lot of built-in options and we're looking for a wisp and they're in alphabetical order so I'm gonna go all the way down to the bottom and that's where wisp is located so again insert tab five footer scroll down at the bottom and find a list [Music] [Applause] select it I'm gonna I don't know if it matters I think it does select close header footer once you add it and then next pass 54 apply the emphasis style to paragraph below the heading 1.2 so let's find the section 1.2 mission here it is here's the paragraph below it let's select it apply the emphasis style to the paragraph below the heading 1.2 here under the Home tab I see styles let's open this up and I see emphasis right here in the middle second row fourth option that is the emphasis style [Music] [Applause] you're gonna select it should look like this and then next [Music] fifty-five change the page background color to ice blue accent two and add a page box border so to change the background color to ice blue I know I'm changing the design so I'm gonna slick design to my right I see page color on the first line I see ass blue accent two ice blue exit 2 you're gonna select that and then I also need to add a box border so I'm gonna select here to the far right page borders [Music] it opens in the pay page border tab the setting is none we want it to be box so once you select box here to your left you will then select okay I was again it says page box border accept all default settings so you're not changing anything else so okay so now you have a nice blue accent to paper with a box border and the next [Music] 56 create a document using the letter origin theme template add the salutation to whom it may concern' with a colon so we know the templates are under file so I select file select new even though what I need is right here I'm gonna just show you remember you can type it in search for it once you do so you open up your template create it here at the top you see where it says type the salutation right here in the instructions it says add the salutation to whom it may concern so let's select type salutation let's type in - hmm it may concern with a colon listen there's a big difference between a semi colon a colon it's not huge but listen you do not not a want this that's know you won't that's a semicolon you want a colon two dots once you talk that in you're gonna select next [Music] [Applause] mark this document is final mark this document is final to do so just like in PowerPoint this is something we did in PowerPoint you go to the file tab in the info section you're gonna select protect document here at the bottom you'll see Marcus final so again file tab info group select protect document the you're gonna select Marcus final this doc you know will be March is final and been saved okay that's that's what we want to do I can't read all that okay in okay the next I [Applause] want a 58 the last one I thought it would never happen 58 apply the print layout view to this document how do you view pre layout well of course you select the View tab and then to your left you'll select print layout and that is all for skill review one let's press mix remember if you had one that was incorrect and you kinda skipped it I will work this for class discussion if I'm not working class discussion task I will also just work it for you individually please let me know if you have any questions remember you do need to do trainings multiple times each time you do a training you're improving your knowledge and you're increasing your time you know sometimes it takes a long time to remember what to do with the more you do it the more you will remember so keep practicing and do your best [Music] [Applause] [Music] you
Show moreFrequently asked questions
How do I create and add an electronic signature in iWork?
How to email a PDF in a way that someone can eSign it and send it back
How can I add multiple signatures in several places in a PDF?
Get more for oblige byline template with airSlate SignNow
- Electronic signature EGT
- Prove electronically signed Insurance Waiver
- Endorse digisign Boat Rental Agreement
- Authorize electronically sign Handyman Services Contract Template
- Anneal mark Animal Shelter Cage Card
- Justify esign Sales Report
- Try countersign Pet Adoption Application
- Add Real Estate Purchase Agreement byline
- Send Food Service Contract Template esigning
- Fax Letter of Recommendation for Babysitter digisign
- Seal Alumni Chapter Annual Report signature service
- Password 1099-MISC Form countersign
- Pass Revocation of Power of Attorney sign
- Renew Free Texas Room Rental Agreement initials
- Test Deposit Receipt eSign
- Require Construction Joint Venture Agreement Template eSignature
- Print patron signatory
- Champion vacationer email signature
- Call for man signature
- Void Boat Bill of Sale template esign
- Adopt Factoring Agreement template signature block
- Vouch Certificate of Insurance template signature service
- Establish Technology Assessment template email signature
- Clear Temporary Employment Contract Template template signatory
- Complete Cleaning Work Order template initials
- Force Bid Proposal Template template electronically signed
- Permit Medical Return to Work Form template byline
- Customize Child Medical Consent template esigning