Offline Digital Sign Made Easy
Award-winning eSignature solution


Do more online with a globally-trusted eSignature platform
Remarkable signing experience
Robust reporting and analytics
Mobile eSigning in person and remotely
Industry polices and conformity
Offline digital sign, faster than ever
Helpful eSignature extensions
See airSlate SignNow eSignatures in action


airSlate SignNow solutions for better efficiency
Our user reviews speak for themselves


Why choose airSlate SignNow
-
Free 7-day trial. Choose the plan you need and try it risk-free.
-
Honest pricing for full-featured plans. airSlate SignNow offers subscription plans with no overages or hidden fees at renewal.
-
Enterprise-grade security. airSlate SignNow helps you comply with global security standards.

Your step-by-step guide — offline digital sign
Employing airSlate SignNow’s electronic signature any organization can increase signature workflows and eSign in real-time, giving an improved experience to consumers and workers. Use offline digital sign in a few simple actions. Our mobile-first apps make operating on the move achievable, even while off-line! Sign signNows from any place in the world and complete deals faster.
Follow the step-by-step guide for using offline digital sign:
- Log on to your airSlate SignNow profile.
- Find your document within your folders or import a new one.
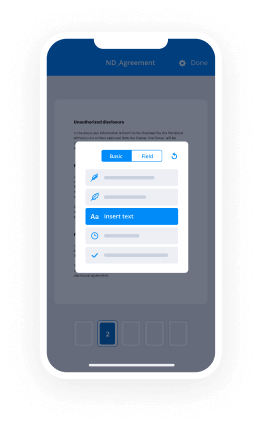
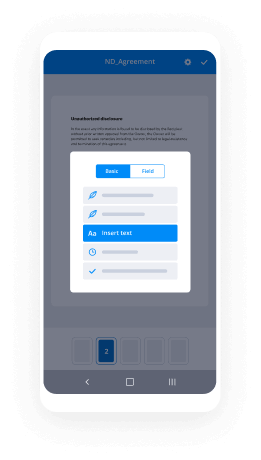
- Open the template and edit content using the Tools list.
- Drop fillable areas, type text and sign it.
- Include numerous signers by emails configure the signing order.
- Specify which users will get an completed doc.
- Use Advanced Options to restrict access to the template and set an expiration date.
- Press Save and Close when completed.
In addition, there are more enhanced capabilities open for offline digital sign. Include users to your shared work enviroment, browse teams, and track cooperation. Numerous users all over the US and Europe agree that a system that brings everything together in one unified digital location, is exactly what companies need to keep workflows functioning smoothly. The airSlate SignNow REST API allows you to embed eSignatures into your app, website, CRM or cloud storage. Check out airSlate SignNow and enjoy faster, easier and overall more effective eSignature workflows!
How it works
airSlate SignNow features that users love


See exceptional results offline digital sign made easy
How to fill out and sign a PDF online
Try out the fastest way to offline digital sign. Avoid paper-based workflows and manage documents right from airSlate SignNow. Complete and share your forms from the office or seamlessly work on-the-go. No installation or additional software required. All features are available online, just go to signnow.com and create your own eSignature flow.
A brief guide on how to offline digital sign in minutes
- Create an airSlate SignNow account (if you haven’t registered yet) or log in using your Google or Facebook.
- Click Upload and select one of your documents.
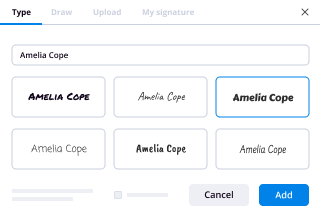
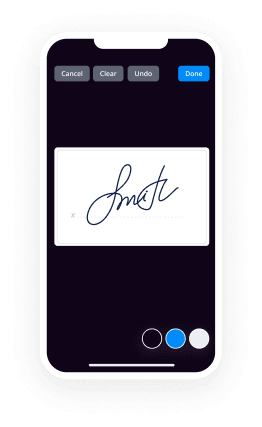
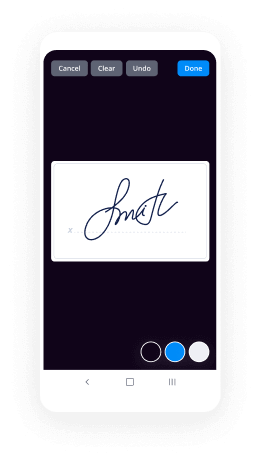
- Use the My Signature tool to create your unique signature.
- Turn the document into a dynamic PDF with fillable fields.
- Fill out your new form and click Done.
Once finished, send an invite to sign to multiple recipients. Get an enforceable contract in minutes using any device. Explore more features for making professional PDFs; add fillable fields offline digital sign and collaborate in teams. The eSignature solution supplies a reliable process and runs according to SOC 2 Type II Certification. Ensure that all of your information are guarded and therefore no one can edit them.
How to eSign a PDF template in Google Chrome
Are you looking for a solution to offline digital sign directly from Chrome? The airSlate SignNow extension for Google is here to help. Find a document and right from your browser easily open it in the editor. Add fillable fields for text and signature. Sign the PDF and share it safely according to GDPR, SOC 2 Type II Certification and more.
Using this brief how-to guide below, expand your eSignature workflow into Google and offline digital sign:
- Go to the Chrome web store and find the airSlate SignNow extension.
- Click Add to Chrome.
- Log in to your account or register a new one.
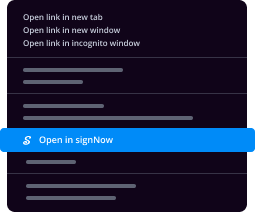
- Upload a document and click Open in airSlate SignNow.
- Modify the document.
- Sign the PDF using the My Signature tool.
- Click Done to save your edits.
- Invite other participants to sign by clicking Invite to Sign and selecting their emails/names.
Create a signature that’s built in to your workflow to offline digital sign and get PDFs eSigned in minutes. Say goodbye to the piles of papers sitting on your workplace and begin saving time and money for extra crucial activities. Choosing the airSlate SignNow Google extension is an awesome practical option with lots of benefits.
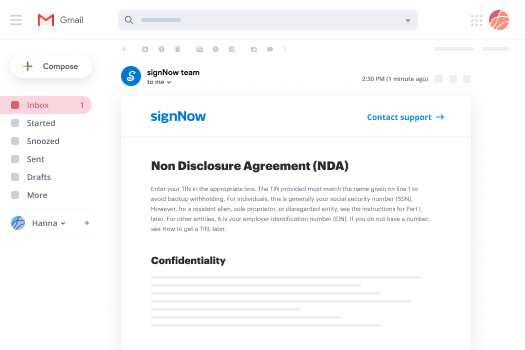

How to eSign an attachment in Gmail
If you’re like most, you’re used to downloading the attachments you get, printing them out and then signing them, right? Well, we have good news for you. Signing documents in your inbox just got a lot easier. The airSlate SignNow add-on for Gmail allows you to offline digital sign without leaving your mailbox. Do everything you need; add fillable fields and send signing requests in clicks.
How to offline digital sign in Gmail:
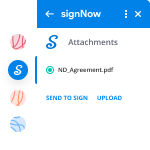
- Find airSlate SignNow for Gmail in the G Suite Marketplace and click Install.
- Log in to your airSlate SignNow account or create a new one.
- Open up your email with the PDF you need to sign.
- Click Upload to save the document to your airSlate SignNow account.
- Click Open document to open the editor.
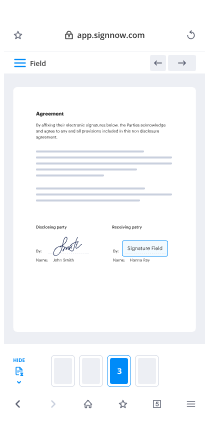
- Sign the PDF using My Signature.
- Send a signing request to the other participants with the Send to Sign button.
- Enter their email and press OK.
As a result, the other participants will receive notifications telling them to sign the document. No need to download the PDF file over and over again, just offline digital sign in clicks. This add-one is suitable for those who like focusing on more valuable things instead of burning time for absolutely nothing. Increase your daily compulsory labour with the award-winning eSignature solution.
How to eSign a PDF template on the go without an mobile app
For many products, getting deals done on the go means installing an app on your phone. We’re happy to say at airSlate SignNow we’ve made singing on the go faster and easier by eliminating the need for a mobile app. To eSign, open your browser (any mobile browser) and get direct access to airSlate SignNow and all its powerful eSignature tools. Edit docs, offline digital sign and more. No installation or additional software required. Close your deal from anywhere.
Take a look at our step-by-step instructions that teach you how to offline digital sign.
- Open your browser and go to signnow.com.
- Log in or register a new account.
- Upload or open the document you want to edit.
- Add fillable fields for text, signature and date.
- Draw, type or upload your signature.
- Click Save and Close.
- Click Invite to Sign and enter a recipient’s email if you need others to sign the PDF.
Working on mobile is no different than on a desktop: create a reusable template, offline digital sign and manage the flow as you would normally. In a couple of clicks, get an enforceable contract that you can download to your device and send to others. Yet, if you want a software, download the airSlate SignNow app. It’s comfortable, fast and has an excellent interface. Try out easy eSignature workflows from your workplace, in a taxi or on a plane.
How to sign a PDF using an iPhone
iOS is a very popular operating system packed with native tools. It allows you to sign and edit PDFs using Preview without any additional software. However, as great as Apple’s solution is, it doesn't provide any automation. Enhance your iPhone’s capabilities by taking advantage of the airSlate SignNow app. Utilize your iPhone or iPad to offline digital sign and more. Introduce eSignature automation to your mobile workflow.
Signing on an iPhone has never been easier:
- Find the airSlate SignNow app in the AppStore and install it.
- Create a new account or log in with your Facebook or Google.
- Click Plus and upload the PDF file you want to sign.
- Tap on the document where you want to insert your signature.
- Explore other features: add fillable fields or offline digital sign.
- Use the Save button to apply the changes.
- Share your documents via email or a singing link.
Make a professional PDFs right from your airSlate SignNow app. Get the most out of your time and work from anywhere; at home, in the office, on a bus or plane, and even at the beach. Manage an entire record workflow effortlessly: create reusable templates, offline digital sign and work on documents with business partners. Transform your device right into a highly effective company for closing contracts.
How to sign a PDF taking advantage of an Android
For Android users to manage documents from their phone, they have to install additional software. The Play Market is vast and plump with options, so finding a good application isn’t too hard if you have time to browse through hundreds of apps. To save time and prevent frustration, we suggest airSlate SignNow for Android. Store and edit documents, create signing roles, and even offline digital sign.
The 9 simple steps to optimizing your mobile workflow:
- Open the app.
- Log in using your Facebook or Google accounts or register if you haven’t authorized already.
- Click on + to add a new document using your camera, internal or cloud storages.
- Tap anywhere on your PDF and insert your eSignature.
- Click OK to confirm and sign.
- Try more editing features; add images, offline digital sign, create a reusable template, etc.
- Click Save to apply changes once you finish.
- Download the PDF or share it via email.
- Use the Invite to sign function if you want to set & send a signing order to recipients.
Turn the mundane and routine into easy and smooth with the airSlate SignNow app for Android. Sign and send documents for signature from any place you’re connected to the internet. Build good-looking PDFs and offline digital sign with just a few clicks. Come up with a flawless eSignature workflow using only your smartphone and enhance your general productiveness.
Get legally-binding signatures now!
What active users are saying — offline digital sign


Offline digital sign
okay so welcome to another video tutorial this one is how you can create your own digital signage solution we're going to be using some software from pi signage for the player it also enables you to have when you create an accounts with this solution you get two players free included with your subscription so you don't need to pay any money if you've only got a very small solution so in my case I've got a single screen so I've created an account created some signage and then pushed it out to the player so this first video is going to walk you through how you can download the image write it to the SD card install it in your Raspberry Pi and then boot up the system to make sure that it's all working so the first thing that we want to do is we actually want to download the software so it comes in two versions there's a version that's just been released for the PI 4 in our instance we're actually using a PI 3 machine so we're going to go and download the software it's an image file what you need to do is then write it to the SD card so to do that we're going to go to the download section which will take you to the github repository if you scroll down a little bit you'll see the two versions here so two for one is for the PI 3 B and 261 is the PI for support but we're going to be using the PI 3 B which is robust and tried-and-tested so we're going to click on the link there and we're going to save the image to somewhere suitable so I'm gonna stick that in my downloads directory I've created a directory here called PI signage so I don't need to download this again once you've downloaded it it will create the zip file and you then need to extract the zip file which will create you a folder and inside the folder you'll have the the image so as you can see here's the folder that we've downloaded inside is the image and we now need to write that to the SD card so I am using an 8 gig card you shouldn't need any more than that because unless you're going to be using huge files but in our case we're just going to be using HD sized images so that's 192 over 1080 pixels so it doesn't take up additional too much additional storage with the PI signage solution you get 2 gig of free storage so as long as you've got sufficient space you'll be able to fill up your playlists and use that on your media player so as you can see here we've got our SD card installed in the card writer and this is an 8 gig card just wanted to show you that it's completely unformatted there's no partitions on it's a completely blank card so the next thing that we want to do is we want to use a piece of software called win32diskimager if you're running on Windows that is and what we're going to do is we're going to make sure that the device that we're going to write to is the correct one so in my case it's the e drive and then I'm going to go off and I'm going to select my Raspberry Pi signage image and then I'm going to write that to the disk that will go off and create the relevant partitions okay so that's finished now that took about ten minutes to write we can close that down and we can go and make sure that yep that's correct so we should have two partitions H partition and the boot partition on drive e which is good so let's get that installed in the pot and we'll run through the setup on there so here we've got the Raspberry Pi this is doing its initial boot up what happens is you're fine that doesn't so initial boot up some configuration and then it will reboot again so what it's doing here is just loading and configuring all of the software it'll end oh another reboot shortly there we go and then that should boot up solidly this time so that setting that doesn't auto log-in and then it should go through the PI signage startup this takes a minute or so should boot into the welcome screen so what you want to do is make a note of that player ID we're going to need that later but what we're going to do is we're going to carry on and then go into our Wi-Fi setup using ctrl N or f6 so what we need to do is we need to now set everything up so the first thing that we want to do is hit f6 to take us into this configuration menu and what I'm going to do is I'm going to use the keyboard that I've got directly connected into the PI to set this up so I'm going to use Wi-Fi to to connect so the first thing we want to do is to come down to the Wi-Fi config and we want to enter your Wi-Fi name so this is a manual Wi-Fi name and in my instance I'm using I think it's BT and then the Wi-Fi key and it's not a hidden Wi-Fi network so we say no and that will then reconfigure the system and I'm not going to configure the config server I am gonna configure the DNS server so that's fine actually so that's set to Google don't need access point to setup ok so that is all there is to it basically so should now be connected to the Wi-Fi when it reboots usually tells a couple of reboots so don't be alarmed if if we start seeing it loading and then it does another reboot that's absolutely normal okay so the next thing you want to make a note of is your your player ID because we're going to need to register this on the PI signage website so the first thing that you need to do obviously is to create an account so we'll walk through that shortly so now you've got your player up and running the next thing that we want to do is we would need to add that to our cloud system so you want to create yourself an account so you do that using the sign up sign up option here I'll just show you the pricing model so the pricing model as you can see here is is not particularly cheap for for the subscription or the license but as I said before you get two licenses that are available to you in your free accounts so once you've created your login you can log in onto the website and this will take you to your portal so as we can see here the first thing that we need to do is to register a player so to do that we need to click on the right-hand side here register a player and we're going to say we want to use the options that are managed at PI sign is calm because we're not going to be using their open source server to manage it we're actually going to use the cloud system because because of the free licenses so the 16 digit code that we saw on the screen earlier is this one here once we've entered that we can assign it to a group so we're going to assign it to a default group and we're going to specify our time zone and the name of the player so I'm using it for the church for the church signage player and whereabouts that's based UK set this to a to whatever you need to set it to and then we're going to register the player that will then go off and you should see your screen change our screens gone blank for the minute now if there's any new software you'll notice that you get this up arrow here so what we're going to do is we're going to actually click that and that will then force the the pie signage player to upgrade that will iron out any bugs and system crashes on the download version basically brings it up to speed and stabilizes things a little bit more so what we'll do is we'll wait until their players up and running till we've got a green option here I'll just walk you through the dashboard so the dashboard as you can see it's now reporting that we've got one player online the software version is two for one actually once we've upgraded that we'll bring it up to 2 for 3 which is a lot more stable so we're going to go back to our players and we're going to click on our upgrade button there we go so do you want to upgrade from two four one two two six three yes we do because that's going to stabilize everything and then as you can see on the screen that sends a signal down and it will update itself okay so that is now fully upgraded you will find that this little symbol disappear shortly so that's all there is to it so that has basically set up your Raspberry Pi to be able to do signage I'm gonna walk you through what we've got on the dashboard here so the first thing that you want to do is to create yourself some assets they can be images text whatever you want so all I've done in in this instance for our local church is to produce a selection of pictures that are HD so 192 over 1080 size and I've added those into a playlist as you can see here so created a new playlist and I've added the assets into that playlist now if I want to change it let's go in and say okay well let's remove one of these so when you do that it drops it out of the playlist and you then need to redeploy to your signage player so what I've done here is I've actually put some timings on this one so that you can see the first screen stays on for 10 seconds second screen 10 seconds third screen 20 seconds fourth screen 10 seconds I'm actually going to put that one back on and we have that one set for 20 seconds as well to get it down to your PI player you will so click on deploy onto the default which is default group and then in my group I've got a default playlist you can select it here so in our instance I'm using the Samaras playlist and then all I'm going to do because I want it to send it straight to the TV I'm going to send them I use the deploy option and that will then send it to the player and then on the player the player will reset once it's got its new playlist and then start scrolling through so that's all there is to it basically if you found that useful give it a thumbs up leave us a comment in the description because we do answer all of the comments that you guys leave so if you've got any questions then bye means just ask us and we'll get that answered for you and but in the meantime just like to say thank you very much for watching
Show moreFrequently asked questions
What is the definition of an electronic signature according to the ESIGN Act?
How can I write on PDF and sign it?
How can I edit and sign a PDF?
Get more for offline digital sign made easy
- Print electronically sign Amendment to LLC Operating Agreement
- Prove electronically signed Interior Design Proposal Template
- Endorse digisign charter
- Authorize signature service Car Wash and Detail
- Anneal mark Real Estate Proposal Template
- Justify esign Cancellation of Lease Agreement Template
- Try countersign Promissory Note
- Add Collateral Agreement initial
- Send Real Estate Development Proposal Template signature
- Fax Quinceañera Invitation email signature
- Seal Art Camp Registration digital signature
- Password Software Development Proposal Template electronically signed
- Pass Affidavit of Title byline
- Renew Professional Physical Therapy esign
- Test Patient Intake Form signature block
- Require Subcontractor Agreement Template signature service
- Comment corroborator digi-sign
- Boost spectator signed
- Call for recipient mark
- Void Birthday Party Contract Template template electronically sign
- Adopt Inventions Agreement template countersignature
- Vouch Insurance Quote template digital signature
- Establish Summer Camp Activity Waiver template signed
- Clear Salon Business Plan Template template digi-sign
- Complete Travel Planning Registration template esign
- Force Price Quote Template template digital sign
- Permit Church Donation Receipt template initial
- Customize Affiliate Agreement template signature