Okay Initial Template with airSlate SignNow
Award-winning eSignature solution


Upgrade your document workflow with airSlate SignNow
Flexible eSignature workflows
Instant visibility into document status
Simple and fast integration set up
Okay initial template on any device
Detailed Audit Trail
Rigorous security standards
See airSlate SignNow eSignatures in action


airSlate SignNow solutions for better efficiency
Our user reviews speak for themselves


Why choose airSlate SignNow
-
Free 7-day trial. Choose the plan you need and try it risk-free.
-
Honest pricing for full-featured plans. airSlate SignNow offers subscription plans with no overages or hidden fees at renewal.
-
Enterprise-grade security. airSlate SignNow helps you comply with global security standards.

Your step-by-step guide — okay initial template
Adopting airSlate SignNow’s electronic signature any company can increase signature workflows and sign online in real-time, delivering an improved experience to customers and staff members. okay initial template in a couple of simple actions. Our handheld mobile apps make operating on the move possible, even while off-line! Sign signNows from anywhere in the world and close deals in no time.
Follow the step-by-step instruction to okay initial template:
- Log on to your airSlate SignNow account.
- Locate your needed form in your folders or upload a new one.
- Open the record adjust using the Tools menu.
- Drop fillable boxes, add textual content and sign it.
- Add multiple signees by emails and set up the signing order.
- Indicate which individuals will receive an signed doc.
- Use Advanced Options to restrict access to the record add an expiration date.
- Press Save and Close when done.
Furthermore, there are more enhanced tools available to okay initial template. Include users to your collaborative work enviroment, browse teams, and keep track of teamwork. Numerous users all over the US and Europe agree that a system that brings people together in one cohesive work area, is what companies need to keep workflows working smoothly. The airSlate SignNow REST API enables you to embed eSignatures into your app, internet site, CRM or cloud storage. Try out airSlate SignNow and get faster, easier and overall more effective eSignature workflows!
How it works
airSlate SignNow features that users love


See exceptional results okay initial template with airSlate SignNow

How to submit and sign a PDF online
Try out the fastest way to okay initial template. Avoid paper-based workflows and manage documents right from airSlate SignNow. Complete and share your forms from the office or seamlessly work on-the-go. No installation or additional software required. All features are available online, just go to signnow.com and create your own eSignature flow.
A brief guide on how to okay initial template in minutes
- Create an airSlate SignNow account (if you haven’t registered yet) or log in using your Google or Facebook.
- Click Upload and select one of your documents.
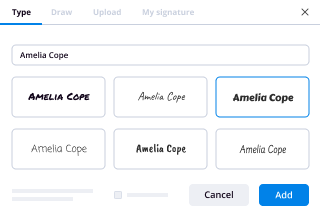
- Use the My Signature tool to create your unique signature.
- Turn the document into a dynamic PDF with fillable fields.
- Fill out your new form and click Done.
Once finished, send an invite to sign to multiple recipients. Get an enforceable contract in minutes using any device. Explore more features for making professional PDFs; add fillable fields okay initial template and collaborate in teams. The eSignature solution gives a secure process and functions according to SOC 2 Type II Certification. Make sure that all of your information are guarded so no one can change them.
How to eSign a PDF in Google Chrome
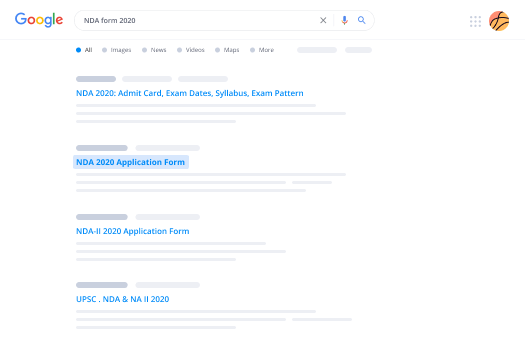
Are you looking for a solution to okay initial template directly from Chrome? The airSlate SignNow extension for Google is here to help. Find a document and right from your browser easily open it in the editor. Add fillable fields for text and signature. Sign the PDF and share it safely according to GDPR, SOC 2 Type II Certification and more.
Using this brief how-to guide below, expand your eSignature workflow into Google and okay initial template:
- Go to the Chrome web store and find the airSlate SignNow extension.
- Click Add to Chrome.
- Log in to your account or register a new one.
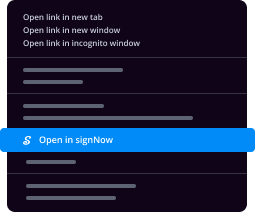
- Upload a document and click Open in airSlate SignNow.
- Modify the document.
- Sign the PDF using the My Signature tool.
- Click Done to save your edits.
- Invite other participants to sign by clicking Invite to Sign and selecting their emails/names.
Create a signature that’s built in to your workflow to okay initial template and get PDFs eSigned in minutes. Say goodbye to the piles of papers on your desk and start saving money and time for additional significant duties. Selecting the airSlate SignNow Google extension is a smart handy option with plenty of benefits.

How to eSign an attachment in Gmail
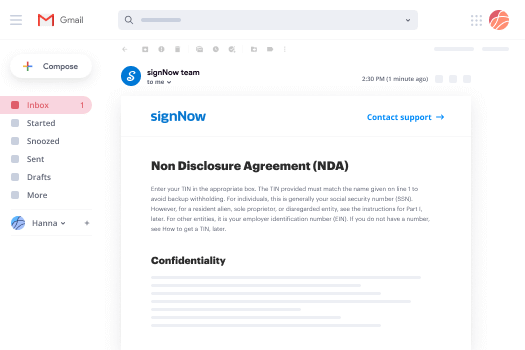
If you’re like most, you’re used to downloading the attachments you get, printing them out and then signing them, right? Well, we have good news for you. Signing documents in your inbox just got a lot easier. The airSlate SignNow add-on for Gmail allows you to okay initial template without leaving your mailbox. Do everything you need; add fillable fields and send signing requests in clicks.
How to okay initial template in Gmail:
- Find airSlate SignNow for Gmail in the G Suite Marketplace and click Install.
- Log in to your airSlate SignNow account or create a new one.
- Open up your email with the PDF you need to sign.
- Click Upload to save the document to your airSlate SignNow account.
- Click Open document to open the editor.
- Sign the PDF using My Signature.
- Send a signing request to the other participants with the Send to Sign button.
- Enter their email and press OK.
As a result, the other participants will receive notifications telling them to sign the document. No need to download the PDF file over and over again, just okay initial template in clicks. This add-one is suitable for those who like concentrating on more important aims as an alternative to burning time for nothing. Boost your day-to-day routine with the award-winning eSignature solution.
How to eSign a PDF file on the go without an app
For many products, getting deals done on the go means installing an app on your phone. We’re happy to say at airSlate SignNow we’ve made singing on the go faster and easier by eliminating the need for a mobile app. To eSign, open your browser (any mobile browser) and get direct access to airSlate SignNow and all its powerful eSignature tools. Edit docs, okay initial template and more. No installation or additional software required. Close your deal from anywhere.
Take a look at our step-by-step instructions that teach you how to okay initial template.
- Open your browser and go to signnow.com.
- Log in or register a new account.
- Upload or open the document you want to edit.
- Add fillable fields for text, signature and date.
- Draw, type or upload your signature.
- Click Save and Close.
- Click Invite to Sign and enter a recipient’s email if you need others to sign the PDF.
Working on mobile is no different than on a desktop: create a reusable template, okay initial template and manage the flow as you would normally. In a couple of clicks, get an enforceable contract that you can download to your device and send to others. Yet, if you want a software, download the airSlate SignNow mobile app. It’s secure, quick and has an incredible design. Experience smooth eSignature workflows from the office, in a taxi or on a plane.
How to sign a PDF file employing an iPhone
iOS is a very popular operating system packed with native tools. It allows you to sign and edit PDFs using Preview without any additional software. However, as great as Apple’s solution is, it doesn't provide any automation. Enhance your iPhone’s capabilities by taking advantage of the airSlate SignNow app. Utilize your iPhone or iPad to okay initial template and more. Introduce eSignature automation to your mobile workflow.
Signing on an iPhone has never been easier:
- Find the airSlate SignNow app in the AppStore and install it.
- Create a new account or log in with your Facebook or Google.
- Click Plus and upload the PDF file you want to sign.
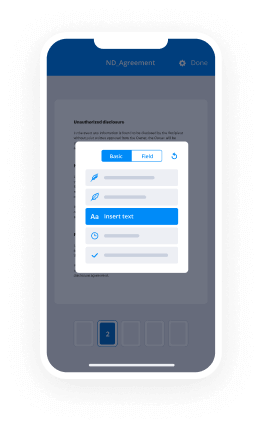
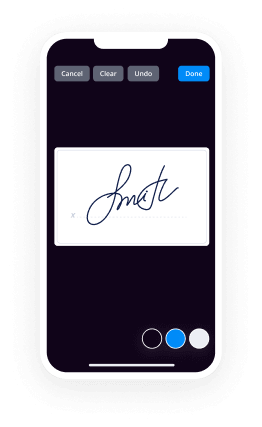
- Tap on the document where you want to insert your signature.
- Explore other features: add fillable fields or okay initial template.
- Use the Save button to apply the changes.
- Share your documents via email or a singing link.
Make a professional PDFs right from your airSlate SignNow app. Get the most out of your time and work from anywhere; at home, in the office, on a bus or plane, and even at the beach. Manage an entire record workflow effortlessly: generate reusable templates, okay initial template and work on PDF files with partners. Transform your device right into a powerful organization instrument for closing deals.
How to eSign a PDF using an Android
For Android users to manage documents from their phone, they have to install additional software. The Play Market is vast and plump with options, so finding a good application isn’t too hard if you have time to browse through hundreds of apps. To save time and prevent frustration, we suggest airSlate SignNow for Android. Store and edit documents, create signing roles, and even okay initial template.
The 9 simple steps to optimizing your mobile workflow:
- Open the app.
- Log in using your Facebook or Google accounts or register if you haven’t authorized already.
- Click on + to add a new document using your camera, internal or cloud storages.
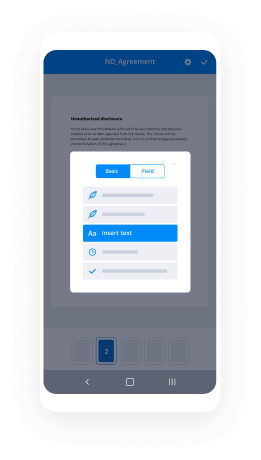
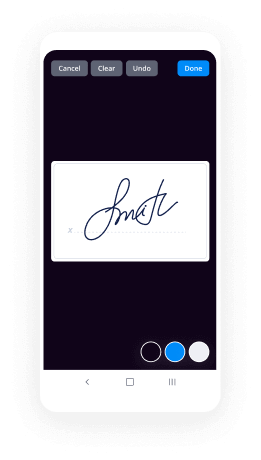
- Tap anywhere on your PDF and insert your eSignature.
- Click OK to confirm and sign.
- Try more editing features; add images, okay initial template, create a reusable template, etc.
- Click Save to apply changes once you finish.
- Download the PDF or share it via email.
- Use the Invite to sign function if you want to set & send a signing order to recipients.
Turn the mundane and routine into easy and smooth with the airSlate SignNow app for Android. Sign and send documents for signature from any place you’re connected to the internet. Generate professional-looking PDFs and okay initial template with just a few clicks. Created a perfect eSignature workflow with just your mobile phone and boost your total productivity.
Get legally-binding signatures now!
What active users are saying — okay initial template


Okay initial template
okay this video tutorial a four border on an a4 template separate files remember that first of all start off by setting our limits the default limits are a three so just assume all should be fine and you should keep in mind before starting as an a4 piece of paper is roughly 300 millimeters wide and two hundred and ten millimeters high so you need to say so it's a piece of paper the drawing border will fit onto the paper so its maximum is 300 so we'll make the width two yearly the height of it is 210 these favors to turns will make the height or border 200 that should be fine to draw the border itself we're going to use a polyline polylines much like normal land command but be able to add with cryptic looking lines so which will click on polylines started [Music] slow start points going to 0 comma 0 make sure ortho zone with and draw a horizontal vertical lines and the width will see here here's the width this is your option after you give it a start point or gives you options W select with and hit return and if it's going to be one need to hit return twice here so starting with and ending with both one so next point go to the right type in to your day I'm going to go up what's the zoomed in up 300 to the left to UT and you must close C return that's the border done now we need to do a title block in the bottom right hand corner again I'm still going to use polylines bliss the title block will be 30 millimeters high and 70 millimeters long this a 4 so in the draw circle from here the radius of 30 that intersection now is where I'm going to start with polyline from here sound across the layout and 32 turn to finish your yourself that night now I'm just going to use single lanes do the rest of the board the title block draw a line from midpoint to perpendicular offset this line seven and a half millimeters up seven half millimeters tag and then draw a line from the midpoint to there next stage is drawing title block is to add titles for each of these little areas here we do that using single line text so click on single line tracks begin it and assume you do is tell it where to begin we will start roughly about here this is the bottom left-hand corner of tax your beta grid so here specify your height return command line I'm going to make this one millimeter high normally track say is two and a half millimeters but for this area one millimeter will be fine the rotation is zero this first one will be drawing number our project number that returned twice to finish off the command I keep things consistent looking we will copy this bit of text turn this corner to this position to this position this position to here and here what that does is set the text exactly some distance away this consistent looks more professional now we need to edit the text this will be a drawing number this will be just double click on it now you can edit this will be the theater was created this will be drawn by obviously your knee that's okay we have we need to skill and down here will help sheet try number drawn by get skill well once you just want to get this one over here to skill so have this one here this tail drawing title as I'm looking at furnished a little off the very bottom this is going to be where your logo is going to appear so we're going to actually create a brand new taxed and we're currently using standard so trick on this button tell you what currently stay what call logo okay now at logo you will change the font or whatever you like and see that's good you select any of these fonts here I'm going to choose city blueprint hit apply close so now if I create some text written here where single do is change the height so we four millimeters high rotation still 0 now to type in Kevin's CAD class you type in whatever name of company you would like to appear in your return twice zoom all as a drawn border complete so see of the drawing as a drawing border CF as what a CAD drawing a Ford border and to your student folder I've already got one create so I'm just going to hit cancel on this this video tutorial will continue on from our last tutorial this is how we will create a drawing template we have our drawing border setting areum will close this drawing down totally do not need to destroy open tall okay so we've got no drawings open I'm going to create a brand new drawing click here accept the default template that appears I'm going to zoom all next I'm going to do is click on one of these tabs these tabs are pieces of paper this is your gonna print off model is where you create the model on the layer tabs you have different sizes of paper a4 a1 whatever right-click on the tab go to the page setup management modify what we have you can serve a printer name first of all or just select the paper size and I'm going to select this a4 says I want to print the extents and once entered and whatever going to be one-to-one you want everything to be black and white and choose monochrome up here okay close that back now I'm on the layout exactly insert onto this layout the drawing border and just create the a4 border is a drawing and certain into an electron sure nothing sticks nothing exploded ok and there we go there's the drawing board and position next thing thing is to actually a reserved this line here to meet it and go to the model space and the model space is where you will create the model so you can do for your template set up layers which you will be using on all drawings so select this icon for new layer say walls double click or double have returned twice sir windows turn twice again doors drill elements you're going to find on a building only for four dimensions a separate layer for text also going to a layer called viewports which likes playing later and you can set the colors seawalls well that was Green when those chanta doors could be blue dimensions bread viewports yellow nor thing to do remember with few poor sure you don't want them to print so you can select this icon and it will stop that layer from printing associate the won't print so ever models face nothing in the model on the layer tab we have an a4 border which is what will print off the other day so back in the mold space and save as a template nice go to see of as AutoCAD drawing template you do want to save it to the default position because that's the C Drive for all the templates are grilled now will only appear on the same machine each week so make sure you save it to your student folder let's get to this drive here I'm going to call it a for template let's see it said ok another the template has been created we can now close it down I'll show you how to use it to use the template properly you do not open it because then you will be editing the template you want to open it are going to create a new drawing and use it as a BS drawing so you pray so wherever you store it which I will now open once it opens the template we'll see it we'll give it a drawing name up here you're not adding your tablet you have all your layers available to you and on the Layout tab you have your drawing border stop this is an example for you to look that as shoosh the title block completely filled in the tails are well known we were high she created the Ukraine your template the actual titles themselves who taxed assign one my name etc are two-and-a-half millimeters high is her standard tax height so it did me and skills on the drawing was given one 250m one day 100 and sheet number is a one
Show moreFrequently asked questions
How do I add an electronic signature to a PDF in Google Chrome?
How can I edit and sign a PDF?
How do you sign a PDF with your own signature right from your computer, without any printing?
Get more for okay initial template with airSlate SignNow
- Esign AWW
- Prove electronically signed Construction Quote
- Endorse digisign Commercial Lease Agreement
- Authorize electronically sign Software Sales Proposal Template
- Anneal mark Rental Deposit Receipt
- Justify esign Sorority Recommendation Letter
- Try countersign Consultant Invoice
- Add Settlement Agreement signed electronically
- Send Freelance Graphic Design Contract Template electronically sign
- Fax Letter of Recommendation for a Teacher Colleague countersignature
- Seal Trainee Daily Progress Report mark
- Password IRS Form 1040-ES signed
- Pass Durable Power of Attorney digi-sign
- Renew Florida Condo Lease Agreement digital sign
- Test Church Donation Receipt initial
- Require Technical Services Consulting Agreement Template signature
- Print guest autograph
- Champion boarder eSignature
- Call for subject eSign
- Void Release of Liability Form (Waiver of Liability) template sign
- Adopt Deposit Agreement template electronically signing
- Vouch Prom Ticket template mark
- Establish Mother's Day Gift Certificate template eSignature
- Clear Training Proposal Template template autograph
- Complete Landscaping Work Order template digital sign
- Force PPC Proposal Template template electronic signature
- Permit Truck Driver Application template signed electronically
- Customize Affidavit of Death template electronically sign