Parallel Electronically Signed Routing Made Easy
Award-winning eSignature solution


Get the powerful eSignature features you need from the solution you trust
Choose the pro service created for pros
Set up eSignature API with ease
Collaborate better together
Parallel electronically signed routing, within a few minutes
Decrease the closing time
Maintain sensitive data safe
See airSlate SignNow eSignatures in action


airSlate SignNow solutions for better efficiency
Our user reviews speak for themselves


Why choose airSlate SignNow
-
Free 7-day trial. Choose the plan you need and try it risk-free.
-
Honest pricing for full-featured plans. airSlate SignNow offers subscription plans with no overages or hidden fees at renewal.
-
Enterprise-grade security. airSlate SignNow helps you comply with global security standards.

Your step-by-step guide — parallel electronically signed routing
Leveraging airSlate SignNow’s electronic signature any organization can speed up signature workflows and eSign in real-time, delivering a better experience to customers and workers. Use parallel electronically signed Routing in a couple of easy steps. Our mobile-first apps make work on the move feasible, even while off the internet! Sign signNows from any place worldwide and close up tasks in no time.
Follow the stepwise instruction for using parallel electronically signed Routing:
- Log on to your airSlate SignNow profile.
- Locate your needed form within your folders or upload a new one.
- Access the record and make edits using the Tools menu.
- Place fillable fields, add text and eSign it.
- List multiple signers via emails and set up the signing sequence.
- Indicate which recipients will receive an executed copy.
- Use Advanced Options to restrict access to the template and set an expiration date.
- Click on Save and Close when finished.
Moreover, there are more extended features accessible for parallel electronically signed Routing. Include users to your common digital workplace, browse teams, and monitor teamwork. Numerous consumers across the US and Europe recognize that a solution that brings people together in a single holistic work area, is what companies need to keep workflows working easily. The airSlate SignNow REST API allows you to integrate eSignatures into your application, website, CRM or cloud. Try out airSlate SignNow and enjoy quicker, easier and overall more effective eSignature workflows!
How it works
airSlate SignNow features that users love


See exceptional results parallel electronically signed Routing made easy
How to fill in and sign a PDF online
Try out the fastest way to parallel electronically signed Routing. Avoid paper-based workflows and manage documents right from airSlate SignNow. Complete and share your forms from the office or seamlessly work on-the-go. No installation or additional software required. All features are available online, just go to signnow.com and create your own eSignature flow.
A brief guide on how to parallel electronically signed Routing in minutes
- Create an airSlate SignNow account (if you haven’t registered yet) or log in using your Google or Facebook.
- Click Upload and select one of your documents.
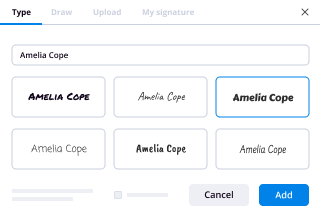
- Use the My Signature tool to create your unique signature.
- Turn the document into a dynamic PDF with fillable fields.
- Fill out your new form and click Done.
Once finished, send an invite to sign to multiple recipients. Get an enforceable contract in minutes using any device. Explore more features for making professional PDFs; add fillable fields parallel electronically signed Routing and collaborate in teams. The eSignature solution gives a secure workflow and operates in accordance with SOC 2 Type II Certification. Be sure that your records are protected and therefore no person can take them.


How to eSign a PDF file in Google Chrome
Are you looking for a solution to parallel electronically signed Routing directly from Chrome? The airSlate SignNow extension for Google is here to help. Find a document and right from your browser easily open it in the editor. Add fillable fields for text and signature. Sign the PDF and share it safely according to GDPR, SOC 2 Type II Certification and more.
Using this brief how-to guide below, expand your eSignature workflow into Google and parallel electronically signed Routing:
- Go to the Chrome web store and find the airSlate SignNow extension.
- Click Add to Chrome.
- Log in to your account or register a new one.
- Upload a document and click Open in airSlate SignNow.
- Modify the document.
- Sign the PDF using the My Signature tool.
- Click Done to save your edits.
- Invite other participants to sign by clicking Invite to Sign and selecting their emails/names.
Create a signature that’s built in to your workflow to parallel electronically signed Routing and get PDFs eSigned in minutes. Say goodbye to the piles of papers on your desk and start saving money and time for more essential duties. Picking out the airSlate SignNow Google extension is a smart convenient decision with lots of benefits.


How to eSign an attachment in Gmail
If you’re like most, you’re used to downloading the attachments you get, printing them out and then signing them, right? Well, we have good news for you. Signing documents in your inbox just got a lot easier. The airSlate SignNow add-on for Gmail allows you to parallel electronically signed Routing without leaving your mailbox. Do everything you need; add fillable fields and send signing requests in clicks.
How to parallel electronically signed Routing in Gmail:
- Find airSlate SignNow for Gmail in the G Suite Marketplace and click Install.
- Log in to your airSlate SignNow account or create a new one.
- Open up your email with the PDF you need to sign.
- Click Upload to save the document to your airSlate SignNow account.
- Click Open document to open the editor.
- Sign the PDF using My Signature.
- Send a signing request to the other participants with the Send to Sign button.
- Enter their email and press OK.
As a result, the other participants will receive notifications telling them to sign the document. No need to download the PDF file over and over again, just parallel electronically signed Routing in clicks. This add-one is suitable for those who like focusing on more significant aims instead of burning time for practically nothing. Improve your day-to-day monotonous tasks with the award-winning eSignature solution.

How to sign a PDF template on the go with no application
For many products, getting deals done on the go means installing an app on your phone. We’re happy to say at airSlate SignNow we’ve made singing on the go faster and easier by eliminating the need for a mobile app. To eSign, open your browser (any mobile browser) and get direct access to airSlate SignNow and all its powerful eSignature tools. Edit docs, parallel electronically signed Routing and more. No installation or additional software required. Close your deal from anywhere.
Take a look at our step-by-step instructions that teach you how to parallel electronically signed Routing.
- Open your browser and go to signnow.com.
- Log in or register a new account.
- Upload or open the document you want to edit.
- Add fillable fields for text, signature and date.
- Draw, type or upload your signature.
- Click Save and Close.
- Click Invite to Sign and enter a recipient’s email if you need others to sign the PDF.
Working on mobile is no different than on a desktop: create a reusable template, parallel electronically signed Routing and manage the flow as you would normally. In a couple of clicks, get an enforceable contract that you can download to your device and send to others. Yet, if you want a software, download the airSlate SignNow app. It’s secure, fast and has an intuitive interface. Take advantage of in effortless eSignature workflows from the business office, in a taxi or on a plane.

How to sign a PDF file using an iPhone
iOS is a very popular operating system packed with native tools. It allows you to sign and edit PDFs using Preview without any additional software. However, as great as Apple’s solution is, it doesn't provide any automation. Enhance your iPhone’s capabilities by taking advantage of the airSlate SignNow app. Utilize your iPhone or iPad to parallel electronically signed Routing and more. Introduce eSignature automation to your mobile workflow.
Signing on an iPhone has never been easier:
- Find the airSlate SignNow app in the AppStore and install it.
- Create a new account or log in with your Facebook or Google.
- Click Plus and upload the PDF file you want to sign.
- Tap on the document where you want to insert your signature.
- Explore other features: add fillable fields or parallel electronically signed Routing.
- Use the Save button to apply the changes.
- Share your documents via email or a singing link.
Make a professional PDFs right from your airSlate SignNow app. Get the most out of your time and work from anywhere; at home, in the office, on a bus or plane, and even at the beach. Manage an entire record workflow effortlessly: create reusable templates, parallel electronically signed Routing and work on PDFs with partners. Turn your device right into a potent business for executing offers.

How to eSign a PDF file Android
For Android users to manage documents from their phone, they have to install additional software. The Play Market is vast and plump with options, so finding a good application isn’t too hard if you have time to browse through hundreds of apps. To save time and prevent frustration, we suggest airSlate SignNow for Android. Store and edit documents, create signing roles, and even parallel electronically signed Routing.
The 9 simple steps to optimizing your mobile workflow:
- Open the app.
- Log in using your Facebook or Google accounts or register if you haven’t authorized already.
- Click on + to add a new document using your camera, internal or cloud storages.
- Tap anywhere on your PDF and insert your eSignature.
- Click OK to confirm and sign.
- Try more editing features; add images, parallel electronically signed Routing, create a reusable template, etc.
- Click Save to apply changes once you finish.
- Download the PDF or share it via email.
- Use the Invite to sign function if you want to set & send a signing order to recipients.
Turn the mundane and routine into easy and smooth with the airSlate SignNow app for Android. Sign and send documents for signature from any place you’re connected to the internet. Generate professional-looking PDFs and parallel electronically signed Routing with a few clicks. Come up with a flawless eSignature process with just your smartphone and improve your total efficiency.
Get legally-binding signatures now!
What active users are saying — parallel electronically signed routing


Related searches to parallel electronically signed Routing made easy

Parallel electronically signed routing
hi so last week we had a look at some serious parallel network problems which were a little bit more complicated in as much as they weren't laid out as you would normally expect them to be this is a sample solution for problem 9 and the reason I've chosen this is because there's a bit of a trick in this question so what we have to do is solve the circuit following the table okay first thing we have to do is to try and simplify the circuit a bit so that we can actually break it down more easily into its series and parallel their components where I suggest you do this is by starting off with the power supply and you don't really have to worry about because it's in the center here you can actually move it so that it's in the on the left hand side so let's start off by doing that we have our power supply at 32 volts and we have a positive and negative connections to it but if we look at the diagram above let's start off with the easier side and we look at our 4 initially and you can see that from the positive side of the curve the power supply he goes to one end of our four on a negative side through this link it goes to the other side so power 4 sits directly across the power supply so let's draw that in so now we have power 4 so the other one we have on this side of the power supply is our 5 and this is a bit of a strange one because if you look at this this is our negative side of the power supply which has a direct link to here so our 5 has in effect 0 volts at this side and it also has 0 volts at this side so our 5 sits underneath this part of the diagram so here we have our 5 and in effect we have 0 volts at this end and we have 0 volts at this end so our 5 has no voltage drop across it and it has no current flowing and as it has no current flowing through it then in actual fact there'll be no power anticipated in that resistor so now we've got the right-hand side of this diagram are sorted out let's look at the left-hand side and what's the best place to start well the top end the positive side there's actually two resistors come off it and the bottom end there's just the one okay and the bottom one that goes to this node here which he said by both of those let's have a look at putting our two in next and it goes from the negative side of the power supply across our two comes across from the negative side of the power supply and that this node here joins up to both those resistors which I'll connect up to the positive side of the power supply to finish off we can stick those two in so now we have a simplified layout showing how the resistors fit together in the various series and parallel networks now it makes it much easier to start simplifying I would recommend when you're doing this that you do draw the diagrams as you go through the simplification process because if you don't do that you're gonna get in a tangle with it okay so first thing we can do is look at these two resistors here which are two resistors in parallel and we can simplify by sticking one resistor in to replace both r1 and r3 what I've actually done is I've replaced r1 and r3 by a single resistor and r5 because we've determined our v has no effect on the circuit at all I've actually omitted that so r1 3 it's going to replace r1 and r3 and because those two are in parallel we use the formula 1 over r1 3 equals 1 over r1 plus one over r3 and we can then substitute in the values r1 is 790 ohms r3 is eight point six times 10 to power 3 so just by calculating the answer 1 over all one two three equals one point three eight two one times ten to the minus three I remember that's 1 over R 1 3 so we need to invert this to get the answer for R 1 comma 3 so 1 comma 3 is equal to 720 3 point 5 3 6 ohms now we've done that we can look at our circuit and see what we can simplify next and these two resistors here are in series so let's replace both of those with one effective resistor R 1 comma 2 comma 3 so we've replaced R 1 3 and R 2 with one resistor with an effective resistance so R 1 2 3 is equal to R 1 3 plus R 2 now I know what R 1 3 is and we know what R 2 is so we can substitute those into the formula like so and then simplify it to find the answer so R 1 2 3 is equal to one thousand seven hundred and twenty three point five three six poems so now we just have the two resistors in parallel the effective resistance R 1 2 3 which replaced the rest of the network that we've taken out and our four two resistors in parallel so let's replace that with one which we're going to call our 1 2 3 4 so if we use 1 over R 1 2 3 4 is equal to 1 over R 1 2 3 plus 1 over R 4 and we can find the effective resistance of the whole circuit so let's substitute in the values substituting in the values we get this then simplifying it we get 1 over R 1 2 3 4 equals this value here and remember this is 1 over so we have to invert it to find the final effective resistance r 1 2 3 4 equals nine hundred and sixty six point four one nine ohms so we worked our way down now and we've simplified this circuit as much as we can so now let's work out what my T the current flowing through circuit start off with V equals that IR we're going to transpose that for I so the total current is equal to V which is 32 volts divided by R on to 3 for the effective resistance of the circuit substituting in the values 32 divided by nine six six point four one nine gives the total current flowing through the circuit as naught point naught 3 3 1 1 amps or 33 point 1 1 milliamps now we can move back up a circuit using that information to help us find some more values in this part it's moving back up the circuit we know that the voltage across R 4 and R 1 2 3 is 32 volts so we can actually work out now the current flowing through R 4 and the current flowing through the rest of the network so let's have a look at that and see what we can work out from that to calculate the current flowing through our 4 we know the voltage we know the resistance so we can just use the formula I 4 equals V over R 4 let's substitute in the values and see what we get I 4 is equal to 32 over 22 kilo ohms and we can simplify that so we get I 4 is equal to point zero one four five amps or 14 and a half millions we can do exactly the same for the current flowing through our one two three network using the formula I 1 2 3 equals V over the effective resistance R 1 2 3 let's substitute in the values and see what we end up with V is 32 volts the effective resistance of our one two three is one seven two three point five three six homes calculating that out we end up with 18 point five seven milliamps now this stays just to make sure we've made no mistakes what we can do is to just do a quick check and we know that the current flowing through the circuit or split here so you have I for going down there and I one-two-three going down there so I total should equal I four plus I 1 2 3 and if you add those together 14 and a half plus eighteen point five seven we should get approximately 31 point one one milliamps which we do so that's good having worked out these two values of current we can now feed those back into the next diagram up and we know now I four and we know I 1 2 3 and I 2 1 2 3 is the same current flowing through the two series resistors so I 1 2 3 flowing through R 2 I 4 flowing through our 4 we can now work out the voltage drop across R 2 so that gives us our fathers directly for the table but also we can work out the voltage drop across R 1 3 which we will need to calculate the final bit of the problem to calculate the voltage drop across R 2 we're going to use Ohm's law so let's have a look at the formula and the substitution the voltage drop across R 2 is equal to the current i-12 3 multiplied by r 2 which is 1 kilo ohms giving us a value the voltage drop across R 2 is 18 point five seven volts for the voltage drop across our one three Network we have the current I 1 2 3 and the effective resistance of our 1 3 which we calculated earlier as 723 point five three six so substituting those in a voltage drop across R 1 3 as fourteen point four 36 and that's a quick check we know that the voltage drop between there and there across that series with a resistor network should be 32 volts and if you add those together that's what you'll actually get so we know the voltage drop across one on our three you know the values if I want on our three so we can now work out the current flowing through r1 and r3 by using the formula I 1 is equal to the voltage drop across R 1 divided by the resistance R 1 so substituting in the values I 1 comes out at 17 point o 4 milliamps and do the same thing for I 3 so doing exactly the same thing I 3 comes out at 1.5 65 milliamps so at this stage we've gone straight away down we've worked out the voltage drops across the various components we've also worked out the current flowing through them so we can now go back and stick those values into the table so we can substitute in to the table all the values that we've calculated so far and we're nearly there so what we have to burn the table now is the power dissipated in the various resistors the formula that springs to mind initially is the power dissipated equals the voltage drop across the resistor times the current flowing through the resistor however there's a slight problem with this because when it comes to the values that we have in the table we calculated all the values of I and the majority of values of V as well so when you're doing the power calculations whenever possible it's best to use known values now the problem is the known values we have are for the resistance so we need to get rid of the current in the formula and use resistance so that we're using as many known values as possible now we know that the current flowing through the resistor is equal to V over R so we can substitute that into the power formula to get rid of I which leaves us with power equals voltage squared divided by resistance so what we're going to do now is use that formula for all these resistors and fill in the table now I don't intend to go through those one by one because you're quite capable of doing that yourself okay so I'll just substitute in the values and see what we get these other values that calculated using P equals V squared over R if you compare that with the answer sheet you'll see that there are some slight discrepancies between the two but this will be down to the rounding errors that we've used throughout the calculations so hopefully you can see that by using this method of simplifying the circuit to start off with and then reducing the number of resistors in the network so you haven't only for one effective resistance at the end then substituting in values as you go back up again that this makes the problem much more straightforward and you're much less likely to make mistakes so it's not difficult it's just time consuming and again draw the diagrams
Show more