Peg Initial Request with airSlate SignNow
Award-winning eSignature solution


Do more online with a globally-trusted eSignature platform
Remarkable signing experience
Robust reports and analytics
Mobile eSigning in person and remotely
Industry polices and compliance
Peg initial request, quicker than ever before
Useful eSignature extensions
See airSlate SignNow eSignatures in action


airSlate SignNow solutions for better efficiency
Our user reviews speak for themselves


Why choose airSlate SignNow
-
Free 7-day trial. Choose the plan you need and try it risk-free.
-
Honest pricing for full-featured plans. airSlate SignNow offers subscription plans with no overages or hidden fees at renewal.
-
Enterprise-grade security. airSlate SignNow helps you comply with global security standards.

Your step-by-step guide — peg initial request
Using airSlate SignNow’s eSignature any company can increase signature workflows and sign online in real-time, giving an improved experience to customers and workers. peg initial Request in a few easy steps. Our mobile-first apps make work on the go feasible, even while offline! eSign signNows from anywhere in the world and complete trades faster.
Take a stepwise instruction to peg initial Request:
- Log on to your airSlate SignNow profile.
- Locate your needed form within your folders or upload a new one.
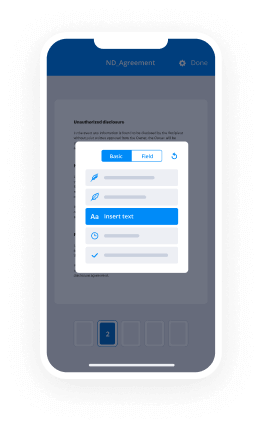
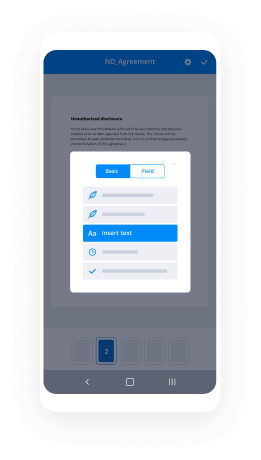
- Open the document adjust using the Tools menu.
- Drag & drop fillable fields, type textual content and sign it.
- Add multiple signees by emails and set up the signing order.
- Choose which users will get an executed doc.
- Use Advanced Options to restrict access to the document add an expiration date.
- Press Save and Close when completed.
Furthermore, there are more extended tools open to peg initial Request. List users to your common digital workplace, browse teams, and monitor collaboration. Numerous customers across the US and Europe concur that a solution that brings everything together in one holistic enviroment, is exactly what enterprises need to keep workflows working efficiently. The airSlate SignNow REST API enables you to embed eSignatures into your app, internet site, CRM or cloud storage. Try out airSlate SignNow and get faster, easier and overall more efficient eSignature workflows!
How it works
airSlate SignNow features that users love


See exceptional results peg initial Request with airSlate SignNow

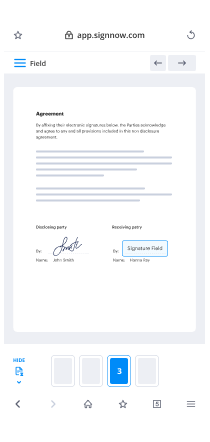
How to complete and eSign a document online
Try out the fastest way to peg initial Request. Avoid paper-based workflows and manage documents right from airSlate SignNow. Complete and share your forms from the office or seamlessly work on-the-go. No installation or additional software required. All features are available online, just go to signnow.com and create your own eSignature flow.
A brief guide on how to peg initial Request in minutes
- Create an airSlate SignNow account (if you haven’t registered yet) or log in using your Google or Facebook.
- Click Upload and select one of your documents.
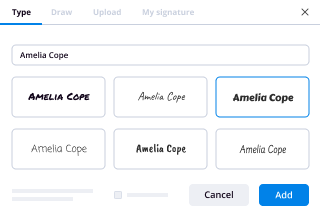
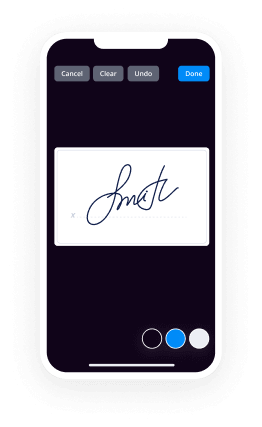
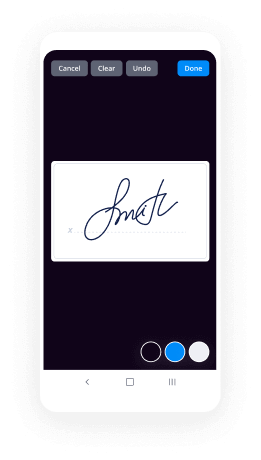
- Use the My Signature tool to create your unique signature.
- Turn the document into a dynamic PDF with fillable fields.
- Fill out your new form and click Done.
Once finished, send an invite to sign to multiple recipients. Get an enforceable contract in minutes using any device. Explore more features for making professional PDFs; add fillable fields peg initial Request and collaborate in teams. The eSignature solution gives a secure workflow and functions based on SOC 2 Type II Certification. Ensure that all your records are protected and that no person can change them.
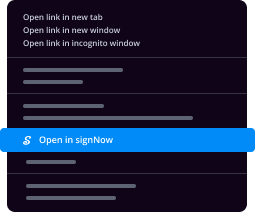
How to eSign a PDF in Google Chrome
Are you looking for a solution to peg initial Request directly from Chrome? The airSlate SignNow extension for Google is here to help. Find a document and right from your browser easily open it in the editor. Add fillable fields for text and signature. Sign the PDF and share it safely according to GDPR, SOC 2 Type II Certification and more.
Using this brief how-to guide below, expand your eSignature workflow into Google and peg initial Request:
- Go to the Chrome web store and find the airSlate SignNow extension.
- Click Add to Chrome.
- Log in to your account or register a new one.
- Upload a document and click Open in airSlate SignNow.
- Modify the document.
- Sign the PDF using the My Signature tool.
- Click Done to save your edits.
- Invite other participants to sign by clicking Invite to Sign and selecting their emails/names.
Create a signature that’s built in to your workflow to peg initial Request and get PDFs eSigned in minutes. Say goodbye to the piles of papers on your desk and start saving money and time for more crucial tasks. Picking out the airSlate SignNow Google extension is a great practical option with many different advantages.
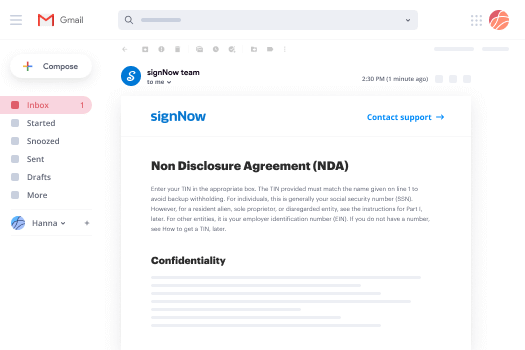
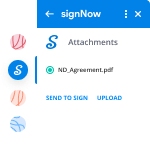

How to sign an attachment in Gmail
If you’re like most, you’re used to downloading the attachments you get, printing them out and then signing them, right? Well, we have good news for you. Signing documents in your inbox just got a lot easier. The airSlate SignNow add-on for Gmail allows you to peg initial Request without leaving your mailbox. Do everything you need; add fillable fields and send signing requests in clicks.
How to peg initial Request in Gmail:
- Find airSlate SignNow for Gmail in the G Suite Marketplace and click Install.
- Log in to your airSlate SignNow account or create a new one.
- Open up your email with the PDF you need to sign.
- Click Upload to save the document to your airSlate SignNow account.
- Click Open document to open the editor.
- Sign the PDF using My Signature.
- Send a signing request to the other participants with the Send to Sign button.
- Enter their email and press OK.
As a result, the other participants will receive notifications telling them to sign the document. No need to download the PDF file over and over again, just peg initial Request in clicks. This add-one is suitable for those who like focusing on more significant aims rather than wasting time for absolutely nothing. Increase your day-to-day routine with the award-winning eSignature application.
How to sign a PDF on the go with no app
For many products, getting deals done on the go means installing an app on your phone. We’re happy to say at airSlate SignNow we’ve made singing on the go faster and easier by eliminating the need for a mobile app. To eSign, open your browser (any mobile browser) and get direct access to airSlate SignNow and all its powerful eSignature tools. Edit docs, peg initial Request and more. No installation or additional software required. Close your deal from anywhere.
Take a look at our step-by-step instructions that teach you how to peg initial Request.
- Open your browser and go to signnow.com.
- Log in or register a new account.
- Upload or open the document you want to edit.
- Add fillable fields for text, signature and date.
- Draw, type or upload your signature.
- Click Save and Close.
- Click Invite to Sign and enter a recipient’s email if you need others to sign the PDF.
Working on mobile is no different than on a desktop: create a reusable template, peg initial Request and manage the flow as you would normally. In a couple of clicks, get an enforceable contract that you can download to your device and send to others. Yet, if you want a software, download the airSlate SignNow app. It’s secure, quick and has an excellent layout. Experience effortless eSignature workflows from the workplace, in a taxi or on an airplane.
How to sign a PDF having an iPad
iOS is a very popular operating system packed with native tools. It allows you to sign and edit PDFs using Preview without any additional software. However, as great as Apple’s solution is, it doesn't provide any automation. Enhance your iPhone’s capabilities by taking advantage of the airSlate SignNow app. Utilize your iPhone or iPad to peg initial Request and more. Introduce eSignature automation to your mobile workflow.
Signing on an iPhone has never been easier:
- Find the airSlate SignNow app in the AppStore and install it.
- Create a new account or log in with your Facebook or Google.
- Click Plus and upload the PDF file you want to sign.
- Tap on the document where you want to insert your signature.
- Explore other features: add fillable fields or peg initial Request.
- Use the Save button to apply the changes.
- Share your documents via email or a singing link.
Make a professional PDFs right from your airSlate SignNow app. Get the most out of your time and work from anywhere; at home, in the office, on a bus or plane, and even at the beach. Manage an entire record workflow effortlessly: build reusable templates, peg initial Request and work on documents with business partners. Transform your device into a highly effective enterprise tool for executing deals.
How to eSign a PDF file using an Android
For Android users to manage documents from their phone, they have to install additional software. The Play Market is vast and plump with options, so finding a good application isn’t too hard if you have time to browse through hundreds of apps. To save time and prevent frustration, we suggest airSlate SignNow for Android. Store and edit documents, create signing roles, and even peg initial Request.
The 9 simple steps to optimizing your mobile workflow:
- Open the app.
- Log in using your Facebook or Google accounts or register if you haven’t authorized already.
- Click on + to add a new document using your camera, internal or cloud storages.
- Tap anywhere on your PDF and insert your eSignature.
- Click OK to confirm and sign.
- Try more editing features; add images, peg initial Request, create a reusable template, etc.
- Click Save to apply changes once you finish.
- Download the PDF or share it via email.
- Use the Invite to sign function if you want to set & send a signing order to recipients.
Turn the mundane and routine into easy and smooth with the airSlate SignNow app for Android. Sign and send documents for signature from any place you’re connected to the internet. Generate professional-looking PDFs and peg initial Request with a few clicks. Created a flawless eSignature process with only your mobile phone and increase your general productivity.
Get legally-binding signatures now!
FAQs
-
How do you do a peg?
Suggested clip Percutaneous Endoscopic Gastrostomy (PEG) Feeding Tube ...YouTubeStart of suggested clipEnd of suggested clip Percutaneous Endoscopic Gastrostomy (PEG) Feeding Tube ... -
What do you do when a PEG tube comes out?
What if the PEG tube falls out? Do not panic if your PEG tube ever falls out. Put a clean, dry towel over the opening to catch drainage and go to your doctor or emergency room to get another tube put in. The opening can close quickly, so get it put back in as soon as you can. -
Is PEG tube placement a major surgery?
Percutaneous endoscopic gastrostomy involves placement of a tube through the abdominal wall and into the stomach through which nutritional liquids can be infused. Percutaneous endoscopic gastrostomy is a surgical procedure; however, it does not require opening the abdomen or an operating room. -
How do you reinsert a PEG tube?
Suggested clip Feeding Tube Skills: Replacing the Gastrostomy Tube - YouTubeYouTubeStart of suggested clipEnd of suggested clip Feeding Tube Skills: Replacing the Gastrostomy Tube - YouTube -
How painful is a feeding tube?
A feeding tube can be uncomfortable and even painful sometimes. You'll need to adjust your sleeping position and make extra time to clean and maintain your tube and to handle any complications. Still, you can do most things as you always have. You can go out to restaurants with friends, have sex, and exercise. -
How do you know if PEG tube is in place?
Suggested clip How often do I need to check tube placement? - YouTubeYouTubeStart of suggested clipEnd of suggested clip How often do I need to check tube placement? - YouTube -
How is a peg feed inserted?
A PEG is a feeding tube inserted into the stomach using a Gastroscope (see diagram). To place the tube, an endoscope (a thin flexible tube with a camera at the end) is passed through your mouth, down the gullet into the stomach. -
What happens if your feeding tube comes out?
If there is blood and injury to the stoma, you should contact your doctor for further instructions. Complete a quick check to ensure the tube still functions. If the balloon still retains water and is without any holes, you can simply rinse off the tube and put it back in, as usual. -
How long does it take for a PEG site to heal?
Caring for the PEG-tube Site The skin should heal in 2 to 3 weeks. You will need to clean the skin around the PEG-tube 1 to 3 times a day. -
How PEG tube is inserted?
A PEG is a feeding tube inserted into the stomach using a Gastroscope (see diagram). To place the tube, an endoscope (a thin flexible tube with a camera at the end) is passed through your mouth, down the gullet into the stomach. -
How long after PEG placement can it be used?
Enteral feeding through the percutaneous endoscopic gastrostomy (PEG) tube is usually initiated about 12 to 24 hours after insertion of the tube. -
What is a peg line?
PEG stands for percutaneous endoscopic gastrostomy, a procedure in which a flexible feeding tube is placed through the abdominal wall and into the stomach. PEG allows nutrition, fluids and/or medications to be put directly into the stomach, bypassing the mouth and esophagus. -
What to expect after feeding tube is removed?
If you eat, the wall of your stomach may stretch and keep the hole open. After 4 hours you can eat again. Take sips of water for the first 4 hours after the tube is removed if you feel thirsty and to keep your mouth moist. After 4 hours you can drink regular amounts of fluids. -
How long does a PEG tube have to stay in?
The PEG tube can stay in your stomach for months or years so you can take fluids, medicines, and nutrition through it when you can't take in enough by mouth. Once you have this type of tube, it is important to let your healthcare provider know if the tube comes out because the opening will close quickly. -
Is a PEG tube permanent?
Depending on the medical condition, a PEG feeding tube may be temporary or permanent. ... However, those with more permanent neurologic damage may require a feeding tube long-term. In either case, the feeding tube can be easily removed if necessary.
What active users are saying — peg initial request


Related searches to peg initial Request with airSlate airSlate SignNow

Peg initial request
[Music] if you have had recent surgery you may have one or more incisions depending on the type of surgery you have had after some surgeries blood and normal body fluids may collect in the surgical site which is also called the wound fluids can build up at the site and slow the healing process they may also interfere with your daily activities and cause discomfort to avoid fluid buildup your surgeon may have inserted a flexible tube into the surgical site during your surgery the drain allows fluid from the surgical site to drain into a reservoir that can be emptied in this video you will learn the steps to care for your drain as well as the dressing covering the area where the drain enters your skin [Music] your wound drainage system consists of tubing also called a catheter or drain and a reservoir at the bottom of the tube also called a bulb throughout this video the wound catheter is referred to as the drain and the reservoir as the bulb the drain tubing is placed inside the wound by your surgeon and is secured to the skin outside of the wound with a suture or stitch this area where the drain enters and is stitched to your skin is called the drain insertion site the bulb provides gentle suction which helps draw fluid from the wound site two times a day empty each bulb measure the amount of fluid in each bulb separately and record the amounts on a specific chart the amount you record on the chart will determine when it's safe for your surgeon to remove the drain there is a risk of infection at the incision site and at the drain insertion site to avoid infection and help the healing process it is important for you and your caregiver to know the right method for cleaning and caring for your incision and drain this portion of the video shows you how to take care of your drain insertion site and the specific dressing your surgeon has chosen for you you need to be aware of potential problems at the drain site and of any signs of infection it is important that you call the Breast Center if you notice any problems before you are discharged you are given a handout reviewing these instructions it has care instructions specific to your drains and surgical incisions the handout has phone numbers for you to call if you have concerns [Music] your incision may be closed with stitches that dissolve on their own or stitches that need to be removed by your surgeon at a later time you may also have a dressing over your drain insertion site there are many types of dressings used to cover incisions the type of dressing you have on your incision may be different from what is shown in this video you will receive separate written instructions on how to care for your incision and dressing it is normal to have a little bit of swelling around each stitch along your incision it is also normal to have a little bit of swelling around each drain insertion site this mild swelling may last for a few days after surgery it is also normal to have some oozing of clear yellowish fluid with a small amount of blood from the incision and around the drain insertion site you may feel some tenderness in these areas [Music] the fluid in the bulb right after surgery is read this is normal because the fluid contains some blood cells it becomes less red over time it usually becomes a clear yellow or cloudy fluid with occasional small red blood clots or pink fibrous tissue this is a normal part of the healing process call the Breast Center right away if the fluid in your bulb becomes bright red with clots or milky white in color also call the Breast Center right away if you measure more than 250 milliliters of fluid within a 24-hour period if your incisions or drains require dressings you will be given the supplies you need to take care of them you may not require dressings if you run out of supplies you can buy more such as gauze pads at any drugstore we recommend a caregiver who can be a family member or a friend care for the incision and drain sites do not take a bath or submerge your incisions or any part of the drain system in water avoid swimming pools jacuzzis lakes and oceans you may take baths and swim only after your surgeon tells you it's safe to do so you may shower with the drain in place 48 hours after surgery if you are unable to shower clean the drain insertion site with soap and water at least one time each day you and your caregiver should always wash your hands first begin by inspecting the incision and drain and certian sites do this at least one time each day make a note of any changes in color or swelling at the incision or drain insertion sites there are many ways to dress and care for the drain insertion site there are also different types of dressings depending on what your surgeon has chosen for your specific needs care of the area will vary please follow the instructions specific to your type of dressing [Music] 4x4 inch gauze and tape dressings were applied to your skin over the drain insertion site at the time of your surgery you need to change your gauze dressing one time each day you may shower 48 hours after surgery we recommend changing your gauze dressing when you shower before you shower gently remove the old tape and gauze dressing and throw them away gently clean the wound drain insertion site with soap and water allow soapy water to run over the dressing like a waterfall rinse well Pat the area dry with a clean towel allowed to air dry for a few minutes if you are unable to shower clean the area with soap and water and rinse well at least one time each day to redress the drain insertion site begin by opening and laying out your supplies on a clean dry surface two or three strips of tape two four by four inch gusse squares for each drain you have start by folding one gauze square in half with a folded edge up place one gauze pad under the drain where the drain meets your skin use one piece of tape to secure it to your skin fold the second piece of 4x4 gauze in half again with a folded edge up place it over the top of the drain use another piece of tape to secure it in place your drain insertion site should remain covered at all times the gauze and tape dressing should be replaced daily every time you clean the drain insertion site or if the dressing falls off or become soiled [Music] each day while cleaning your incisions and drain insertion site look for signs of infection typical signs of infection include redness or swelling drainage with pus opening of the incision bad odor pain and/or fever with a temperature above 100 1.5 degrees Fahrenheit if you have any of these signs of infection call the Breast Center immediately [Music] because you have a drain you need to empty and measure the contents of the bulb this is called stripping the drain you must strip the drain at least two times a day to prevent the drain from becoming clogged with blood clots or fibrous material to strip the drain first wash your hands with your non-dominant hand firmly hold the drain without moving it near the skin at the drain insertion site with your dominant hand and close to the drain stitch place an alcohol prep pad around the drain with your thumb and first finger gently pinch the drain with the alcohol prep pad and slide the alcohol prep pad down the entire length of the drain until your fingers meet the top of the bulb the alcohol prep pad helps your fingers slide more easily along the tube the fluid should move along with your fingers down the length of the drain and empty into the bulb repeat this procedure for each drain you have it is not necessary to completely clear all the fluid from the drain but try to move as many clots down the drain into the bald as you can if the flow of the drainage is blocked and stripping does not restore the flow call the Breast Center at least two times a day after you have stripped the drain empty the fluid collected in each bulb into a separate measuring cup to empty the bulb and measure the fluid follow these steps after stripping the drain unplug the stopper from the emptying port located at the top of the bulb tip the bulb upside down over the measuring cup gently squeeze all of the fluid from the bulb into the measuring cup your nurse will give you measuring cups if your bulb is small and fills quickly you may need to empty the bulb and measure the fluid more than two times a day do not let the bulb completely fill because this will stop the fluid from flowing into the bulb do not disconnect the drain tubing from the bulb at any time if the drainage into the bulb stops call the Breast Center [Music] two times a day measure and record the amount of fluid collected in each bulb it is very important that you record the amount of fluid for each bulb separately at least two times every day do not record a daily or weekly total do not record the total of all bulbs on the volume of drainage chart record the date time and amount of fluid collected from each bulb your nurse reviews your volume of drainage chart this information is used to determine if your drains can safely be removed after you have recorded the amount of fluid from each bulb on your volume of drainage chart discard the fluid by flushing it down the toilet in the evening when you empty and measure your fluid drainage take your body temperature and record it on the volume of drainage chart if your body temperature is ever 100 1.5 degrees Fahrenheit or higher call the Breast Center [Music] after emptying and measuring the fluid from each bulb you will need to reactivate the bulb suction first wipe the port opening with an alcohol swab to clean it next gently squeeze the bulb and flatten it as completely as possible while the bulb is completely flattened insert the stopper into the emptying port as far as possible release your grip from the bulb if the bulb stays flattened you have successfully reactivated the bulb suction in the next few hours you will notice the bulb expanding gradually as it fills with fluid if the bulb does not expand gradually and collect fluid call the Breast Center [Music] gravity is necessary to keep the drains functioning properly you must place the bulb below the drain insertion site using the plastic tag on the bulb attach it to your clothing or drain belt do not disconnect bend compress or puncture the drain tubing if the drain becomes disconnected or damaged contact the Breast Center [Music] the length of time that your drain remains in place depends on the amount of fluid coming from the surgical site when one drain produces less than 30 milliliters of drainage over a 24-hour period for two days in a row your drain is ready to be removed when your drain output meets this criteria call the Breast Center and the nurses will schedule your appointment for your drain to be removed the drains are usually removed within three weeks of the surgery regardless of the drainage output however your surgeon may recommend removal at a different time after your drain is removed continue to wash that area of your skin daily with soap and water after the drain is removed in clinic your nurse may tape a 4x4 gauze bandage over the drain site you may remove the tape and gauze 24 hours after the drain is removed it is not necessary to replace the gauze [Music] you are responsible for the care of your incision and drain and certian site when you leave the hospital after surgery it is important that you recognize any unusual changes with your incision the drain and the drain insertion site call the Breast Center if any of the following things occur the bulb suction cannot be activated the drain falls out or is accidentally cut the drain fluid in the bulb has a foul smell you have a body temperature of 101 point 5 degrees Fahrenheit or higher there is increased redness swelling or abnormal drainage from the drain insertion site there is an air leak fluid leak or any other malfunction in the system Klotz form in the tubing and block drainage the bulb is not collecting fluid if you measure more than 250 milliliters of drainage from one bulb in 24 hours if the amount of drainage is less than 30 milliliters in a 24-hour period for two days in a row if the drain is no longer secured to your skin with a stitch before you leave the hospital you will be given all of the supplies and information to properly care for your incision drain and drain insertion site it is very important that you carefully follow these instructions you may find it helpful to write down your questions and concerns do not hesitate to call the Breast Center to speak with a nurse for help if you experience any of the problems mentioned in this video if you are ever in doubt please call the Breast Center we are happy to help you [Music] you
Show moreFrequently asked questions
What is needed for an electronic signature?
How can I sign a PDF?
What can I use to eSign a document?
Get more for peg initial Request with airSlate SignNow
- Print electronically sign Tourist Transport Ticket
- Prove electronically signed SaaS Sales Proposal Template
- Endorse digisign Roommate Agreement Template
- Authorize electronically sign Transfer Agreement
- Anneal mark Freelance Invoice
- Justify esign Affiliate Agreement
- Try countersign Social Media Policy Template
- Add Insuring Agreement esign
- Send Rental Receipt Template signature block
- Fax Promotion Announcement Letter signature service
- Seal New Hire Press Release email signature
- Password Marketing Proposal Template signatory
- Pass Photo Release Form initials
- Renew Influencer Photography Contract byline
- Test Marketing Brief esigning
- Require Roommate Agreement Template digisign
- Comment watcher electronically signed
- Champion awardee digital signature
- Call for company countersignature
- Void Partnership Agreement Amendment template initial
- Adopt Funding Agreement template signature
- Vouch Tourist Transport Ticket template email signature
- Establish Simple Medical History template digital signature
- Clear Roofing Proposal Template template electronically signed
- Complete Pet Grooming Registration template byline
- Force Declaration of Trust Template template digi-sign
- Permit Gala Reservation Confirmation Letter template esign
- Customize Toll Manufacturing Agreement template signature block