Ratify Attachment Field with airSlate SignNow
Award-winning eSignature solution


Improve your document workflow with airSlate SignNow
Agile eSignature workflows
Instant visibility into document status
Simple and fast integration set up
Ratify attachment field on any device
Advanced Audit Trail
Strict safety standards
See airSlate SignNow eSignatures in action


airSlate SignNow solutions for better efficiency
Our user reviews speak for themselves


Why choose airSlate SignNow
-
Free 7-day trial. Choose the plan you need and try it risk-free.
-
Honest pricing for full-featured plans. airSlate SignNow offers subscription plans with no overages or hidden fees at renewal.
-
Enterprise-grade security. airSlate SignNow helps you comply with global security standards.

Your step-by-step guide — ratify attachment field
Employing airSlate SignNow’s electronic signature any business can speed up signature workflows and eSign in real-time, supplying a better experience to customers and staff members. ratify attachment field in a couple of simple actions. Our mobile-first apps make work on the go feasible, even while offline! Sign documents from any place worldwide and close tasks faster.
Follow the walk-through guideline to ratify attachment field:
- Sign in to your airSlate SignNow account.
- Find your document in your folders or upload a new one.
- Open up the template and edit content using the Tools list.
- Drag & drop fillable fields, type textual content and sign it.
- Include multiple signers using their emails and set the signing sequence.
- Choose which users will get an completed copy.
- Use Advanced Options to limit access to the record and set up an expiry date.
- Press Save and Close when done.
Moreover, there are more extended tools accessible to ratify attachment field. Add users to your collaborative work enviroment, view teams, and keep track of cooperation. Millions of users all over the US and Europe recognize that a system that brings everything together in one cohesive digital location, is what enterprises need to keep workflows working effortlessly. The airSlate SignNow REST API enables you to embed eSignatures into your application, internet site, CRM or cloud storage. Check out airSlate SignNow and enjoy quicker, smoother and overall more effective eSignature workflows!
How it works
airSlate SignNow features that users love


See exceptional results ratify attachment field with airSlate SignNow

How to fill out and sign a document online
Try out the fastest way to ratify attachment field. Avoid paper-based workflows and manage documents right from airSlate SignNow. Complete and share your forms from the office or seamlessly work on-the-go. No installation or additional software required. All features are available online, just go to signnow.com and create your own eSignature flow.
A brief guide on how to ratify attachment field in minutes
- Create an airSlate SignNow account (if you haven’t registered yet) or log in using your Google or Facebook.
- Click Upload and select one of your documents.
- Use the My Signature tool to create your unique signature.
- Turn the document into a dynamic PDF with fillable fields.
- Fill out your new form and click Done.
Once finished, send an invite to sign to multiple recipients. Get an enforceable contract in minutes using any device. Explore more features for making professional PDFs; add fillable fields ratify attachment field and collaborate in teams. The eSignature solution gives a secure workflow and runs according to SOC 2 Type II Certification. Make sure that all of your information are protected and that no person can edit them.
How to eSign a PDF template in Google Chrome
Are you looking for a solution to ratify attachment field directly from Chrome? The airSlate SignNow extension for Google is here to help. Find a document and right from your browser easily open it in the editor. Add fillable fields for text and signature. Sign the PDF and share it safely according to GDPR, SOC 2 Type II Certification and more.
Using this brief how-to guide below, expand your eSignature workflow into Google and ratify attachment field:
- Go to the Chrome web store and find the airSlate SignNow extension.
- Click Add to Chrome.
- Log in to your account or register a new one.
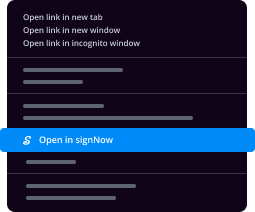
- Upload a document and click Open in airSlate SignNow.
- Modify the document.
- Sign the PDF using the My Signature tool.
- Click Done to save your edits.
- Invite other participants to sign by clicking Invite to Sign and selecting their emails/names.
Create a signature that’s built in to your workflow to ratify attachment field and get PDFs eSigned in minutes. Say goodbye to the piles of papers on your desk and start saving money and time for additional important duties. Selecting the airSlate SignNow Google extension is a smart practical decision with lots of advantages.

How to sign an attachment in Gmail
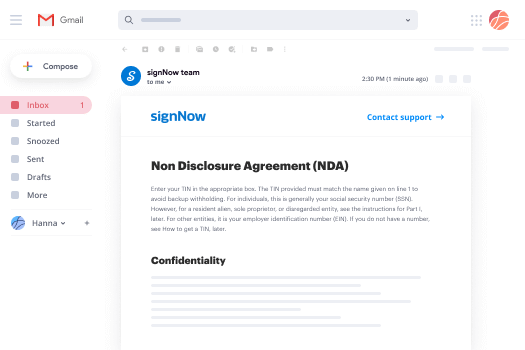
If you’re like most, you’re used to downloading the attachments you get, printing them out and then signing them, right? Well, we have good news for you. Signing documents in your inbox just got a lot easier. The airSlate SignNow add-on for Gmail allows you to ratify attachment field without leaving your mailbox. Do everything you need; add fillable fields and send signing requests in clicks.
How to ratify attachment field in Gmail:
- Find airSlate SignNow for Gmail in the G Suite Marketplace and click Install.
- Log in to your airSlate SignNow account or create a new one.
- Open up your email with the PDF you need to sign.
- Click Upload to save the document to your airSlate SignNow account.
- Click Open document to open the editor.
- Sign the PDF using My Signature.
- Send a signing request to the other participants with the Send to Sign button.
- Enter their email and press OK.
As a result, the other participants will receive notifications telling them to sign the document. No need to download the PDF file over and over again, just ratify attachment field in clicks. This add-one is suitable for those who like focusing on more significant things rather than burning time for practically nothing. Boost your day-to-day monotonous tasks with the award-winning eSignature service.
How to sign a PDF on the go with no mobile app
For many products, getting deals done on the go means installing an app on your phone. We’re happy to say at airSlate SignNow we’ve made singing on the go faster and easier by eliminating the need for a mobile app. To eSign, open your browser (any mobile browser) and get direct access to airSlate SignNow and all its powerful eSignature tools. Edit docs, ratify attachment field and more. No installation or additional software required. Close your deal from anywhere.
Take a look at our step-by-step instructions that teach you how to ratify attachment field.
- Open your browser and go to signnow.com.
- Log in or register a new account.
- Upload or open the document you want to edit.
- Add fillable fields for text, signature and date.
- Draw, type or upload your signature.
- Click Save and Close.
- Click Invite to Sign and enter a recipient’s email if you need others to sign the PDF.
Working on mobile is no different than on a desktop: create a reusable template, ratify attachment field and manage the flow as you would normally. In a couple of clicks, get an enforceable contract that you can download to your device and send to others. Yet, if you want a software, download the airSlate SignNow mobile app. It’s comfortable, quick and has an excellent design. Try out smooth eSignature workflows from the business office, in a taxi or on an airplane.
How to sign a PDF using an iPad
iOS is a very popular operating system packed with native tools. It allows you to sign and edit PDFs using Preview without any additional software. However, as great as Apple’s solution is, it doesn't provide any automation. Enhance your iPhone’s capabilities by taking advantage of the airSlate SignNow app. Utilize your iPhone or iPad to ratify attachment field and more. Introduce eSignature automation to your mobile workflow.
Signing on an iPhone has never been easier:
- Find the airSlate SignNow app in the AppStore and install it.
- Create a new account or log in with your Facebook or Google.
- Click Plus and upload the PDF file you want to sign.
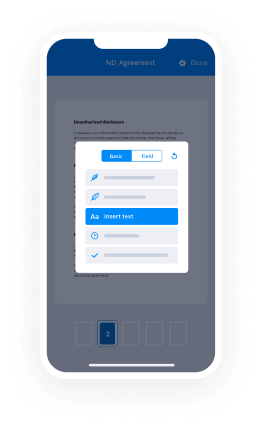
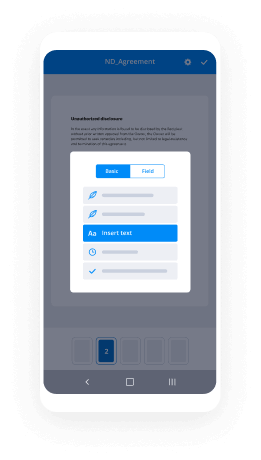
- Tap on the document where you want to insert your signature.
- Explore other features: add fillable fields or ratify attachment field.
- Use the Save button to apply the changes.
- Share your documents via email or a singing link.
Make a professional PDFs right from your airSlate SignNow app. Get the most out of your time and work from anywhere; at home, in the office, on a bus or plane, and even at the beach. Manage an entire record workflow effortlessly: build reusable templates, ratify attachment field and work on PDFs with business partners. Transform your device into a potent enterprise tool for executing contracts.
How to eSign a PDF file taking advantage of an Android
For Android users to manage documents from their phone, they have to install additional software. The Play Market is vast and plump with options, so finding a good application isn’t too hard if you have time to browse through hundreds of apps. To save time and prevent frustration, we suggest airSlate SignNow for Android. Store and edit documents, create signing roles, and even ratify attachment field.
The 9 simple steps to optimizing your mobile workflow:
- Open the app.
- Log in using your Facebook or Google accounts or register if you haven’t authorized already.
- Click on + to add a new document using your camera, internal or cloud storages.
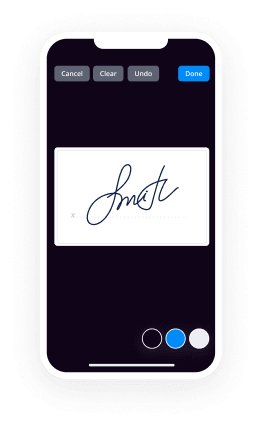
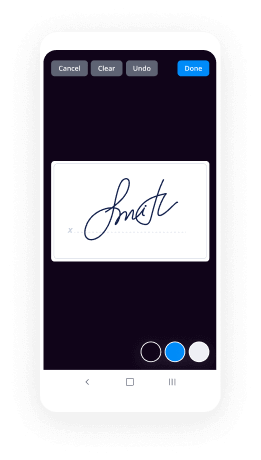
- Tap anywhere on your PDF and insert your eSignature.
- Click OK to confirm and sign.
- Try more editing features; add images, ratify attachment field, create a reusable template, etc.
- Click Save to apply changes once you finish.
- Download the PDF or share it via email.
- Use the Invite to sign function if you want to set & send a signing order to recipients.
Turn the mundane and routine into easy and smooth with the airSlate SignNow app for Android. Sign and send documents for signature from any place you’re connected to the internet. Generate professional-looking PDFs and ratify attachment field with couple of clicks. Come up with a faultless eSignature process with just your mobile phone and increase your general productiveness.
Get legally-binding signatures now!
FAQs
-
How do you name an attachment field in access?
Suggested clip Microsoft Access 2010 Tables: Attachment Field to Attach Files to ...YouTubeStart of suggested clipEnd of suggested clip Microsoft Access 2010 Tables: Attachment Field to Attach Files to ... -
Where is the attachment field in access?
Suggested clip Access 2007 Table: Attachment Field - YouTubeYouTubeStart of suggested clipEnd of suggested clip Access 2007 Table: Attachment Field - YouTube -
Can you attach files in Microsoft forms?
If you want users to be able to insert files on a Microsoft Office InfoPath form, you can use a file attachment control on your form template. Users can use this control to attach files to your form, and the files are then encoded and saved with the form data. -
Where is the attachment toolbar in access?
Suggested clip Add attachments to a record in an Access 2007 form - YouTubeYouTubeStart of suggested clipEnd of suggested clip Add attachments to a record in an Access 2007 form - YouTube -
How do I add an attachment field in Access 2016?
Suggested clip Microsoft Access 2016: Table Attachment Fields - YouTubeYouTubeStart of suggested clipEnd of suggested clip Microsoft Access 2016: Table Attachment Fields - YouTube -
How do I insert an image into a form?
To insert an image into your form, you will need to add a Section or Description Area Field to your form and then click on the Insert Image button (which looks like a picture of mountains). This will bring up the Insert image dialog box. Click on the Upload button on this box to upload your own image. -
Can we store images in MS Access database?
3 Effective Methods to Handle Images in MS Access Database. ... The user can Store their image in the OLE field and later use a bound object type frame to display the image in the document. The user can Store any path of the image in the document text field, using the image control button to display the image. -
How do you add an attachment button in access?
Open the form that displays your attachments, and locate the record to which you want to attach a file. Select the attachment control \u2014 the control that is bound to the Attachment field. ... Click the View Attachments button (the signNowclip icon) to open the Attachments dialog box. In the dialog box, click Add. -
Can you attach a file to a Microsoft form?
If you want users to be able to insert files on a Microsoft Office InfoPath form, you can use a file attachment control on your form template. Users can use this control to attach files to your form, and the files are then encoded and saved with the form data. -
Can you add an attachment to a Google form?
Upload files to a form Open a form in Google Forms. Click Add Add. Next to the question title, click the Down arrow Down Arrow. Click File Upload. -
How do I attach a file in ServiceNow?
Select the 'Manage Attachments' signNowclip in the upper right toolbar within the ServiceNow ticket. 5. Select 'Choose Files', and select the file you wish to attach. Once the file is uploaded, ensure you select 'Attach'. -
How do I view attachments in ServiceNow?
Navigate to a record (incident, form, list, and so on) with an attachment. Click View next to the file attachment name to view the attachment. -
How do you limit file attachments in ServiceNow?
The default maximum size limit for an attachment file that can be added to a record in the ServiceNow platform is 1024 MB for a new out-of-box instance. However, this limit can be adjusted in the system to allow for larger maximum attachment sizes or decrease the maximum size of an attachment allowed on the system.
What active users are saying — ratify attachment field


Ratify attachment field
in today's show we're gonna talk power-ups attachments and using them with Azure blob storage so now we're not going to all the attachments control for the SharePoint stuff bit we're gonna talk about using Azure blob storage to store attachments for things like expense reports and purchase orders and any other place we want to have one-to-many relationship for these attachments and so we're gonna do is we're going to take the expense report app we built in the previous video and we're going to expand upon that by attaching receipts we're gonna store those in Azure blob storage we're connecting sequel SharePoint we're gonna try and bring the whole store together for a really fun video but first here's our intro hi my name is Shane young with power apps nine one one those guys and today's show we talk about power apps attachments so not the attachments control that works with SharePoint c.d.s we're not gonna go down that road what we're gonna do is we're gonna talk about attachments where you want to attach files to things like expense reports purchasing apps inspection apps safety apps things where you need to attach one too many images to a file or to a record and you might be storing that information out in SharePoint it might be storing its sequel CD s you might be storing it who knows where but so what we're gonna do is we're gonna look at this very common request because honestly in the last two weeks I've had about five different people have me explain it to him says I can't make a video start repeating myself over and over and over again so that's we're gonna dive into and what way we're going to do is we're gonna take the expense report that we built in a previous video so link somewhere on the screen right now if you haven't watched that one we're gonna take that existing expense report app and we're gonna bolt into it attachments to have a little bit of fun also it's good news is this is like my fifth time doing this video because somebody named logitech keeps messing up their software which messes up the recording so I keep throwing away videos but I'm not throwing this one away you will see this one no matter what so anyway let's jump over to my desktop take a look in see we think okay so over here my desktop I thought the first thing we would do is just take a quick run-through of the existing app and show you the functionality we're about to build so you get really excited for what we're gonna do alright so we're going to create a new expense over here you can see that we've got our typical stuff you know Logitech makes me angry it's named for expense report it's a weird expense report of expense hardware we're gonna spy a new camera not a new right a new camera and expensive cost is one two three because the cameras are expensive we'll say save so our expense report out right it does its thing but now I have this new button over here tap to quick or add an attachment so we're gonna click on this and when this little guy pops up we're now I'm going to say alright well let's grab this Chewie says good job image say open and after a second he gets put out as your blob storage notice here we can delete it if we needed to but we'll say save so that will write the master record off to its home the child items off to where they can go and then the attachments where they go ooh everything is done and so then don't now if we go here to view and edit expenses and we scroll all the way at the bottom no there's a logitech makes me angry there's a new camera good job we have made an expense report with attachments I mean I attached a gift become a dork but you get the idea so all right so that's what we're about to build and it's gonna take a little bit of time so let's just dive over there attack it so switch over here to this app so this is an app right you can see that currently now that functionality is here save as my friend so let's go right here and say okay let's zoom out a little bit there we go so in here what we need to do I think first things first is was attached the file right so I think that's the first piece of it and so in order to do that what we're gonna do is we're gonna use the media and then the add picture control now this control is called add picture but in reality it should really say attach anything you want because when you click on this button missus hit play and click on the button real quick so you only get image files but notice down here some people haven't caught this before down here set of image files we have all files and so then now I could attach a PDF or an excel file or any other type of receipt and this is the experience with a Chrome browser if you use a different browser you might see different options show up and if you do it on a mobile device like when I do it on my iPhone I get a different experience it's like hey do you want to use existing file use a photo or take your own picture right so the experience is gonna be a little bit different with this control depending on what device you're using it for so important just to note as you're testing and making sure it does what you want okay so when you use this control it comes with two pieces it comes with a button and a uploaded image which is an image control to show what you just attached we don't want to do that so we're just going to delete that portion that will not hurt anything and then this is really just a button but it's not it's kind of a little different you don't get all the same flexibility so we're gonna do a little light branding real quick just to make sure that we at least understand kind of what's going on so there's blue there and then we'll set the color to red doom and so I'm not red white duh it's Monday morning so don't make fun of me so there you go so we can't do that and I'll just kind of resize it up here and so it looks mostly like a button now I've done this for customers before and with a little bit of elbow grease you can make it look a lot more like a button so I could make it the same colors as the other ones use the same fonts same that type of stuff the only thing it can't do is I can do the rounded corners so if that really bothers you you might have to find a different way to do rounded corners anyway so then we here you can see it says tap or click to add a picture but we want to make this a little more friendly so there is a text property just as you would expect and so we're just gonna change just to say and your receipt so there we go okay so without a lot of work we've got a button and that will grab our piece and so now that we can grab the information with the user we need to send it off to Azure blob storage so to do that we're going to go over here to view and then data sources and then we're gonna click add a data source and then down here we've got add your blob storage boom so now we have Azure blob storage if you haven't used Azure blob storage I have an intro video for that also somewhere on the screen or in the description somewhere on this page so you can go watch that video I'm not gonna go through the mechanics of how I gotten all that setup today there's a separate video on that so there's Azure blob storage boom we're looking good so now we're gonna do is when come back to this one and we're gonna say alright when they click on this what I want to do is I want to take advantage of on select so when they press the button we're gonna need to do some things so the very first thing we're going to do is we want to save the file straight off to Azure blob storage so I'm gonna do something I'm gonna say set var as your file anyone say as your blob storage as your Bob storage and then dot create file and so it says what is your folder path well if you don't remember I can switch back over to my as your storage Explorer and see I have a folder path called save files here so I'm just gonna use that one so minimize we put that in quotes and say save files here just like that then it says what is the name of the file well this is one of those things I didn't know for a really long time so add Media button one why we do this you see dot media which is the file but what about the final name well it turns out you can just type in file name I did not know that so Brian dang told me that so thank you Brian you're welcome Shane and now what we want to do so we've got both the the folder path the name and so what is the file like what is the actual contents well that's just going to be add Media button one and in that friendly little media so close the parentheses for the ash boil up storage close a parenthesis for the set so if you haven't done this before what's gonna happen is this is going to save the file out to Azure blob storage which is what we need but it's going to set everything that gets put out there set that whole record into this variable so that way can reference a couple of the fields because we're gonna need those in the next step so this is one of those tricks to do two things at once right we're uploading the file and saving all of its output into a variable so we have to be able to have it so we can reference it here in a second okay so now that we've got the file out to Azure blob storage come to a semicolon and what I want to do is I want to put this stuff into a collection so I'm gonna say I want to do collect nope you got it yes Belle collect correctly that people and then we're gonna do VAR receipts and so what do we want to put in our collection so in our collection we're going to need a couple of different things we're going to want to have probably the file names I'm gonna do these abbreviations because that makes it easier for us when we do a little matching in a bit so bear with me if I'm going to use FN for file names so what is the file name well so for the file name we know that's just add Media button one dot file name again I'm cool and then what I want here is I want a file link I want to link to the file right so fl4 file link and so the link to the file is going to be a combination of two things so first we're open up as your stored Explorer again we're gonna grab this URL so ctrl copy right so down here in the bottom left the URL this is the URL to the actual folder that we're in so I want the file to be we're gonna put that inside quotes so that ampersand right so concatenate to it add to the text and then VAR as your file dot path and so path is the the path to the file so we're gonna combine the two of those into one string and let's see sets our filename that's our file link we're doing pretty good here then we need one more thing we're gonna grab the file ID so I'm gonna do fi D which is weird right feed and so then that is going to be var as your file dot ID and so that's the whole reason that we wanted to return the record right because I needed these two pieces of information into my collection so I had to kind of put them in a record and some of the other solutions I've done the same thing but I've done it in one fell swoop because I needed one piece of information but since I needed to I broke this out into two separate steps alright so I think that looks pretty good to me so what we're gonna do is we have a way to get the file put it in Azure blob storage put in a collection so now we obviously need a gallery to display those so we're going in sir a gallery I'm gonna pull this little guy way over here somewhere oh it was kind of I was joyous things for everybody's in the way so we're just gonna close out of all this I'm gonna put this right here and so you could do this image gallery if you want it I don't want to show the image right because I might be attaching excels and PDFs and things like that so we're not going to do this we're going to run change the layout to just be a plain title and so for the hope we got to set the items property first shamed the it's Monday morning remember and so this would be what collects hey where's our was a receipt collection right then we just do that oh you guys want me just collect for receipt this should not be it should we collect collect receipts come on people yell at me when I make mistakes like that alright so then now for our items property it is collect receipts Oh much better and so then for title five this isn't going to be F ID this is going to be file name so if we say play add your seat will add this picture of chewy I'll add picture Greg there we go there we go so we've got this kind of over here and let's see I don't want this arrow someone get rid of it OOP I'm gonna make this font a little smaller so you see the whole file name somebody 12 we kind of put it up here in the corner give it plenty of room maybe 12 is a little too small how about 16 here we go so something like that alright and remember these file names the link these are going to depend on the length of the file name that your users are attaching so playing accordingly but so right now I want to hatch anything bigger than that just to say out of trouble and so what I want to happen here is I want to make it so that when they click on this file that we're actually going to launch it so I'm going to take the control that we're currently on I'm gonna say on select we're going to do launch and then we're going to launch B file linked right FL so the idea we hit play I click on the file walk long I I did this on purpose cousin usually gonna happen you guys look up here the top my url is almost right so that's my right as your bob test windows right here save files here save files here twice so this is what happens to people right because if you go back to here we said hey add save files here plus the path well the path includes save files here so what you really want to do is you want to delete all with this off so this should just be your route URL so now if we attach a second file so change picture open we'll talk about that in a minute I don't like the whole change picture either so then now if we click on aw shucks there we go aw shucks alright so our images are working and the reason that I want to use launched right here right this is very I did this very much on purpose because launched what it's going to do is it doesn't do what it just says he browser go figure out your default way of handling this file and then deal with it so when I said launch filing can I pass the JPEG well the browser knows to show that JPEG if I had given it an excel file it would have downloaded it but given a PDF file it would have shown it the browser right your default browser settings or what controls what happens when you hand a file link like that off to the launch command and so it'll behave differently on your computer versus your your mobile devices so make sure you're planning accordingly but launch is really great here because this gives me for more flexibility where my user doesn't want to just do images they want to do Excel files and PDFs and those type of attachments as well if you just want to do images then use the image control and just show the little little image back so you have a lot of flexibility here but I wanted to kind of show you guys the way that I think about that also up here you heard me say I don't like this says change picture I don't want this I don't want to deal with this button have different modes so what I will typically do is back here on the button right to the add Media button on select after it does all the work I wanted it to do before I'm gonna hit shift inner and then I'm gonna say reset and then I'm gonna say reset add Media button 1 and that will set it back to its default settings which so it'll say the same text it just haven't cuts down on the weirdness for me I think also here will bonus thing if you haven't seen it yet forever we always had to make sure we didn't end in a semicolon Microsoft just updated about a week ago that now when you write your formulas if you have a trailing print trailing semicolon like this it doesn't cause errors like it used to so whoo whoo good job product team that was a that was a big one all right so here we go so now if we attach a third picture wish to see what that change did well do my wife hello Nicola see so now I just come back to add your receipt over and over again so I don't have to mess with it and you can resize it to get rid of the weird blueness you can make these look better this is good enough for right now mechanically all right so we're in great shape here so now we are storing files and as your blob storage we're displaying them if we want to let the users delete them great thing to do what I can do is I'm going to insert a icon and this is bonus this wasn't in the first seven versions that I had to delete so I learned something new between the times I've recorded again good for you guys all right so if they go to the trash can I need to delete it from two places one is I need to remove it from the collection so remove collect receipts this item so that will delete this row out of the collection but I also got to get it out of blob storage I don't wanna leave it out there forever either so I'm going to say for that I'm gonna say Azure blob storage delete file and it says well what's the ID and that's the reason we went to the effort of storing F ID so like that so now I can delete the file both from the collection and as your blob storage some bonus yay the last version the video I told you figured out yourself oops anyway um alright so now I think we need to do is we need to go right to the data source so to write to the data source what we're going to do we're going to kind of go see how we've done this before so we couldn't save well what this button did in our previous video is it submits this top form and then when this form gets submitted if we click on the actual form up here form 1 minus is going to submit off to expense master on success what we did was we said okay well we're successful with that we want a for all expense collection that's the collection we are shown in the gallery down here we're going to patch all of those items create new records for all those out in our data source in this case the data source was SharePoint doesn't matter right your data source here didn't matter is use SharePoint for that video so what we're gonna need to do now is we need to go right here to the end of the line so after we get done patching all the line items we need to patch all of our seats so shift inner or vice promise I press shift enter there we go and so what are we going to do though I thought would be fun is a store those over in sequel so we're storing the expense line items in SharePoint right and that's over here you can see there is a expense master where is it expense master expense details list that's where all the SharePoint content or all the illini of stuffs getting we're storing the files and Azure blob storage but I needed to have metadata dissociated with us files so I need a table where I store all the references to the file this is part that a lot of people get confused by and miss when they're trying to build this from the cells the first time I know we can keep fixing these for people so what we're gonna do is I'm gonna jump on a sequel rabbit little fun over here and so I have a database right add your blob storage there's a video to that somewhere as well but so has your blob storage so I have a database called Branson from when I went off to the North American collaboration summit and so here we're gonna make ourselves a new table and then make a new table I'm gonna copy some code and paste it over here for you so I'm gonna say new query alright so in the Branson database we're gonna use this code and once again I have a video that shows you how to do this so I'm not going to explain it or you can just you know pause this pause and steal that code right now but that's going to create us a table called receipts again is gonna set up a ID column with a primary key of blah blah blah alright so let's say execute perfect let's go over here we'll say refresh and this is important because this is like if I'm building this for customers so literally what I do I paste this in because I need the table to have a certain base and then now that we have this thing called receipts again we're going to say design curse you logitech okay so then now we can do is we can build our own columns and so when you're doing this the solution these are the columns I think you should all have right so like I tell my consultants on team you will have all these columns or I will punch you in the nose and I'll say I tell it's sick chewy on them but yeah he's so ferocious anyway these are the columns I want you to all have in your thing so the first one is going to be the file link and this will be the actual link to the file that we store so VAR a car and I'm gonna make this a pretty big one just in case people use a large file name so 256 you can database size ease any way you want but for me I make it 256 I'm going to need a file name I want to know what is the name of the file and so I think 50 characters is fine for that so then I'm going to need two columns that you weren't thinking of probably one is I'm gonna call it master ID this is going to be a integer and this is the column that is going to connect all the glue right if we switch over to SharePoint again for just one second and so if you look over here an expense master when I added that record alright Logitech makes me angry that was record number 54 that was the SharePoint ID of 54 so I grabbed that 54 if you go to expense details scroll the bottom keep scrolling to the bottom a new camera it's master ID is 54 right 54 if I scroll all the way back to the top because they've not locked the header jet you can see that I called that column master ID that's the glue that holds a parent-child relationship together so when I go to sequel I want to use that same column name so I know that that's the glue column alright and so it's gonna be an integer so if this if that one had had attachments it would have been 54 and so then finally this is new for me but this is going to be the something like as your file ID and that's going to be an integer also and the reason that I realized I needed that was because I want to give people the ability to delete the file format and in order to leak the file manager you have to have the files ID you can't do it by filename or file path at least with all the things that they are exposed to us that we have available so what I'm going to do this is brand new I have not even told my consultants this yet but we're gonna start storing this column as well so it used to be for a consultants on the team it's now 5 and all you guys you know before they do so good job but so these 5 columns are what you need in order to build and furnaces solution have complete access these files and some flexibility later so that looks good some say save if your sequel person and you're being judgey right now to stop it alright so then there you go there are your five files or five files five columns so we're done with address equal so minimize that we'll go back over here to our app and so then what we need to do is when you go to view data sources I'm going to add a data source I scroll all the way the bottom of my data source is somewhere down here have a sequel Branson there it is and then what you're going to see here is there's receipts again sure as well nervous it wasn't a show for a second so say connect okay so now we have access to that so back to our forum so remember we patched it off to SharePoint so now we want to do is we're gonna say for all I mean so for all is our way of looping through things and so we're going to do is for all the receipts in the collection right so run for run this set of code one time for every line in there so if you have zero receipts at run zero times if you have seven attachment to run seven times that's the beauty of for all and so we're gonna do is we're gonna say alright for all that I want to patch what I want to patch and one patch receipts again and with patch we're gonna say I wanted it instead of I'm saying the words I want to do the defaults function so defaults function is a way of telling power apps that I want make a new record out there in that sequel table so then we're just gonna do receipts again so patch receipts again with defaults receipts again which means make a new record and so now we're gonna set our column so we're gonna say alright file name you are equal to our friend FN and say and if I had made both of them file name now what had to do some weird matching stuff that I even wanna mess with and you end up having to use rename columns and things like that so using abbreviated names in the collection and real names in the database make make this match portion a lot easier that's the file name I need to then do the file link right so what was that was I do file link oh I definitely did not spell it that way how about that I'm gonna do FL we need the file ID uh-oh wait what did I call it in sequel as your file ID shoe file link file name so this would be as your file ID and that would be FID and then the fourth column that we need is we need the the master ID and so for master ID you can either get that by doing so the reason we do this in the on successor is you get it right here so you can grab it this way now but now I mean I found myself right let's close this out close this close this oh it's mad about something found Oh I'm storing this is a text so that's weird that's right we'll say use the value function to change that like that now what are you mad about patch oh I'm just missing another area sure okay so that gets the line good so one of the things I don't like here is I'm referencing form one last submit that ID twice so what I decided to do was I'm gonna go up here and I'm gonna say set var Master ID like this and I'm gonna use that so that'll put that into a variable and so then I'll just go change this one to var master ID and then change this right here to var master ID I don't think this is I wouldn't call us a required step but for me this makes the code read a lot easier right so I throw the master ID into a variable and so then the master ID here and here I don't know but it made me feel better I don't think you had to do that but that's how I would do it all right so that if everything is working correctly should be absorbing all of our content so let's do this now let's go back over here let's say play us cranium Spence we're just call it test because I'm tired of typing snarky things call it wasteful mmm when testing is wasteful right no we'll make this worth $100 say save well add a second item maybe maybe it's worth $1,000 there yeah so save those we'll get rid of the blank line we don't have to but we did know now you see that all these items are still over here oh so what do I need to do I need to go back so let's go back to this the front screen do a skin and so here right what do we do on select new form and then we clear collect expense collection and then we navigate well you know what we probably should do what should you do a couple things well we should hit shift enter here and hit shift enter here twice and so then what I'm gonna do here is I must say I want you to clear collect receipts so that way all right this should never really happen to a real user but in my testing I want to make sure every time I press this create new expense report and that it resets everything the other thing that I found in testing that made my life easier is if I always do a reset form in form 1 so that way the form gets blanked out if I had any default values in there and then it goes all right that looks a little better once again these are just things that are all about me makes my life easier is a guy who guys to build this app and test it and maintain it because now by his say create new expense oh nice blank screen so and then will say test again and still must be hardware apparently and so this was a no and a hundred like this and then maybe in a thousand you guys enjoy watching me tight don't you say add your seats so now we could choose a file a scribe chewy says good job again alright we added that one we can add another receipt greg's ugly face and remember right if you click on this you can see that file is in Azure blob storage already right it's not tied anything but we got that file out there because a lot of my customers want to make sure the moment the user attaches a we ain't take the pain of writing it across the network but B we don't lose the file and so that's the way we decided to do it you don't have to do it you could put these files into a collection and not write them to Azure blob storage until I submit if that's what you want to do it's up to you all right so we've got our stuff in here this all looks good so we're gonna say save alright after a second or two it finished me buddy five seconds I held my breath the whole time so I didn't turn purple so it's okay so then now if we go and look we can go over here to view it any expenses let's scroll the bottom so test again so no maybe all right so we have half of it but now we need to expose the files right so what are we going to do we're gonna take this I'm gonna kind of grab this guy no it'll be a pain like that boom so now I'm gonna make this little smaller we're going to insert another gallery vertical and when I put the gallery over here Oh clicking is hard people really it's all garbage on the screen go away stuff alright so for my data source it's going to be receipts again it's not as your blob sort its receipts again and just for fun what we're gonna do is we're going to say alright this image is going to be what file link oh look at that Craig sideways and chewy says good job so we have all of the content but remember we don't want all of this let's get rid of this what we really want to do is we weren't then just saying we want to filter this stuff so filter receipts again where master ID equals master gallery not selected dot ID right because that the ID of this record over here is what showed up over here right you can see that this one was filtered by that same formula and so then now this one is filtered by it same formula and I realize you see everything but if we click on please please work we don't see anything here right because there's no images associated with that one and so then you could write something that said you know show some text that says no attack it's or something like that and make that only invisible only visible if the the pieces were there and then I think the last thing you might want to do and this is one of those like I said bonus things but so now we could throw a trash can over here and so if you want to just get rid of that file right then you would be able to use the the idea right you'd say what we did we'd say remove from receipts again this item so I would get rid of the reference in wherever and then we'd say as your blob storage Chewie just walk to any her to say its name one too many times as your file ID and so that would delete the file from our sequel table and then that would delete the file from our Azure blob storage so yes what you guys think the is this feel good this is this is really this is real live what I do and build in the conversations I've had with several different people over the last few weeks this is the thing you guys need to be building so the other I guess bright side is I can tell you that on my fifth time recording it because of the stupid camera that the quality is a lot better right I solved a couple of talk I taught you more things each iteration so maybe you really want me to get out tonight number ten I don't know what I'd be teaching you at that point we do like launching spaceships the moon or something so anyway I'll quit babbling as always if you need anything you can reach out to me at power apps nine-one-one right we have some training we have some new online training that I'm supposed to be working on but I'm working on this instead so we got a bunch of new cool stuff coming in that space and you know we got consulting all those fun things if you need anything leave me a comment below I always respond to those sometimes it takes me a week to respond to them I apologize but I do respond all the comments so I'd love to hear your ideas and feedback right because that's what drives cool videos like this is people asking for them so I don't I think with all that said I'm gonna say thanks and have a great day hey it's me again if you got a second click the subscribe button that always keeps me making more videos or if you want to work together need some help getting your power apps going hit me up with power apps 9-1-1 always happy to work together or finally if you're always looking for more videos that's probably what it is check out the power ops playlist over here and you know enjoy that alright thanks and have a great day
Show moreFrequently asked questions
How do I add an electronic signature to a PDF in Google Chrome?
What do I need to sign a PDF file?
How can I sign a PDF file and send it back?
Get more for ratify attachment field with airSlate SignNow
- Print electronically sign Employee Engagement Survey
- Prove electronically signed Power of Attorney
- Endorse digisign Sponsorship Proposal Template
- Authorize electronically sign Non-Compete Agreement Template
- Anneal mark Letter of Recommendation Template for Coworker
- Justify esign Medical Invoice
- Try countersign Affidavit of Service
- Add Security Agreement electronic signature
- Send Sales Contract Template signed electronically
- Fax Letter of Recommendation for Scholarship electronically sign
- Seal Event Press Release electronically signing
- Password Event Sponsorship Proposal Template mark
- Pass Construction Contract Agreement signed
- Renew Time and Materials Contract autograph
- Test Delivery Receipt digital sign
- Require Construction Proposal and Agreement Template initial
- Print beneficiary eSignature
- Champion person eSign
- Call for client initials
- Void Affiliate Agreement template countersign
- Adopt Earn Out Agreement template sign
- Vouch Travel Information template electronically signing
- Establish Massage Gift Certificate template eSign
- Clear Consulting Contract Template template eSignature
- Complete Freelance Web Development Request template autograph
- Force Network Installation Proposal template digisign
- Permit Video Release Consent Letter template electronic signature
- Customize Leave of Absence Agreement template signed electronically