Realize Digi-sign Template with airSlate SignNow
Award-winning eSignature solution


Do more online with a globally-trusted eSignature platform
Outstanding signing experience
Robust reports and analytics
Mobile eSigning in person and remotely
Industry polices and conformity
Realize digi sign template, quicker than ever before
Helpful eSignature add-ons
See airSlate SignNow eSignatures in action


airSlate SignNow solutions for better efficiency
Our user reviews speak for themselves


Why choose airSlate SignNow
-
Free 7-day trial. Choose the plan you need and try it risk-free.
-
Honest pricing for full-featured plans. airSlate SignNow offers subscription plans with no overages or hidden fees at renewal.
-
Enterprise-grade security. airSlate SignNow helps you comply with global security standards.

Your step-by-step guide — realize digi sign template
Using airSlate SignNow’s electronic signature any business can enhance signature workflows and eSign in real-time, supplying a better experience to customers and staff members. realize digi-sign template in a few simple steps. Our mobile-first apps make work on the run achievable, even while off the internet! Sign signNows from anywhere in the world and make trades in less time.
Follow the stepwise guideline to realize digi-sign template:
- Log on to your airSlate SignNow profile.
- Find your record within your folders or upload a new one.
- Access the template and edit content using the Tools list.
- Drop fillable boxes, add text and sign it.
- List numerous signers via emails and set the signing sequence.
- Choose which users will receive an completed version.
- Use Advanced Options to reduce access to the template and set an expiration date.
- Click on Save and Close when finished.
Additionally, there are more advanced capabilities accessible to realize digi-sign template. Include users to your collaborative work enviroment, view teams, and keep track of teamwork. Numerous users across the US and Europe agree that a system that brings people together in a single holistic enviroment, is exactly what enterprises need to keep workflows functioning efficiently. The airSlate SignNow REST API enables you to integrate eSignatures into your app, website, CRM or cloud. Try out airSlate SignNow and enjoy faster, smoother and overall more productive eSignature workflows!
How it works
airSlate SignNow features that users love


See exceptional results realize digi-sign template with airSlate SignNow
How to submit and eSign a document online
Try out the fastest way to realize digi-sign template. Avoid paper-based workflows and manage documents right from airSlate SignNow. Complete and share your forms from the office or seamlessly work on-the-go. No installation or additional software required. All features are available online, just go to signnow.com and create your own eSignature flow.
A brief guide on how to realize digi-sign template in minutes
- Create an airSlate SignNow account (if you haven’t registered yet) or log in using your Google or Facebook.
- Click Upload and select one of your documents.
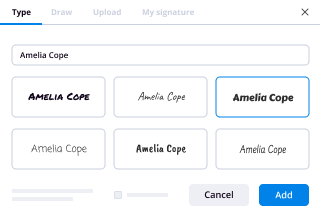
- Use the My Signature tool to create your unique signature.
- Turn the document into a dynamic PDF with fillable fields.
- Fill out your new form and click Done.
Once finished, send an invite to sign to multiple recipients. Get an enforceable contract in minutes using any device. Explore more features for making professional PDFs; add fillable fields realize digi-sign template and collaborate in teams. The eSignature solution gives a secure process and functions in accordance with SOC 2 Type II Certification. Ensure that all your records are guarded and therefore no one can take them.
How to eSign a PDF file in Google Chrome
Are you looking for a solution to realize digi-sign template directly from Chrome? The airSlate SignNow extension for Google is here to help. Find a document and right from your browser easily open it in the editor. Add fillable fields for text and signature. Sign the PDF and share it safely according to GDPR, SOC 2 Type II Certification and more.
Using this brief how-to guide below, expand your eSignature workflow into Google and realize digi-sign template:
- Go to the Chrome web store and find the airSlate SignNow extension.
- Click Add to Chrome.
- Log in to your account or register a new one.
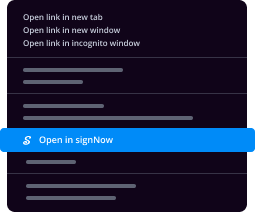
- Upload a document and click Open in airSlate SignNow.
- Modify the document.
- Sign the PDF using the My Signature tool.
- Click Done to save your edits.
- Invite other participants to sign by clicking Invite to Sign and selecting their emails/names.
Create a signature that’s built in to your workflow to realize digi-sign template and get PDFs eSigned in minutes. Say goodbye to the piles of papers on your desk and start saving money and time for extra important activities. Choosing the airSlate SignNow Google extension is a smart practical choice with many different advantages.

How to sign an attachment in Gmail
If you’re like most, you’re used to downloading the attachments you get, printing them out and then signing them, right? Well, we have good news for you. Signing documents in your inbox just got a lot easier. The airSlate SignNow add-on for Gmail allows you to realize digi-sign template without leaving your mailbox. Do everything you need; add fillable fields and send signing requests in clicks.
How to realize digi-sign template in Gmail:
- Find airSlate SignNow for Gmail in the G Suite Marketplace and click Install.
- Log in to your airSlate SignNow account or create a new one.
- Open up your email with the PDF you need to sign.
- Click Upload to save the document to your airSlate SignNow account.
- Click Open document to open the editor.
- Sign the PDF using My Signature.
- Send a signing request to the other participants with the Send to Sign button.
- Enter their email and press OK.
As a result, the other participants will receive notifications telling them to sign the document. No need to download the PDF file over and over again, just realize digi-sign template in clicks. This add-one is suitable for those who like concentrating on more important tasks rather than burning up time for absolutely nothing. Increase your daily monotonous tasks with the award-winning eSignature application.
How to eSign a PDF template on the go without an application
For many products, getting deals done on the go means installing an app on your phone. We’re happy to say at airSlate SignNow we’ve made singing on the go faster and easier by eliminating the need for a mobile app. To eSign, open your browser (any mobile browser) and get direct access to airSlate SignNow and all its powerful eSignature tools. Edit docs, realize digi-sign template and more. No installation or additional software required. Close your deal from anywhere.
Take a look at our step-by-step instructions that teach you how to realize digi-sign template.
- Open your browser and go to signnow.com.
- Log in or register a new account.
- Upload or open the document you want to edit.
- Add fillable fields for text, signature and date.
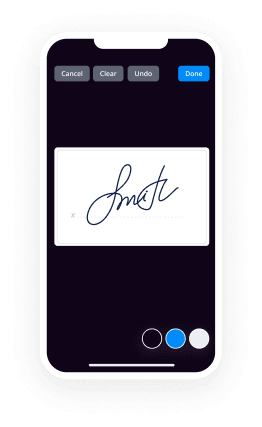
- Draw, type or upload your signature.
- Click Save and Close.
- Click Invite to Sign and enter a recipient’s email if you need others to sign the PDF.
Working on mobile is no different than on a desktop: create a reusable template, realize digi-sign template and manage the flow as you would normally. In a couple of clicks, get an enforceable contract that you can download to your device and send to others. Yet, if you truly want an application, download the airSlate SignNow app. It’s comfortable, fast and has an incredible layout. Experience easy eSignature workflows from your office, in a taxi or on an airplane.
How to sign a PDF file having an iPad
iOS is a very popular operating system packed with native tools. It allows you to sign and edit PDFs using Preview without any additional software. However, as great as Apple’s solution is, it doesn't provide any automation. Enhance your iPhone’s capabilities by taking advantage of the airSlate SignNow app. Utilize your iPhone or iPad to realize digi-sign template and more. Introduce eSignature automation to your mobile workflow.
Signing on an iPhone has never been easier:
- Find the airSlate SignNow app in the AppStore and install it.
- Create a new account or log in with your Facebook or Google.
- Click Plus and upload the PDF file you want to sign.
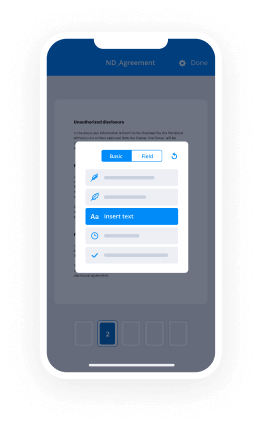
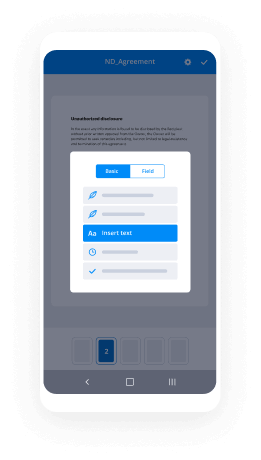
- Tap on the document where you want to insert your signature.
- Explore other features: add fillable fields or realize digi-sign template.
- Use the Save button to apply the changes.
- Share your documents via email or a singing link.
Make a professional PDFs right from your airSlate SignNow app. Get the most out of your time and work from anywhere; at home, in the office, on a bus or plane, and even at the beach. Manage an entire record workflow effortlessly: generate reusable templates, realize digi-sign template and work on PDFs with partners. Transform your device into a highly effective company for closing offers.
How to sign a PDF Android
For Android users to manage documents from their phone, they have to install additional software. The Play Market is vast and plump with options, so finding a good application isn’t too hard if you have time to browse through hundreds of apps. To save time and prevent frustration, we suggest airSlate SignNow for Android. Store and edit documents, create signing roles, and even realize digi-sign template.
The 9 simple steps to optimizing your mobile workflow:
- Open the app.
- Log in using your Facebook or Google accounts or register if you haven’t authorized already.
- Click on + to add a new document using your camera, internal or cloud storages.
- Tap anywhere on your PDF and insert your eSignature.
- Click OK to confirm and sign.
- Try more editing features; add images, realize digi-sign template, create a reusable template, etc.
- Click Save to apply changes once you finish.
- Download the PDF or share it via email.
- Use the Invite to sign function if you want to set & send a signing order to recipients.
Turn the mundane and routine into easy and smooth with the airSlate SignNow app for Android. Sign and send documents for signature from any place you’re connected to the internet. Generate professional PDFs and realize digi-sign template with a few clicks. Assembled a flawless eSignature workflow with just your smartphone and enhance your general efficiency.
Get legally-binding signatures now!
What active users are saying — realize digi sign template


Related searches to realize digi-sign template with airSlate airSlate SignNow

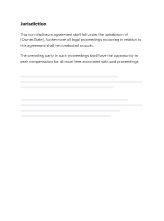
Initials waiver agreement template
Oh hi everyone and welcome to today's webinar getting started with hello sign my name is Kate and I'm a customer success manager here at hello sign and I'll be walking you through our web app features today don't let's take a quick look at what we're gonna be going over today we're first gonna look at who can sign your documents and we're gonna look at how to create a signature request and also look at how to create templates and use them to streamline your workflows we'll also take a peek at the signer experience and where you can track your documents and then finally we'll have a Q&A session which you can go ahead and enter Inc questions to the zum-zum Q&A control panel at any time and I'll answer as many as I can once we wrap all right before we go ahead and dive in I do want to mention that we will be looking at only our web app features today we will not be covering any of our hellosign API features so starting off we want to look at who can sign your documents so we have three different options for you the first being just me so this is going to be an option where you can create a document fill out some information and then adhere your signature and send that out to individuals and then we also have our me and others the me and others is going to allow you to input information on your behalf and in here your signature as well as create fields for your signers to fill out and adhere their signature as well and then finally we have just others so if you have documents that need information to be filled out by your signers only and then adhered their signature only such as any tax forms this is going to be a great option for you alright so now we know who can sign we want to look at where you can sign the first being your laptop or desktop the most common of options and we also have your smartphone and tablets and we also have an option where you're able to sign in person so you when you have somebody maybe walking into your office and you want them to sign in sign an NDA anything like that you're going to be able to set that up on your tablet and have them do it right as they walk in all right so now let's go ahead and jump into my demo account and take a look at some of these features in action ok so when you first log into your account you will be prompted to your home screen here this is asking you to simply select what what type of document or who needs to sign so those three options that we just went over are going to be those three options that will always populate before we go ahead and jump in to creating a request I do want to show some navigation here so you're gonna have your main menu here on the left-hand side where you're able to select your signer options look into your templates track your documents which we'll look into a little bit more later as well as manage your teams and our integrations list over here on your right-hand side you're going to have your username or your login email which will always be your username will be up here on the right-hand side so this is going to allow you to populate your signatures here any of the safe signatures as well as create signatures and then also look at any remaining credits and jump into your settings menu so let's go ahead and look at creating and saving a signature I'm going to go ahead and click on edit signature here okay so along the top you'll see I have all of my saved signatures so I have two different options here that I've gone ahead and saved now on the left hand side here you're gonna see the four different options that we have to actually create your signature the first being to draw in your signature here and you can easily do that using your trackpad or your mouse I can type my signature in and when I type that in I can use different fonts that we provide here you can also upload an image of your signature directly to the options there so if you want to have a more realistic signature there you can go ahead and upload that and then we also have the user smartphone option for this all you would need to do is take a photo of your signature using your phone and then go ahead and email it into sign at hello sign comm with the subject line being your unique code once you've done that your signature will be uploaded to your account to select your default all you'll do is go ahead and click on the saved signatures and then simply select the signature you'd like to use all right so now let's go ahead and start creating a signature request so for this I'm going to use them me and others as it is going to be one of our most common options there so the first thing you're going to need to do is going to be uploading a file you have a couple of different options here the first is going to be uploading the file directly from your computer or your device we're also able to use a template we've already created which we will do in just a moment you can also use any of your file sharing service options here such as your Google Drive box Dropbox Microsoft onedrive or Evernote and then you can always drag and drop your file here as well so I'm going to go ahead and upload a file you now if you have more than one file that you need to have signed so if you have a couple of different documents you are going to be able to add them in secession here and then also create their order so if I wanted to go ahead and add another option here I could go ahead and select my PDF and have that upload and then I can choose the order in which they're placed when you actually send this request this will push them down into one so it will not go as multiple different requests it will be in a single fluid request all right let's just Whittle that back down to one and keep moving on so now we need to select who's going to be signing since I selected me and others I'm already added here so I don't need to worry about that but I do need to go ahead and add in the next person who needs to sign so I'll go ahead and add that person in here and enter in their email now I can continue to add signers by simply clicking on the add signer of course if I've added too many I can easily remove those all right so now we have a couple of options that you can choose from as far as the actual emailing process here the first is going to be adding a CC option so if you want to add somebody to that particular chain that way they know that the document is out for signature and that a signature has been applied you can go ahead and have them on the CC the next is going to be an able signer reassignment so what this is going to allow you to do is allow for your signers to actually reassign this document to another individual so for example if you're working a sales deal and you have a new individual our new sales contract come through and you're actually not the individual that needs to sign off you need to have your manager sign off what I could do then is simply reassign this to my manager and have them sign the document this will allow up to three reassignments after three reassignments you would need to have the document recreated and reset and then I also have my assign higher order so this is going to just simply select needs to sign this document first and as soon as that person has signed it will then trigger an email to the next individual now it is important to note as soon as you do send the first request out everyone on your list will get a notification that the signing process has started and that they will soon receive an email once the individual in front of them has signed off all right now let's go ahead and prepare our documents for signing here is where we're actually going to lay down any of our text fields and sign your fields so as you might have noticed automatically it starts to go ahead and flash save every few moments or so that's because what hellosign is doing is it's automatically saving as you're working through your document all right so let's go ahead and lay down our first box so I'll go ahead and grab my text box by clicking on text box along my top menu here and then simply click where I would like this to be placed I can stretch this out to match the actual box here and then on this drop-down I can select who needs to fill this out so if I wanted to fill this out now I could go ahead and do that and now I can go ahead and I can update my SOT bye font size if I wanted to as well as I continue on with my particular fields here since I have already selected text box it's going to automatically continue with that selection I also have selected me now and so it's continuing with that selection as well to update that all I need to do is go ahead and let's click on that again go ahead and update who's going to be feeling that out so maybe I'll go ahead and enter in myself but it's actually one the signing process is happening now you'll also notice I have this required field so I can easily make this something that is required or not required by the individual that is assigned this particular field and then I also have my validation types so if I would like to go ahead and exclude certain options so maybe I wanted to do numbers only I could do that so it's going to restrict what individuals are actually able to put into this field I'll continue moving on here to lay down a few more fields so I'll go ahead and update that to the next individual you and I'll also go and add another field here you all right so as I go down I can add a couple of more options here so one might be my initials maybe I want them to initial off each one of these listings here so I'll go ahead and drop an initial box again I can resize this if I'd like or maybe I want to do a checkbox I can do that as well again to lay down your field simply just click where you want that to actually exist on your document now I'm gonna go ahead and enter in my signatures go ahead and click and drop that signature here and then I'm gonna go ahead and add in another signature and I'm actually going to go ahead and sign this now so I'm gonna go in an update me now since I already have a couple of signatures saved I can simply select from my signatures and insert now I'm going to select my date sign boxes place back down I'm gonna say me now and it's gonna automatically fill in the date but for here I want to update this to actually be my signer and now I'm ready to go so I'll go ahead and click continue my document is ready to go and I need to enter in the title now the title here is going to be the title of the document so when you're looking for it in your Documents folder this is how you're going to find it and then also it's going to be the title of the email and then I can also enter in a optional message for more context if I'd like and simply send my request now I'm prompted back to our home screen here and you'll see along the top that I have my request has been automatically sent all right now let's take a look at our templates so one way to streamline your workflow is to use templates this allows you to create documents that you know you're going to be using on a regular basis and simply add them and then add your signers so you don't have to go through placing your fields down every single time so we have two different options here the first is going to be creating a standard template this is great for those options where you need a more than a single signature and then also for those that need to be more customized this will be sent through an email through your hellosign account the other option is going to be creating a link so what you're going to do with this is create a template that has a link directly to it this is great for those that only need a single signature it's also going to be those particular forms that are going to be the same all the time waivers permission slips standardized forms that you have on your website for example with this link you'll be able to embed this in an email or have it also in your say your website so you'll be able to create that link and insert that where you need creating a link here will also be how you're able to start the in-person signing process so let's go ahead and create a standard template again I'm need to select what type of file so I'm going to go ahead and add in my file here and again if I had more than one document I could go ahead and add those and arrange the order now because this is going to be a template what we need to do is set up our roles the roles are going to designate who is going to need to sign where so when you actually go and go through the signing process you would then assign those roles to your particular signers for example for this permission slip I can have parent and I could have teacher I still have my same options with the CC and the sign of reassignment and signer order and I'll still go through the same process I prepare in my document so here I'll go ahead and grab my textbox that out and I'm gonna have the teacher fill that out now go ahead and enter in another text box here and I'll reconfigure and this time I'm going to have my parent one more here for my teacher you and then of course laying down your signatures you you all right so once you're ready to go ahead and save your template you've laid all of your fields and you're ready to go ahead and keep moving all you'll go ahead and do is click continue now as you'll see also just like with the original signing process you'll see the save option periodically flash because hellosign is constantly saving the work you're doing so go ahead and click continue now go ahead and add in my title and I can add in a message if I wanted to create my template and now we're going to be prompted to either go ahead and use the template or share this template with my team I'm going to go ahead and close all right so now that we're already here when you create that template it automatically populates you to your template section in your document section on this main menu on the left hand side when looking at your templates you see that title which is also the title the email that would be sent out and along the side here you're gonna have a quick actions menu you can easily jump in and edit you can duplicate you can use the template and I can edit my team access so any members I have on my team here I can go ahead and add them to this particular template so before we go any further at looking at our documents was going to go ahead and take a look at our signer experience so I'll go ahead and open up my email so that we can see what that looks like for those you're sending that particular signature request to you you you you you all right so I'm now here in my email and I can see my title here and then my message go ahead and click review inside my document will load I will see the information that has already been input by the either previous individuals that are signing my document or by the individual who created the document for me so I can see which fields are required by me by going ahead and looking at that asterisk so I'll go ahead and enter that in all right so now if I went ahead and tried to continue by clicking next you'll see that I'm prompted to another required field so I can go ahead and draw in my initials here insert and then also see that I have another option here and now I can click to sign you once you have completed the center will see this particular bar across the top letting them know that they've completed the signing process so now I'm gonna go ahead and click to continue and now hello sign is prompting you with the I agree option to confirm that you agree that this is a legally binding document if your signers want to look into the actual Terms of Service they have a link to that here so I'll go ahead and select I agree now I'm redirected to a thank you for submitting your document if you would like your it there is an option within the admin settings to redirect this to a different page of your choosing that's again going to be when you're setting up your account as an admin all right so that's going to be what your signers are walking through once they receive your documents let's go ahead and jump back into my demo account and look at where we can track our documents so in my main menu on the left hand side I have my documents menu it's going to automatically open up to all team documents if you are an admin if you're not an admin it will just open up to all of your documents you can see the status along the left-hand side if it's a document that needs your signature you can easily click your sign option if you want to get some more information such as document ID you can go ahead and actually click on that and then just like your template you're going to have your quick action option here which is going to allow you a couple of different options including renaming downloading resending the option as well as pushing out a reminder to your signer if they have not signed yet if you do wish to cancel you do have the option to cancel here it is important to note that this will not erase the document for others on the other end okay you're also going to be able to break out your different signatures or your different requests here based on their status so moving down now let's take a look at our teams so within hellosign you're going to be able to add multiple different team members to your account this is going to be how admins are able to restrict what specific members are able to do by placing them on a specific role so within the roles we have our make admin make developer and make team manager since this individual is already a member that's not an option but if I wanted to switch that I can make this admin a member so that's going to provide different levels of access to what you can do within your hellosign account quickly we're gonna go over a brief look at our settings here so with your settings depending on your role for admins you are going to have your business features here you're going to be able to add branding by adding your company logo any tag line and then that redirect you're going to be able to add that here now another thing you're going to be able to do is that email that your individual signers receive has a from email address it is a default email and no reply email you can go ahead and name this so that it looks a little different when they actually receive that you can also select what type of signatures you want individuals to be able to submit if you only want them to be able to type and drop you can go ahead and remove that smart phone and upload moving over you're gonna have again teens here which is also going to allow you to manage your team settings as well as your team members and then for individual members here you're going to be able to look at your your individual profile this is where you're going to be able to manage your email address and your profile I'm sorry and your password you can also enter in all of your specific information here if you would like to have that specified and then finally towards the bottom this is where you're going to be able to manage your notifications if you're injured in integrations we do have a list of our integrations here some are going to be right out of the box so you can easily activate others we provide a little bit of information here but if you'd like to get more information such as our hello sign for Salesforce you can go ahead and click on more information and you can reach out to your sales representative and then finally we're looking at our billing so this is going to be for any admin they're going to be able to manage any of your billing options including getting a copy of any invoices all right so as we wrap up I do want to point out a couple of resources here first being our online community and our Help Center within our online community you can reach out to users just like yourselves to ask questions and discuss different features and then in our Help Center you can find a plethora of great help articles as well as short on-demand video tutorials all right so if you do have any questions go ahead and enter them in now otherwise I do want to thank everyone for joining today's session and if you have questions after we jump off please don't hesitate to jump into that Help Center have a great day
Show moreFrequently asked questions
How do I create and add an electronic signature in iWork?
How do I sign a PDF electronically?
How do I eSign a PDF on a PC?
Get more for realize digi-sign template with airSlate SignNow
- Electronic signature xhtml
- Prove electronically signed Volunteer Confidentiality Agreement
- Endorse digisign Influencer Photography Contract
- Authorize electronically sign Auto Repair Contract Template
- Anneal mark Medical Records Release Authorization
- Justify esign Art Camp Registration
- Try countersign Certificate of Insurance
- Add Loan Agreement byline
- Send Auto Repair Contract Template esigning
- Fax Letter of Recommendation for College digisign
- Seal BMI Chart signature service
- Password Form W-4 countersign
- Pass Power of Attorney sign
- Renew Event Facility Rental Agreement initials
- Test T Shirt Order Confirmation eSign
- Require Web Design Agreement Template eSignature
- Print company signatory
- Champion companion email signature
- Call for acceptor signature
- Void Bill of Sale template esign
- Adopt Development Agreement template signature block
- Vouch Employee of the Month Certificate template signature service
- Establish IT Service Request template email signature
- Clear Employment Contract Template template signatory
- Complete Quality Incident Record template initials
- Force Video Proposal Template template electronically signed
- Permit Basic Employment Application template byline
- Customize Affidavit Templates template esigning