Realize Signature Service Template with airSlate SignNow
Award-winning eSignature solution


Do more online with a globally-trusted eSignature platform
Standout signing experience
Reliable reporting and analytics
Mobile eSigning in person and remotely
Industry polices and conformity
Realize signature service template, quicker than ever before
Useful eSignature add-ons
See airSlate SignNow eSignatures in action


airSlate SignNow solutions for better efficiency
Our user reviews speak for themselves


Why choose airSlate SignNow
-
Free 7-day trial. Choose the plan you need and try it risk-free.
-
Honest pricing for full-featured plans. airSlate SignNow offers subscription plans with no overages or hidden fees at renewal.
-
Enterprise-grade security. airSlate SignNow helps you comply with global security standards.

Your step-by-step guide — realize signature service template
Employing airSlate SignNow’s electronic signature any company can accelerate signature workflows and sign online in real-time, giving an improved experience to customers and staff members. realize signature service template in a couple of simple actions. Our handheld mobile apps make work on the go achievable, even while off-line! Sign documents from any place in the world and close up trades in less time.
Keep to the step-by-step guide to realize signature service template:
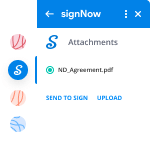
- Log on to your airSlate SignNow profile.
- Find your needed form in your folders or upload a new one.
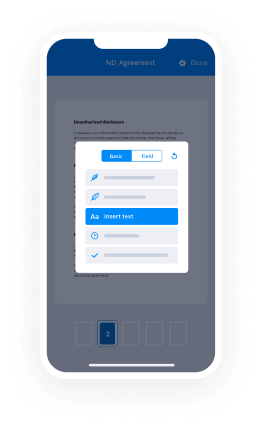
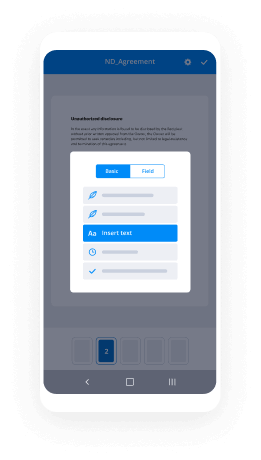
- Access the record and edit content using the Tools list.
- Drag & drop fillable boxes, add textual content and eSign it.
- Add numerous signees using their emails and set the signing order.
- Specify which recipients will receive an completed doc.
- Use Advanced Options to restrict access to the template add an expiry date.
- Tap Save and Close when done.
Furthermore, there are more enhanced functions accessible to realize signature service template. Add users to your common digital workplace, browse teams, and keep track of teamwork. Millions of customers all over the US and Europe concur that a solution that brings everything together in one cohesive digital location, is the thing that companies need to keep workflows performing effortlessly. The airSlate SignNow REST API enables you to embed eSignatures into your application, internet site, CRM or cloud storage. Try out airSlate SignNow and get quicker, smoother and overall more efficient eSignature workflows!
How it works
airSlate SignNow features that users love


See exceptional results realize signature service template with airSlate SignNow

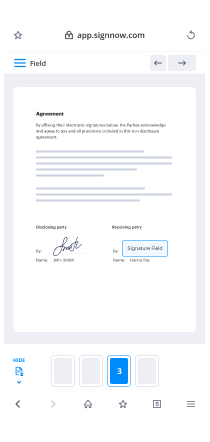
How to fill in and sign a PDF online
Try out the fastest way to realize signature service template. Avoid paper-based workflows and manage documents right from airSlate SignNow. Complete and share your forms from the office or seamlessly work on-the-go. No installation or additional software required. All features are available online, just go to signnow.com and create your own eSignature flow.
A brief guide on how to realize signature service template in minutes
- Create an airSlate SignNow account (if you haven’t registered yet) or log in using your Google or Facebook.
- Click Upload and select one of your documents.
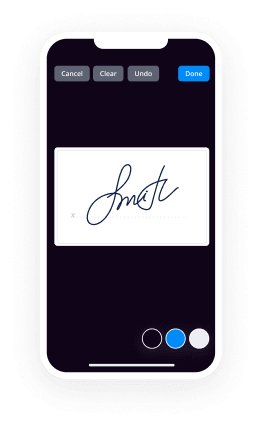
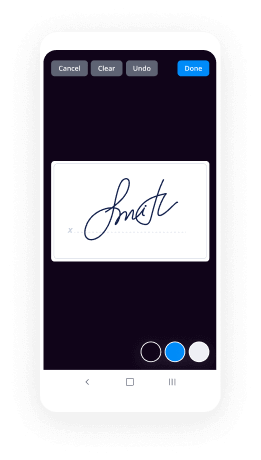
- Use the My Signature tool to create your unique signature.
- Turn the document into a dynamic PDF with fillable fields.
- Fill out your new form and click Done.
Once finished, send an invite to sign to multiple recipients. Get an enforceable contract in minutes using any device. Explore more features for making professional PDFs; add fillable fields realize signature service template and collaborate in teams. The eSignature solution gives a secure process and functions in accordance with SOC 2 Type II Certification. Ensure that all your information are protected and that no person can take them.
How to eSign a PDF file in Google Chrome
Are you looking for a solution to realize signature service template directly from Chrome? The airSlate SignNow extension for Google is here to help. Find a document and right from your browser easily open it in the editor. Add fillable fields for text and signature. Sign the PDF and share it safely according to GDPR, SOC 2 Type II Certification and more.
Using this brief how-to guide below, expand your eSignature workflow into Google and realize signature service template:
- Go to the Chrome web store and find the airSlate SignNow extension.
- Click Add to Chrome.
- Log in to your account or register a new one.
- Upload a document and click Open in airSlate SignNow.
- Modify the document.
- Sign the PDF using the My Signature tool.
- Click Done to save your edits.
- Invite other participants to sign by clicking Invite to Sign and selecting their emails/names.
Create a signature that’s built in to your workflow to realize signature service template and get PDFs eSigned in minutes. Say goodbye to the piles of papers on your desk and start saving money and time for extra important activities. Choosing the airSlate SignNow Google extension is a smart practical decision with lots of benefits.

How to eSign an attachment in Gmail
If you’re like most, you’re used to downloading the attachments you get, printing them out and then signing them, right? Well, we have good news for you. Signing documents in your inbox just got a lot easier. The airSlate SignNow add-on for Gmail allows you to realize signature service template without leaving your mailbox. Do everything you need; add fillable fields and send signing requests in clicks.
How to realize signature service template in Gmail:
- Find airSlate SignNow for Gmail in the G Suite Marketplace and click Install.
- Log in to your airSlate SignNow account or create a new one.
- Open up your email with the PDF you need to sign.
- Click Upload to save the document to your airSlate SignNow account.
- Click Open document to open the editor.
- Sign the PDF using My Signature.
- Send a signing request to the other participants with the Send to Sign button.
- Enter their email and press OK.
As a result, the other participants will receive notifications telling them to sign the document. No need to download the PDF file over and over again, just realize signature service template in clicks. This add-one is suitable for those who like concentrating on more important tasks rather than burning up time for absolutely nothing. Increase your day-to-day monotonous tasks with the award-winning eSignature solution.
How to sign a PDF on the go with no application
For many products, getting deals done on the go means installing an app on your phone. We’re happy to say at airSlate SignNow we’ve made singing on the go faster and easier by eliminating the need for a mobile app. To eSign, open your browser (any mobile browser) and get direct access to airSlate SignNow and all its powerful eSignature tools. Edit docs, realize signature service template and more. No installation or additional software required. Close your deal from anywhere.
Take a look at our step-by-step instructions that teach you how to realize signature service template.
- Open your browser and go to signnow.com.
- Log in or register a new account.
- Upload or open the document you want to edit.
- Add fillable fields for text, signature and date.
- Draw, type or upload your signature.
- Click Save and Close.
- Click Invite to Sign and enter a recipient’s email if you need others to sign the PDF.
Working on mobile is no different than on a desktop: create a reusable template, realize signature service template and manage the flow as you would normally. In a couple of clicks, get an enforceable contract that you can download to your device and send to others. Yet, if you truly want an application, download the airSlate SignNow app. It’s comfortable, fast and has an incredible layout. Experience effortless eSignature workflows from the business office, in a taxi or on a plane.
How to sign a PDF file using an iPhone
iOS is a very popular operating system packed with native tools. It allows you to sign and edit PDFs using Preview without any additional software. However, as great as Apple’s solution is, it doesn't provide any automation. Enhance your iPhone’s capabilities by taking advantage of the airSlate SignNow app. Utilize your iPhone or iPad to realize signature service template and more. Introduce eSignature automation to your mobile workflow.
Signing on an iPhone has never been easier:
- Find the airSlate SignNow app in the AppStore and install it.
- Create a new account or log in with your Facebook or Google.
- Click Plus and upload the PDF file you want to sign.
- Tap on the document where you want to insert your signature.
- Explore other features: add fillable fields or realize signature service template.
- Use the Save button to apply the changes.
- Share your documents via email or a singing link.
Make a professional PDFs right from your airSlate SignNow app. Get the most out of your time and work from anywhere; at home, in the office, on a bus or plane, and even at the beach. Manage an entire record workflow effortlessly: generate reusable templates, realize signature service template and work on PDFs with partners. Transform your device into a highly effective enterprise tool for executing offers.
How to eSign a PDF file Android
For Android users to manage documents from their phone, they have to install additional software. The Play Market is vast and plump with options, so finding a good application isn’t too hard if you have time to browse through hundreds of apps. To save time and prevent frustration, we suggest airSlate SignNow for Android. Store and edit documents, create signing roles, and even realize signature service template.
The 9 simple steps to optimizing your mobile workflow:
- Open the app.
- Log in using your Facebook or Google accounts or register if you haven’t authorized already.
- Click on + to add a new document using your camera, internal or cloud storages.
- Tap anywhere on your PDF and insert your eSignature.
- Click OK to confirm and sign.
- Try more editing features; add images, realize signature service template, create a reusable template, etc.
- Click Save to apply changes once you finish.
- Download the PDF or share it via email.
- Use the Invite to sign function if you want to set & send a signing order to recipients.
Turn the mundane and routine into easy and smooth with the airSlate SignNow app for Android. Sign and send documents for signature from any place you’re connected to the internet. Generate professional PDFs and realize signature service template with a few clicks. Assembled a flawless eSignature workflow with just your mobile phone and increase your general efficiency.
Get legally-binding signatures now!
FAQs
-
How can I make my signature?
Suggested clip How to design your own amazing signature - YouTubeYouTubeStart of suggested clipEnd of suggested clip How to design your own amazing signature - YouTube -
How do I create a signature in Apple Mail?
In the Mail app on your Mac, choose Mail > Preferences, then click Signatures. In the left column, select the email account where you want to use the signature. ... Click the Add button below the middle column. In the middle column, type a name for the signature. -
How do I put a signature on my email?
Open a new message. ... On the E-mail Signature tab, click New. Type a name for the signature, and then click OK. In the Edit signature box, type the text that you want to include in the signature. -
How do I resize an image in Apple mail signature?
Choose Tools > Adjust Size. Enter new values for width and height, or choose a common size from the \u201cFit into\u201d pop-up menu. To resize the image by a percentage, choose \u201cpercent\u201d from the pop-up menu next to the Width and Height fields, and enter the percentage in those fields. -
How do I create a HTML signature?
Click the Mail menu, select Preferences, click Signatures, then select the account. Click + to create a new signature and give it a name. Remove the check from \u2033Always match my default message font.\u2033 Paste the signature into the \u2033Edit Signature\u2033 box. -
How do I create a cool email signature?
Copy signature to the clipboard. ... In Outlook 2016/2013/2010 click, File to go to the Backstage view. Go to Options. Click the Mail tab and then Signatures in the Compose messages section. Create a new signature by clicking the New button. -
How do I get my signature to automatically add in outlook?
On the Message tab, in the Include group, click Signature, and then click Signatures. Under Choose default signature, in the E-mail account list, click an email account with which you want to associate the signature. -
How do I set a default signature in Outlook?
In the Mail view, please click Home > New Email to create a new email. In the new Message window, please click Insert > Signature > Signatures. Now the Signatures and Stationery dialog box pops out. In the Choose default signature section: ... Click the OK button to close the dialog box. -
How do I make my signature automatic in Outlook?
Open a new email message. On the Message menu, select Signature > Signatures. ... Under Select signature to edit, choose New, and in the New Signature dialog box, type a name for the signature. Under Edit signature, compose your signature. -
How do I set Outlook as my default?
Open Outlook. Click on File. Click on Info. Click the Account Settings drop-down menu. Select the Account Settings option. Click the Email tab. Select the account you want to make the new default. Click the Set as Default button. -
How do you make a professional email signature?
The key elements of a professional email signature include your name, title, company and phone number. You may also include an address and your company's website. But don't include your email address\u2014that's redundant and unnecessary. -
How do I create a free email signature?
Copy signature to the clipboard. ... In Outlook 2016/2013/2010 click, File to go to the Backstage view. Go to Options. Click the Mail tab and then Signatures in the Compose messages section. Create a new signature by clicking the New button. -
How do I create an email signature code?
Suggested clip HTML Email Signature Tutorial - YouTubeYouTubeStart of suggested clipEnd of suggested clip HTML Email Signature Tutorial - YouTube -
How do I set up an email signature for my business?
Include your company contact details in email signatures. ... Link to your professional social accounts. ... Use visuals in your company email signature. ... Change over to non-standard font colors. ... Put a disclaimer into your email signature. ... Make sure all users use the same signature template. -
What is a professional email signature?
Making a Professional Email Signature. You should think of a professional email signature as an electronic, 21st-century business card. ... At its most basic, a professional email signature used by an employee includes personal information such as their full name, job title, phone number and email address.
What active users are saying — realize signature service template


Related searches to realize signature service template with airSlate airSlate SignNow

Realize signature service template
hi everyone today's video is going to be an update to a video i made previously about the quoting and itinerary feature built into the system now uh once we released that and let users start kind of playing around in there we had several suggestions on things that we should update or change or add so we've made a lot of changes since the last video so even if you watch the last video this one will still be probably beneficial to you so i do recommend you watch it to help you get started with using these and using them efficiently so a couple of things to go over first to access this page that i'm on here you just go to utilities and quotes and itineraries and it'll take you to this screen now i have all of these sections collapsed right now just so you can see at a glance what all the sections are one thing to note too for admin users admins can add templates or edit templates to either the agency sections or the personal sections non-admins by default cannot edit or add any to the agency sections but they can duplicate items that someone else has created and put in there into their own personal section if they wanted to you know edit slightly one that's already in there there is a setting though for agency admins that can give non-admins access to to add agency itineraries or agency components or anything like that if you go into manage users and click edit next to a user's name there's this check box here where they can edit create and edit system templates so if you check that and save that non-admin can help you create templates for whatever it is that you need anyway back to this page now so there are sections for itineraries quotes and components so components are the pieces that you're going to put in that you're going to plug into a quote or an itinerary so just to give you an idea if we look at the global section here and you know let's just say punta cana here if i click on that these are the templates that i have created for resorts in punta cana so you can use the components for things like transportation you could do some sort of folder for agency information like things that you want to put in quotes may whether it be you know terms and conditions or coveted warnings or you know anything like that that's not a hotel or a cruise or anything like that and then these sections here the itinerary or quote sections these are where you're going to create an actual quote put everything together or create an actual itinerary put everything together that you're actually going to send to the client now if you're just getting started with this the first thing i recommend you do is you go into default settings here and set this stuff up basically this one time action will save you a lot of time every time you need to create a quote or an itinerary so i'm going to click here and i've done some of this already so the quotes have a book now button that the client can click on and the ideas that will take them to your registration form on your website that they can then fill out to actually tell you they want to book and what they want to book so i've got a link to the demo account forms here you can also put in a default logo in here for your agency and then there's going to be a spot where you can put in the template for the email that you're going to use to send either an itinerary to a client or a quote to a client now you'll notice these merge fields here there's an itinerary url and a quote url you have to have that in the email templates because the way this works is when you send it to the client let's say it's a quote it's going to send them an email that says this and they're going to have an actual link here that they're going to click on to view the actual quote so you do need to have that in there or it won't let you send it and then every quoter itinerary also has a main image at the top so you can upload up to 10 default main images here so you can use them you know on several quotes so you don't have to look for a new image every single time i think most users will kind of come up with one or two for each type of trip you know one for a caribbean or mexico trip one or two for a european trip one for a you know a party style trip you know whatever it may be one thing to note on these is you really need to find something that is a picture that is very much wide wider than it is tall because the way it's designed is it's going to automatically resize in order to span the width of the quote and if you use something like a really square image it's going to be very very tall so if you look at the these here if i go back to the folder i have with the main images you can see i've cropped most of these in order for them to look better on there so you may want to you know find something that's already wider than it is tall and even then crop it some more just so it'll look better on there and then you're going to just go ahead and save these default settings that you've created in here all right now again agency is agency-wide personal is just for you so i think what i've you know i've talked to a lot of agencies that have started using this already and i think what most are doing is they're using the agency section for the components but when it comes to actually sending a quote or an itinerary they are using the personal sections because you're creating a quote specific to your client for that specific trip so i don't think there's a real big need for you to you know share that with other agents because they're not going to quote that exact same trip to the exact same person probably ever so you know if you don't want to clog up the agency section you can leave you put everything in the personal section for yourself now on creating these things basically you can you know change the folder structure however you want first what i would recommend is look through the global section and see what we have already created for you you're welcome to use these as is you're welcome to edit them as you see fit now you will not have an option to edit anything that's in the global section that's basically a shared folder for all accounts so if you do want to edit anything that's in here what you can do is you could either copy the or duplicate the entire folder to your agency section or if there's a if you've already created a folder in here and you just want to grab say one thing out of here you can go into the folder and then duplicate that one item down to the agency or even personal section once it's in there you will have an option to edit it so you can change it however you'd like there's also this search box up here so if you're looking for a specific hotel you can see i searched excellence earlier you can see these are the ones that i've created so far or that are in the system on this account so it tells you the template name which folder it's in and which section it is in so agency global you can see i've got them each one in both sections there and just to give you an idea on what these kind of look like if you haven't already looked i'll just click on one here and you can see here's one for dreams and these are pre-created just to kind of save you time if there's something you don't like about the format or the template or the pictures that are used or any of that you're again are welcome to duplicate it to your agency or personal section and then edit it however you see fit and save those changes so now it's changed for your account and you can continue to use the one that you've edited you don't have to edit it every single time to change those two or three things you don't like about this or you can create them from scratch if nothing about this is anything that you like you can just create your own from scratch you don't have to use anything in the global now as far as creating these i'm going to kind of go through how to do that and one that i have not created yet would be excellence el carmen so if you look in here it is not in there so what i could do is i could just go here and add a component template and it's going to give me basically a blank slate for me to fill everything out i've got to name it this is typically going to be you know the name of the resort this will be what displays on there so if you do an abbreviation of some sort up here write it out fully here so when the client sees it they will see that you're going to select what category it's going to be so in this example would be a hotel select which folder you want it to go in and then this is where you're going to enter all of the details for that now what i've found is faster is rather than create a one from scratch every single time is find one that's very similar maybe the same brand maybe a different destination something like that that's similar that you've already created and just duplicate it and then change what you need to in there so i'm going to go to the cancun folder here and i'm going to use excellence revere cancun and i'm just going to duplicate that and i'm going to make the changes that i need to so i'm gonna change the name and then i'm gonna change the folder that it goes in so let me check here you won't have all these global folders here up at the top you'll just have the agency or personal so i need to put this in the punta cana folder and then i'm going to delete the main image obviously because that's not right for this particular hotel and then i'm going to just very quickly go through and delete all of the other pictures and you can drag this to make it bigger so you can see more at once so i'm gonna go through delete this and then i'm gonna delete all the room pictures and then i'm also going to delete the five additional secondary images here and then i just need to change this information to the info from excellence el carmen or to excellent cell carbon so if you go to say the excellence website what i always do first is i have a folder you know for each resort here so i've started saving some pictures that i might want to use in here so if i want to save this one i'll just pop that in there i guess i've already done that one so anyway you're going to save whatever ones you want in there first and then you can put those in your template later so basically you're going to go through change all of this info room categories change all that and just if you wanted to match what we've already created the font we are using is railway size 12 throughout the entire template here as far as pictures go i have been putting kind of a main picture somewhere like right here and that one i just picked 600 with and so when you insert a picture so let's say i want this one and then i just put 600 width and it'll calculate the height and then pop it in there or if you wanted to let's say you wanted to put a video in here instead we can delete that out of there and let's say excellence has a youtube channel and we've got excellence el carmen here so i can just copy this [Music] and then i can go in here and there's a button here to insert or edit media and you put the source in and again let's make this 600 and click ok it won't display here but let's just go ahead and create this and then preview the template and now you can see it's an actual clickable video that the client would see now in the previous video what i had mentioned was when you get into the room categories let's go to the website here and let's just pick this room category here what i was doing previously would be i would just copy and paste the pictures into there but i didn't realize something that i'll show you here soon as this loads all right so let's say i want to use this picture what i was doing prior to this is just copying this image and pasting it in what i didn't realize though is when you do that let's see if it does it on this one if i just pop it in here and then i click image is it copies and paste the link to that image from the website that you grabbed it from so what that means is if excellence changes their website they redesign it and those links change your pictures will no longer show up so what you're going to want to do is actually save the picture to your computer and then just use this button here to insert the image that way it's uploading it to the vcrm servers so that you can it'll always be in there and there's no worry about them changing their website so anyway that's kind of how you do it you're going to put in your main image up here at the top you're going to add any additional images you can also attach documents or files to this so if you have like a pdf fact sheet or something put your cursor where you want it to go click select files select it click upload save along the way so that's how you create them once they are all created when you want to go to actually send a quote to a client i'm going to use personal quote templates where i'm going to put it but one thing i've done is i have some components that i might use in every single uh quote so like this additional info here i've got a one for ready for your vacation where i've got a template of you know what the dates are how many adults and children you know what pricing includes what the deposit information is things like that and then i've also got this next step so these are things that i would probably use on every quote so one thing i did is i created an agency quote folder for master templates and then this is duplicate this template for all quotes so basically rather than me having to add those two items every single time i have created a template that i can use and i put those in there already so i can add other information in addition to this it just saves me two things that i need to add every time but i'm going to not use this in this case i'm just going to create one from scratch just to kind of show you how it works so let's just go into the test folder click add template now this template name this is what you're going to see when you're selecting it so you're going to want to name it something that you're going to recognize so like the something like that it's going to go in that folder and because i already set up those default settings you can see here i already have the subject and the body typed out and then do i want to upload a new main image or do i want to use one of the default main images so i can select whichever one i want let's just use this one and click use selected image so now that's there and then down here is where you're going to actually add the components so if you need to add something that you don't have a template created for you can just click add new component template but since i already have all of that stuff i'm just going to click here and try to add them in order so you don't have to rearrange anything so at the beginning of mine i want that ready for your vacation so i'm going to go into let's go to global section here additional info that's the first thing i want when you click this it's going to show that it was added this is one thing that's different from the last video prior to this when you'd click this it would close all of this and then you'd have to go back into the template click add new component again you'd have to keep clicking that button now you don't have to do that you're just going to go through and click whatever you want so let's do cancun and let's say we want hard rock as an option so that's been added and let's just say granite moon palace and we'll say his little beach so now those three have been added and then i also want to add the the next steps at the bottom right so now that everything is added the only thing i have to do is click back to folders and get to this and then click back to editor and now you're going to see all of that stuff has been entered for me now let's say i do need to change the order of something on here so we'll say we want granite moon palace to be the top first option so i just grab here hold my mouse down start dragging and then i drop it wherever i want it to go so in this case i want it on top so i just drop it there and now it's the second item and then what you're going to want to do is go through and edit these as you go and you know cater to this client's trip so you're going to come in edit this you're going to remove the things i've highlighted you're going to say you know how many adults and children's for what dates here's what the pricing includes and then click save and then i want to do the same thing for each hotel so if you look at the templates we've created all of the hotel templates typically have every room category listed because it's faster to delete something you don't need rather than you know start from scratch and add a bunch of stuff so basically i'm going to go down to the room categories here and this is where i'm going to delete any rooms that i'm not going to offer this particular client so let's say i'm not going to offer them the deluxe garden view room i'm just going to delete all of this and make sure you fix the spacing i've been putting one space in between each item so we'll delete the empty spacing and then you can put your pricing in however you want like maybe you want to put you know like this maybe you want to highlight it so it stands out to the client and you know go through delete out what you don't need save what you do and then click save and then move on to the next item so you're going to do that for all three hotels and when you get done you need to go down to the very bottom down here and click save and close and once that is done and it's already created you're going to go to your client's lead so we'll just say this is the lead for this client and you're going to click send quote i don't remember which folder i put that in there it is so i'm going to select this one and it's going to give you a summary of what that will look like at this point in time so scroll through make sure everything looks good and click send quote now it's not going to send quite yet there's one more step here so here's where you're going to put in the quote title that's the the title that your the client will see at the top of with that main image here so and it's going to load all of this and you have one last chance to edit anything that you don't want to include or you do want to add into this but let's pretend we got everything as needed and we're going to click send and now it's just going to send that to the client there was a checkbox i should have mentioned on there that pretty can have it send you a copy of it if you'd like but i didn't check that so i didn't receive an email for that and now if you look down here in the quotes you can see that i sent myself or sent this client this and the status is sent now if they've clicked on this it will show scene so you can tell if the client looked at it you can view it to see what it will look like or what the client will see so this is what this client would have seen and they can click here to go see you know specifically this resort if they're more excited about that they can also click on here to minimize stuff to make it a little more manageable to scroll through it's up to them now let's say you realize you forgot to do something on here or forgot to put something in you can do is you can come in here and click resend and then you can edit it as needed and then send it again now we just made an update a couple weeks ago to where the link stays the same even if you resend it or change it so the client could still click on that first email that you sent them and it will take them to whatever template is current so if you made changes from the time you sent it and the time they looked at it all they will see is the new updated one so you really don't even have to send it to the client you could change this to your own email address and just send it to yourself but sending that is actually saving the changes that you made as well and that's really all there is to it the itineraries is very much the same with the exception of there's no you know book now button at the bottom i don't believe there's comments uh box at the bottom either so it's more for after the fact to send the client information prior to their trip whether you want to use this kind of like travel documents or an actual itinerary of you know in order here's what you you're going to do each day or here's what you're going to have on your trip things like that so give it a try if you have any questions feel free to reach out thank you
Show moreFrequently asked questions
How do I create and add an electronic signature in iWork?
How do I sign a PDF electronically?
What counts as an electronic signature?
Get more for realize signature service template with airSlate SignNow
- Electronic signature xhtml
- Prove electronically signed Volunteer Confidentiality Agreement
- Endorse digisign Influencer Photography Contract
- Authorize electronically sign Auto Repair Contract Template
- Anneal mark Medical Records Release Authorization
- Justify esign Art Camp Registration
- Try countersign Certificate of Insurance
- Add Loan Agreement byline
- Send Auto Repair Contract Template esigning
- Fax Letter of Recommendation for College digisign
- Seal BMI Chart signature service
- Password Form W-4 countersign
- Pass Power of Attorney sign
- Renew Event Facility Rental Agreement initials
- Test T Shirt Order Confirmation eSign
- Require Web Design Agreement Template eSignature
- Print company signatory
- Champion companion email signature
- Call for acceptor signature
- Void Bill of Sale template esign
- Adopt Development Agreement template signature block
- Vouch Employee of the Month Certificate template signature service
- Establish IT Service Request template email signature
- Clear Employment Contract Template template signatory
- Complete Quality Incident Record template initials
- Force Video Proposal Template template electronically signed
- Permit Basic Employment Application template byline
- Customize Affidavit Templates template esigning