Recommend Validated Field with airSlate SignNow
Award-winning eSignature solution


Get the robust eSignature features you need from the company you trust
Choose the pro service created for professionals
Set up eSignature API with ease
Work better together
Recommend validated field, in minutes
Reduce your closing time
Maintain sensitive information safe
See airSlate SignNow eSignatures in action


airSlate SignNow solutions for better efficiency
Our user reviews speak for themselves


Why choose airSlate SignNow
-
Free 7-day trial. Choose the plan you need and try it risk-free.
-
Honest pricing for full-featured plans. airSlate SignNow offers subscription plans with no overages or hidden fees at renewal.
-
Enterprise-grade security. airSlate SignNow helps you comply with global security standards.

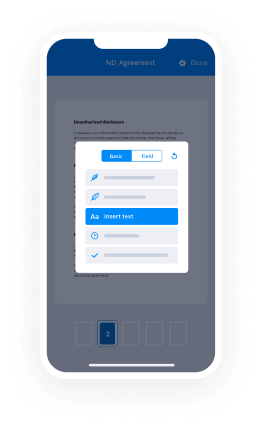
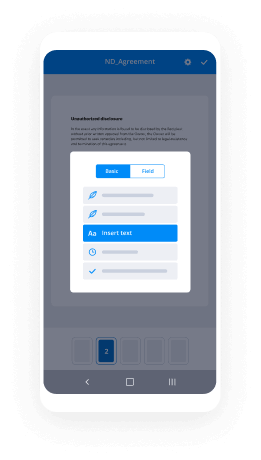
Your step-by-step guide — recommend validated field
Employing airSlate SignNow’s eSignature any organization can speed up signature workflows and eSign in real-time, supplying an improved experience to clients and employees. recommend validated field in a couple of easy steps. Our mobile apps make operating on the move feasible, even while offline! Sign contracts from any place in the world and make deals quicker.
Take a step-by-step guideline to recommend validated field:
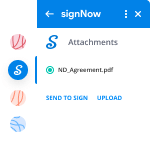
- Sign in to your airSlate SignNow profile.
- Find your record in your folders or import a new one.
- Open up the document and edit content using the Tools list.
- Drop fillable areas, add textual content and sign it.
- Include numerous signees via emails configure the signing order.
- Specify which individuals will receive an executed copy.
- Use Advanced Options to restrict access to the record and set an expiry date.
- Press Save and Close when done.
Additionally, there are more enhanced features open to recommend validated field. List users to your shared work enviroment, view teams, and monitor cooperation. Millions of consumers all over the US and Europe agree that a solution that brings people together in a single unified workspace, is what companies need to keep workflows performing smoothly. The airSlate SignNow REST API allows you to integrate eSignatures into your application, website, CRM or cloud. Try out airSlate SignNow and enjoy quicker, easier and overall more efficient eSignature workflows!
How it works
airSlate SignNow features that users love


See exceptional results recommend validated field with airSlate SignNow

How to complete and eSign a document online
Try out the fastest way to recommend validated field. Avoid paper-based workflows and manage documents right from airSlate SignNow. Complete and share your forms from the office or seamlessly work on-the-go. No installation or additional software required. All features are available online, just go to signnow.com and create your own eSignature flow.
A brief guide on how to recommend validated field in minutes
- Create an airSlate SignNow account (if you haven’t registered yet) or log in using your Google or Facebook.
- Click Upload and select one of your documents.
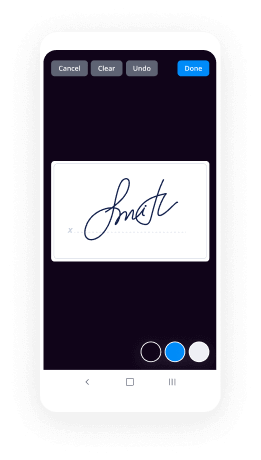
- Use the My Signature tool to create your unique signature.
- Turn the document into a dynamic PDF with fillable fields.
- Fill out your new form and click Done.
Once finished, send an invite to sign to multiple recipients. Get an enforceable contract in minutes using any device. Explore more features for making professional PDFs; add fillable fields recommend validated field and collaborate in teams. The eSignature solution gives a secure workflow and runs according to SOC 2 Type II Certification. Ensure that all your records are protected so no one can take them.
How to eSign a PDF file in Google Chrome
Are you looking for a solution to recommend validated field directly from Chrome? The airSlate SignNow extension for Google is here to help. Find a document and right from your browser easily open it in the editor. Add fillable fields for text and signature. Sign the PDF and share it safely according to GDPR, SOC 2 Type II Certification and more.
Using this brief how-to guide below, expand your eSignature workflow into Google and recommend validated field:
- Go to the Chrome web store and find the airSlate SignNow extension.
- Click Add to Chrome.
- Log in to your account or register a new one.
- Upload a document and click Open in airSlate SignNow.
- Modify the document.
- Sign the PDF using the My Signature tool.
- Click Done to save your edits.
- Invite other participants to sign by clicking Invite to Sign and selecting their emails/names.
Create a signature that’s built in to your workflow to recommend validated field and get PDFs eSigned in minutes. Say goodbye to the piles of papers on your desk and start saving money and time for additional important activities. Choosing the airSlate SignNow Google extension is a smart convenient choice with many different advantages.
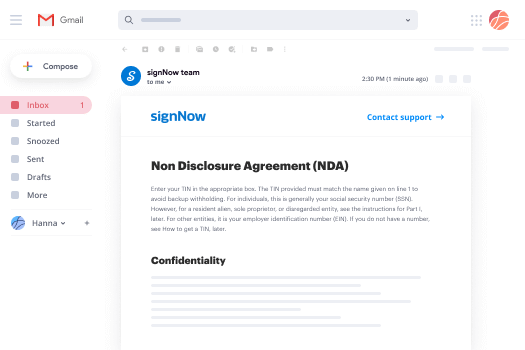

How to sign an attachment in Gmail
If you’re like most, you’re used to downloading the attachments you get, printing them out and then signing them, right? Well, we have good news for you. Signing documents in your inbox just got a lot easier. The airSlate SignNow add-on for Gmail allows you to recommend validated field without leaving your mailbox. Do everything you need; add fillable fields and send signing requests in clicks.
How to recommend validated field in Gmail:
- Find airSlate SignNow for Gmail in the G Suite Marketplace and click Install.
- Log in to your airSlate SignNow account or create a new one.
- Open up your email with the PDF you need to sign.
- Click Upload to save the document to your airSlate SignNow account.
- Click Open document to open the editor.
- Sign the PDF using My Signature.
- Send a signing request to the other participants with the Send to Sign button.
- Enter their email and press OK.
As a result, the other participants will receive notifications telling them to sign the document. No need to download the PDF file over and over again, just recommend validated field in clicks. This add-one is suitable for those who like focusing on more significant things rather than burning up time for absolutely nothing. Boost your daily monotonous tasks with the award-winning eSignature application.
How to sign a PDF file on the go without an application
For many products, getting deals done on the go means installing an app on your phone. We’re happy to say at airSlate SignNow we’ve made singing on the go faster and easier by eliminating the need for a mobile app. To eSign, open your browser (any mobile browser) and get direct access to airSlate SignNow and all its powerful eSignature tools. Edit docs, recommend validated field and more. No installation or additional software required. Close your deal from anywhere.
Take a look at our step-by-step instructions that teach you how to recommend validated field.
- Open your browser and go to signnow.com.
- Log in or register a new account.
- Upload or open the document you want to edit.
- Add fillable fields for text, signature and date.
- Draw, type or upload your signature.
- Click Save and Close.
- Click Invite to Sign and enter a recipient’s email if you need others to sign the PDF.
Working on mobile is no different than on a desktop: create a reusable template, recommend validated field and manage the flow as you would normally. In a couple of clicks, get an enforceable contract that you can download to your device and send to others. Yet, if you want a software, download the airSlate SignNow mobile app. It’s comfortable, quick and has an excellent interface. Try out seamless eSignature workflows from your office, in a taxi or on an airplane.

How to sign a PDF having an iPad
iOS is a very popular operating system packed with native tools. It allows you to sign and edit PDFs using Preview without any additional software. However, as great as Apple’s solution is, it doesn't provide any automation. Enhance your iPhone’s capabilities by taking advantage of the airSlate SignNow app. Utilize your iPhone or iPad to recommend validated field and more. Introduce eSignature automation to your mobile workflow.
Signing on an iPhone has never been easier:
- Find the airSlate SignNow app in the AppStore and install it.
- Create a new account or log in with your Facebook or Google.
- Click Plus and upload the PDF file you want to sign.
- Tap on the document where you want to insert your signature.
- Explore other features: add fillable fields or recommend validated field.
- Use the Save button to apply the changes.
- Share your documents via email or a singing link.
Make a professional PDFs right from your airSlate SignNow app. Get the most out of your time and work from anywhere; at home, in the office, on a bus or plane, and even at the beach. Manage an entire record workflow effortlessly: build reusable templates, recommend validated field and work on PDFs with business partners. Transform your device right into a highly effective business instrument for closing offers.
How to sign a PDF Android
For Android users to manage documents from their phone, they have to install additional software. The Play Market is vast and plump with options, so finding a good application isn’t too hard if you have time to browse through hundreds of apps. To save time and prevent frustration, we suggest airSlate SignNow for Android. Store and edit documents, create signing roles, and even recommend validated field.
The 9 simple steps to optimizing your mobile workflow:
- Open the app.
- Log in using your Facebook or Google accounts or register if you haven’t authorized already.
- Click on + to add a new document using your camera, internal or cloud storages.
- Tap anywhere on your PDF and insert your eSignature.
- Click OK to confirm and sign.
- Try more editing features; add images, recommend validated field, create a reusable template, etc.
- Click Save to apply changes once you finish.
- Download the PDF or share it via email.
- Use the Invite to sign function if you want to set & send a signing order to recipients.
Turn the mundane and routine into easy and smooth with the airSlate SignNow app for Android. Sign and send documents for signature from any place you’re connected to the internet. Generate professional-looking PDFs and recommend validated field with couple of clicks. Created a flawless eSignature workflow with just your smartphone and increase your total efficiency.
Get legally-binding signatures now!
FAQs
-
What is field validation?
Validation rules verify that the data users enter in a form meets the standards you specify before the form can be submitted. A validation rule contains an expression that evaluates data entered in one or more fields and returns a boolean value. -
What is validation testing with example?
Validation Testing, carried out by QA professionals, is to determine if the system complies with the requirements and performs functions for which it is intended and meets the organization's goals and user needs. ... Validation is done at the end of the development process and takes place after verification is completed. -
What is field level validation?
Field- level keyboard events allow you to immediately validate user input : KeyDown, KeyPress, KeyUp. Form-level validation is the process of validating all fields on a form at once. it is usually called when the user is ready to proceed to another step. -
What is validation and types of validation in asp net?
ASP.Net provides various validation controls that validate the user data to ensure that the data entered by the user are satisfied with the condition. ASP.Net provides RequiredFieldValidator, RangeValidator, CompareValidator, RegularExpressionValidator, CustomValidator and ValidationSummary. -
How many validation controls are there in asp net?
There are six validation controls available in the ASP.NET. By default, the validation controls perform validation on both the client (the browser) and the server. -
How do you validate a form?
Basic Validation \u2212 First of all, the form must be checked to make sure all the mandatory fields are filled in. It would require just a loop through each field in the form and check for data. Data Format Validation \u2212 Secondly, the data that is entered must be checked for correct form and value. -
Why form validation is required?
Form validation is required to prevent web form abuse by malicious users. Improper validation of form data is one of the main causes of security vulnerabilities. It exposes your website to attacks such as header injections, cross-site scripting, and SQL injections. -
How do you create a form in HTML?
The -
Where should input validation occur?
Data validation should occur in two locations: The point where data is acted upon, for example validating input parameters to an SQL query. General validation at the point where data is submitted, for example in a web application some validation should occur on the client. -
How do you validate information?
To validate data, appropriate tests need to be run, such as running the data through business cases, usability testing, and case models. To validate fluctuating data, appropriate meetings can also be set up to establish and authenticate the information, such as when you need up-to-date information for a status report. -
What is the purpose of data format validation?
What is the purpose of data format validation? Explanation: The data entered through the server side is used for validation. The data that is entered must be checked for correct form and value. This would need to put more logic to test the correctness of data. -
How do you ensure validity in research?
When the study permits, deep saturation into the research will also promote validity. If responses become more consistent across larger numbers of samples, the data becomes more reliable. Another technique to establish validity is to actively seek alternative explanations to what appear to be research results. -
How is data validation done?
Validation is an automated check, performed to guarantee that the data input is rational and acceptable. It does not check the correctness of the data itself. ... The validation is carried out by the computer when you input data. It is a way of checking the input data against a given set of validation rules.
What active users are saying — recommend validated field


Recommend validated field
in this video of Microsoft asp.net we are going to discuss a new category of controls that is validation controls whenever we design a form where we are taking some input from the user there may be a chance that we may no get not get the correct information so we can go for validation controls in order to put some validations on the client side so here variation controls are here to basically validate the user input so that we can get the correct data and what all the controls are required field validator will be used when I want to make some particular text box mandatory means if there is a field called first name and I want that user must enter the first name then I will use the required field validator for that particular text box similarly range validator will be used when I want some specific data may be a number of amount amount of any particular currency a date in a particular range so I will go for the range validator similarly I will go for compare value later when I want to compare two values for example I want that password and confirm password must be same so here we have to compare two values similarly it's about equality whether if you want to compare is the greater than less than or any other particular operator you can still go for the compare value just in the case you want to compare two values the regular expression evaluator will be used when I want a value in a particular format for example email id must be in a particular format like add the rate then some domain name then dot at least one so that is an expression so this is what we can validate using regular expression validator custom validator where we can define our own concept like what I want to validate so I will just write a code that may be a c-sharp or JavaScript function which will define the functionality for this custom variate and finally validation summary the control which will summarize all the validation messages and somewhere in the page either as a text on a browser on a page or as an alert box so let's go through each of these controls separately now so now let's start the implementation of the validation control we're in the tool box I'll find a section for these validation controls but before getting started with these controls make sure in web.config you have made a small change what let's see there so here in web config file which is used for conferring configuring your web application here I will just pass one application setting inside which I will add a key in app settings you can add multiple keys for the different purposes here what I'm going to do is I am going to setup validation setting and what in validation setting the unobtrusive validation mode and I will set it to null so make sure you have made this setting before using the validation control in your website once you have done this you can simply come to your pages and can start working with the validation control so here the first control which I am going to discuss is the required field validator as the name says it will ensure that the control which is associated with the required field validator is properly filled up so let's add this one here in the table as here you can see so we can set the required field validator to any of the control and here I will validate the user ID text box using required field validator so start in starting I will discuss few properties which will be common for all the validation controls which are display static if you'll say display static the controls will be added on the web page during the compilation time itself means when the page is getting initialized but if you will make it dynamic that will simply ensure that the rendering of such controls will be happening when at the runtime the validation will take place so I prefer dynamic display if you'll say none because the validation message will not be shown so I will go for diner for now error message is the descriptive message which you want to show so here I will say user ID is mandatory all right and then the font color it's not required but yes I will just make it red text I can make it as risk all right so now here you can see if the test text message is set then it will show you the text message that is asterisk all right so this is about the property and in all the controls of validation you will find these ones again there is something called control to validate which will be common for all the validation controls and here I will choose txt underscore user ID means the textbox which is associated for the user ID I have renamed all the controls so that it will be easier for us to understand so now here you can see that txt user ID is set in after that set focus on error so set focus on error is false that means as soon as the validation will take place the cursor will start blinking or the control will directly go to the control which is set as a control to validate so if I will say it true that will actually happen so these are all the properties which you will find in all the controls including this validation group so now the specific property which you will find for required field validator is the initial value so basically this initial value will help us out in the case when I will be changing the default value of the control for example the default value of a textbox is blank and if the textbox is blank I want to raise the validation similarly this initial value by default it is blank so if the initial value of required field validator is equal to the value of control to validate this validation will take place that means initial value is blank text box is blank both are equal so the validation will take place that mean it will not allow being null value so let's execute and see whether it is going on correctly or not so now as here you can see the form is here now when I click on submit you see the text is being here cursor started blinking that is because of the set focus on error so as soon as I click here it will be very rated now if I enter any value and then I click on submit you can see now the page is getting posted back because so far there is only one validation control is there so this is how you can apply the required field validator in all the text boxes in all the controls where you want to make the input mandatory now similarly if I will apply the required field greater for a drop-down list I'll have to do one change let's see what is that so let me do some common changes so as you can see I have changed the display error message text control to validate that is DDL country's drop-down list countries set focus on error now I have to make the change in the deep initial value as here you can see the initial value of this control is select a country so I'll have to write the same that is select a country all right so it is like that now let's execute okay let me change the font color as well alrighty so let's execute it now so as you can see both asterisks are here but the focus can be set only on one control so whichever will appear first the focus will go on to that control once you have entered anything there you will submit and now you can see there is a blue outline over the drop-down list that means the focus is now on the drop-down list so I will choose a country and then that is gone and now I can submit the form as well this is about the required field very rater so the next control in the list is the regular expression validator whenever I want some value to come in a particular format like email id mobile number so I can go for the regular expression validator internally this control works on the regex concept of dotnet framework so I'll add this regular expression validator for the field email id and let's do some changes now in the property so few changes which were common I'm going to make them so I have set all the properties like display error message for color text control to validate which is mandatory one and set focus on error now the specific property which will come here is the validation expression so here you can see an ellipse button I'll come some predefined formats are here like I get the internet email address also in that so I will choose that and internally as I said it is following the regex concept of dotnet framework so let's execute this one since I have not applied the required field theater here so it will not show me the s risk right now but if I enter anything in the incorrect format then obviously it is going to show me that all right so whatever you are entering here now should be in the correct format all right whether you are entering the correct value or not that may vary alright so let me enter something here so this is the correct format so now the validation is gone so if you want email to be mandatory as well you can add the required field variator as well one control can be validated through multiple validation controls but one validation control only validate one control all right so as here I said you can add one more validation control for this text box which will be the required field validator similarly if you want to validate the mobile number you can again come to regular expression validator like this and again I will change few properties and now here in the validation expression you can write it by yourself also in mobile number I am expecting the 10 digit numerical value that means only the digits value can be there so what can I do is passing a backslash D that will enable you to enter the digit value if I add plus you can add up to any digit numbers all right but if I will pass 10 inside the curly braces that means I can only pass 10 digits so let's execute this to check it so if I'll enter any alphabet it will show me invalid number similarly if I'll enter any number it will show me invalid number again all right now let me put some tanjit number like 1 2 3 4 5 6 7 8 9 10 so now this error is gone all right though there are a few other exceptions we through other validations I should say which are there so I filled up the form completely and then I'll submit but this is how you can start working with the regular expression validator control so the next control in the list is the range validator which will allow a user to enter the value in a given range so for the date of birth kind of feel I can go for this range validator so let's go and see some properties so first of all I'll start with changing some default properties as they were doing so the common properties have been modified now now let's see some specific type of properties for the range validator I'll start with the type where I will have to specify like which type of value I am going to validate whether it's a number whole number or a decimal number or a currency or a date or a string so depending on the type you can set the minimum and the maximum value for the range valuator so here for date of birth I'll have to go for the date here in the error message I have said age must be between 18 to 45 so I just wanted like the user must be entering some date of birth which will make the age in this range so according to that I will have to pass the minimum and the maximum value but the date changes on the daily basis if it is a number if it is about a currency fixed amount I can write that particular value right here as well but since it is about date I'll have to go for the coding for making the changes so in the page load event I can do that so what I will do I will say range validator one dot minimum value so here minimum value is of string type so I'll set the date according to that so date time dot now minimum value means the date of 45 years ago all right that will be the minimum value for this range validator so did time dot now dot add years and for that I'll have to go 45 years back so add years - 45 dot - short date string similarly for range validator dot maximum value is equal to date time dot now dot add years and maximum it could be 18 years of a date so - 18.2 short date string so now again it will not mind when I will not enter anything here but obviously when it's about some date let me enter some value like 1207 1934 so it's saying age not in range because it will not make a person of age 45 all right so but if I'll make it like 88 then it will not mind okay it's 12 7 month and year 1988 similarly if I will enter something like 2005 again it is not causing a user 18 plus so this is how you can work with the range validator for a given data type now let's come to the other control which is the compare control as the name says whenever I want to compare two values we'll go for the compare control in our form we have the fields like password and confirm password which must be same so I can use this compare validator in the confirm password text box so that I'll ensure that the value of confirm password must be same as that of the password text box so here I will add this compare validator and in the properties again I'll start with some common properties so now as you can see display error message folk error text and the control to validate and set focus on error all these properties have been set now let's focus on the specific properties of the compare validator so again the type is here which will make us like which type of value I want to compare whether it's going to be a number or a string in this particular case since I am working with the password it will be a string now after that the operator properties here if you choose the number or something integer or double currency something then in that case you can go for the different operators like not equal greater than and others but in this case I'll have to go for the equal only because the password and confirm password must be equal and then the last property which is specific to this one is the control to compare basically for comparing we have the couple of properties like control to compare and value to compare make sure only one of these two properties must be set if both are not set then it will give you an error if both are set again it will give you the error so they follow actually the XOR operation so only one can be true and other must be false so in our case I don't have any specific value but in case when you go for any OTP comparison or any capture comparison then you can go for the value to compare property otherwise you will have to go for the control to compare in this case so I will say I'll compare it with text password and I'll validate texts confirm password so let's execute it now I'll start entering the password here I have not set it as the password mode alright so that you can see what I am entering into it so if I will do any incorrect value it will say password mismatched again it will say the same password mismatched but if I enter the exact same value it will not say anything so this is how you work with the compare very later at last we have the custom validator so we'll come to tool box to choose the custom validator and here I'll apply it for the password as the name says it's custom validator means you can define your own function whatever you want to put in the validation and you have two choices either you can go for a JavaScript function to put your client-side validation or you can go for the C shop code for putting the server-side validation so here I'll just go to the properties to set some common properties as we used to do so as you can see here like I have set all the common properties now if you want to create a JavaScript function then you can just define that and later you can pass the name of that function right here in the client validation function and apart from that by default as the other validation controls if you will leave the textbox empty this custom control will not validate that but if you want to do that you can just say it true like validate empty text to true now the client validation function is not there but I have already said the control to validate so whatever the definition we will do we will it will be applied for this textbox so just double click on this custom validator which will create this particular function with a couple of arguments object source which is the custom validator and herbs which is containing the value for the control to validate that is the textbox so here what I will do I'll just take length Ln is equal to Earth's dot value length now I have the length and if length is greater than equal to eight and length is less than or equal to 15 then in that case I will say herbs value is fine it's valid so else dot is where it is equal to true else herbs dot is valid is equal to false so this is the definition the similar definition you can put in the JavaScript as well so let's execute it first on the server side as it is server validate so since that was a server validate you can put any code using the c-sharp now here when I will click you see it is not showing the error for this why because so far the validations are on the client fat itself so let me put something here and in the country so now when I'll submit it will show invalid password and you see here the page is getting refreshed all right and then it is showing me the invalid password that is the error message here I said that the length of the password should be between 8 to 15 characters so one two three four five six seven eight and as soon as I did that the error is gone the validation message is gone
Show more