Recover Signature Service Phone with airSlate SignNow
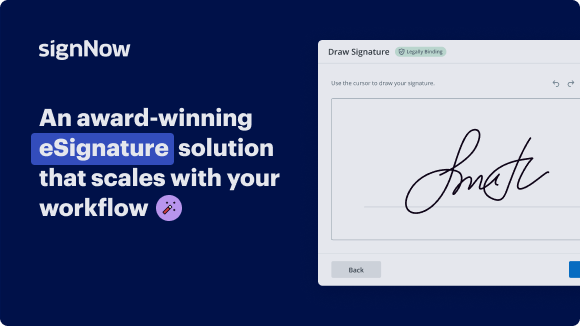
Award-winning eSignature solution


Get the powerful eSignature features you need from the company you trust
Choose the pro service designed for pros
Set up eSignature API with ease
Collaborate better together
Recover signature service phone, in minutes
Reduce your closing time
Keep sensitive data safe
See airSlate SignNow eSignatures in action


airSlate SignNow solutions for better efficiency
Our user reviews speak for themselves


Why choose airSlate SignNow
-
Free 7-day trial. Choose the plan you need and try it risk-free.
-
Honest pricing for full-featured plans. airSlate SignNow offers subscription plans with no overages or hidden fees at renewal.
-
Enterprise-grade security. airSlate SignNow helps you comply with global security standards.

Your step-by-step guide — recover signature service phone
Using airSlate SignNow’s eSignature any business can speed up signature workflows and eSign in real-time, delivering a better experience to customers and employees. recover signature service phone in a few simple steps. Our mobile-first apps make working on the go possible, even while offline! Sign documents from anywhere in the world and close deals faster.
Follow the step-by-step guide to recover signature service phone:
- Log in to your airSlate SignNow account.
- Locate your document in your folders or upload a new one.
- Open the document and make edits using the Tools menu.
- Drag & drop fillable fields, add text and sign it.
- Add multiple signers using their emails and set the signing order.
- Specify which recipients will get an executed copy.
- Use Advanced Options to limit access to the record and set an expiration date.
- Click Save and Close when completed.
In addition, there are more advanced features available to recover signature service phone. Add users to your shared workspace, view teams, and track collaboration. Millions of users across the US and Europe agree that a solution that brings everything together in one unified digital location, is the thing that businesses need to keep workflows performing smoothly. The airSlate SignNow REST API allows you to integrate eSignatures into your application, internet site, CRM or cloud. Try out airSlate SignNow and enjoy faster, smoother and overall more effective eSignature workflows!
How it works
airSlate SignNow features that users love


Get legally-binding signatures now!
FAQs
-
How do I access airSlate SignNow?
Open up your browser and visit signnow.com. Log in or create a new account. Upload or open the PDF file you want to change. Put fillable fields for text, eSignature and date/time. -
How do I recover a lost digital signature?
Recover your digital signature certificate: Go to notarius.com/recover. Enter your business email address associated with your digital signature; you will receive an email at your alternate email address AND at your business email address associated with your digital signature. -
Where do I find signature on my phone?
Add or change a signature Open the Gmail app . In the top left, tap Menu . Scroll to the bottom, then tap Settings. Choose the Google Account where you want to add a signature. Tap Mobile Signature. Enter the text for your signature. Tap OK. -
How do I download airSlate SignNow?
To sign a document in Google Chrome, search for the airSlate SignNow add-on in the Web Store and download it. -
How can I get airSlate SignNow for free?
Yes, you can download the mobile app and create a free airSlate SignNow account directly within the app to get started. Signing is always free and you can send three free signature requests with your free account. -
How do you use airSlate SignNow?
How to fill in and eSign a document online Create an airSlate SignNow account (if you haven't registered yet) or sign in with your Google or Facebook. Click Upload and choose your PDFs. Use the My Signature to insert your signature. Turn the sample in a powerful PDF with fillable fields. Fill out your contract and click Done.
What active users are saying — recover signature service phone


Recover signature service phone
Walkthrough the hard year 2021, we come to the new year 2022. Welcome back, guys. Still, iPhone’s problem will not be solved with the new year come. I realize there are still many people who have the issue that iPhone stuck on [support.apple.com/iphone/restore](http://support.apple.com/iphone/restore) interface, or you can call it restore screen, recovery mode. They try many ways but still can’t fix that issue. But hey, don’t worry, I know a few ways that can actually fix the issue, just follow me and you will know. Method One: Fix with ReiBoot This is the most efficient way, I suggest your guys try this, Just connect your iPhone to Pc or Mac. Then open ReiBoot, click the Exit Recovery Mode option, and wait for a little while, then you can see, my iPhone is out of the restore screen, it is very easy!! Go give it a try! Method Two: Force Restart A reboot might fix the issue, so let’s try it, press the volume up and press the volume down button, then press and hold the power button, keep holding till the apple logo appears. If everything goes right, it should be normal again, if it is not, it will return to restore screen, like this. If this happens on your iPhone too, you need to follow the next three method to fix it. Method Three: Fix with iTunes iTunes is able to fix this issue in normal situations, connect your iPhone to PC or Mac, open iTunes. You will see iTunes pop-up a window that tells you your iPhone needs to be restored or updated. Click updated here, it will start to download the firmware, wait for it complete. Then it will start update your iPhone, along with fixing the problem. I know many of your guys are not comfortable with using iTunes, so follow the next method, it works perfectly well on [support.apple.com/](http://support.apple.com/restore)iphone/restore issue, and won’t cause you any data loss. Method Four: iOS System Repair(No Data Loss) Check the download link in the description and download ReiBoot. Open ReiBoot, and connect your iPhone to PC or Mac. Click the green start button, click standard repair. Here will require a download, just click it. Be patient, wait for the download complete, it won’t be long. Then click Start Standard Repair. The repair process might take some time, be patient and do not disconnect your iPhone during the process, or it won’t work. When it is done, you can see my iPhone is back to its normal state. Go try it on! If none of the above methods work on your iPhone, you should try the last method, it will completely clear your iPhone to its original state, do remember to back up your iPhone. Method Five: iOS System Repair(Deep Repair) Click the green start button, click deep repair this time. Here also require a download, I will skip the download process. Click start deep repair, this process also takes some time, be patient, do not disconnect during the process....
Show more