Redline Show Registration Form with airSlate SignNow
Award-winning eSignature solution


Do more online with a globally-trusted eSignature platform
Remarkable signing experience
Robust reports and analytics
Mobile eSigning in person and remotely
Industry regulations and conformity
Redline show registration form, quicker than ever
Helpful eSignature extensions
See airSlate SignNow eSignatures in action


airSlate SignNow solutions for better efficiency
Our user reviews speak for themselves


Why choose airSlate SignNow
-
Free 7-day trial. Choose the plan you need and try it risk-free.
-
Honest pricing for full-featured plans. airSlate SignNow offers subscription plans with no overages or hidden fees at renewal.
-
Enterprise-grade security. airSlate SignNow helps you comply with global security standards.

Your step-by-step guide — redline show registration form
Employing airSlate SignNow’s eSignature any business can accelerate signature workflows and sign online in real-time, providing a better experience to clients and staff members. redline Show Registration Form in a few easy steps. Our handheld mobile apps make operating on the run achievable, even while off the internet! Sign signNows from anywhere in the world and complete tasks faster.
Take a walk-through guideline to redline Show Registration Form:
- Log in to your airSlate SignNow account.
- Locate your document within your folders or import a new one.
- the record adjust using the Tools list.
- Drag & drop fillable areas, type text and eSign it.
- List numerous signers via emails and set up the signing order.
- Choose which individuals can get an executed copy.
- Use Advanced Options to restrict access to the document and set up an expiration date.
- Press Save and Close when done.
Additionally, there are more innovative tools accessible to redline Show Registration Form. List users to your collaborative workspace, view teams, and track collaboration. Numerous people all over the US and Europe agree that a system that brings people together in a single cohesive work area, is exactly what businesses need to keep workflows functioning smoothly. The airSlate SignNow REST API allows you to integrate eSignatures into your app, website, CRM or cloud storage. Try out airSlate SignNow and get faster, smoother and overall more efficient eSignature workflows!
How it works
airSlate SignNow features that users love


See exceptional results redline Show Registration Form with airSlate SignNow
How to complete and eSign a PDF online
Try out the fastest way to redline Show Registration Form. Avoid paper-based workflows and manage documents right from airSlate SignNow. Complete and share your forms from the office or seamlessly work on-the-go. No installation or additional software required. All features are available online, just go to signnow.com and create your own eSignature flow.
A brief guide on how to redline Show Registration Form in minutes
- Create an airSlate SignNow account (if you haven’t registered yet) or log in using your Google or Facebook.
- Click Upload and select one of your documents.
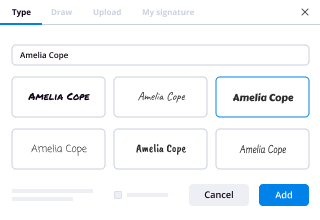
- Use the My Signature tool to create your unique signature.
- Turn the document into a dynamic PDF with fillable fields.
- Fill out your new form and click Done.
Once finished, send an invite to sign to multiple recipients. Get an enforceable contract in minutes using any device. Explore more features for making professional PDFs; add fillable fields redline Show Registration Form and collaborate in teams. The eSignature solution supplies a reliable process and operates in accordance with SOC 2 Type II Certification. Make sure that all your information are guarded so no one can edit them.

How to eSign a PDF template in Google Chrome
Are you looking for a solution to redline Show Registration Form directly from Chrome? The airSlate SignNow extension for Google is here to help. Find a document and right from your browser easily open it in the editor. Add fillable fields for text and signature. Sign the PDF and share it safely according to GDPR, SOC 2 Type II Certification and more.
Using this brief how-to guide below, expand your eSignature workflow into Google and redline Show Registration Form:
- Go to the Chrome web store and find the airSlate SignNow extension.
- Click Add to Chrome.
- Log in to your account or register a new one.
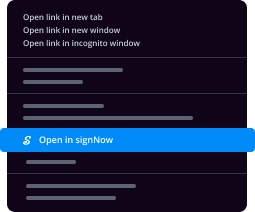
- Upload a document and click Open in airSlate SignNow.
- Modify the document.
- Sign the PDF using the My Signature tool.
- Click Done to save your edits.
- Invite other participants to sign by clicking Invite to Sign and selecting their emails/names.
Create a signature that’s built in to your workflow to redline Show Registration Form and get PDFs eSigned in minutes. Say goodbye to the piles of papers sitting on your workplace and begin saving time and money for additional significant tasks. Choosing the airSlate SignNow Google extension is a smart handy option with many different benefits.

How to eSign an attachment in Gmail
If you’re like most, you’re used to downloading the attachments you get, printing them out and then signing them, right? Well, we have good news for you. Signing documents in your inbox just got a lot easier. The airSlate SignNow add-on for Gmail allows you to redline Show Registration Form without leaving your mailbox. Do everything you need; add fillable fields and send signing requests in clicks.
How to redline Show Registration Form in Gmail:
- Find airSlate SignNow for Gmail in the G Suite Marketplace and click Install.
- Log in to your airSlate SignNow account or create a new one.
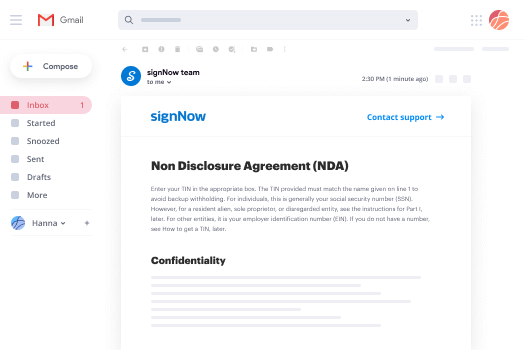
- Open up your email with the PDF you need to sign.
- Click Upload to save the document to your airSlate SignNow account.
- Click Open document to open the editor.
- Sign the PDF using My Signature.
- Send a signing request to the other participants with the Send to Sign button.
- Enter their email and press OK.
As a result, the other participants will receive notifications telling them to sign the document. No need to download the PDF file over and over again, just redline Show Registration Form in clicks. This add-one is suitable for those who like focusing on more valuable goals instead of wasting time for absolutely nothing. Improve your day-to-day routine with the award-winning eSignature platform.
How to eSign a PDF file on the go without an mobile app
For many products, getting deals done on the go means installing an app on your phone. We’re happy to say at airSlate SignNow we’ve made singing on the go faster and easier by eliminating the need for a mobile app. To eSign, open your browser (any mobile browser) and get direct access to airSlate SignNow and all its powerful eSignature tools. Edit docs, redline Show Registration Form and more. No installation or additional software required. Close your deal from anywhere.
Take a look at our step-by-step instructions that teach you how to redline Show Registration Form.
- Open your browser and go to signnow.com.
- Log in or register a new account.
- Upload or open the document you want to edit.
- Add fillable fields for text, signature and date.
- Draw, type or upload your signature.
- Click Save and Close.
- Click Invite to Sign and enter a recipient’s email if you need others to sign the PDF.
Working on mobile is no different than on a desktop: create a reusable template, redline Show Registration Form and manage the flow as you would normally. In a couple of clicks, get an enforceable contract that you can download to your device and send to others. Yet, if you want an application, download the airSlate SignNow mobile app. It’s comfortable, quick and has an excellent layout. Take advantage of in effortless eSignature workflows from the workplace, in a taxi or on a plane.
How to sign a PDF having an iPhone
iOS is a very popular operating system packed with native tools. It allows you to sign and edit PDFs using Preview without any additional software. However, as great as Apple’s solution is, it doesn't provide any automation. Enhance your iPhone’s capabilities by taking advantage of the airSlate SignNow app. Utilize your iPhone or iPad to redline Show Registration Form and more. Introduce eSignature automation to your mobile workflow.
Signing on an iPhone has never been easier:
- Find the airSlate SignNow app in the AppStore and install it.
- Create a new account or log in with your Facebook or Google.
- Click Plus and upload the PDF file you want to sign.
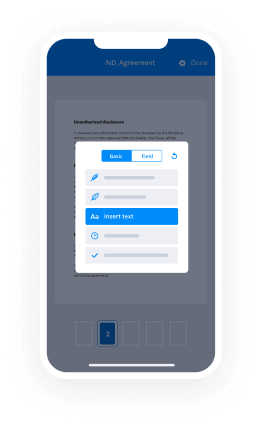
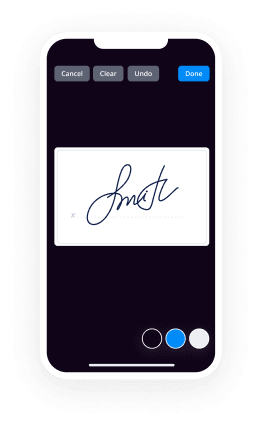
- Tap on the document where you want to insert your signature.
- Explore other features: add fillable fields or redline Show Registration Form.
- Use the Save button to apply the changes.
- Share your documents via email or a singing link.
Make a professional PDFs right from your airSlate SignNow app. Get the most out of your time and work from anywhere; at home, in the office, on a bus or plane, and even at the beach. Manage an entire record workflow easily: make reusable templates, redline Show Registration Form and work on documents with business partners. Transform your device into a effective organization instrument for closing contracts.
How to eSign a PDF taking advantage of an Android
For Android users to manage documents from their phone, they have to install additional software. The Play Market is vast and plump with options, so finding a good application isn’t too hard if you have time to browse through hundreds of apps. To save time and prevent frustration, we suggest airSlate SignNow for Android. Store and edit documents, create signing roles, and even redline Show Registration Form.
The 9 simple steps to optimizing your mobile workflow:
- Open the app.
- Log in using your Facebook or Google accounts or register if you haven’t authorized already.
- Click on + to add a new document using your camera, internal or cloud storages.
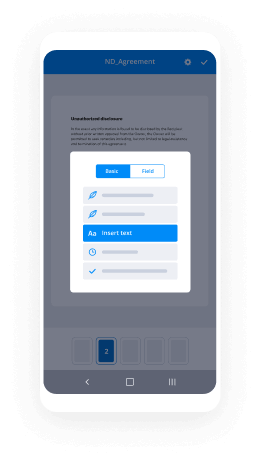
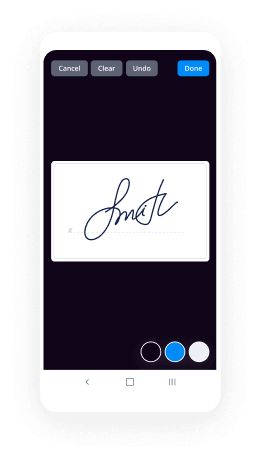
- Tap anywhere on your PDF and insert your eSignature.
- Click OK to confirm and sign.
- Try more editing features; add images, redline Show Registration Form, create a reusable template, etc.
- Click Save to apply changes once you finish.
- Download the PDF or share it via email.
- Use the Invite to sign function if you want to set & send a signing order to recipients.
Turn the mundane and routine into easy and smooth with the airSlate SignNow app for Android. Sign and send documents for signature from any place you’re connected to the internet. Build good-looking PDFs and redline Show Registration Form with couple of clicks. Put together a perfect eSignature process with just your mobile phone and boost your total productiveness.
Get legally-binding signatures now!
FAQs
-
How do you do the red line?
Click the Review tab. Click Track Changes. Click Simple Markup. Click All Markup. Click Show Markup. Select options to show. Highlight text and select New Comment. Edit the document and click Accept. -
How does the Redline work?
Part of the Marion County Transit Plan, IndyGo's Red Line is a 13.1-mile bus system, with electric buses arriving in 10- to 20-minute intervals. It's a fixed-route, mass transit system known as bus rapid transit with many features similar to light rail, including dedicated lanes and standalone stations. -
How do you pay for Red Line?
Now you can use fare vending machines located at all Red Line stations and the Carson Transit Center to pay for both rapid transit and local route service. Passes that can be purchased at Red Line stations are: Two-Hour Transfer Ticket (Full and Half Fare), Day Pass (Full and Half Fare), and Week Pass (Full Fare). -
Is the Red Line a train?
Red Line 'L' The Red Line provides 24-hour train service between Howard on the North Side and 95th/Dan Ryan on the South Side via subway through downtown Chicago. -
Is the Red Line Safe?
Red line is safe at night. However the blue line is not. Riding the blue line during the day is sketchy enough, riding it at night is suicide. Be careful if you are a woman. -
How long does it take to ride the Red Line?
Upgraded Rider Experience Red Line service runs every 10-20 minutes, with buses stopping at designated stations that are generally only ¼ to ½ mile apart. -
How much does it cost to join the Hot Wheels Redline Club?
The Hot Wheels® Red Line Club® (RLC) is an annual premium membership for members of HotWheelsCollectors.com (HWC). For a membership fee of USD $29.99 (plus shipping, processing, and tax), RLC members enjoy valuable features and exclusive products not available to other HWC members. -
What is Hot Wheels Redline?
A "Redline" Hot Wheels car is one that was manufactured within the first ten years of production, 1968 to 1977. The term "redline" derives from the fact that, during that period, the cars were manufactured with a red stripe on the tire. -
Where do you enter Hot Wheels codes?
Enter the 5-digit code from the back of the package in the Cars/Collection section of the website. Enter the 5-digit code from the back of the package into Showdown game or app. Scan the QR code on the cars package in the Showdown app. -
What is a Hot Wheels zamac?
ZAMAC is an acronym for the Zinc, Aluminum, Magnesium, and Copper alloy that Hot Wheels and other die-cast toy cars are made from (cast). A ZAMAC car is basically an unpainted car and/or base. Category:ZAMAC Hot Wheels. -
What is the difference between Redline and Blackline documents?
A \u201clegal blackline\u201d is a comparision between original documents and revised documents. ... A blacklined document is normally referred to as a \u201clegal blackline\u201d only in the legal profession. A \u201credline\u201d document is much the same as a blackline document, but usually refers to one outside the legal profession. -
What is a Blackline vs Redline?
For the uninitiated, when you are tracking revisions of documents, a comparison between an original and an updated version is generally referred to as some sort of coloured line. ... Redline = a markup; blackline = a document comparison showing deltas between two documents. At least, that's my understanding! -
What does redlining a document mean?
"Redlining" is a form of editing in which red ink is used to indicate removal or addition of text in Microsoft Word. You can redline a Microsoft Word document by using Microsoft Word's built-in "Track Changes" feature, or you can manually redline the document with font color changes and strike-throughs. -
What does Blackline mean on a document?
blackline (plural blacklines) A document indicating the differences between two versions of another document. -
What is redlining a document?
"Redlining" is a form of editing in which red ink is used to indicate removal or addition of text in Microsoft Word. You can redline a Microsoft Word document by using Microsoft Word's built-in "Track Changes" feature, or you can manually redline the document with font color changes and strike-throughs.
What active users are saying — redline show registration form


Related searches to redline Show Registration Form with airSlate airSlate SignNow

Redline show registration form
so in this video we're going to have a look at the complete workflow when using registration magic to create a registration page right so the first thing that we'll do is we'll head over to registration magic and let's create a form that we're going to use for our registration so we'll head over to new form we'll give the form a name let's call it demo registration and we'll hit save the form has been saved and now we can go and edit the fields so you'll see that the default fields are inserted such as username password and email but we would like to get a little bit more information from our users we'll go to add field and you'll see we're going to look for some profile information such as first name last name we could look at a nickname so we'll start then with first name we'll give it a label of first name we'll copy the title to placeholder text we won't put in any hover text we won't look at any icon settings and we'll add to form then we'll add a last name so add field we'll look at last name i'll add to form right we can now just slide that up and down on our form so we'll have the first name the last name the username the password and the email so we'll move the email address up as well so you've got first name last name email and we'll add a nickname right so there we've added those fields to our sign up form so let's just go and have a look again now at the first name and as you can see we have first name then we have some icon settings here we haven't chosen to put in an icon and then we also have some advanced settings so in the advanced settings you can set your a css class attribute if you want to style this particular field in a different way we have a maximum length offered and here we can set the required field preference so in this case we would like to put in a required field and we can allow the user then to edit this after submission we'll update that field we'll head over to the last name field and we'll do the same we'll make that a required field and also allow the user to edit after registration and then finally we'll look at the nickname but we won't make that a required field and what we can do is we can then just allow this one to be edited after registration if the person would like to do that so let's set that right so now we've set up a very basic form for a customer to use to register so let's have a look and see what that looks like on the front end and in order to do that we need to get the short code for this particular form one of the ways that we can do that now is to head over to our form dashboard and on the right hand side you'll see we can copy that form id so we'll copy that and what we'll do is we'll head over to some pages on our website and let's create a page to register i've already created the page so we'll go into edit that page and to add to the page we're just going to insert the shortcode so let's go insert shortcode we'll update that and now we can go and view the page on the front end and you'll see that our registration form is inserted on the page right so first name last name nickname and email so i'm a registered user and i did say that you could edit these fields even though you are registered so in this case i'm going to change my my nickname to bruce nickname and submit so that will essentially just update my information right submit it so i am now registered if i was not a registered user on the website let's take that we'll open a separate browser and we'll go to the register page on the website and you'll see that the registration form now includes first name last name nickname email username and password and the option then to confirm the password and when we looked at it using the demo page where i'm already registered you'll see that it doesn't include my email or does include the email but username and password is not included because i'm already logged in and a registered user and i'm allowed to then edit these fields which is why they allow me to edit right so that would be the registration right so let's go and have a look now and register as a user on the page where i'm not logged in right so here we have that page and i'm not a registered user so here we are on the page to register and i'm going to register as a demo let's make that one word email address my username i will put as demo user my password right and i submit the form so my demo registration has been submitted and now i can head back to my website and let's have a look and see what happened there so here we are and if i refresh this page you will see that the demo user has been created and if i head over to registration magic and i go and look at all the forms and i go to demo registration you'll see that it does register the two forms that were submitted and if i just click on that number two it will now show me the two users that are on the website now here is the demo user entry and that was the form that i submitted as a logged in user so if i click on that i can now um exports i can mark all as read i can now also go in and view that user's details so here we have the details when they subscribe the browser they used and i can also edit that submission if i wanted to edit that submission so let's go back to the user manager right so in the user manager now you'll see that we have the demo user here that is registered and if i click on that i can activate or deactivate the account now we didn't put the workflow in for what happens to the user when they register we just wanted to demonstrate a simple registration so let's dig a little bit deeper to set up what happens to that user when they register to do that we head back to all forms and we're going to go to the dashboard and this is where the magic happens where you can set up in far more detail what happens to that user what you'll also see now is a graph and that indicates the number of visits and the number of submissions of that registration form give you a little bit of insight into how many people consider registering and how many people actually do so we did look at the fields manager and we did look at the design so let's have a look at the general settings for people who then use this form to register right so we've said that it's a demo registration is the name of the form and the form type allow user to create a user account we didn't enter any content above the form so what we can do now on future registrations is registration content above the form so this could be good reasons to register so we'll add that above the form there's no price attached to this form and we're not going to limit the number of registrations to the form when we click on save great so if we want to see what that looks like let's head over to that form and we'll just reload the page and now you'll see that there is an additional set of information that appears above the form let's move on to the next section which is the account section now you'll see that a user account is created and we've set the user role to subscriber we could have given the user an option to choose their user role and then select which user roles they could choose from in this case though we've limited them to a subscriber role as a general website registration form we could have forced the login after registration but we haven't and we could also hide the username field the email will work as a username so in this case though the email doesn't work as a username the user will enter their username let's save that there's nothing that we want to change there and we can look at what happens when the post is submitted so here's the success message that the form has been successfully submitted so when the form is submitted in we can say thank you for submitting your registration application right then we can display a unique token number should we wish to to do that and then we could also look at redirection so either to another page on the website or to a different url on a completely different website anywhere else and we could also look at sending the submitted data to an external url and that might be for use in other applications in this case we'll just stick with the success message and save right so that is what happens when the post is submitted we can now also look then at an autoresponder so what happens when the form is submitted so we could auto reply to the user in this case though we're not going to do that so while we're looking at autoresponder there are some emails that are generated when a user registers on the website so let's have a look at those here is the email that was sent to the user to say your account has been successfully been created you can now log in with the following credentials and the username and password was emailed to the user what also took place at the same time is that an email was sent to the admin of the website and we can just take a quick look at that so what that said is that a new user has registered on the website that's the username that's the email address please click on the button below to activate the user so just by clicking on that button the user can be activated but before we activate the user just want to have a look at a couple of other things before we complete that process we haven't set any limits and here we have access control so um enable date based form access control so that's when the form is then only available between certain dates so that might be for a limited time subscription option enable a passphrase based form access control that would almost be like setting up a password so only people with that passphrase will be able to access the form so also might be good to link that then to some kind of a promotion enable user role based form access control so if you only wanted specific registered users who have logged in to be able to access the form you could do that and then also the domain based access control so only email addresses from a specific domain could have that access and then access the literal so if you're not authorized to access to view the content you're not able then to see the content so if you don't match these conditions you will then see a message that you don't have access to register on that form and then we have the access control we have the email templates so this is typically what the what would be sent so this is the one that we saw which said your account has been successfully created you can now log in using the following credentials so we saw that earlier we have the subject for the email for verification if we were doing email verification so if we said that the user needed to verify their email address before they could get access so that just to eliminate spam submissions then this would be the email address used and here we have the user activation email subject thank you for registering with your scientists now active so you saw previously that we still need to go and verify that account for the user to have access to the website and then the notification template for the admin and you'll see here that this is the email that we received earlier which would allow us to click on the link to activate the account and if we scroll further down the new submission email subject to the admin so there's no nothing that we need to do there what's interesting here is that you can add a number of other fields to that which will give you a lot more information but for our purposes we can save that and let's just go and have a look at the global overrides so there are some global settings that are set up and this would allow us to then obviously overwrite them send notifications to we could send an additional notification to a different email address other than the one that is set globally show the form limits above the form the honor form limits word press registration auto approval yes or no in our case the approval is not auto because the admin would need to approve that registration we haven't enabled recapture and we're not limiting to a device so now that we've had a look at that let's just go and have a look and see what happens if we try and log in before the account is approved so we'll head over to our website and we have the login now the registration but we don't have a login form so what we need to do is create a login form for users who want to log in so we'll head back to registration magic and we'll go back to the dashboard or the dashboard for the plugin and we're going to add a form which will be a login form here is the standard login form created when you install the plugin so we can go and have a look at that and you'll see that it's a pretty standard form with a username and a password for the login so we can go ahead and use that form another place then to get the shortcode we don't need to go to the form dashboard we can copy the short code there and let's go and create a login page so we'll head over to pages i've already created the login page and we're just going to insert the shortcode on the page and that will allow us to log in so there we go we have the login and we're going to add the shortcode we'll publish that update that and then we'll have a look and see what that looks like on the front end right that has been created and when we look at it on the front end now you will see that it pulls up my account information because i'm already logged in as a user but if i wasn't logged in as a user i could then let's head over to our page and how we're going to login as the user they just registered so my username was demo user and the password and we're going to log in and you'll see now that the account hasn't been activated so we're getting the message i can't not activate it so to activate the account for users if we're going to do it in a manual process we'll head over back to registration magic and we can move over to user manager so in this case each user has to be approved for membership we'll head over to demo user click on activate and now when we go back to our login page demo user and i log in you will see that i cannot log in and i'm a demo user and i can navigate over to my account right so we just need to fix some formatting there but let's go and have a look at how we set up that that page properly right so here we are that's the demo user that was approved if i go back to all forms you'll see we have our login form and we still have it showing as the two that have registered but now we want to look at the profile page with my information on before we do that let's have a look at the email that was sent so here's the email that was received hi thank you for registering with and the website your account is now active regards and this is an email that we could style further to make it nicer for the user so there we have the confirmation to the user that their account has now been approved so we'll head back to registration magic and we're going to set up that page that's used to display the user's information to do that we head over to global settings and in global settings you can set the global pages and that would be the default pages then for the different tasks that need to be formed when managing accounts and here we can set the default registration page so let's set that then so if somebody wants to register that will automatically be the page they'll be redirected to and then the default user account page and in this case we'll call it submissions and we'll click on save so those are the default settings that will be used now on the website we head back to all forms we can go and look at our demo registration dashboard and everything looks in order so let's go and have a look now at the uh user page again so in fact let's go and set up that user page first so if we head over to that page and we're going to look at submissions and you'll see that a short code is needed then to display the user information and this is a default shortcode and it's registration magic front submissions so we already have that installed on the page so we can then go and view page and you'll see the user information on that page the same thing that we can do then is head over to where we were before let's just refresh that login information we'll head over to my account and now you'll see that the my account information fits neatly on the page and here we have my personal details we then have the registration so if we wanted to we could open that we could see the registration or we could go to registrations and we can download the information downloads it into a pdf okay and at the moment you'll see the information isn't displaying correctly but that is something that we will resolve then we have a payment history but of course there are no payments we have an inbox and that's communication just to show that the account was activated so that was communication from the website if you had any orders there would be an order any downloads addresses so this would be more for shipping that more around woocommerce and here we can reset the password if we need to reset it all password new password confirm new password so here the user gets a good idea of their history on this website so let's head back to registration magic because there is more that can be done within registration magic but that would be the basic workflow for somebody who's registered on the website and they are now registered user and you would manually activate their account
Show moreFrequently asked questions
What is the definition of an electronic signature according to the ESIGN Act?
What is needed for an electronic signature?
How can I electronically sign a read-only PDF that is not editable?
Get more for redline Show Registration Form with airSlate SignNow
- Aicpa countersign
- Prove electronically signing Single Page Business Plan
- Endorse digi-sign Letter of Recommendation for Employee
- Authorize signature service Self Employed Invoice
- Anneal mark SEO Proposal Template
- Justify esign report
- Try initial Animal Surrender
- Add Labor Agreement electronically signing
- Send Travel Proposal Template mark
- Fax Beverage Inventory signed
- Seal Camper Information autograph
- Password Incentive Plan digital sign
- Pass Gardening Contract Template initial
- Renew Simple Photography Agreement electronically sign
- Test Web Banner Design Request countersignature
- Require Voter Agreement Template digital signature
- Comment signer signed electronically
- Boost supporter electronic signature
- Compel looker-on digisign
- Void Photography Services Contract Template template eSign
- Adopt Recapitalization Agreement template eSignature
- Vouch New Client Onboarding Checklist template autograph
- Establish Baby Dedication Certificate template electronic signature
- Clear Separation Agreement Template template signed electronically
- Complete Car Service Receipt template electronically sign
- Force Nanny Contract Template template sign
- Permit Business Plan Financial template electronically signing
- Customize Insertion Order Template template mark