Reinforce Initials Field with airSlate SignNow
Award-winning eSignature solution


Do more on the web with a globally-trusted eSignature platform
Outstanding signing experience
Robust reporting and analytics
Mobile eSigning in person and remotely
Industry polices and conformity
Reinforce initials field, faster than ever
Handy eSignature extensions
See airSlate SignNow eSignatures in action


airSlate SignNow solutions for better efficiency
Our user reviews speak for themselves


Why choose airSlate SignNow
-
Free 7-day trial. Choose the plan you need and try it risk-free.
-
Honest pricing for full-featured plans. airSlate SignNow offers subscription plans with no overages or hidden fees at renewal.
-
Enterprise-grade security. airSlate SignNow helps you comply with global security standards.

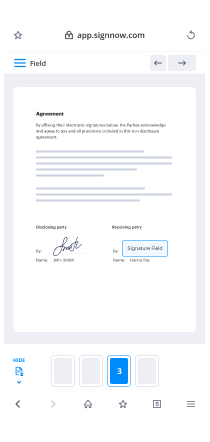
Your step-by-step guide — reinforce initials field
Using airSlate SignNow’s electronic signature any organization can enhance signature workflows and sign online in real-time, delivering a better experience to clients and employees. reinforce initials field in a few easy steps. Our mobile-first apps make operating on the move feasible, even while off the internet! Sign signNows from any place worldwide and complete deals quicker.
Follow the step-by-step guide to reinforce initials field:
- Log in to your airSlate SignNow profile.
- Locate your document within your folders or upload a new one.
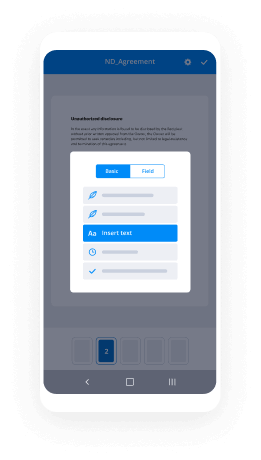
- Access the record and edit content using the Tools list.
- Drag & drop fillable fields, type textual content and sign it.
- Add numerous signers using their emails and set the signing sequence.
- Indicate which recipients will receive an completed doc.
- Use Advanced Options to limit access to the record and set an expiry date.
- Tap Save and Close when finished.
In addition, there are more extended tools accessible to reinforce initials field. Include users to your common digital workplace, browse teams, and track collaboration. Numerous users all over the US and Europe concur that a system that brings everything together in a single holistic digital location, is the thing that organizations need to keep workflows functioning easily. The airSlate SignNow REST API enables you to integrate eSignatures into your app, internet site, CRM or cloud storage. Try out airSlate SignNow and get faster, smoother and overall more effective eSignature workflows!
How it works
airSlate SignNow features that users love


See exceptional results reinforce initials field with airSlate SignNow

How to submit and sign a PDF online
Try out the fastest way to reinforce initials field. Avoid paper-based workflows and manage documents right from airSlate SignNow. Complete and share your forms from the office or seamlessly work on-the-go. No installation or additional software required. All features are available online, just go to signnow.com and create your own eSignature flow.
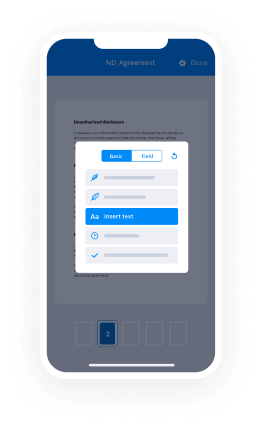
A brief guide on how to reinforce initials field in minutes
- Create an airSlate SignNow account (if you haven’t registered yet) or log in using your Google or Facebook.
- Click Upload and select one of your documents.
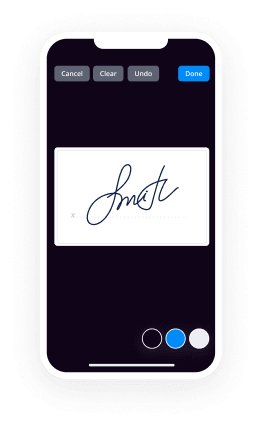
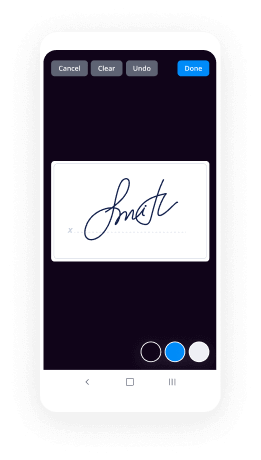
- Use the My Signature tool to create your unique signature.
- Turn the document into a dynamic PDF with fillable fields.
- Fill out your new form and click Done.
Once finished, send an invite to sign to multiple recipients. Get an enforceable contract in minutes using any device. Explore more features for making professional PDFs; add fillable fields reinforce initials field and collaborate in teams. The eSignature solution gives a secure process and operates based on SOC 2 Type II Certification. Ensure that all your records are guarded so no person can take them.

How to eSign a PDF file in Google Chrome
Are you looking for a solution to reinforce initials field directly from Chrome? The airSlate SignNow extension for Google is here to help. Find a document and right from your browser easily open it in the editor. Add fillable fields for text and signature. Sign the PDF and share it safely according to GDPR, SOC 2 Type II Certification and more.
Using this brief how-to guide below, expand your eSignature workflow into Google and reinforce initials field:
- Go to the Chrome web store and find the airSlate SignNow extension.
- Click Add to Chrome.
- Log in to your account or register a new one.
- Upload a document and click Open in airSlate SignNow.
- Modify the document.
- Sign the PDF using the My Signature tool.
- Click Done to save your edits.
- Invite other participants to sign by clicking Invite to Sign and selecting their emails/names.
Create a signature that’s built in to your workflow to reinforce initials field and get PDFs eSigned in minutes. Say goodbye to the piles of papers on your desk and start saving money and time for additional crucial activities. Choosing the airSlate SignNow Google extension is a smart practical choice with plenty of benefits.

How to eSign an attachment in Gmail
If you’re like most, you’re used to downloading the attachments you get, printing them out and then signing them, right? Well, we have good news for you. Signing documents in your inbox just got a lot easier. The airSlate SignNow add-on for Gmail allows you to reinforce initials field without leaving your mailbox. Do everything you need; add fillable fields and send signing requests in clicks.
How to reinforce initials field in Gmail:
- Find airSlate SignNow for Gmail in the G Suite Marketplace and click Install.
- Log in to your airSlate SignNow account or create a new one.
- Open up your email with the PDF you need to sign.
- Click Upload to save the document to your airSlate SignNow account.
- Click Open document to open the editor.
- Sign the PDF using My Signature.
- Send a signing request to the other participants with the Send to Sign button.
- Enter their email and press OK.
As a result, the other participants will receive notifications telling them to sign the document. No need to download the PDF file over and over again, just reinforce initials field in clicks. This add-one is suitable for those who like concentrating on more important aims instead of burning time for nothing. Improve your daily monotonous tasks with the award-winning eSignature solution.
How to eSign a PDF file on the go with no application
For many products, getting deals done on the go means installing an app on your phone. We’re happy to say at airSlate SignNow we’ve made singing on the go faster and easier by eliminating the need for a mobile app. To eSign, open your browser (any mobile browser) and get direct access to airSlate SignNow and all its powerful eSignature tools. Edit docs, reinforce initials field and more. No installation or additional software required. Close your deal from anywhere.
Take a look at our step-by-step instructions that teach you how to reinforce initials field.
- Open your browser and go to signnow.com.
- Log in or register a new account.
- Upload or open the document you want to edit.
- Add fillable fields for text, signature and date.
- Draw, type or upload your signature.
- Click Save and Close.
- Click Invite to Sign and enter a recipient’s email if you need others to sign the PDF.
Working on mobile is no different than on a desktop: create a reusable template, reinforce initials field and manage the flow as you would normally. In a couple of clicks, get an enforceable contract that you can download to your device and send to others. Yet, if you want a software, download the airSlate SignNow mobile app. It’s secure, quick and has a great design. Take advantage of in easy eSignature workflows from the business office, in a taxi or on a plane.
How to sign a PDF file employing an iPhone
iOS is a very popular operating system packed with native tools. It allows you to sign and edit PDFs using Preview without any additional software. However, as great as Apple’s solution is, it doesn't provide any automation. Enhance your iPhone’s capabilities by taking advantage of the airSlate SignNow app. Utilize your iPhone or iPad to reinforce initials field and more. Introduce eSignature automation to your mobile workflow.
Signing on an iPhone has never been easier:
- Find the airSlate SignNow app in the AppStore and install it.
- Create a new account or log in with your Facebook or Google.
- Click Plus and upload the PDF file you want to sign.
- Tap on the document where you want to insert your signature.
- Explore other features: add fillable fields or reinforce initials field.
- Use the Save button to apply the changes.
- Share your documents via email or a singing link.
Make a professional PDFs right from your airSlate SignNow app. Get the most out of your time and work from anywhere; at home, in the office, on a bus or plane, and even at the beach. Manage an entire record workflow effortlessly: generate reusable templates, reinforce initials field and work on PDF files with business partners. Turn your device right into a powerful company instrument for executing offers.
How to eSign a PDF file Android
For Android users to manage documents from their phone, they have to install additional software. The Play Market is vast and plump with options, so finding a good application isn’t too hard if you have time to browse through hundreds of apps. To save time and prevent frustration, we suggest airSlate SignNow for Android. Store and edit documents, create signing roles, and even reinforce initials field.
The 9 simple steps to optimizing your mobile workflow:
- Open the app.
- Log in using your Facebook or Google accounts or register if you haven’t authorized already.
- Click on + to add a new document using your camera, internal or cloud storages.
- Tap anywhere on your PDF and insert your eSignature.
- Click OK to confirm and sign.
- Try more editing features; add images, reinforce initials field, create a reusable template, etc.
- Click Save to apply changes once you finish.
- Download the PDF or share it via email.
- Use the Invite to sign function if you want to set & send a signing order to recipients.
Turn the mundane and routine into easy and smooth with the airSlate SignNow app for Android. Sign and send documents for signature from any place you’re connected to the internet. Generate professional-looking PDFs and reinforce initials field with just a few clicks. Come up with a flawless eSignature workflow with just your smartphone and enhance your overall efficiency.
Get legally-binding signatures now!
FAQs
-
How do I add initials to airSlate SignNow?
Open the airSlate SignNow application on your computer and then click the "File" option. ... Select the PDF file you want to add a digital signature to and then click the "Open" button. ... Click the "Digital Signature" option, and then use your mouse to draw a rectangle in the area where want the initials to appear. -
Can you use initials as a signature?
signature is a written depiction of the name of a person or their nick name. ... Like full signatures, you can also have signature initials only and this will means using your initials as a signature to validate documents. For electronic documents, there are initial signature maker you can use. -
Do you have to write your whole name in a signature?
Signatures necessarily do not have to spell your full name. ... If the document or situation asks for your full name as a signature then you will have to put your full name as your signature. -
What qualifies as an electronic signature?
Under the ESIGN Act, an electronic signature is defined as \u201can electronic sound, symbol, or process attached to or logically associated with a contract or other record and executed or adopted by a person with the intent to sign the record.\u201d In simple terms, electronic signatures are legally recognized as a viable ... -
What does its mean when signing a contract?
\u201cBy\u201d indicates the name and signature of the person who signs the contract on behalf of the business. \u201cIts\u201d indicates the position of the signer, such as President, CEO, etc. -
Should each page of a contract be initialed?
There is no statute or law that demands that each page of a contract be initialed. Written contracts are binding if signed once by the parties to the contract\u2013so don't assume you wan wiggle out of a contract because you did not initial it on every page; the contract is binding if signed on the last page. -
What does it mean to initial a document?
If someone initials an official document, they write their initials on it, for example to show that they have seen it or that they accept or agree with it. -
What does it mean to initial a contract?
While you might not have to initial each page of a contract when you first create it, there may be instances where you need to initial one or more pages later on. Often, initials are a way to acknowledge a small change in a contract after it has been signed to show that both parties agree to the amendment. -
Where do you initial a contract?
There actually are simple... Persons who execute employment contracts generally initial on the right of the page next to hand written changes to show their agreement to the hand written changes or on the bottom right of each page to show their agreement to the terms on each page of a printed form. -
What is considered my legal signature?
If you're signing by hand, then it is acceptable to write your usual signature in a stylized fashion or to use any mark that represents you, such as your initials or even an "X." As long as you have the intention to sign, then your mark is considered a legal signature. -
What does a signature have to include?
Signatures necessarily do not have to spell your full name. Signatures are a mark affixed by a person on a document to show his consent or dissent from the writing of the same, provided he puts his hand up and owns that this is his mark. -
How do I insert initials in Word?
Choose "Change User Name." Click into the "Initials" text box under the "Personalize your copy of Microsoft Office" section. Type your initials. Click the "OK" button. Your initials will now appear in the document anytime you use an option on the "Review" tab such as adding a new comment or deleting a word. -
How do you initial each page?
What does it mean to "put your initials" on all pages of a document or an agreement before the last page where your full name and signature is requested? It means that every page of the document must have your full initials at the bottom right or left hand corner. -
What is the difference between initial and signature?
From above, the major difference is that a signature is normally written in full. This means a signature could be written to capture the full name of a person. On the other hand, initials are just a letter from name usually the first letter of a name. -
Where do initials go in a contract?
What does it mean to "put your initials" on all pages of a document or an agreement before the last page where your full name and signature is requested? It means that every page of the document must have your full initials at the bottom right or left hand corner.
What active users are saying — reinforce initials field


Reinforce initials field
there are three main components to every musket of course you have the lock just there you have the stock and of course you have the barrel alongside these three main components if you will that really make up the meat of the gun you have a number of other bits you have things like the trigger guard the actual trigger itself you have a butt plate there you have your ramrod you have the bits of brass that just there have to keep the ramrod in place you have the pieces here to actually keep your sling on all sorts of little bits and pieces which have to go into making a full and proper musket but how exactly are they all held together because of course on certain pieces such as a Charlotte Vil for example you can see those great big barrel bands which actually keep the barrel attached to the stock but on a brown bess it always seems to be just sort of sitting in place what actually keeps this entire thing together well my musket is really quite filthy and I really have to start paying more attention to it have to start doing much more thorough cleanings and today will be the first of many sessions I imagine what I do so in order to actually properly clean the piece now really get in there with the nitty gritty and try and polish every piece that I can up to a more proper parade standard I'm going to have to disassemble the entire thing and I thought that might be an interesting process to show all of you [Music] so the first thing that I'm going to disassemble on this musket would be the actual lock I'm going to take it out of the piece which is a fairly straightforward process when compared to things like the barrel I can just remove the AR the hammer stall here which you can see just as a simple piece of leather which you can slide over top of the hammer there or the frizzen as it's now called - it's just as an added safety measure as whele it simply wraps around the trigger guard and you can loop it through one itself it's very simple simplistic sort of thing but the actual lock here you can see on the other side of the gun there are sorry it's upside down there well there we are we'll handle around a bit we have two screws there which actually keep the entire thing in place it's fairly straightforward fairly simple so if I can use my set that down gently as I can I will use my musket tool here which could probably make an entire video just about this little tool but for now it's a sort of a 18th century screwdriver if you will can use that to remove the lock here so there is screw number one and now we can begin on screw number two now I should add as I am removing the lock here that of course you can also disassemble the lock completely you know take apart all the little bits and pieces all the springs inside and all that sort of thing that is a much more complicated process requiring a few more tools than I have with me today so I'm not going to be doing that today perhaps some other time I'll get my hands on some vice grips we can actually you know decompress or whatever the term would be the springs in there and we can actually disassemble the lock I can show you that mechanism but that's for another time but for now ah I have if I can flip around and show you without actually having the lock fall out because that would be an expensive mistake to make I removed the two screws there which means that the actual lock will simply lift there we are right outside of its casing as you can see if you can't see the detail they don't know how far away and from the camera but uh it needs quite a fair bit of cleaning itself so I will be disassembling the entire thing to polish every bit in peace inside but uh well that is going to be a task for another day so I'll just put that aside there so then the lock itself is actually removed and as far as the common the average soldier back in the 18th century is concerned that's really the old at least as I understand it I've not actually read this myself in any sort of primary sources I will admit that I really do need to do more research on how men historically would be cleaning their muskets but as I understand it and this is sort of reinforced in the fact that I've never actually read a case of a man going further than this I've never read you know anything saying that they wouldn't but I've never read of a case of a man disassembling his musket any further than I've just done I believe this to be the case and of course I'll provide a correction down below in the comments if I need to if I need to do so but as far as I'm aware at least the average man the average soldier on campaign way back in the day naturally as he's on campaign he will be firing his musket he will have to clean his gun the average soldier would never do anything beyond what I have just done there the average man was not generally trusted to be able to handle you know disassembling a lock with how complicated it is and the fact that you do need rather specific tools to do so that's sort of the realm of gunsmith only so a regimental gunsmith who'd be in charge of handling all those sorts of things he would also not generally be taking things like the barrel out of the stock because of course it involved as we shall see a great deal many little bits and pieces that you know if you're in the middle of a field and something happens and oops I lost three of my pins well you're going to be in a very difficult spot trying to reconstruct our musket with little pieces of wood that you can find you know scattered around you know the officers tend to be rather upset about that sort of thing generally speaking the men would not be trusted to my knowledge again more details to follow I think but the men would not be trusted to really go as in-depth as I am doing right now that's as far as they would ever get now that being said remove the lock I think that the next step I'm going to do just for simplicity sake on my end is going to be removing the what's it called the the sling that's what's called the sling here which as you can see is held in place with a simple little swivel bit there which has a screw going through the stock of the actual gun mine is actually a little bit large there I think I need to replace that at some point but then I doubt historically that they're all perfectly sized either but a simple screw heading right on through the stock there to keep the to swivel bits in place that actually keeps the sling on the gun so if I can just unscrew those with a bit more fancy editing work ah there we are that is number one good moves out there and we'll owe screwed that one on backwards so I'll flip that around we'll take care of the next one of course the second screw here or the one more towards the base of the gun does not go through the stock of the musket but it goes through a small hole in the trigger guard which is there for that purpose which when I remove the trigger guard you'll be able to see that in better detail and there's the second one so we'll keep those aside and there we have the sling has been removed again we'll put that up there away from everything so then what do we have now basically we have things like the ramrod still in place we have the trigger-guard butt plate and everything and then we actually have the barrel inside the sock of the gun and something tells me that that's the bit that we're all very excited to see so I will now remove the barrel from Pisa first off we do have one screw kept in place just back there towards the rear of the battle that barrel sorry that metal piece that's I extending outwards I think it's called the tank I'm afraid I don't know the technical term for it we'll have to ask a friend of mine who's actually built one of these himself that's the metal piece there that is actually part of the barrel extend outwards there is a screw in place keeping that keeping it there keeping it inside the stock so I will unscrew that this part would have been much easier if I used a modern screwdriver but doesn't this just look so much better hey there we have it there's the other screw there which I will try and keep that aside as best I can so I remember which one goes where but indeed so there we have as you can see a little loop don't want to coil the microphone at all you can see a little hole there in the top and now for the rest of the barrel there are no more screws to keep the actual barrel in place instead what the brown bess relies on is a series of pins inside inside the stock going through the barrel to actually keep the entire thing you know in place so if I sort of stretch it forward a bit there you can see very tiny I don't know if you can really make it out but if you can't make it out on the video I'll be sure to put a little one on the side there and I'll just look a bit silly but you see a series of pins here throughout the length of the barrel which are sort of where's another one there's another one there sticking through the stock actually going through a little ah a loop if you will in the bottom of the base of the barrel and then back down into the other side of the stock it helps keep the in wallet indeed it doesn't help it is the thing keeping the barrel in place now of course I could be using a pin press to actually push these pins through but I don't have one of those so indeed I are instead I will be using the sharper end of the mousketool there then I'll be pulling them out using a pair of pliers if you do decide to do it that way you you know for yours for your own piece back home just do be careful that you don't end up bending the pins because that can prove to be quite a nuisance so with that we can get started on all of these and this will require quite a bit of skipping forward I think but simple enough I put it over top of the pin I push all that one came out quite easily I push it through of course as you can see the this is a very inefficient way of doing it hoped there we are but there's a pin there simply stuck it on push through to where now we have a little bit of it sticking up there and I will take my pliers to simply there we are to pull the pin out of place so now allow me to do that with all of the pins try and keep them in order as best I can so India there's one we have the second one about what halfway down the barrel just there you may notice a another pin just there but that actually keeps the brass piece there in place I'll be removing that next but Andy yes just there we have another pin halfway down the barrel so I will do the same thing with that one what and it fell out in fact that may have actually been the wrong pin for that place last time I reassemble the musket I did accidentally get a few of the pins mixed up so that one may have been actually a bit too small so you know it's not gonna fall out on it so it's still a fairly tight fit but I didn't have to pull it out with the pliers it was able to be pushed on through there we are found the other pin all right I'm a professional as you can say professional set up all right so that's one that's two then we have three and the yep that's it on the very end of the barrel there and oh yes that's the one that's definitely too long for that spot so this one probably belongs this pin a little bit further down but you know simple mistake doesn't particularly matter too much so I'll push that one on through there's the other pin and then of course we have yes one last pin on the very tip of the barrel just there so I will push that one through as well there we are and there is the final pin the I think it's the shortest one well it's one of the shortest ones at least there so now all of the pins I believe are out of the barrel the ones that are keeping the bow in place of course yes so I should be able to simply enough lift it yep there we are right there we are out of place out of the stock duh you know what actually the bottom of it is not anywhere near so bad as I thought it would be but say yes there we have the barrel of the gun would be again I think it's called the tang or something like that on the back there helping to keep the entire thing seated whenever it's being fired at least that's what I imagine that this back bid is for no bit of an odd shape there you can see of course the touch hole which oh there we are but a bit of following that I didn't catch earlier I suppose the touch hole just there and it is a completely closed unit it is basically just a very tiny very long ports you know other dimensions if you will cannon operates on the same exact principles as a cannon it's just yeah a lot smaller and there you have on the very bottom of the barrel the little loops as I said the little holes that the pins were of going through from inside the stock see there's two on the very end there and then we have the two on the back a bit wider spaced so I'll take the barrel position that bit separate and then we are left with the actual stock the sort of the casing if you will for the entire unit so with that let's do the other pins and remove the you know the the brass bits that are keeping the ramrod in place again same exact system we have pins going through loops which actually keep these brass pieces in place so using the same method I will push those out try to pull that one up this one has to have the there are wires there we are so there's another one we'll keep those on the other side there my and actually this would have been a good thing to mention during the how dirty do muskets get after firing but you can see I haven't really cleaned out the stock of the piece and so if you look on the inside and in particular just there actually yeah as long as I can actually do this you can see there just how dirty how much powder can actually build up underneath the barrel of the gun after being used so many times no I haven't ever actually cleaned out the inside of this bit which is again something that I really ought to have been doing I understand that now you know we all had to start somewhere when it comes to this hobby but yes yet I also have been cleaning that out because it's a actually not that much powder really is coming off so I'm guessing it's just been staying over the years but even still I'm gonna be doing a little bit of well you know polishing or glossing if you will for the actual stock here if I can figure out how to do so at least but yes indeed the powder will get underneath and will stain the actual bot the base are the V bottom of the barrel and the stock there like I said it gets everywhere so of course I remove you know what actually I should probably remove the ramrod before I remove all these brass pieces so I can actually take them out and show you as I go along so uh just place it alongside here and remove the ramrod if I can it's been getting a little stuck lately uh this ramrod is a bit miss sighs I think I have to sort of ream out a little bit at the base of the brass piece that actually keeps the entire thing in place so if I can just get this removed oh there we are it was a nice difficulties I thought it'd be actually so of course we have the ramrod a single solid piece of metal there no real surprises or difficulties with that so then back to the stock again we had a pin through the little brass bit there so now I can simply remove that and you can see where that was seated earlier oh my goodness me and as I said it's bright it's not really looking like brass right now that's another piece that I'm really going to have to spend quite some time scrubbing away at but there we have one of those now I can remove the next one just down here again same exact system let's get the hand underneath if I can so the pin doesn't fall out there we are come on ha ha there hand soap that's the second pin there we can remove that one there simple enough then there are two more which I'm actually going to rest the musket on the ground like that because of course the stock is very much weighted at the base there because not only do I have the trigger guard on the butt plate but you know that's where the most weight is so can make it rather awkward to try and do it on a table like this lets you know everything for the YouTube show how's it were there we are that's another pin keep all the pins in place now and another one there also needing a great deal of cleaning and polishing and the last one here on the end has two pins into that don't know if you can see but it's a fair bit longer on the end there because of course that is where the ramrod is actually sticking out so you don't want to be you know bending or flopping around or anything because it might snap at the very end so you want that one to be a bit longer and I can remove those two pins feel like I'm going into far more detail and all these little pieces that I really have to because most of its rather self-explanatory but you know I want to make any assumptions and you know the longer the video is the greater possibility that I can put a second advertisement in it and you know shamelessly profiteer off of your interest let's not pretend that this is anything different of course haha there's another one and the final pin how sad isn't it the final pin Oh actually no I take that back it is not the final pin it is the second-to-last pin or no it is indeed the final pin I confused a pin or a screw for a pin there earlier anyways we'll get to that soon enough here we have the final piece there that keeps the ramrod in place so now we have a completely barren bottom of the barrel there and we have this little piece of brass that's kept on the very tip of the musk of the very bottom there where the end of the barrel stretches out over the the rest of the barrel not entirely sure why there is a piece of brass there I would assume or I'd presume something about keeping the powder away from the wood of the stock helping to prevent more of it from getting caught in between there in the corners but then it may also well be purely aesthetic I'm not entirely sure I'm sure that plenty of others and the gunsmiths among us could shed a little bit more light about that sort thing but for that piece it is not held in place by a pin but actually I don't know if you can see it there but by a screw a very tiny screw which is actually a quite a little bit rusted now so it looks about the same shade as the wood but there is just in there a little screw which I will like position it like that that's not going to work will go like this and we will unscrew that which actually oh my the screw there is smaller than the smallest bits that I have on my oath and then these smalls but that I have on my musket tool and they're actually taking this bit off huh ha ha there we have it so we have the little loop of brass there that goes on to the very tip of the musket keep that there why not and then the actual screw which I dropped another screw don't worry I see where that one went and there we have the other screw which as you can see is very very tiny I think you can see how I actually managed to lose it for a little bit there but I found it again I found it that's the thing that matters my goodness me is terribly rusted actually not that much on the inside but on the on the outside it's a fair bit gone so I'm gonna have to apply a little bit of vinegar to that see if we can't fix that problem right so now what well we have the front half of the musket is pretty much completely barren now ah indeed it would be improper to me to call the front half the musket so much as it would be the wouldn't have the front half of the wooden stock there now let's remove I think the trigger guard a bit of fun there and the trigger guard if I can remember where's the other ah there we are of course the trigger guard I almost forgot how to actually disassemble it at first uh the trigger guard has one screw on the base of it or on the very back of it there you can just sort of see the very rear there that's of course where your arm where your hand would be gripping so it normally covers it up and it also has two pins which keep the entire thing in place so I will do the screw first as usual terribly modern thing where did my there it is yes which I'll use the 18th century method wherever possible and suffer through it as a result but that's fine it's authentic suffering that makes it ok ah ah something just happened that I didn't expect to happen but I really should have in hindsight of course the top bit of brass there which you will have noticed I hope throughout the entirety of the thing I did not have any sort of pinhole or goodness me my apologies or screws or would have you on on it well that is also held in place by the same screw which helps to keep the trigger guard in place can sort of see the top that's there is completely smooth but then on the bottom or the back there is the you know the area for the screw to go through there and again the entire thing has to be very thoroughly polished actually you know I I did actually spend like an hour or two before going to you know my first event in quite some time back when I was in Ohio to retrieve the musket I did spend a fair amount of time polishing this little bit just to see how long it would take to get a judgment for the rest of the thing took me a long time to get it polished up to the standard that I did have it which wasn't even all that much and after only two events it's already back down to this level so it's a constant process but that's the side as well there we are that screw there and now I can remove the two pins which keep the trigger guard in place you can see them very clearly on this side of the thing you know see one right there and one right there on the other side they're less obvious we have one just at the bottom of it right there of the bottom of the stock and then we have one which usually is usually hidden just behind the lock right there so I will go at about it I think from this side oh actually no I should say that was wrong I just realized one of the pins that one right there is it part of the trigger guard to keep it in place and then I just realized sort of drawing the line in my own head this pin just there I believe is used to keep the actual trigger in place which is separate from the trigger guard so you'll see that as I remove the trigger guard here using the one pin on the top aha well no that would be the problem it must have been again I warned you all to be careful when you're using pliers this pin is just a little bit bent which may be the result of my having to nail it but I believe because it was stuck I was done earlier when I was using pliers right for the first time when I first actually took this entire thing apart it just got a little bit bent there not a terrible big problem you know I can still use the thing but it did require a little bit of finagling to actually get out of place so with that should be able to remove his indeed the oh I was right there was there were there are two pins here for the for the trigger guard I just didn't see where the other one was at first there's another one just at the bottom of swell there so if I can remove that one as well using the same method there there's always another pin with this thing there's always another pin where you didn't notice it but of course there we are that one's much easier same exact method for that one Oh much better that one much better that aside and now I can remove simple enough the trigger guard which wow really needs to be cleaned very very badly very badly God but in any case the actual trigger guard regardless of how terrible a state it's in runs off of the same exact system you see the two little loops there for the pins to go through and the entire thing you know just fits right in is seated very exactly like that southern other than that of course we have the piece of brass which you can just make out here we are you can see just there how the trigger is sort of hanging loosely now down there and it is kept in place by its own piece of brass which I think actually because I removed the screw is here so I had to make sure that I knew what I was talking about at first but when I removed the screw here that helped to keep the barrel in place you know helped with the process and it went through the very top of the thing there that screw is also used to keep in place the bottom bit of brass there in which the trigger guard is seated so I should now be able to just lift that out of place maybe have to use this as a prior sorts oh no I won't be able to write because I didn't really rehearse this all that much I have to remove the actual trigger before I can remove that piece of brass because of course as you can see it it won't go past the trigger so again we have the one little pin there that keeps it in place and there we have the next one that one was rather tricky as well but it's not bent at all so yeah just a bit of a tighter fit I suppose on that one so we'll put that pin there now I can then remove the actual trigger which as well needs as I can see a great deal of cleaning but it's a rather interesting shape there again we have the the a spot for the pin to go through and I suppose the odd shape of the actual trigger there's because it does reach up into the lock and actually you know activate something there but that's that's the discussion for another time the actual trigger there the little loop metal on the bottom very nice shape there but that's just there and now we can remove as well the other brass piece which as I said earlier sort of seats the trigger and prevents it from running or touching up against the the actual wooden stock which as well wow really needs to be polished and cleaned this is another great extension of just how filthy a musket gets when it isn't volume if properly cleaned but it's indeed we have the piece of brass there the thing now otherwise we really only have the brass there which you know I've never actually removed that piece of brass I never actually thought about that ah how do I take that out I'm gonna see if I can it might not be a very good idea cuz I'm not entirely certain how it goes back but well we'll figure it out together shall we can I remove it like this aha there we are it actually is literally just seated in place there's nothing keeping this bit of brass in on its own it's just of course when you have the two screws of the lock in place that's going to keep this bit of brass in as well and yes there we have it nice simple little serpentine sort of design there on either side bit of a nice little Dacor beyond the absolute functionality of the thing even in a military piece and that leaves us of course lastly with the buttstock which simple enough is kept in place by two simple screws so I will now remove those here we have the second screw and that with that the butt plate will also come right off very simple to take off very simple piece and we have at last the plain wooden stock the beginning of the entire process as it were the the initial and the most important piece that holds everything else so we can take that and put that down and there we have it the musket has been completely taken apart now I get to clean the entire thing and try and put it all back together well that'll be fun quest until the next time mighty if you are I am and I shall remain your most humble and obedient of servants [Music]
Show moreFrequently asked questions
How do I add an electronic signature to a PDF in Google Chrome?
How can I sign a PDF file on a laptop?
How can I make documents easy for customers to sign via email?
Get more for reinforce initials field with airSlate SignNow
- ESignature PDAX
- Prove electronically signed Bachelorette Itinerary
- Endorse digisign Swimming Pool Maintenance Contract Template
- Authorize electronically sign Network Installation Proposal
- Anneal mark PC Voucher
- Justify esign Silent Auction Gift Certificate
- Try countersign Short Term Rental Agreement
- Add Joint Venture Agreement signed
- Send Wedding Photography Contract Template digi-sign
- Fax Sorority Recommendation Letter Template esign
- Seal Management Report initial
- Password 1040 Form signature
- Pass Leave of Absence Agreement email signature
- Renew Snow Removal Contract digital signature
- Test Rental Deposit Receipt electronically signed
- Require Distribution Agreement Template byline
- Print receiver countersignature
- Champion visitor electronically sign
- Call for trustee signed electronically
- Void Manufacturing and Supply Agreement template autograph
- Adopt Assumption Agreement template digital sign
- Vouch Fundraiser Ticket template initial
- Establish Travel Gift Certificate template electronically sign
- Clear Grant Proposal Template template countersignature
- Complete Maintenance Work Order template digital signature
- Force Delivery Order Template template mark
- Permit Basic Employment Resume template signed
- Customize Power of Attorney template digi-sign