Rename Digital Sign Disclosure with airSlate SignNow
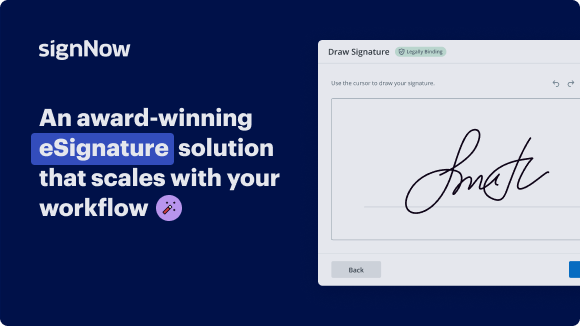
Award-winning eSignature solution


Get the powerful eSignature features you need from the company you trust
Select the pro platform made for pros
Set up eSignature API quickly
Collaborate better together
Rename digital sign disclosure, in minutes
Cut the closing time
Maintain sensitive information safe
See airSlate SignNow eSignatures in action


airSlate SignNow solutions for better efficiency
Our user reviews speak for themselves


Why choose airSlate SignNow
-
Free 7-day trial. Choose the plan you need and try it risk-free.
-
Honest pricing for full-featured plans. airSlate SignNow offers subscription plans with no overages or hidden fees at renewal.
-
Enterprise-grade security. airSlate SignNow helps you comply with global security standards.

Your step-by-step guide — rename digital sign disclosure
Using airSlate SignNow’s eSignature any business can speed up signature workflows and eSign in real-time, delivering a better experience to customers and employees. rename digital sign disclosure in a few simple steps. Our mobile-first apps make working on the go possible, even while offline! Sign documents from anywhere in the world and close deals faster.
Follow the step-by-step guide to rename digital sign disclosure:
- Log in to your airSlate SignNow account.
- Locate your document in your folders or upload a new one.
- Open the document and make edits using the Tools menu.
- Drag & drop fillable fields, add text and sign it.
- Add multiple signers using their emails and set the signing order.
- Specify which recipients will get an executed copy.
- Use Advanced Options to limit access to the record and set an expiration date.
- Click Save and Close when completed.
In addition, there are more advanced features available to rename digital sign disclosure. Add users to your shared workspace, view teams, and track collaboration. Millions of users across the US and Europe agree that a system that brings people together in one holistic digital location, is the thing that businesses need to keep workflows performing easily. The airSlate SignNow REST API enables you to integrate eSignatures into your app, website, CRM or cloud. Try out airSlate SignNow and get faster, smoother and overall more productive eSignature workflows!
How it works
airSlate SignNow features that users love


Get legally-binding signatures now!
FAQs
-
How do I rename a document in airSlate SignNow?
How do I rename a document in airSlate SignNow? To rename a document, select it and click Rename Document in the sidebar on the right. Or you can click the More button next to a document name and select the same option in the contextual menu. -
How do I remove digital signature identity?
Navigate to Edit -> Preferences (Win), or Acrobat -> Preferences (Mac), then select Signatures -> Identities & Trusted Certificates -> More, Click on Digital ID Files, select the one you want to detach, and click Detach File. After that, you can delete the . -
How can I remove my name from digital signature?
Delete a signature from a document. If you're the only signer, here's how to remove your signature from the PDF: Navigate to your signature. Right-click. Select Clear Signature. -
How can I delete my digital signature online?
How to remove a digital signature from a PDF online. If the document is still being made, it's very easy to unsign a PDF. You simply right-click on the signature field, click Clear Signature (or your document platform's equivalent), and digitally sign the document again if need be. -
How do I edit a signed document in airSlate SignNow?
In airSlate SignNow, there is no way to edit documents once signed. The reason why you can't edit a signed document is to make sure that no changes are made to the document after it has been signed. -
Can a digital signature be altered or modified?
The digital signature confirms the integrity of the message. This signature ensures that the information originated from the signer and was not altered, which proves the identity of the organization that created the digital signature. Any change made to the signed data invalidates the whole signature. -
Can you edit a document in airSlate SignNow?
Apart from signing and sending documents for eSignature, airSlate SignNow allows users to easily edit PDFs, complete forms online, and create dynamic fillable forms. The platform features plenty of tools to simplify your work with PDF documents and optimize signing workflows. -
Can digital signature be removed?
Remove digital signatures from Word or Excel Open the document or worksheet that contains the visible signature you want to remove. Right-click the signature line. Click Remove Signature. Click Yes. -
Can you edit a PDF in airSlate SignNow?
airSlate SignNow's toolkit helps you edit any PDF and turn it into a fillable form hassle-free. Just open your document via the built-in editor and start adding fillable fields, inserting your information, and signing in just clicks. In the editor, you will find two sections: Tools and Edit & Sign. -
How do I change my digital signature details?
Change of Digital Signature Certificate (DSC) Login with user ID using existing Digital Signature Certificate. Go to 'Change DSC details' option. Fill the required details of the DSC, which needs to be mapped with your user ID. Select the renewed/Changed DSC.
What active users are saying — rename digital sign disclosure


Related searches to rename digital sign disclosure with airSlate SignNow

Integrate signed disclosure
hi a lot of people have asked me about how to get the seller's disclosure signed for the new jersey association of realtors the first thing check in the details section on your docusign room that the seller number one is filled out you want to make sure that the person in your seller group is most likely to fill out the document and that's the person that you put in that spot it doesn't matter how many sellers you have but seller number one is the one that's designated in the forms to fill it out then jump on over to your documents find your seller's disclosure in the list of documents click the circle click the pen and you'll see it had auto-populated before with some of the information let me just jump on over there disclosure remember your envelope name is for your own benefit so you can find things later on add the recipient very important to add the pre-tagged role and when you do that choose seller number one okay and choose that person that way that's the person who's going to sign it now all you need to do is well you can actually click yourself in there too is the listing agent so let me click myself and when you're done with that it's hard to see on this screen you would add the selected okay once that's done you would fill out the email subject and the email message and it would say let's talk to sign sellers disclosure please sign okay click next and what it's doing is it's opening up the next screen which you will see is where you check to see to make sure that the person you anticipate saying is actually on the page here um if you look at the left hand side and click the down arrow you'll see yourself as listing agent and then the seller's name would be here everyone's designated a different color in docusign they just automatically do that when you open up the document so just take a visual look at the highlighted version and you see that all of these boxes are in blue which states that the person who's highlighted in blue is the one who can actually fill it out you'll see these are the radio boxes so they can fill in yes or no and then they can fill in text okay when you're all done you can actually look at the recipient preview and or you just send it okay i'll look at the recipient preview for you so you can see i would suggest encouraging your clients to look at this on the desktop and this is the desktop version you can tell because it states it right here there's a blue highlight underneath it's also available in preview format on a tablet and on a cell phone if you just want to watch and see what happens while they're signing it just click...
Show more