Scan Date Field with airSlate SignNow
Award-winning eSignature solution


Upgrade your document workflow with airSlate SignNow
Agile eSignature workflows
Instant visibility into document status
Easy and fast integration set up
Scan date field on any device
Detailed Audit Trail
Rigorous safety requirements
See airSlate SignNow eSignatures in action


airSlate SignNow solutions for better efficiency
Our user reviews speak for themselves


Why choose airSlate SignNow
-
Free 7-day trial. Choose the plan you need and try it risk-free.
-
Honest pricing for full-featured plans. airSlate SignNow offers subscription plans with no overages or hidden fees at renewal.
-
Enterprise-grade security. airSlate SignNow helps you comply with global security standards.

Your step-by-step guide — scan date field
Using airSlate SignNow’s electronic signature any company can speed up signature workflows and eSign in real-time, providing a greater experience to customers and staff members. scan date field in a couple of easy steps. Our mobile apps make operating on the move possible, even while offline! eSign contracts from any place in the world and complete deals in less time.
Follow the step-by-step guide to scan date field:
- Log on to your airSlate SignNow profile.
- Find your document in your folders or upload a new one.
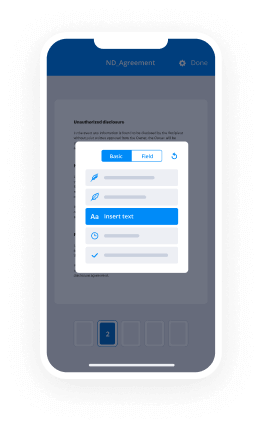
- Open the document and edit content using the Tools menu.
- Drag & drop fillable fields, add text and eSign it.
- List numerous signees using their emails and set the signing order.
- Specify which individuals can get an executed version.
- Use Advanced Options to reduce access to the record and set up an expiry date.
- Press Save and Close when finished.
In addition, there are more enhanced features accessible to scan date field. Add users to your collaborative digital workplace, browse teams, and keep track of collaboration. Millions of customers across the US and Europe recognize that a system that brings people together in one cohesive enviroment, is the thing that enterprises need to keep workflows working easily. The airSlate SignNow REST API enables you to integrate eSignatures into your app, website, CRM or cloud storage. Try out airSlate SignNow and get faster, smoother and overall more effective eSignature workflows!
How it works
airSlate SignNow features that users love


See exceptional results scan date field with airSlate SignNow

How to submit and eSign a document online
Try out the fastest way to scan date field. Avoid paper-based workflows and manage documents right from airSlate SignNow. Complete and share your forms from the office or seamlessly work on-the-go. No installation or additional software required. All features are available online, just go to signnow.com and create your own eSignature flow.
A brief guide on how to scan date field in minutes
- Create an airSlate SignNow account (if you haven’t registered yet) or log in using your Google or Facebook.
- Click Upload and select one of your documents.
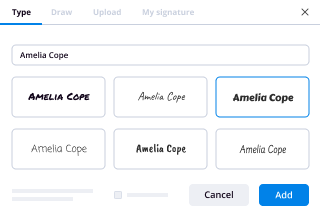
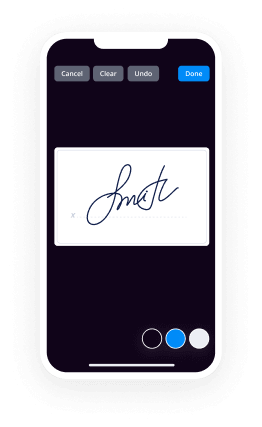
- Use the My Signature tool to create your unique signature.
- Turn the document into a dynamic PDF with fillable fields.
- Fill out your new form and click Done.
Once finished, send an invite to sign to multiple recipients. Get an enforceable contract in minutes using any device. Explore more features for making professional PDFs; add fillable fields scan date field and collaborate in teams. The eSignature solution gives a secure workflow and runs based on SOC 2 Type II Certification. Be sure that all of your information are protected and therefore no person can change them.
How to eSign a PDF in Google Chrome
Are you looking for a solution to scan date field directly from Chrome? The airSlate SignNow extension for Google is here to help. Find a document and right from your browser easily open it in the editor. Add fillable fields for text and signature. Sign the PDF and share it safely according to GDPR, SOC 2 Type II Certification and more.
Using this brief how-to guide below, expand your eSignature workflow into Google and scan date field:
- Go to the Chrome web store and find the airSlate SignNow extension.
- Click Add to Chrome.
- Log in to your account or register a new one.
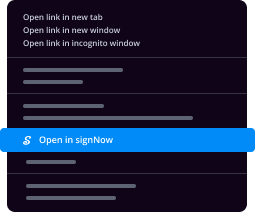
- Upload a document and click Open in airSlate SignNow.
- Modify the document.
- Sign the PDF using the My Signature tool.
- Click Done to save your edits.
- Invite other participants to sign by clicking Invite to Sign and selecting their emails/names.
Create a signature that’s built in to your workflow to scan date field and get PDFs eSigned in minutes. Say goodbye to the piles of papers on your desk and start saving money and time for additional essential duties. Choosing the airSlate SignNow Google extension is an awesome convenient option with many different advantages.

How to sign an attachment in Gmail
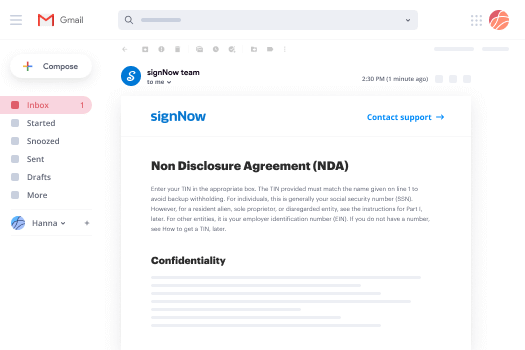
If you’re like most, you’re used to downloading the attachments you get, printing them out and then signing them, right? Well, we have good news for you. Signing documents in your inbox just got a lot easier. The airSlate SignNow add-on for Gmail allows you to scan date field without leaving your mailbox. Do everything you need; add fillable fields and send signing requests in clicks.
How to scan date field in Gmail:
- Find airSlate SignNow for Gmail in the G Suite Marketplace and click Install.
- Log in to your airSlate SignNow account or create a new one.
- Open up your email with the PDF you need to sign.
- Click Upload to save the document to your airSlate SignNow account.
- Click Open document to open the editor.
- Sign the PDF using My Signature.
- Send a signing request to the other participants with the Send to Sign button.
- Enter their email and press OK.
As a result, the other participants will receive notifications telling them to sign the document. No need to download the PDF file over and over again, just scan date field in clicks. This add-one is suitable for those who like concentrating on more important goals instead of burning time for absolutely nothing. Boost your day-to-day routine with the award-winning eSignature application.
How to sign a PDF template on the go with no app
For many products, getting deals done on the go means installing an app on your phone. We’re happy to say at airSlate SignNow we’ve made singing on the go faster and easier by eliminating the need for a mobile app. To eSign, open your browser (any mobile browser) and get direct access to airSlate SignNow and all its powerful eSignature tools. Edit docs, scan date field and more. No installation or additional software required. Close your deal from anywhere.
Take a look at our step-by-step instructions that teach you how to scan date field.
- Open your browser and go to signnow.com.
- Log in or register a new account.
- Upload or open the document you want to edit.
- Add fillable fields for text, signature and date.
- Draw, type or upload your signature.
- Click Save and Close.
- Click Invite to Sign and enter a recipient’s email if you need others to sign the PDF.
Working on mobile is no different than on a desktop: create a reusable template, scan date field and manage the flow as you would normally. In a couple of clicks, get an enforceable contract that you can download to your device and send to others. Yet, if you want a software, download the airSlate SignNow mobile app. It’s secure, fast and has a great layout. Experience smooth eSignature workflows from the workplace, in a taxi or on an airplane.
How to sign a PDF file having an iPad
iOS is a very popular operating system packed with native tools. It allows you to sign and edit PDFs using Preview without any additional software. However, as great as Apple’s solution is, it doesn't provide any automation. Enhance your iPhone’s capabilities by taking advantage of the airSlate SignNow app. Utilize your iPhone or iPad to scan date field and more. Introduce eSignature automation to your mobile workflow.
Signing on an iPhone has never been easier:
- Find the airSlate SignNow app in the AppStore and install it.
- Create a new account or log in with your Facebook or Google.
- Click Plus and upload the PDF file you want to sign.
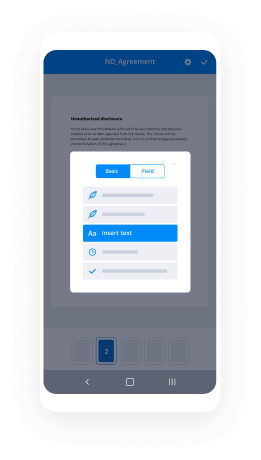
- Tap on the document where you want to insert your signature.
- Explore other features: add fillable fields or scan date field.
- Use the Save button to apply the changes.
- Share your documents via email or a singing link.
Make a professional PDFs right from your airSlate SignNow app. Get the most out of your time and work from anywhere; at home, in the office, on a bus or plane, and even at the beach. Manage an entire record workflow effortlessly: generate reusable templates, scan date field and work on documents with business partners. Turn your device into a highly effective business for executing deals.
How to eSign a PDF file using an Android
For Android users to manage documents from their phone, they have to install additional software. The Play Market is vast and plump with options, so finding a good application isn’t too hard if you have time to browse through hundreds of apps. To save time and prevent frustration, we suggest airSlate SignNow for Android. Store and edit documents, create signing roles, and even scan date field.
The 9 simple steps to optimizing your mobile workflow:
- Open the app.
- Log in using your Facebook or Google accounts or register if you haven’t authorized already.
- Click on + to add a new document using your camera, internal or cloud storages.
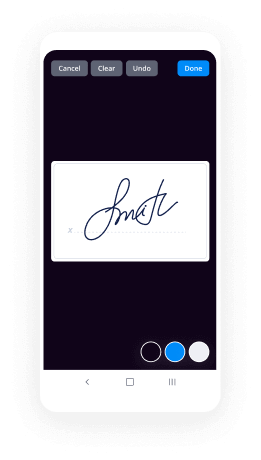
- Tap anywhere on your PDF and insert your eSignature.
- Click OK to confirm and sign.
- Try more editing features; add images, scan date field, create a reusable template, etc.
- Click Save to apply changes once you finish.
- Download the PDF or share it via email.
- Use the Invite to sign function if you want to set & send a signing order to recipients.
Turn the mundane and routine into easy and smooth with the airSlate SignNow app for Android. Sign and send documents for signature from any place you’re connected to the internet. Generate professional-looking PDFs and scan date field with just a few clicks. Put together a flawless eSignature workflow using only your smartphone and improve your total productivity.
Get legally-binding signatures now!
FAQs
-
How do I insert date and time in a barcode scan in Excel?
Suggested clip How to enter the date and time for barcode scans in Excel - YouTubeYouTubeStart of suggested clipEnd of suggested clip How to enter the date and time for barcode scans in Excel - YouTube -
How do I track a barcode?
Download and install the Barcode Scanner, a bar code tracking program available free from Brothersoft. Take a digital picture or scan the bar code image you want to track. Select "Browse" on the Barcode Scanner software. ... Choose "Extract" to retrieve the bar code information. -
How do you scan a spreadsheet?
Purchase Scan to Spreadsheet for your iPhone or Android. Hit the plus sign to start a new spreadsheetSelect from one of the Templates (Default, Inventory, or Bin Inventory) and give it a name (We named our's Books) Select the Play button to start the new spreadsheet. -
How do you set up a barcode scanner?
Insert the driver installation disc for the USB barcode scanner into the CD/DVD drive of the computer. Wait for the setup wizard window to appear, then click "Install," "Install Scanner Driver" or another similarly named button or link. Follow the on-screen prompts to install the USB barcode scanner driver in Windows. -
What can I do with a barcode scanner?
A barcode scanner is a device used to read barcodes. Most businesses buy scanners for use during the checkout process. However, as we've discussed, they are also used for inventory management, whether that's in your store or within a larger warehouse setting. -
How do you take date input?
import java.text.SimpleDateFormat; import java.util.Date; public class StringToDateExample1 { public static void main(String[] args)throws Exception { String sDate1="31/12/1998"; Date date1=new SimpleDateFormat("dd/MM/yyyy").parse(sDate1); System.out.println(sDate1+"\\t"+date1); } -
How do you assign a value to input type date?
Set a date for a date field: getElementById("myDate"). value = "2014-02-09"; Get the date of a date field: var x = document. getElementById("myDate"). value; An example that shows the difference between the defaultValue and value property: getElementById("myDate"); var defaultVal = x. defaultValue; var currentVal = x. -
How do I keep the default value in a text box?
If you want to set default text in textbox then you can use 2 attributes. If you dont pass any value then it will take ur dafault_value as input. If user click on the textbox then it display value along with your default_value and further user can write this value as per there requirement. -
Is there any way to change input type date format?
Browsers obtain the date-input format from user's system date format. (Tested in supported browsers, Chrome, Edge.) As there is no standard defined by specs as of now to change the style of date control, its not possible to implement the same in browsers. -
How do you format date?
Select the cells you want to format. Press CTRL+1. In the Format Cells box, click the Number tab. In the Category list, click Date. Under Type, pick a date format. ... If you want to use a date format according to how another language displays dates, choose the language in Locale (location). -
What is input system time?
In computer science and computer programming, system time represents a computer system's notion of the passage of time. ... System time is measured by a system clock, which is typically implemented as a simple count of the number of ticks that have transpired since some arbitrary starting date, called the epoch. -
How can I get input time in HTML?
Start time: Value of the time input: "n/a" . When a form including a time input is submitted, the value is encoded before being included in the form's data. The form's data entry for a time input will always be in the form name=hh%3Amm , or name=hh%3Amm%3ass if seconds are included (see Using the step attribute). -
How do I set the default time in input type time?
Change the default value of a time field: getElementById("myTime"). defaultValue = "18:00"; Get the default value of a time field: getElementById("myTime"). defaultValue; An example that shows the difference between the defaultValue and value property: getElementById("myTime"); var defaultVal = x. defaultValue; -
How do you select time in HTML?
Input Type Time The allows the user to select a time (no time zone). Depending on browser support, a time picker can show up in the input field. -
How do you assign a date value to a date variable in Java?
String s = "09/22/2006"; SimpleDateFormat sd = new SimpleDateFormat("MM/dd/yyyy"); Date date1 = sd. parse(s); Calendar c = Calendar. getInstance(); c. set(2006, 8, 22); //month is zero based Date date2 = c.
What active users are saying — scan date field


Related searches to scan date field with airSlate airSlate SignNow

Scan date field
this is the third video in the using the Concorde suite series this video is Concorde forms designer creating a scan template so you can scan your form in the remark office om our software the next video in the series is concrete forms designer scanning some forms and getting some results at the beginning of each video I like to show you where to access the documentation for the concrete forms designer open the Concorde forms designer software click on help and Concorde documentation and it'll bring up this folder you have the system requirements in a PDF a couple of quick guides for using the Concorde suite and if you double click on the Concorde user's manual 7-0 it will bring up the Concorde user's guide and you have bookmarks over here you can click on any bookmark and it will take you to the chapter or section of the manual that will describe different things so I'll let you peruse that on your own up here in the top of this window it does show you where the Concorde documentation resides on your computer the C Drive in the Program Files folder subfolders data blocks Concord 7-0 and documentation in case you ever want to know so let's close this so to scan your form in the remark office software you must create a file called the scan template file now in Concord when you save your form that looks like this and this form is slightly different from the one that we used in the first two videos that we created it's very similar it's a little shorter it's only one page just for illustration but it is very similar to previous form but when you create a form and Concord and save it it saves the form into a file with an FSL extension you can see that up top here in the title bar showing you that you have the datablocks Concord software open and the form that you have open is too easy form dot F SL now the scan template file is a different file and it is the one used by the remark office software to know how to scan your form and it has a different extension it has an om r extension I'm going to go over here and switch to the remark data center scanning program just briefly and I'm going I may refer to this program several times during this video you can see up here that we're in the remark office om our data center this is the actual scanning program and we have loaded the too easy for mu M R file this is the file that we're going to create and it defines how your form will be scanned where areas are on the form that will be scanned bubble areas comments areas and things like that it also defines the format of the data and by that I mean the order of the fields so here we have session ID group ID date and then the questions and at the very end we have a comments field so this is just the physical order of the fields that's what we mean when we say format of the fields so let's go back to the Concorde software before you create the scan template there are a few things you need to do to set up the form so that all of the areas that you want to scan will be scanned now the bubble areas like this group ID the date and these questions these conquered software knows that those are scannable areas ok so you've already done most of the work to create those and that they will be put into the scan template but there are some other scannable elements that we're going to add but before we do that the first thing we want to do is talk a little bit about these bubble fields if you just have a bubble field like a group ID or a date and you have numbers inside the bubbles in this case we have these are 0 through 9 grids so we have 0 through 9 the field is ready to scan Concord already knows what each bubble means because it has a number in it and so there's not much you have to do when you come out of the EZ form wizard these fields are often skin linked and you can see that their length because whenever I tap on the fields around I just get one set of field markers around that field now one thing about the difference between this date field in this group ID field you can notice is that the box here is very light around the group ID field and it's very dark or darker around the date field it's better to have lighter boxes and I will be discussing why that's true when we create the scan template and go to look at it I just wanted to mention that but down here with these this bubble fields we have blank bubbles so you have to tell Concord what you want for output from these blank bubbles and if you don't tell it anything what you'll get is numbers 1 2 3 4 5 but you can tell it that you want something else you can tell it that you want these labels for example excellent very good good fair and poor you also need to join with this bubble field the response field these questions and the reason for that is that when you get to the remark office software if you've joined these questions and these labels to the bubble field then they'll appear on the reports without any extra work having to be done so that's a really good quality and when we come out of the EZ form design wizard these fields are already linked together and linking is a process by which we join the questions and the labels with the bubble field I'm going to when I click here I can tell this is linked because no matter where I click on I get one set of handles or field markers I also up here on the object bar I see this unlink selected fields button anytime you see this you know you have a link selected so I'm gonna click on that and notice what happens is that our all of the little fields that make up this whole group all of each of the labels the response or bubble field all of the different shading pieces here and all of the different text pieces they all become active so I could modify them here but I really just want to show you the purpose of linking the purpose of linking once again is to join the all of the texts that are the questions and the texts that are the labels to the response field so if I want to unselect all of these fields I just click off in the white space anytime you want to unselect everything on the form just click off in the white space but then I want to select all of these fields again and I want to link them and there's the easiest way to select a large group of fields is to left-click somewhere outside the group and start drawing this box by pulling your mouse dragging your mouse over so that you have grabbed all of the fields that you want to link in now and you can do it from either side I'm gonna click off in the white space you can do it from either side I'm going to the top left corner this time and I'm doing the same thing drawing a box dragging my mouse down to the bottom and to the right and it will select all those fields now when you're linking labels and question text with a response field you don't want to link in extraneous text and this piece of text up here is just a piece of instructions it is an extraneous or extra text if we link this in the linking module will become confused and I'm going to go ahead and do that and when I mean confused it won't know what to do with this piece of text it doesn't know whether it's a label or a question and what the linking module is trying to do is match the number of rows of bubbles here to the number of questions that you have and the number of columns of bubbles here to the number of labels that you have so this is just extra and it doesn't know what to do with it so when I link here I'm going to go up click on the link button number one is gonna give me an error telling me I'm going to see some text in the extra text area and that's always bad when I click OK the link properties come up the idea for the link property is coming up when you link these kinds of fields is to show you you want to look and check if the labels are correct and the questions are correct and you can see the things didn't work we don't have any labels here labels being the answers to the questions the question text seems to be here okay but I've got a whole bunch of stuff down here in my extra text and my labels aren't correct so that's a mistake and I can correct it very simply I can click OK out here I can unlink and if I have a bunch of fields selected you can unselect the field by holding down the shift key placing your cursor over that field and clicking on it and it will unselect it will also reselect if I hold down the shift key and click it again it Reese elects it but I want to unselect it and then I just want to link again I can press this link button I can also go to format and click on link selected fields is exactly the same procedure and when I do that notice that things have changed we didn't get an error number one excellent very good fair and poor all my labels are here in the correct order my questions are here in the correct order so everything looks good and I have nothing in the extra text field anytime you see something down here in extra text you have a problem now there's one other thing that you may want to do where you're looking at the scanning properties for this linked question area a lot of people like their means to be closer to 5 if most people answer excellent or very good but our values over here are set to one through five so most people answer excellent or very good this will be in the mean would be a number closer to one or two so to change that we just need to reorder these values and you can do them by hand but you can also right click here a little menu comes up and you can say renumber values from five to one that will give you a mean closer to five then to one which is what most people like to do okay so I'm going to click there are some other scanning properties that are exposed up here generally these are not something you need to change there for very specialized situations but there are some things if there will you did need to change these scanning properties and these are the properties that these are properties that will affect how this field is scanned this is where you would do it but there are a lot of other properties that are written into the scan template file and you can't change them there but if you can change them here it's better to do it here so that anytime you recreate the scan template you get these changes that you've made so we click OK here everything is is linked here and even though it looks like this piece of text is inside the link I can tell that it's not because if I click on it my handles for the big linked area disappear and I can see just the this piece of text is selected ok so that is how you link fields so that the text which is the question text and the labels get transferred into the scan template and thereby they can appear in the reports with no extra work so that's a good thing ok so we've talked about the bubble fields these are now ready to be scanned a one of the things you might check and see up here click on each one and make sure that they are labeled if this form was created with the easy form design wizard they will be labeled if not you will see lists of these scannable elements and so it's good idea to have them labeled properly and I click over here I get date I click over here I just have Q the reason we name it Q is because the questions will be labeled for us automatically 1 to 15 when we create the scan template so we don't have to worry about what that is you could put question or qu es I just prefer Q and when you do that I'm going to go back over here to the remark sauce this is what you get your columns are labeled q1 q2 q3 and so forth so back to concorde all right we have two other things or scannable elements that we want to scan on this form and let's talk about those the first one is this this area here this is actually a data merge field the data merge feature is the ability to take information from a file and print it on a form while the forms are being printed okay so you can customize these sheets as they're being printed in this case when I click on it this is a session ID and what we're going to do when we printed these forms or what we did when we printed these forms is we took information from a file and it put a number in here you'll see that in the next video scanning some forms and getting some results that the numbers that are put in there our session ID numbers and they're they're not dollar signs they're whatever the data is taken from the file once again data merge is explained in a different video but we still even though that that's going to be printed we still have to tell the scan template or the remark software that we want to scan this area because we're going to actually scan this printed area the remark office software has that ability it's called OCR field so we're going to create a box over this to tell it to scan this area and read it and the way you do that is you go to this colored puzzle piece that says other scannable regions you can also go up here to tools an image region this is the same thing it's other scannable regions image region being one of them when you click there you just draw a box over the area okay now the box will pop it will default to an image region and we're going to change that we want it to be an OCR region OCR optical character recognition the software will read machine generated text or printer generated text so we're going to change it to OCR we're going to call this session ID because this is going to be the column header once again in the remark office day Center when you go to scan and what I mean by that again back over to remark is this is the column header right here this is what you want it to say up here to label this data point so let's go back to Concord and we've changed OCR region we've given it a field name and the data type is textual general you don't have to change this and that's all we had to do here so when I click OK something will change on the screen the field becomes purple purple identifies an OCR region an image region is blue of OCR region is purple so let's go down here and there's another scannable element down here and that's this comments area we want the software to separate these comments areas into what's known as an image region and the remark software will take each of these image regions save it in a file and with a very simple report we can gather them together onto a single report so that you can read someone can read the comments on a report without having to have the physical forms presence that's the purpose of an image region and we're going to create another one we're going to click on our image region tool or other scannable regions tool and it's defaulted to image region and we're going to draw a box around the comments area okay now notice that I make my box a little bigger than the actual comments area and the reason I do that is because people tend to write outside the lines and you want to get their whole comments so it created the image region now we're going to go look at the properties we're going to name the field we're going to call it comments and it's image region so we don't have to change anything and then down here there's a couple of other things these are done for you automatically looks good mean to do that when you name a field comments the begins names with also switches to comments you could change this if you like but this these two parameters just affect where the files are going to be stored and what's the beginning name of each of the files you really don't have to know this information but in case you want to know where the little image files that it's going to create are stored it's in this folder this is the default folder now you may not be able to save here so you may have to save them in your Documents area in a subfolder but then it's going to create a little file for each in each form that it scans it's going to begin the name with this and then it's going to add the date and a serial number because of course it's going to be creating a lot of them one for each form that scan but you really once again you don't have to know this other than you may have to change this because you may not be able to save in this folder ok click OK here and you can see what it's done is its created our image region you can expand it here if you want I'm just gonna expand it a little bit just to make it sort of even maybe make it just a little bit bigger and so that's our next scannable element and then we're going to talk about one more although we're not going to use it on this form we've really now defined all of the scannable elements for this form and I'm going to go ahead and click on my save form icon here to save it so we've set up our OCR field our bubble fields were already set up we just had to modify our questions a little bit and then we set up our image region so we're really about ready to create the scan template but I want to talk about one more use of the other scannable fields area so here I'm clicked on this tool and instead of image region I'm going to select data entry field ok and then I'm going to draw a little box right here okay just and then we're gonna talk about what we're doing okay this box is not really going to scan anything the purpose of a data entry field is to put information into your form or I'm sorry into your output data when you scan your forms that doesn't exist on the form it can be used as a placeholder if you need a dummy field for some reason it can also be used to put some information in your form that doesn't exist on the form and let me give you an example let's say we had we wanted to put the region that these forms came from and we didn't put a field on the form for region we could call this region I'm going to type this in here it's set to be a data entry field we can then in the default fill area we can type in the region so let's say the region was Atlanta okay what we would get now is a column of data and it would have region as its name and then in each and every data record Atlanta would be put into the data record okay and back over here to the remark software so we would have another field here called region and Atlanta would be in there for every form we scanned so we could change that we could change the scan template later for every different region but it does allow you to put information that's not on your form into the data if you so need to do so the other thing you can do if you put in a number if you wanted a serial print number in your form information in your data you could put in a number here tell it to auto increment the value and it will on the first form it scans the number would be 1,000 then second form would be 1001 and so forth so you can also add a serial number to your data for each data record but we're going to delete this and unclick this and then just click OK here and if I left that here this would become a data field now because the it's not really scanning anything it doesn't matter where this is you can put it anywhere in the form I usually just put it someplace where there's a little blank space but it's just sort of a placeholder so that you can change the properties of that data entry field but we're not going to use this I just wanted to mention it so I'm going to click on my big red X serum and delete that selected field ok and let's save my form again ok so at this point we are almost ready to create the scan template but there's one more thing we should do and we're going to talk about the items on the scanning menu once you've set up your OCR fields your image regions you've done all your linking you can use these options on the scanning menu and they're meant to be used in the order that they appear and the second one is create scan template so we have one thing we should do first and this is set up the order of the output fields and I'm going to click on this this is a very simple operation it brings up a list of all of the scanning elements on your form and this gives you the ability to change the order of the scanning elements and we are going to do that what I mean by the order I'm talking about the physical order of the output data once again let's go back over here the remark office software and I'm talking about the physical order here so if I wanted my date to be first I could move that around and that's all this screen does back over here in Concord and we're going to do that I actually want my session ID to be first and the reason it's not in the correct order is because I created it after all these bubble fields were created so it's very simple to move I'll have to do is left-click and drag it into the proper position then I have my group ID my date my questions and my comments I usually put my image regions at the end as the last field just to keep them out of the way and you'll see why in the next video when you scan them because there's quite a bit information that gets stored in this field and they're sort of long so it's best it's it's easiest something just put them at the end and so I'm going to leave that there so that's all there is to this I've just changed the physical order of the output data so and that's what it says to output fields so click OK and we're done I'm gonna save this form okay at this point we are ready to create the scan template and so that's what we're gonna do we're going to go to scanning and create scan template and a notice that this window pops up create the remark office template the software uses the base form same name as our form file for Concord to easy form and then as the OEM our extension it's not a good idea to change this number if you leak or change this name if you leave the name the same then Concord will do some nice things for you and also you know which scan template file matches which form file so it's very there's no reason not to keep the name exactly the same so I'm just gonna say save here it's found one that's already out there and I'm going to overwrite it and it created it that's all there is to it it's created except that it's not entirely complete there is one thing we have to do to it and that is to scan a blank or unfilled out copy of our form into the scan template and to do that we go to the third option on the scanning menu these two options actually start up modules within the remark office software the first one starts the time template editor and the second one starts the data center which you've already seen but we're going to launch the template editor first once again we're doing the third item and so here is the remark office template editor you can see that because we've kept the base name the same it loaded the template we just created automatically but change this name it would not have done this so you can see that our fields over here so you can tell we have a our template loaded I'm going to move this down just a little bit and so what we have to do what we should be seeing here if this template was complete is a blank image of our form but we're not seeing that so we have to provide that image and it's very easy to do you go up here to tools and reset images and it pops up the reset images window okay down here at the bottom it's telling me it's looking for one image if we had a two-sided form it would be looking for two images if we had two sheets with two pages front and back on inch it would be looking for four images and you would scan them at the same time we are going to scan just the one image or one page now up here there's a couple things to look at first of all we have read from scanner setup and so we're going to be looking to scan this image directly from the scanner okay there's another way that you can use the remark office software and that is to scan forms into image files using something like a multifunction device it does scanning copying and printing and you can then read from files I'm going to show you how to do that in just a second but first of all we're going to read from the scanner now if I wanted to change some of the scanner properties I can do that right here and I'm gonna click here to show you some things you might want to change first of all if I was scanning a two-sided form I do have my Hardware option sets a duplex scanner but I don't have scanned duplex so if I was scanning a two-sided form I would want to check this box so that it would scan both sides of the sheet at the same time and most image scanners these days will do that up here this just tells you what scanner if you had several scanners connected to your computer you could select from the list I'm going to be scanning from this Fujitsu model scanner then there's a couple of parameters down here that I want to talk about scanners can scan at most multi different resolutions from 200 by 200 to 300 by 300 400 by 400 some of them go as high as 600 by 600 or even higher we've got our set to 200 by 200 and a colored depths of black and white instead of gray scale or color why the reason is very simple the remark office software will scan your forms properly at process them properly using a low resolution and a low color depth when you use these low parameters the files that get created for each format you scan are much smaller if you go to 300 by 300 and go to color here the file gets rather large for each and every form that's and and you can use up a lot of hard drive space if you use those parameters and the remark software works just fine at these parameters if you were to get back some forms that were printed badly or filled out badly that's when you might want to change these to higher resolutions or higher color depths and you might also want to change the brightness number but unless you have a problem set of forms these parameters here should work fine so I'm just gonna click OK here and we're ready to scan so I have a blank copy of my form loaded in the scanner and I'm just gonna click on this button acquire image from scanner well it's doing that I want to point out this warning here in red always use forms that have not been marked I cannot tell you how important that is if you use a form that's already been marked let's say there were some marks here in the questions area or in the date area everything will seem to go okay with what we're doing here but when you go to scan your actual forms the data will come out wrong the software needs a blank copy of your form to compare it to the filled out form so that it knows what's been filled out and that's the reason this form must be blank or unfilled out okay so this looks pretty good it's not skewed if it was skewed I could simply load my scan my scanner with the form and click on the button again but it looks good so I'm gonna click OK and what pops up is this window saying it's recommended that you perform an auto alignment operation after modifying the image if I say yes it's going to try to line up these fields so I'm gonna click yes and it was able to line up two of them but it wasn't able to line up the date field and that's what it's telling me here let's click OK so what we're looking for our bubble fields should all be green and these two turn green so it was able to find the area and it was able I'm just moving these over a little bit by clicking on them the one redfield the reason it's not is because the soft the field is touching the blue box okay now when I put my cursor over I get an error that says the top region is touching marks actually it's the side of the region sometimes the error is a little more accurate than others but where we can fix this simply by left clicking and dragging the area so that's not touching the box anywhere and then it turns green but here's where I wanted to talk about the dark box versus the light box notice that the light box and the shading and the shading over here they all dropped away when we scan this form that's very much on purpose so going back to Concord if you use light boxes and very light shading the when you scan the forms those areas will drop away and the remarked office software works much better when it has more white space around the bubbles so that if a form was slightly misprinted or slightly missed scan the software can actually look around the area if you leave enough white space and find that area here this will scan but the dark box is limiting the remark offices ability somewhat so it's better to create we make the boxes wider have thicker lines but lighter in color so that's the purpose of that and then the only other two areas we have are our comments area which I'm just going to line it up just a little bit better with the actual scan form maybe make this a little smaller you could move these things around and here I'm going to make this just a little smaller so that it scans the actual area where the numbers going to be printed okay so what are we doing here well we are actually adjusting the scan template for your specific setup for the way you printed the forms and the way that your scanner scanned the forms so we're adjusting for two pieces of hardware that do have variation each scanner scans a little different each printer prints a little different so we've just adjusted the scan template so that it'll scan the actual forms we printed what that means of course is that the blank form that you scan in here should be printed in exactly the same way as the forms that you're going to hand out to be filled out okay and that's that is an important thing to know but once you've adjusted all your fields and all your bubble fields turned green you click OK save it and we are now done with this scan template ok so we are now ready to scan some forms what I'm going to do before we do that though is I'm going to adjust show you how to scan from a file instead of directly from the scanner so I'm going to go to tools reset images and I'm gonna change the setting here to read from image files and when I click on acquire images from file it pops up a select image file window and I can go down and select now it pops it up into the area where I have some forms stored these are actually filled out forms but here I have one labeled a to easy form blank when I click on that one and click open it will open that file and read the image out of that file and that's what it did here and when I click OK here it we then go through the exact same procedure again ok this time it was able to line all the three fields up and then I might move my comments areas around ok so that's how you scan a form or image out of a file and the same thing you do a similar thing when you actually go to scan your forms you can pull them out of files that you've created on a multifunction device so that concludes our video for today we have we let's save this again and if we exit this scan template is complete and ready to use and then the next thing we might do is click on scanning and use the fourth option which would take us if I do this to the remark office data center and we're ready to scan some forms but that's the next video so this concludes this video which is Concord forms designer creating a scan template to scan your form and remark office'll mr and the next video in the using the concord suite series is concorde forms designer scanning some forms and getting some results thank you for watching you you
Show moreFrequently asked questions
How do I add an electronic signature to a PDF in Google Chrome?
How can I easily get an electronic signature created in Word?
Where should I sign in a PDF?
Get more for scan date field with airSlate SignNow
- Print electronically sign Band Scholarship Application
- Prove electronically signed Photography Services Contract
- Endorse digisign Travel Proposal Template
- Authorize electronically sign Sales Agency Agreement Template
- Anneal mark Course Evaluation
- Justify esign Business Quote
- Try countersign Month-to-Month Rental/Lease Agreement
- Add Consulting Agreement eSign
- Send Interior Design Contract Template eSignature
- Fax Letter of Recommendation for Student autograph
- Seal Client Progress Report electronic signature
- Password Exclusive Distribution Agreement Template signed electronically
- Pass Horse Bill of Sale electronically sign
- Renew Nanny Contract electronically signing
- Test Restaurant Receipt mark
- Require Compromise Agreement Template signed
- Print heir sign
- Champion company countersign
- Call for vacationer signature service
- Void HIPAA Business Associate Agreement template esigning
- Adopt Labor Agreement template digisign
- Vouch Reservation Template for Gala template electronic signature
- Establish Restaurant Gift Certificate template countersign
- Clear Landscaping Services Contract Template template sign
- Complete Customer Product Setup Order template electronically signing
- Force Equipment Purchase Proposal Template template initials
- Permit Corporate Resolution Form template eSign
- Customize Durable Power of Attorney template eSignature