Scan Title Field with airSlate SignNow
Award-winning eSignature solution


Get the robust eSignature features you need from the company you trust
Select the pro service designed for pros
Configure eSignature API with ease
Collaborate better together
Scan title field, within minutes
Decrease the closing time
Keep sensitive data safe
See airSlate SignNow eSignatures in action


airSlate SignNow solutions for better efficiency
Our user reviews speak for themselves


Why choose airSlate SignNow
-
Free 7-day trial. Choose the plan you need and try it risk-free.
-
Honest pricing for full-featured plans. airSlate SignNow offers subscription plans with no overages or hidden fees at renewal.
-
Enterprise-grade security. airSlate SignNow helps you comply with global security standards.

Your step-by-step guide — scan title field
Employing airSlate SignNow’s eSignature any business can enhance signature workflows and sign online in real-time, providing a better experience to clients and workers. scan title field in a few easy steps. Our handheld mobile apps make working on the run possible, even while off-line! eSign contracts from anywhere in the world and close up deals in less time.
Keep to the stepwise instruction to scan title field:
- Sign in to your airSlate SignNow profile.
- Locate your record in your folders or import a new one.
- Open the record adjust using the Tools list.
- Drop fillable areas, type textual content and eSign it.
- Include multiple signees using their emails and set the signing sequence.
- Indicate which recipients will receive an signed copy.
- Use Advanced Options to restrict access to the record add an expiration date.
- Press Save and Close when completed.
Additionally, there are more innovative capabilities open to scan title field. Include users to your collaborative workspace, browse teams, and track teamwork. Numerous people all over the US and Europe concur that a solution that brings everything together in a single cohesive workspace, is what organizations need to keep workflows performing efficiently. The airSlate SignNow REST API enables you to integrate eSignatures into your application, internet site, CRM or cloud storage. Check out airSlate SignNow and enjoy faster, smoother and overall more effective eSignature workflows!
How it works
airSlate SignNow features that users love


See exceptional results scan title field with airSlate SignNow

How to submit and sign a document online
Try out the fastest way to scan title field. Avoid paper-based workflows and manage documents right from airSlate SignNow. Complete and share your forms from the office or seamlessly work on-the-go. No installation or additional software required. All features are available online, just go to signnow.com and create your own eSignature flow.
A brief guide on how to scan title field in minutes
- Create an airSlate SignNow account (if you haven’t registered yet) or log in using your Google or Facebook.
- Click Upload and select one of your documents.
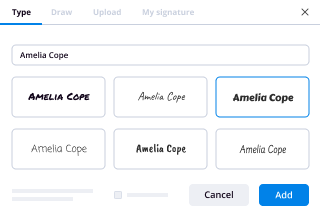
- Use the My Signature tool to create your unique signature.
- Turn the document into a dynamic PDF with fillable fields.
- Fill out your new form and click Done.
Once finished, send an invite to sign to multiple recipients. Get an enforceable contract in minutes using any device. Explore more features for making professional PDFs; add fillable fields scan title field and collaborate in teams. The eSignature solution gives a secure workflow and runs based on SOC 2 Type II Certification. Be sure that all of your information are guarded so no person can edit them.
How to eSign a PDF template in Google Chrome
Are you looking for a solution to scan title field directly from Chrome? The airSlate SignNow extension for Google is here to help. Find a document and right from your browser easily open it in the editor. Add fillable fields for text and signature. Sign the PDF and share it safely according to GDPR, SOC 2 Type II Certification and more.
Using this brief how-to guide below, expand your eSignature workflow into Google and scan title field:
- Go to the Chrome web store and find the airSlate SignNow extension.
- Click Add to Chrome.
- Log in to your account or register a new one.
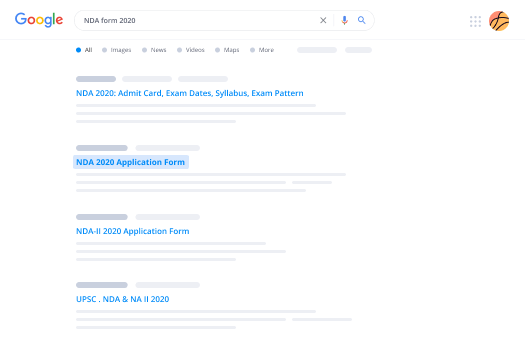
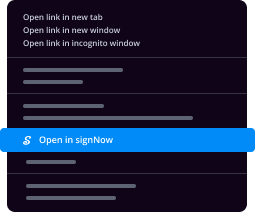
- Upload a document and click Open in airSlate SignNow.
- Modify the document.
- Sign the PDF using the My Signature tool.
- Click Done to save your edits.
- Invite other participants to sign by clicking Invite to Sign and selecting their emails/names.
Create a signature that’s built in to your workflow to scan title field and get PDFs eSigned in minutes. Say goodbye to the piles of papers on your desk and start saving money and time for additional essential duties. Choosing the airSlate SignNow Google extension is an awesome practical choice with plenty of advantages.

How to sign an attachment in Gmail
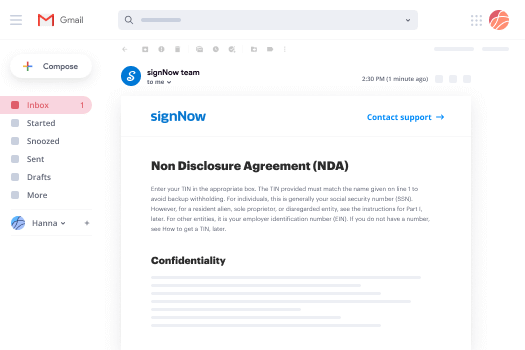
If you’re like most, you’re used to downloading the attachments you get, printing them out and then signing them, right? Well, we have good news for you. Signing documents in your inbox just got a lot easier. The airSlate SignNow add-on for Gmail allows you to scan title field without leaving your mailbox. Do everything you need; add fillable fields and send signing requests in clicks.
How to scan title field in Gmail:
- Find airSlate SignNow for Gmail in the G Suite Marketplace and click Install.
- Log in to your airSlate SignNow account or create a new one.
- Open up your email with the PDF you need to sign.
- Click Upload to save the document to your airSlate SignNow account.
- Click Open document to open the editor.
- Sign the PDF using My Signature.
- Send a signing request to the other participants with the Send to Sign button.
- Enter their email and press OK.
As a result, the other participants will receive notifications telling them to sign the document. No need to download the PDF file over and over again, just scan title field in clicks. This add-one is suitable for those who like concentrating on more important goals instead of burning time for absolutely nothing. Increase your daily monotonous tasks with the award-winning eSignature service.
How to eSign a PDF file on the go with no mobile app
For many products, getting deals done on the go means installing an app on your phone. We’re happy to say at airSlate SignNow we’ve made singing on the go faster and easier by eliminating the need for a mobile app. To eSign, open your browser (any mobile browser) and get direct access to airSlate SignNow and all its powerful eSignature tools. Edit docs, scan title field and more. No installation or additional software required. Close your deal from anywhere.
Take a look at our step-by-step instructions that teach you how to scan title field.
- Open your browser and go to signnow.com.
- Log in or register a new account.
- Upload or open the document you want to edit.
- Add fillable fields for text, signature and date.
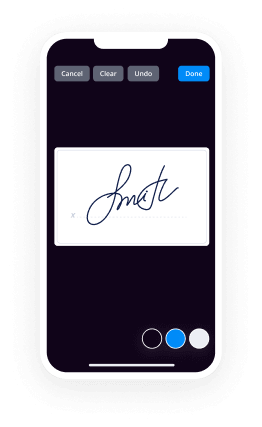
- Draw, type or upload your signature.
- Click Save and Close.
- Click Invite to Sign and enter a recipient’s email if you need others to sign the PDF.
Working on mobile is no different than on a desktop: create a reusable template, scan title field and manage the flow as you would normally. In a couple of clicks, get an enforceable contract that you can download to your device and send to others. Yet, if you want a software, download the airSlate SignNow mobile app. It’s secure, fast and has a great layout. Experience easy eSignature workflows from the business office, in a taxi or on an airplane.
How to sign a PDF file employing an iPad
iOS is a very popular operating system packed with native tools. It allows you to sign and edit PDFs using Preview without any additional software. However, as great as Apple’s solution is, it doesn't provide any automation. Enhance your iPhone’s capabilities by taking advantage of the airSlate SignNow app. Utilize your iPhone or iPad to scan title field and more. Introduce eSignature automation to your mobile workflow.
Signing on an iPhone has never been easier:
- Find the airSlate SignNow app in the AppStore and install it.
- Create a new account or log in with your Facebook or Google.
- Click Plus and upload the PDF file you want to sign.
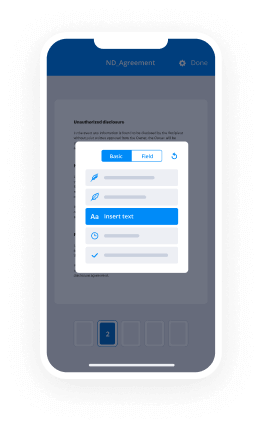
- Tap on the document where you want to insert your signature.
- Explore other features: add fillable fields or scan title field.
- Use the Save button to apply the changes.
- Share your documents via email or a singing link.
Make a professional PDFs right from your airSlate SignNow app. Get the most out of your time and work from anywhere; at home, in the office, on a bus or plane, and even at the beach. Manage an entire record workflow effortlessly: generate reusable templates, scan title field and work on documents with business partners. Turn your device into a highly effective company instrument for executing contracts.
How to eSign a PDF file taking advantage of an Android
For Android users to manage documents from their phone, they have to install additional software. The Play Market is vast and plump with options, so finding a good application isn’t too hard if you have time to browse through hundreds of apps. To save time and prevent frustration, we suggest airSlate SignNow for Android. Store and edit documents, create signing roles, and even scan title field.
The 9 simple steps to optimizing your mobile workflow:
- Open the app.
- Log in using your Facebook or Google accounts or register if you haven’t authorized already.
- Click on + to add a new document using your camera, internal or cloud storages.
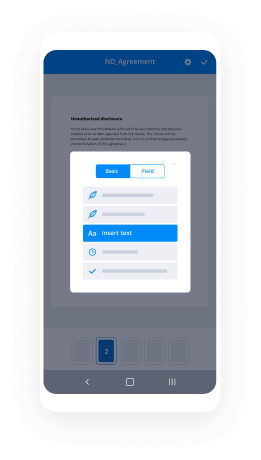
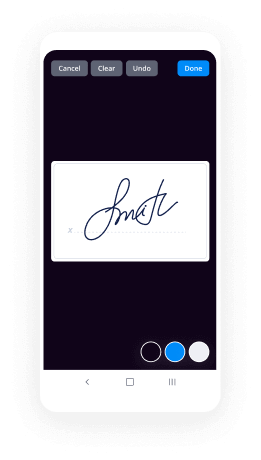
- Tap anywhere on your PDF and insert your eSignature.
- Click OK to confirm and sign.
- Try more editing features; add images, scan title field, create a reusable template, etc.
- Click Save to apply changes once you finish.
- Download the PDF or share it via email.
- Use the Invite to sign function if you want to set & send a signing order to recipients.
Turn the mundane and routine into easy and smooth with the airSlate SignNow app for Android. Sign and send documents for signature from any place you’re connected to the internet. Generate professional-looking PDFs and scan title field with just a few clicks. Put together a flawless eSignature workflow using only your smartphone and enhance your overall productiveness.
Get legally-binding signatures now!
What active users are saying — scan title field


Related searches to scan title field with airSlate airSlate SignNow

Scan title field
hey guys I'm Andy and today I'm going to show you how to scan with the blk 360 with the field 360 app on the iPad now [Music] I'm using my iPad for this but you can also use field 360 on your Android tablet and soon you'll be able to use it on your phone so I'm already connected to the BOK 360s Wi-Fi so I can go right into field 360 and right off the bat you're gonna see a thumbnail for each different project you have I've only got one but you can create a new one by pressing this little plus symbol at the bottom you can name your job I'm gonna keep it job number two and then you can take a picture of your site just so you know what job you're whichever you're using so this picture will become the thumbnail for this project I'm gonna save that when I go into the job you don't I don't have any scans in here yet but I can take my first one now I'm going to set my scanner up in the middle of the room here now at the bottom there's three little buttons the leftmost one is a little target and that's how I start a new scan so I have a bunch of different options here I can title the scan I'm going to name it house and here I have the different scan settings I have four different buttons the first one is the scan density setting so I can set this low medium or high and you can see a little time indicator that will show you how long the scan is going to take depending on these settings so the next button is imagery so I can turn imagery off completely if I don't need imagery the point cloud won't be colorized but if you don't need it you can really cut down your scan time considerably by doing a 40 second scan if you wanted for this project I definitely need imagery and the next button is the HDR I can toggle HDR on or off depending on my conditions and if HDR is toggled off I can also choose to do an automatic flash turn flash on or turn it off for this project because I have pretty bright light coming in through the windows I'm gonna turn HDR on and I'm going to do a medium density scan once that's all set I can click play and it'll start the scan alright once the scan finishes up all the data is going to transfer over to the iPad and right off the bat you can see kind of a bird's-eye view of the scan data if I tap on this scan I can go into 360 now I can see the panoramic image that the scanner took and then if I tap 3d now I can see an initial rendering of the 3d scan data so I can navigate around this isn't the the final full quality data but all the full quality data will be transferred over when you transfer this project - register 360 so this looks good I like my settings now I can go back and I can start my next scan so now what I need to do is move my scanner to the second spot here I'm going to tap on the target again to start a new scan you can see that it used my initial name house and added a 1 so it's going to iterate through the name if you want I like those settings so I'm going to keep them the same and I'm gonna press play to start another scan alright so the second scan just finished up and transferred over you can see I have two different setups here initially they're just gonna be dropped in the middle of my coordinate system at 0-0 but I can tap on one of them and I can drag them around I can tap on this circle and kind of orient them in the right way so I'm going to tap on this one and see if I can somewhat align the two now I want to register these two together so if I tap on this right hand button down here that's the link button so it's already had it already has one set up highlighted I'm gonna tap on the second one it's going to give me a dotted link line between them I'm going to tap start alignment and you'll see one scan is orange in one scan as blue so you can make sure that they're pretty well lined up and then I'm going to tap optimize and that's gonna snap the the scans together in the right orientation I can also check to make sure that these are oriented vertically using the the button at the top here everything looks good so I'm going to tap create link now it's going to lock those together into one bundle so you can see if I rotate this those two scans are are just locked together now if I tap on the bundle and I tap 3d now I can see the whole 3d point cloud bundle I can navigate around to make sure I've captured what I need to the next thing I want to talk about our tags tags are a way of adding non scan data to your scan project so you can see that the bottom button in the middle is is the tags button and I can add tags in a bunch of different formats so I can add an image a video a file my iPad can add an audio recording or just simple text so in this instance the client wants to put a specific hook on a specific point on the wall so what I can do is take a image of this hook and now I can attach this to any point in the scan so I can drop my crosshairs right where they want to put it tap attach and now that image is attached to the point cloud so when I move this project over to register 360 on the computer I'll be able to pull up that that picture sometimes you might not want to use your iPad for the entire project what you can do is set the push button scan settings so you can continue your project just by pressing the button to take each scan so if I already know what scan settings are working for this project what I can do is tap on this little eye at the top so I can say configure power button now I can go through I can I'm using medium scan density and HDR images now I can also choose the scan delay so this is how long the scanner will wait for you to get out of the way before starting to scan I can save these settings now I don't need to use my iPad I can go through move the scanner to my next position press the button and it'll take the next scan all right so that scan just finished up I only did the one scan but you can go through and take as many scans as you want and all of that data will always be saved to the internal memory on the BOK 360 then afterwards you can go ahead and sync all that data back to the iPad and register it before you transfer it over to your computer so once I'm all done scanning and I'm ready to sync all the data back to my iPad I can go ahead turn my iPad back on and connect to the scanner again and I'm gonna go down and just as I'm starting a new scan but this time I'm going to go over to the scanner data tab so now I can see all the data all the scans that are currently saved on the internal memory of the scanner in this case I just took the one scan so I'm going to select that one and now I'm going to up at the top right tap this download button so now that scan is going to come over to the iPad and then I can register it just like I have done so far with my project so when that scan finishes transferring over you can see that it's dropped in the middle of my coordinate system again I can tap it drag it over rotate it around to get it roughly in the right spot and then I'm going to tap the link button tap my second set up and here I'm just gonna tap optimize it snaps it right into place I can click create link now I have a full bundle of these three scans all locked together alright so I can see that all my data looks really good so that means I'm all done here on site the next step will be to transfer this project over to register 360 once I get back to the office alright so I'm back in the office and I've got my entire project on the iPad in field 360 but the next step is to move this data over to register 360 on my computer so what I need to do is make sure that both my computer and the iPad are connected to the same Wi-Fi network and then in field 360 I'm going to tap on this little I at the top right and check sync server this is what I need to do when I'm transferring data over to the computer then when I go in to register 360 on the computer we're going to create a new project and I'm going to click on this field 360 import button so you'll see you have to make sure that this IP address is exactly as it's written on your iPad you can even test can the connection to see that the iPad and the computer can can see each other and I'm going to click Add to project so then it's going to bring in just a quick preview of each of the projects that you have on field 360 on the iPad so I can see that this is this is a job that I did earlier and I can see over here on job 2 this is the job that I want to import today I don't need to import the the other job so what I can do is uncheck that one and now I can hit import and it's going to import all that data to the computer alright so once that finishes up you can see that it's imported the data I can click OK and now I can see that all my data is here so I can go into my bundle cloud you can zoom around now I can see the full quality data I can even see this tag that I put in I can click on this button here and brings up a picture that I took in the field so now I can go ahead and export this out to AutoCAD or Revit or whatever other software that I want to use this data in so field 360 is a great tool to use on site when you're controlling your blk 360 and it really speeds up your workflow because you can have your entire project registered together so that there's essentially no work to do once you get back to the office if you're already using register 360 the field 360 app is free you can download it from the Apple App Store or the Google Play Store if you're not using register 360 you can download a free trial I'll put a link in the description so you can go ahead and try it out thanks for watching guys and I'll see you next time
Show moreFrequently asked questions
How do I add an electronic signature to a PDF in Google Chrome?
How can I eSign a form or contract in Word?
What is considered an electronic signature?
Get more for scan title field with airSlate SignNow
- Print electronically sign Drama Scholarship Application
- Prove electronically signed Home Inspection Services Contract
- Endorse digisign Business Partnership Proposal Template
- Authorize electronically sign Barter Agreement Template
- Anneal mark Employee Recognition Award Nomination Template
- Justify esign Logo Design Quote
- Try countersign Mortgage Deed
- Add Consulting Agreement digi-sign
- Send Interior Design Contract Template esign
- Fax Letter of Recommendation for Student signature block
- Seal Client Progress Report signature
- Password Exclusive Distribution Agreement Template email signature
- Pass Horse Bill of Sale signatory
- Renew Nanny Contract electronically signed
- Test Restaurant Receipt byline
- Require Compromise Agreement Template esigning
- Print heir digital signature
- Champion company countersignature
- Call for vacationer electronically sign
- Void HIPAA Business Associate Agreement template digital sign
- Adopt Labor Agreement template initial
- Vouch Reservation Template for Gala template signature
- Establish Restaurant Gift Certificate template countersignature
- Clear Landscaping Services Contract Template template digital signature
- Complete Customer Product Setup Order template electronically signed
- Force Equipment Purchase Proposal Template template signed
- Permit Corporate Resolution Form template digi-sign
- Customize Durable Power of Attorney template esign