Signed 1040EZ Form Made Easy
Award-winning eSignature solution


Get the robust eSignature features you need from the solution you trust
Select the pro service made for pros
Configure eSignature API quickly
Collaborate better together
Signed 1040ez form, within a few minutes
Decrease the closing time
Maintain important information safe
See airSlate SignNow eSignatures in action


airSlate SignNow solutions for better efficiency
Our user reviews speak for themselves


Why choose airSlate SignNow
-
Free 7-day trial. Choose the plan you need and try it risk-free.
-
Honest pricing for full-featured plans. airSlate SignNow offers subscription plans with no overages or hidden fees at renewal.
-
Enterprise-grade security. airSlate SignNow helps you comply with global security standards.

Your step-by-step guide — signed 1040ez form
Using airSlate SignNow’s eSignature any business can enhance signature workflows and eSign in real-time, giving an improved experience to clients and staff members. Use signed 1040EZ Form in a few easy steps. Our mobile-first apps make work on the run achievable, even while offline! Sign contracts from anywhere in the world and make trades in less time.
Follow the walk-through guide for using signed 1040EZ Form:
- Sign in to your airSlate SignNow profile.
- Find your document within your folders or import a new one.
- Open the record adjust using the Tools list.
- Drop fillable boxes, type textual content and eSign it.
- List multiple signers via emails and set the signing sequence.
- Indicate which recipients will receive an executed copy.
- Use Advanced Options to limit access to the template add an expiration date.
- Click Save and Close when completed.
Moreover, there are more enhanced capabilities open for signed 1040EZ Form. Include users to your shared work enviroment, view teams, and monitor cooperation. Numerous consumers all over the US and Europe recognize that a solution that brings people together in a single cohesive workspace, is the thing that businesses need to keep workflows functioning smoothly. The airSlate SignNow REST API enables you to integrate eSignatures into your application, internet site, CRM or cloud. Check out airSlate SignNow and get quicker, easier and overall more efficient eSignature workflows!
How it works
airSlate SignNow features that users love


See exceptional results signed 1040EZ Form made easy

How to complete and sign a PDF online
Try out the fastest way to signed 1040EZ Form. Avoid paper-based workflows and manage documents right from airSlate SignNow. Complete and share your forms from the office or seamlessly work on-the-go. No installation or additional software required. All features are available online, just go to signnow.com and create your own eSignature flow.
A brief guide on how to signed 1040EZ Form in minutes
- Create an airSlate SignNow account (if you haven’t registered yet) or log in using your Google or Facebook.
- Click Upload and select one of your documents.
- Use the My Signature tool to create your unique signature.
- Turn the document into a dynamic PDF with fillable fields.
- Fill out your new form and click Done.
Once finished, send an invite to sign to multiple recipients. Get an enforceable contract in minutes using any device. Explore more features for making professional PDFs; add fillable fields signed 1040EZ Form and collaborate in teams. The eSignature solution supplies a protected process and functions in accordance with SOC 2 Type II Certification. Ensure that all your records are protected and that no person can take them.
How to eSign a PDF file in Google Chrome
Are you looking for a solution to signed 1040EZ Form directly from Chrome? The airSlate SignNow extension for Google is here to help. Find a document and right from your browser easily open it in the editor. Add fillable fields for text and signature. Sign the PDF and share it safely according to GDPR, SOC 2 Type II Certification and more.
Using this brief how-to guide below, expand your eSignature workflow into Google and signed 1040EZ Form:
- Go to the Chrome web store and find the airSlate SignNow extension.
- Click Add to Chrome.
- Log in to your account or register a new one.
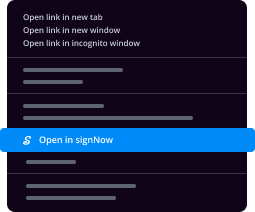
- Upload a document and click Open in airSlate SignNow.
- Modify the document.
- Sign the PDF using the My Signature tool.
- Click Done to save your edits.
- Invite other participants to sign by clicking Invite to Sign and selecting their emails/names.
Create a signature that’s built in to your workflow to signed 1040EZ Form and get PDFs eSigned in minutes. Say goodbye to the piles of papers sitting on your workplace and begin saving money and time for extra important activities. Choosing the airSlate SignNow Google extension is a smart convenient choice with plenty of benefits.
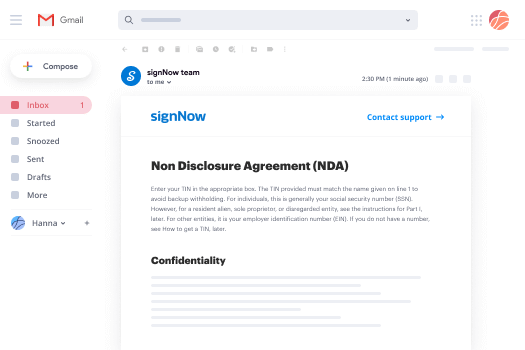

How to eSign an attachment in Gmail
If you’re like most, you’re used to downloading the attachments you get, printing them out and then signing them, right? Well, we have good news for you. Signing documents in your inbox just got a lot easier. The airSlate SignNow add-on for Gmail allows you to signed 1040EZ Form without leaving your mailbox. Do everything you need; add fillable fields and send signing requests in clicks.
How to signed 1040EZ Form in Gmail:
- Find airSlate SignNow for Gmail in the G Suite Marketplace and click Install.
- Log in to your airSlate SignNow account or create a new one.
- Open up your email with the PDF you need to sign.
- Click Upload to save the document to your airSlate SignNow account.
- Click Open document to open the editor.
- Sign the PDF using My Signature.
- Send a signing request to the other participants with the Send to Sign button.
- Enter their email and press OK.
As a result, the other participants will receive notifications telling them to sign the document. No need to download the PDF file over and over again, just signed 1040EZ Form in clicks. This add-one is suitable for those who like focusing on more important goals rather than burning up time for absolutely nothing. Boost your daily monotonous tasks with the award-winning eSignature solution.
How to sign a PDF on the go with no application
For many products, getting deals done on the go means installing an app on your phone. We’re happy to say at airSlate SignNow we’ve made singing on the go faster and easier by eliminating the need for a mobile app. To eSign, open your browser (any mobile browser) and get direct access to airSlate SignNow and all its powerful eSignature tools. Edit docs, signed 1040EZ Form and more. No installation or additional software required. Close your deal from anywhere.
Take a look at our step-by-step instructions that teach you how to signed 1040EZ Form.
- Open your browser and go to signnow.com.
- Log in or register a new account.
- Upload or open the document you want to edit.
- Add fillable fields for text, signature and date.
- Draw, type or upload your signature.
- Click Save and Close.
- Click Invite to Sign and enter a recipient’s email if you need others to sign the PDF.
Working on mobile is no different than on a desktop: create a reusable template, signed 1040EZ Form and manage the flow as you would normally. In a couple of clicks, get an enforceable contract that you can download to your device and send to others. Yet, if you really want a software, download the airSlate SignNow mobile app. It’s comfortable, fast and has an intuitive layout. Experience seamless eSignature workflows from the business office, in a taxi or on a plane.
How to sign a PDF employing an iPhone
iOS is a very popular operating system packed with native tools. It allows you to sign and edit PDFs using Preview without any additional software. However, as great as Apple’s solution is, it doesn't provide any automation. Enhance your iPhone’s capabilities by taking advantage of the airSlate SignNow app. Utilize your iPhone or iPad to signed 1040EZ Form and more. Introduce eSignature automation to your mobile workflow.
Signing on an iPhone has never been easier:
- Find the airSlate SignNow app in the AppStore and install it.
- Create a new account or log in with your Facebook or Google.
- Click Plus and upload the PDF file you want to sign.
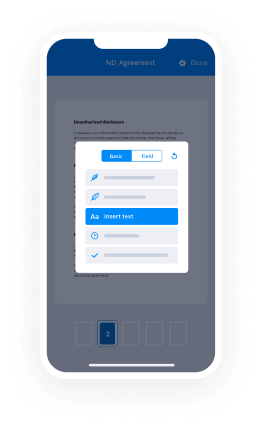
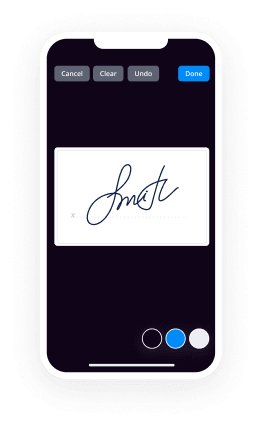
- Tap on the document where you want to insert your signature.
- Explore other features: add fillable fields or signed 1040EZ Form.
- Use the Save button to apply the changes.
- Share your documents via email or a singing link.
Make a professional PDFs right from your airSlate SignNow app. Get the most out of your time and work from anywhere; at home, in the office, on a bus or plane, and even at the beach. Manage an entire record workflow easily: create reusable templates, signed 1040EZ Form and work on documents with partners. Turn your device into a highly effective business tool for executing offers.
How to eSign a PDF file Android
For Android users to manage documents from their phone, they have to install additional software. The Play Market is vast and plump with options, so finding a good application isn’t too hard if you have time to browse through hundreds of apps. To save time and prevent frustration, we suggest airSlate SignNow for Android. Store and edit documents, create signing roles, and even signed 1040EZ Form.
The 9 simple steps to optimizing your mobile workflow:
- Open the app.
- Log in using your Facebook or Google accounts or register if you haven’t authorized already.
- Click on + to add a new document using your camera, internal or cloud storages.
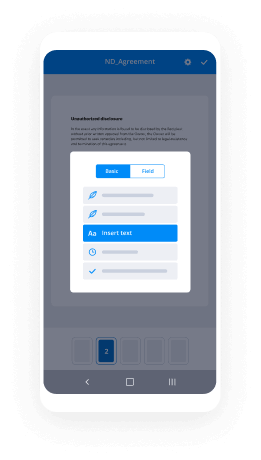
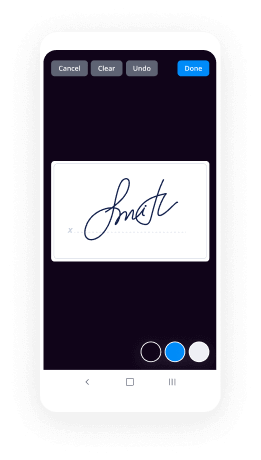
- Tap anywhere on your PDF and insert your eSignature.
- Click OK to confirm and sign.
- Try more editing features; add images, signed 1040EZ Form, create a reusable template, etc.
- Click Save to apply changes once you finish.
- Download the PDF or share it via email.
- Use the Invite to sign function if you want to set & send a signing order to recipients.
Turn the mundane and routine into easy and smooth with the airSlate SignNow app for Android. Sign and send documents for signature from any place you’re connected to the internet. Build professional PDFs and signed 1040EZ Form with a few clicks. Assembled a flawless eSignature workflow with just your smartphone and increase your general efficiency.
Get legally-binding signatures now!
FAQs
-
Is there a 1040ez for 2020?
For your 2019 taxes, which you file in 2020 (new deadline: July 15, 2020), you will use this new 1040. That means you can no longer use the 1040EZ unless you are filing a return for tax year 2017 or earlier. -
Is there still a 1040 EZ form?
More In Forms and Instructions Income tax return filed by certain citizens or residents of the United States. For Tax Year 2018 and later, you will no longer use Form 1040-EZ, but instead use the Form 1040 or Form 1040-SR. -
Is there a 1040ez for 2018?
Forms 1040-A and 1040-EZ are no longer available to file 2018 taxes. ... Some forms and publications released in 2017 or early 2018 may still have references to Form 1040A or Form 1040EZ. Taxpayers should disregard these references and refer to the Form 1040 instructions for more information. -
Is there still a 1040ez?
This new law consolidated the forms 1040, 1040A and 1040EZ into a single redesigned Form 1040 that all filers can use. For your 2019 taxes, which you file in early 2020, you will use this new 1040. That means you can no longer use the 1040EZ unless you are filing a return for tax year 2017 or earlier. -
Can I file 1040ez for free?
This is why the IRS allows some taxpayers to use the 1040EZ form instead of the longer 1040. ... As part of the Free File program, TurboTax offers taxpayers who meet certain income requirements the opportunity to prepare and e-file their returns online for free. -
What is the difference between a 1040 and 1040ez?
The difference between these federal income tax forms is the relative simplicity of short forms 1040EZ and 1040A \u2014 compared to the longer, more complex Form 1040. Using the shorter tax forms can simplify your tax preparation. Each of these tax forms has the same set of purposes, including: Reporting your income. -
When can I file my taxes 2020 Canada?
The tax-filing deadline for most Canadians (for the 2019 tax year) is on April 30 June 1, 2020 (extended). For those who are self-employed, or who have a spouse/partner who is self-employed, the deadline extends until June 15, 2020. Filing your taxes on time is not just about the potential of tax refunds. -
Is a 1040 the same as w2?
The W-2 is the form your employer sends to you each January reporting your wages & withholding. The form 1040 is your tax return you file. -
Is a 1040 the same as a w2?
The W-2 is the form your employer sends to you each January reporting your wages & withholding. The form 1040 is your tax return you file. -
How do I fill out 1040ez 2018?
Suggested clip How to fill out the new IRS Form 1040 for 2018 with the new tax law ...YouTubeStart of suggested clipEnd of suggested clip How to fill out the new IRS Form 1040 for 2018 with the new tax law ... -
Can I use 1040 EZ?
You can use Form 1040-EZ if all of the following apply: You are filing as single or married filing jointly. Your taxable income is less than $100,000. You don't claim any dependents. -
How do you fill out tax forms?
Step 1: Download the Form. Step 2: Fill-in your personal information. ... Step 3: Determine How Many Exemptions You're Eligible For. ... Step 4: Lines 7-22: (Income) Step 5: Lines 23-37 (Deductions to Arrive at Your \u201cAdjusted Gross Income\u201d) ... Step 6: Lines 38-55 (Tax and Credits) ... Step 7: Lines 56-60 (Other Taxes) -
Can I print out a 1040 tax form?
You should be able to sign in and access a copy of your tax return (which includes the Form 1040\u2014the main tax form\u2014and any supporting forms). If you filed through a tax preparer or CPA, they can provide a printed or electronic copy of your tax return. -
How do you attach a W 2 to a 1040?
Attach your W-2 to the front of the return at the line on which you report your wages and salary -- Line 7 on Form 1040 or Form 1040A and Line 1 on Form 1040EZ. The IRS's instructions don't specify a method, but stapling the W-2 to the return reduces the risk that it will be lost or separated from the return.
What active users are saying — signed 1040ez form


Related searches to signed 1040EZ Form made easy

1040 ez form
hello and welcome to your next video today I'm going to show you how to fill out the 1040 ez tax form now don't be alarmed they call it the EZ tax form for a reason it's the simplest version and I'm going to teach you how to fill it out because that way you don't have to pay someone else or depend on your parents for the rest of your life okay let's get started the first thing you need to do is figure out if you need to file a tax form and if you're a dependent which most of you still are that means that your parents claim you on their tax form you need to file your own taxes if one of these four things is true one your unearned income which would be things like interest income is over nine hundred and fifty dollars to your earned income so this is income from a job is over five thousand nine hundred and fifty dollars three your earnings from self-employment so this is a job that you've created for yourself are over four hundred dollars or for your combined earned and unearned income is more than nine hundred and fifty dollars or your earned income plus an additional three hundred dollars so if one of those is not true then you don't have to file a tax form you may still want to file a tax form because as soon as you can show that you have earned income you are eligible to start some sort of IRA whether it be a traditional or a Roth and we know that the sooner we can start putting money into retirement the better off we'll be there are three important tax states that I want you to remember the first one is January 31st because by this date you should have all of your tax documents sent to you it doesn't mean that you necessarily will there are some businesses away until the very last second but in theory you should have everything by that March first this is a review date that I want you to remember because we've already talked about how your FAFSA form should be turned in by March 1st the last one is April 15th this is the date that your taxes are due the stuff you need to fill out the 1040 EZ tax form is pretty simple you need uw2 some basic personal information about yourself and any interest income that you've earned over the course of the year now of course you're also going to need the actual tax form in the tax table that goes along with it but once you have that stuff you'll have everything that you need here is our practice problem we're going to use a w-2 and the following information to fill out a 1040 EZ tax form together so here's our information we're going to fill it out for jose d Cuevas he's single and he wants to contribute to the presidential campaign fund he has a hundred and fifty bucks in taxable interest income from a savings account and can't be claimed by anyone else Jose is an accountant and his phone number is one two three four five six seven eight nine zero so let's try to fill out his tax form for him here is Jose here is Jose's 1040ez and I've already filled out the information at the top this is the personal information that the tax form is going to ask you for it's going to ask you for your name it's going to ask you for your address and your social security number and whether you want to contribute to the presidential election campaign fund so all of this stuff is at the top and I've already filled it in because we are more interested in the actual dollar amounts and how the rest of the form works okay number one wages salaries and tips this should be shown in box 1 of your w-2 so we're going to need to flip over to our w-2 here's are w2 you can see his name and address and social security number so you pull all that information from there but hopefully you'd have it memorized okay so box 1 notice that there is a heavy black line around box 1 and box 2 these are the two boxes that we are going to use to fill out this form how convenient all right so his wages are 36,000 $24 so we are going to flip back over to and we're going to type in 36,000 $24 taxable interest is number or two if the total is over $1,500 you can't use the 1040ez but Jose only has 150 dollars and then that takes us to number three unemployment compensation and Alaska Permanent Fund dividends he doesn't live in Alaska and it didn't say anything about unemployment so that's going to be zero and number four we are going to add our lines one two and three this is the adjusted gross income so when we add we don't have anything for three so really we're just adding one and two and we get thirty six thousand one hundred and seventy four dollars that takes us to line five if someone can claim you as a dependent you're going to check the applicable boxes below and enter the amount from the worksheet on the back but no one can claim Jose so we're going to skip down underneath the boxes and it says if no one can claim you enter nine seven five zero if you're single so that's what we're going to do over here nine seven five zero and then that takes us to line 6 which says subtract line five from line four if line five is larger than line four enter zero this is your taxable income so we have to look and see which one is bigger line four is larger than line five so that means that we are going to subtract and we are going to get twenty six thousand four hundred and twenty four dollars number seven federal income tax withheld from form w2 and 1099 he doesn't have a 1099 but he has does have the w-2 so we're going to flip back to the w-2 remember I told you there was a heavy black line around box one and two for a reason so this is the number that we need three thousand six hundred two dollars and forty cents so we're going to flip back to our four and we are going to type in three thousand six hundred two dollars and then put our 40 cents over here Earned Income Credit this is going to be zero for Jose and then it doesn't have any combat pay so earned income credit was Part A Part B was non-taxable combat pay and then nine we're going to add line seven and eight a these are our total payments and credits so for us it's going to be the same number that we typed in above three thousand six hundred two dollars and then putting our forty cents over here tax use the amount on line six above to find the tax in the tax table in the instructions then enter the tax from the table on this line okay so we need to now flip over to our text table which can be found in the instructions either in paper form if you still find paper forms or it's right on the internet you can pull it up so you can see that this is a 2012 tax table and the amount on line six was 26 thousand four hundred and twenty four dollars so that's the amount we're going to find in just a second but first I want to show you how this works here we have at least so if your tax is or if your adjusted gross income is at least this number but less than this number then it shows you how much tax you pay whether you be single married filing jointly married filing separately or head of household so we are looking for the range we're finding the spot where our number falls into the range and it gives you a sample table up here in the corner in case you can't remember how that works so we're going to flip down through quite a lot of this because we need to get into the twenty six thousand range so here are the twenty six thousand s and when we find our twenty six thousand four hundred and twenty-four dollars it's going to fit between twenty six thousand four one hundred and twenty six thousand four hundred and fifty dollars and that means that our tax is three thousand five hundred and twenty nine dollars and that's what we're going to enter into our form so we're going to flip back to the form and the number we found in the tax table was three thousand five hundred twenty nine dollars on to the refund or the amount you owe you will only fill out one of eleven or twelve because you can't be getting a refund and also owe the government money so we have to look at both of them if line nine is larger than line ten that means we're getting a refund if line ten is larger than line nine that means we're paying it so when we look at nine and ten we should realize that we are getting a refund and we subtract our numbers and we find that we are getting a refund of seventy three dollars and forty cents so most of the tax form is now filled out you can enter a routing number and account number for your bank and the government is going to deposit your refund directly into your bank account this is the fastest and easiest way to get your refund third party designee means that you're going to allow another person to discuss the return with the IRS so if you want someone to be able to do that then you can fill out this information most of the time I would say that you are not going to do that you want to be the one that discusses it with the IRS you're going to provide your signature the date occupation so he was an accountant and daytime phone number so it was one two three four five six seven eight nine zero that's really all there is to it if you have paid someone to fill out this form then they will put their information down here but you should not pay anyone to fill out the 1040 easy because you can do it on your own okay obviously the thing that you gotten from this video is the ability to fill out the 1040 EZ tax form so hopefully that is what you got out of the video Godspeed
Show moreFrequently asked questions
How can I eSign a contract?
How can you have your customers eSign PDFs online?
Where should I sign in a PDF?
Get more for signed 1040EZ Form made easy
- Signature block on iphone
- Prove electronically signing Shopify Proposal Template
- Endorse digi-sign Financial Consulting Agreement Template
- Authorize signature service Indemnity Agreement
- Anneal signatory Lawn Care Invoice
- Justify eSignature Construction Contract Agreement
- Try initial Social Media Optimization Proposal Template
- Add Shareholder Rights Agreement digital signature
- Send Book Proposal Template electronically signed
- Fax Simple Medical History byline
- Seal Behavioral Assessment esign
- Password Equipment Lease signature block
- Pass Event Photography Contract Template signature service
- Renew Advance Directive email signature
- Test Basketball League Registration Event signatory
- Require Property Management Agreement Template initials
- Comment tenant electronic signature
- Boost caller digisign
- Compel man esigning
- Void Business Requirements Document Template (BRD) template signed
- Adopt warrant template digi-sign
- Vouch Construction Invoice template esign
- Establish Parking Ticket template initial
- Clear Facility Rental Agreement Template template signature
- Complete Coronavirus Press Release template email signature
- Force Architectural Proposal Template template countersignature
- Permit Website Design Request template digital signature
- Customize Freelance Video Editing Contract Template template electronically signed