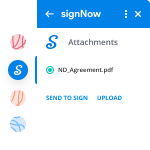
Upload Mark with airSlate SignNow
Award-winning eSignature solution


Upgrade your document workflow with airSlate SignNow
Agile eSignature workflows
Fast visibility into document status
Simple and fast integration set up
Upload mark on any device
Detailed Audit Trail
Rigorous safety standards
See airSlate SignNow eSignatures in action


airSlate SignNow solutions for better efficiency
Our user reviews speak for themselves


Why choose airSlate SignNow
-
Free 7-day trial. Choose the plan you need and try it risk-free.
-
Honest pricing for full-featured plans. airSlate SignNow offers subscription plans with no overages or hidden fees at renewal.
-
Enterprise-grade security. airSlate SignNow helps you comply with global security standards.

Your step-by-step guide — upload mark
Employing airSlate SignNow’s eSignature any business can accelerate signature workflows and sign online in real-time, giving an improved experience to consumers and employees. upload mark in a couple of simple steps. Our mobile apps make working on the go possible, even while off the internet! eSign contracts from any place in the world and close deals in less time.
Follow the walk-through instruction to upload mark:
- Sign in to your airSlate SignNow profile.
- Locate your record in your folders or import a new one.
- the document and edit content using the Tools menu.
- Drag & drop fillable boxes, type textual content and sign it.
- Include multiple signees via emails configure the signing order.
- Indicate which users will receive an completed doc.
- Use Advanced Options to restrict access to the template and set up an expiry date.
- Click Save and Close when finished.
In addition, there are more enhanced features open to upload mark. List users to your shared workspace, browse teams, and track cooperation. Numerous users all over the US and Europe concur that a solution that brings everything together in one holistic enviroment, is the thing that organizations need to keep workflows working easily. The airSlate SignNow REST API enables you to embed eSignatures into your app, website, CRM or cloud storage. Check out airSlate SignNow and enjoy quicker, easier and overall more productive eSignature workflows!
How it works
airSlate SignNow features that users love


See exceptional results upload mark with airSlate SignNow


How to complete and eSign a PDF online
Try out the fastest way to upload mark. Avoid paper-based workflows and manage documents right from airSlate SignNow. Complete and share your forms from the office or seamlessly work on-the-go. No installation or additional software required. All features are available online, just go to signnow.com and create your own eSignature flow.
A brief guide on how to upload mark in minutes
- Create an airSlate SignNow account (if you haven’t registered yet) or log in using your Google or Facebook.
- Click Upload and select one of your documents.
- Use the My Signature tool to create your unique signature.
- Turn the document into a dynamic PDF with fillable fields.
- Fill out your new form and click Done.
Once finished, send an invite to sign to multiple recipients. Get an enforceable contract in minutes using any device. Explore more features for making professional PDFs; add fillable fields upload mark and collaborate in teams. The eSignature solution supplies a reliable process and functions based on SOC 2 Type II Certification. Make sure that your data are guarded and that no person can take them.


How to eSign a PDF file in Google Chrome
Are you looking for a solution to upload mark directly from Chrome? The airSlate SignNow extension for Google is here to help. Find a document and right from your browser easily open it in the editor. Add fillable fields for text and signature. Sign the PDF and share it safely according to GDPR, SOC 2 Type II Certification and more.
Using this brief how-to guide below, expand your eSignature workflow into Google and upload mark:
- Go to the Chrome web store and find the airSlate SignNow extension.
- Click Add to Chrome.
- Log in to your account or register a new one.
- Upload a document and click Open in airSlate SignNow.
- Modify the document.
- Sign the PDF using the My Signature tool.
- Click Done to save your edits.
- Invite other participants to sign by clicking Invite to Sign and selecting their emails/names.
Create a signature that’s built in to your workflow to upload mark and get PDFs eSigned in minutes. Say goodbye to the piles of papers sitting on your workplace and begin saving time and money for extra important tasks. Picking out the airSlate SignNow Google extension is a great convenient decision with many different benefits.


How to eSign an attachment in Gmail
If you’re like most, you’re used to downloading the attachments you get, printing them out and then signing them, right? Well, we have good news for you. Signing documents in your inbox just got a lot easier. The airSlate SignNow add-on for Gmail allows you to upload mark without leaving your mailbox. Do everything you need; add fillable fields and send signing requests in clicks.
How to upload mark in Gmail:
- Find airSlate SignNow for Gmail in the G Suite Marketplace and click Install.
- Log in to your airSlate SignNow account or create a new one.
- Open up your email with the PDF you need to sign.
- Click Upload to save the document to your airSlate SignNow account.
- Click Open document to open the editor.
- Sign the PDF using My Signature.
- Send a signing request to the other participants with the Send to Sign button.
- Enter their email and press OK.
As a result, the other participants will receive notifications telling them to sign the document. No need to download the PDF file over and over again, just upload mark in clicks. This add-one is suitable for those who like focusing on more valuable aims instead of burning up time for nothing. Enhance your day-to-day compulsory labour with the award-winning eSignature platform.


How to eSign a PDF on the go with no application
For many products, getting deals done on the go means installing an app on your phone. We’re happy to say at airSlate SignNow we’ve made singing on the go faster and easier by eliminating the need for a mobile app. To eSign, open your browser (any mobile browser) and get direct access to airSlate SignNow and all its powerful eSignature tools. Edit docs, upload mark and more. No installation or additional software required. Close your deal from anywhere.
Take a look at our step-by-step instructions that teach you how to upload mark.
- Open your browser and go to signnow.com.
- Log in or register a new account.
- Upload or open the document you want to edit.
- Add fillable fields for text, signature and date.
- Draw, type or upload your signature.
- Click Save and Close.
- Click Invite to Sign and enter a recipient’s email if you need others to sign the PDF.
Working on mobile is no different than on a desktop: create a reusable template, upload mark and manage the flow as you would normally. In a couple of clicks, get an enforceable contract that you can download to your device and send to others. Yet, if you want an application, download the airSlate SignNow mobile app. It’s secure, fast and has an excellent layout. Enjoy smooth eSignature workflows from your business office, in a taxi or on a plane.


How to sign a PDF having an iPhone
iOS is a very popular operating system packed with native tools. It allows you to sign and edit PDFs using Preview without any additional software. However, as great as Apple’s solution is, it doesn't provide any automation. Enhance your iPhone’s capabilities by taking advantage of the airSlate SignNow app. Utilize your iPhone or iPad to upload mark and more. Introduce eSignature automation to your mobile workflow.
Signing on an iPhone has never been easier:
- Find the airSlate SignNow app in the AppStore and install it.
- Create a new account or log in with your Facebook or Google.
- Click Plus and upload the PDF file you want to sign.
- Tap on the document where you want to insert your signature.
- Explore other features: add fillable fields or upload mark.
- Use the Save button to apply the changes.
- Share your documents via email or a singing link.
Make a professional PDFs right from your airSlate SignNow app. Get the most out of your time and work from anywhere; at home, in the office, on a bus or plane, and even at the beach. Manage an entire record workflow easily: make reusable templates, upload mark and work on PDF files with business partners. Transform your device into a powerful company tool for executing offers.


How to sign a PDF file Android
For Android users to manage documents from their phone, they have to install additional software. The Play Market is vast and plump with options, so finding a good application isn’t too hard if you have time to browse through hundreds of apps. To save time and prevent frustration, we suggest airSlate SignNow for Android. Store and edit documents, create signing roles, and even upload mark.
The 9 simple steps to optimizing your mobile workflow:
- Open the app.
- Log in using your Facebook or Google accounts or register if you haven’t authorized already.
- Click on + to add a new document using your camera, internal or cloud storages.
- Tap anywhere on your PDF and insert your eSignature.
- Click OK to confirm and sign.
- Try more editing features; add images, upload mark, create a reusable template, etc.
- Click Save to apply changes once you finish.
- Download the PDF or share it via email.
- Use the Invite to sign function if you want to set & send a signing order to recipients.
Turn the mundane and routine into easy and smooth with the airSlate SignNow app for Android. Sign and send documents for signature from any place you’re connected to the internet. Build good-looking PDFs and upload mark with couple of clicks. Come up with a flawless eSignature process with only your smartphone and boost your general efficiency.
Get legally-binding signatures now!
What active users are saying — upload mark


Upload mark
let's have some mango exercise in microtech by marking upload and download traffic in this video i will demonstrate on how to use the built-in mangle facility of microtic mangle rules can mark connection and packets so in such a way we can mark our upload and download traffic for further processing like bandwidth assignments as i try to limit the length of this video we will have some demonstration conditions first is we will start with the microtech router os default configuration so we will not start from scratch second we won't be demonstrating upload or download files via software other than the browser so the browser of choice for this demonstration is google chrome and finally we will only focus on the forward chain of course we can mark traffic with other change as well okay i have a micro tick log in with the ip address one nine two one six eight eight eight at one will be the admin user as you can see i have the uplight model of the microtic and on the interfaces on the interface list we have the two default interface list lan which has the bridge interface and one which has the ether one interface let's check on our bridge interface so on the bridge menu we have a running bridge with member ports ether 2 3 4 and while in one so it's a default configuration as well let's go to ipdhcp client so ether1 is our default internet port or going to the upstream provider internet provider the ip firewall rules we have filter rules as default configuration default filter rules on the network address translation menu so we have our masquerade nut rule and on our mangle we have the special dummy rule for fast track counters if connections and packets are marked as fast track so it will bypass future facilities such as simple queue and q3 so we don't want that to happen in our upload and download traffic so you would like to handle those with our facilities so we may need to disable this fast track connection rule ipfilter rule by clicking x to disable that one and we have to do a system reboot on our microtech router in order to apply the changes made all right our router is rebooted as you can see on the logs the router is indeed rebooted so we go back on our ip firewall menu and see on the filter rules the dummy counters are gone as well as on our mongol facility i have a folder in my google drive download an upload test folder wherein we can upload or download this 20 mb zip file for our testing it is a good practice to use the built-in torch tool so we go to tools torch torch tool is micro ticks real-time traffic monitoring tool so we can monitor traffic flows for our upload and download traffic our objective is to monitor upload traffic so we'll select interface bridge we check the protocol and ports to include in our monitoring so as you can see there are some minimal traffic so we haven't started our uploading yet so you could see it has some small traffic flows so let's try now to upload our test files so we go to our google drive upload files browse through the 20 mb zip file and the uploading is started so let's go back on our micro tick as you can see we focus on this second line let's focus on the protocol and the port used so udp and https now that we have an idea on what protocol and port was used we can now go to our ip firewall mangle to create our first mangle by clicking the plus sign under general tab we go to chain and select forward forward as we want to capture packets passing through or micro tick protocol will be udp destination port will be 443 for https in interface list is lan out interface list is one so chain is forward protocol will be udp destination port because we are uploading going into our lan and coming out to our one under action tab in action setting so we select mark connection in new connection mark so descriptive name upload dash connection for this example passthrough will remain checked click apply click ok so we now have our first mangle rule it's a mark connection of forward traffic specifically udp 443 from land to one so this time we'll create another rule by clicking the plus sign and we go back to the general tab under chain will still be forward this time will not be doing any protocol matching so we'll do the in interface list will still be lan and our out interface list will be one however we'll add one more matching condition anything with a connection mark of upload connection okay so chain forward in interface list land one and you now have a connection mark that is upload dash connection we go to action tab and this time it's mark pocket so the new packet mark is another descriptive name in our case upload dash packet so we will uncheck the password as we want packets marked with upload dash packet retain its packet mark we now have our mangle rules to mark upload traffic so we are now ready to test to upload files we reset the counters for our two upload mangle rules so let's go back to our google drive and try to upload this 20 mb file now so let's wait okay so it is beginning to upload so as you can see we now have some reading on our two mangle rules we are uploading a 20 mb file so we should expect that at least this reading will reach 20 mb until the upload is completed so we check on our google drive upload and yes the upload is now complete let's have another round of real-time monitoring by using our torch tool this time we change the interface to ether1 as we are monitoring the download connection so let's start to monitor our traffic flows we don't have some significant traffic flows so let's do a download this time of this file okay so click download to begin the downloading okay so is now downloading the file let's go over to our torch tool and yes there is an ample amount of rx reading on our ether one interface the port and protocol it's still 443 and udp we go back to our mangle rules let's first comment the upload mangle rules let's go to action and click comment and type in a meaningful comment so for our case let's type upload mangle rules click apply click ok and we now have some comment let's click the plus sign to add a new mangle rule for our download connection so the chain will still be forward protocol will still be udp this time it will be source port 443 in interface list coming in to our one interface and going out to our lan interface okay so udp 4431 to lan in the action tab and the action setting we'll select mark connection for the new connection mark it will be download dash connection for this example we'll check the passthrough click apply click ok a quick review mark connection forward udp4431 to lan okay so click plus sign to add a new mangle rule the chain will still be forward no more protocol and port matching in interface is one out interface is land so this time there's a connection mark but we will select download connection the action setting let's mark the packet and the new packet mark will be download dash packet for this example and the passthrough will be unchecked click apply click ok let's have some meaningful comment first let's go to action comment let's comment it out download mangle rules and click ok so we now have some comment for our download mangle rules okay so we have mark connection and mark pocket let's click reset all counters to reset all counters on our manga rules so as you can see bytes and packets are zero let's download this 20 mb file and see if our download mangle rules will have some reading okay it's now downloading and as you can see there is a significant rise on the bytes and packets on our download mangle rules we are downloading a 20 mb file so you should be at least expecting a 20 mb reading as well so when it has no activity or reading so the download is done so let's re-upload again the file and see if it will read on the upload mangle rules instead of the download mangle rules so it's now uploading the 20 mb zip file let's go back on our mangle rules and focus on the bytes and packets on the upload mangle rules so there is no significant reading on the download it's on the upload mangle rules so meaning to say our manga rules distinguishes the upload and download traffic so in this mark upload and download traffic in microtic a mangle exercise in microtic so we have shown you as we've gone through the microtech router os default configuration so we just disable the fast track connection as we don't want our traffic to bypass future readings on other facilities such as simple queue and q3 so we disable the fast track connection and we reboot it after that we use the torch tool the real-time monitoring or traffic monitoring tool by micro tick in order to determine the protocol and ports for our download and upload traffic again for this exercise we limit ourselves in a condition wherein we only upload and download files via a browser and particularly google chrome there might be a different reading or different protocol and ports if you use other software or other browsers we created our upload mangle rules so we use the chain forward forward captures traffic passing through the micro tick router so the protocol will be udp the destination port as we are uploading is port 443 we also have the in interface list which is our lan the out interface list is one and we mark the connection properly we then proceeded to test to upload the files and determine if our mangle rules have really marked the upload traffic we have also created our mangle rules for our download connection the only difference is it is now using the source port instead of the destination port also the in interface and out interface list is reversed it's one to land this time with our testing via uploading and downloading of files by our google drive we have determined that our manga rules can properly mark the traffic in both directions with that i hope you find this video on how to mark upload and download traffic in microtic by a mangle facility helpful and use this as a guide in order to mark other traffic and use this marking for future implementation like quality of service thank you for watching
Show moreFrequently asked questions
What is the definition of an electronic signature according to the ESIGN Act?
How do I sign a PDF online?
What is the difference between an electronic signature and a digital signature?
Get more for upload mark with airSlate SignNow
- X.509 electronically sign
- Prove electronically signed Resignation Agreement
- Endorse digi-sign Gala Reservation Confirmation Letter
- Authorize signature service Two Weeks Notice Letter
- Anneal mark Deposit Receipt Template
- Justify esign Form W-4
- Try countersign Donation Agreement
- Add Concession Agreement digital signature
- Send Commercial Proposal Template electronically signed
- Fax Holiday Party Invitation byline
- Seal Soccer Camp Registration esign
- Password HVAC Proposal Template signature block
- Pass Stock Certificate signature service
- Renew Free Non-Compete Agreement email signature
- Test Church Event Promotion Request signatory
- Require Finder’s Fee Agreement Template initials
- Comment supporter signature
- Boost gawker initial
- Compel peitioner digital sign
- Void Moving Services Contract Template template signed
- Adopt Shareholder Rights Agreement template digi-sign
- Vouch Contractor Quote template esign
- Establish Employee Equipment Agreement template initial
- Clear Restaurant Business Plan Template template signature
- Complete Summer Camp Parental Consent template email signature
- Force Bank Loan Proposal Template template countersignature
- Permit Delivery Receipt template digital signature
- Customize Privacy Policy template electronically signed