Urge Calculated Field with airSlate SignNow
Award-winning eSignature solution


Get the powerful eSignature features you need from the company you trust
Select the pro service created for professionals
Configure eSignature API quickly
Work better together
Urge calculated field, within a few minutes
Cut the closing time
Maintain sensitive information safe
See airSlate SignNow eSignatures in action


airSlate SignNow solutions for better efficiency
Our user reviews speak for themselves


Why choose airSlate SignNow
-
Free 7-day trial. Choose the plan you need and try it risk-free.
-
Honest pricing for full-featured plans. airSlate SignNow offers subscription plans with no overages or hidden fees at renewal.
-
Enterprise-grade security. airSlate SignNow helps you comply with global security standards.

Your step-by-step guide — urge calculated field
Using airSlate SignNow’s electronic signature any company can speed up signature workflows and eSign in real-time, supplying an improved experience to clients and employees. urge calculated field in a couple of easy steps. Our handheld mobile apps make working on the move achievable, even while off the internet! Sign documents from anywhere in the world and complete tasks in less time.
Keep to the step-by-step instruction to urge calculated field:
- Sign in to your airSlate SignNow account.
- Find your document within your folders or upload a new one.
- Open up the document and edit content using the Tools list.
- Drop fillable areas, add text and sign it.
- Add numerous signers using their emails configure the signing order.
- Specify which users can get an signed version.
- Use Advanced Options to reduce access to the template and set up an expiration date.
- Click on Save and Close when completed.
In addition, there are more extended tools available to urge calculated field. Add users to your collaborative workspace, browse teams, and track teamwork. Millions of consumers across the US and Europe recognize that a solution that brings everything together in one cohesive enviroment, is the thing that enterprises need to keep workflows performing smoothly. The airSlate SignNow REST API enables you to integrate eSignatures into your application, website, CRM or cloud storage. Check out airSlate SignNow and enjoy quicker, smoother and overall more productive eSignature workflows!
How it works
airSlate SignNow features that users love


See exceptional results urge calculated field with airSlate SignNow
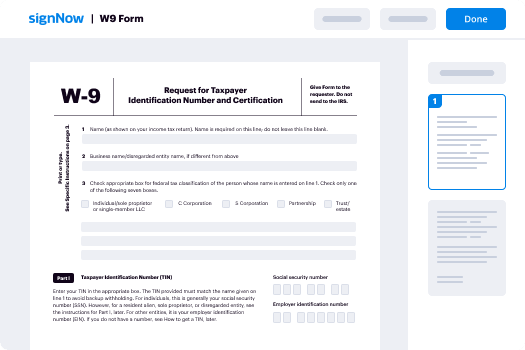
How to fill out and sign a PDF online
Try out the fastest way to urge calculated field. Avoid paper-based workflows and manage documents right from airSlate SignNow. Complete and share your forms from the office or seamlessly work on-the-go. No installation or additional software required. All features are available online, just go to signnow.com and create your own eSignature flow.
A brief guide on how to urge calculated field in minutes
- Create an airSlate SignNow account (if you haven’t registered yet) or log in using your Google or Facebook.
- Click Upload and select one of your documents.
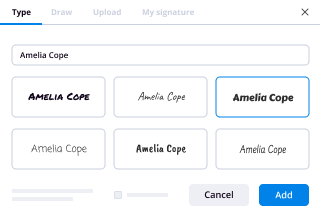
- Use the My Signature tool to create your unique signature.
- Turn the document into a dynamic PDF with fillable fields.
- Fill out your new form and click Done.
Once finished, send an invite to sign to multiple recipients. Get an enforceable contract in minutes using any device. Explore more features for making professional PDFs; add fillable fields urge calculated field and collaborate in teams. The eSignature solution gives a secure process and operates based on SOC 2 Type II Certification. Make sure that all of your records are protected so no one can edit them.

How to eSign a PDF template in Google Chrome
Are you looking for a solution to urge calculated field directly from Chrome? The airSlate SignNow extension for Google is here to help. Find a document and right from your browser easily open it in the editor. Add fillable fields for text and signature. Sign the PDF and share it safely according to GDPR, SOC 2 Type II Certification and more.
Using this brief how-to guide below, expand your eSignature workflow into Google and urge calculated field:
- Go to the Chrome web store and find the airSlate SignNow extension.
- Click Add to Chrome.
- Log in to your account or register a new one.
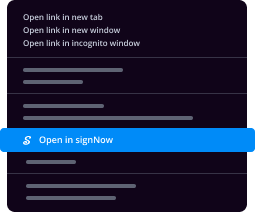
- Upload a document and click Open in airSlate SignNow.
- Modify the document.
- Sign the PDF using the My Signature tool.
- Click Done to save your edits.
- Invite other participants to sign by clicking Invite to Sign and selecting their emails/names.
Create a signature that’s built in to your workflow to urge calculated field and get PDFs eSigned in minutes. Say goodbye to the piles of papers on your desk and start saving money and time for additional crucial duties. Selecting the airSlate SignNow Google extension is a smart convenient option with lots of benefits.
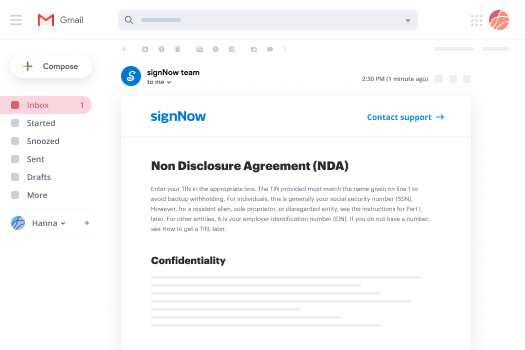

How to eSign an attachment in Gmail
If you’re like most, you’re used to downloading the attachments you get, printing them out and then signing them, right? Well, we have good news for you. Signing documents in your inbox just got a lot easier. The airSlate SignNow add-on for Gmail allows you to urge calculated field without leaving your mailbox. Do everything you need; add fillable fields and send signing requests in clicks.
How to urge calculated field in Gmail:
- Find airSlate SignNow for Gmail in the G Suite Marketplace and click Install.
- Log in to your airSlate SignNow account or create a new one.
- Open up your email with the PDF you need to sign.
- Click Upload to save the document to your airSlate SignNow account.
- Click Open document to open the editor.
- Sign the PDF using My Signature.
- Send a signing request to the other participants with the Send to Sign button.
- Enter their email and press OK.
As a result, the other participants will receive notifications telling them to sign the document. No need to download the PDF file over and over again, just urge calculated field in clicks. This add-one is suitable for those who like concentrating on more important goals as an alternative to wasting time for nothing. Increase your daily compulsory labour with the award-winning eSignature solution.
How to sign a PDF file on the go without an mobile app
For many products, getting deals done on the go means installing an app on your phone. We’re happy to say at airSlate SignNow we’ve made singing on the go faster and easier by eliminating the need for a mobile app. To eSign, open your browser (any mobile browser) and get direct access to airSlate SignNow and all its powerful eSignature tools. Edit docs, urge calculated field and more. No installation or additional software required. Close your deal from anywhere.
Take a look at our step-by-step instructions that teach you how to urge calculated field.
- Open your browser and go to signnow.com.
- Log in or register a new account.
- Upload or open the document you want to edit.
- Add fillable fields for text, signature and date.
- Draw, type or upload your signature.
- Click Save and Close.
- Click Invite to Sign and enter a recipient’s email if you need others to sign the PDF.
Working on mobile is no different than on a desktop: create a reusable template, urge calculated field and manage the flow as you would normally. In a couple of clicks, get an enforceable contract that you can download to your device and send to others. Yet, if you want a software, download the airSlate SignNow mobile app. It’s secure, quick and has a great layout. Try out easy eSignature workflows from your workplace, in a taxi or on a plane.

How to sign a PDF using an iPhone
iOS is a very popular operating system packed with native tools. It allows you to sign and edit PDFs using Preview without any additional software. However, as great as Apple’s solution is, it doesn't provide any automation. Enhance your iPhone’s capabilities by taking advantage of the airSlate SignNow app. Utilize your iPhone or iPad to urge calculated field and more. Introduce eSignature automation to your mobile workflow.
Signing on an iPhone has never been easier:
- Find the airSlate SignNow app in the AppStore and install it.
- Create a new account or log in with your Facebook or Google.
- Click Plus and upload the PDF file you want to sign.
- Tap on the document where you want to insert your signature.
- Explore other features: add fillable fields or urge calculated field.
- Use the Save button to apply the changes.
- Share your documents via email or a singing link.
Make a professional PDFs right from your airSlate SignNow app. Get the most out of your time and work from anywhere; at home, in the office, on a bus or plane, and even at the beach. Manage an entire record workflow effortlessly: generate reusable templates, urge calculated field and work on PDF files with business partners. Turn your device into a effective business instrument for closing contracts.

How to sign a PDF taking advantage of an Android
For Android users to manage documents from their phone, they have to install additional software. The Play Market is vast and plump with options, so finding a good application isn’t too hard if you have time to browse through hundreds of apps. To save time and prevent frustration, we suggest airSlate SignNow for Android. Store and edit documents, create signing roles, and even urge calculated field.
The 9 simple steps to optimizing your mobile workflow:
- Open the app.
- Log in using your Facebook or Google accounts or register if you haven’t authorized already.
- Click on + to add a new document using your camera, internal or cloud storages.
- Tap anywhere on your PDF and insert your eSignature.
- Click OK to confirm and sign.
- Try more editing features; add images, urge calculated field, create a reusable template, etc.
- Click Save to apply changes once you finish.
- Download the PDF or share it via email.
- Use the Invite to sign function if you want to set & send a signing order to recipients.
Turn the mundane and routine into easy and smooth with the airSlate SignNow app for Android. Sign and send documents for signature from any place you’re connected to the internet. Generate professional-looking PDFs and urge calculated field with just a few clicks. Assembled a faultless eSignature process with just your smartphone and increase your total productiveness.
Get legally-binding signatures now!
FAQs
-
How do you apply a formula to an entire column in Excel?
Suggested clip Apply a Formula to an Entire Column in Excel - YouTubeYouTubeStart of suggested clipEnd of suggested clip Apply a Formula to an Entire Column in Excel - YouTube -
How do you insert a calculated field?
Select a cell in the pivot table, and on the Excel Ribbon, under the PivotTable Tools tab, click the Options tab (Analyze tab in Excel 2013). In the Calculations group, click Fields, Items, & Sets, and then click Calculated Field. Type a name for the calculated field, for example, RepBonus. -
What is calculated field?
A calculated field is a field that derives its value by performing a function on values from other table fields. It can also calculate values entered by hand. The field's data only appears for the duration of the query. -
How do I add percentages to a pivot table?
Suggested clip Excel PivotTable add Percentage of Total column - YouTubeYouTubeStart of suggested clipEnd of suggested clip Excel PivotTable add Percentage of Total column - YouTube -
What is a calculated field in Excel?
A calculated item becomes an item in a pivot field. Its calculation can use the sum of other items in the same field. The individual records in the source data are calculated, and then the results are summed. Calculated items are listed with other items in the Row or Column area of the pivot table. -
Why can't I add a calculated field to my pivot table?
Drop the data into Excel into a table. If you try to pivot off this data, the calculated field will still be grayed out. BUT, if you make a dynamic range on the table and create a new pivot table that references the dynamic range of the table instead of the table itself, the calculated field will not be grayed out. -
How do you find the calculated field in a pivot table?
Click the PivotTable. On the Options tab, in the Tools group, click Formulas, and then click List Formulas. In the list of formulas, find the formula that you want to change listed under Calculated Field or Calculated Item. -
How do I add a calculated field to a query in access?
To create a calculated field in Access queries, open the query into which to insert the calculated field in design view. Click into the \u201cField:\u201d row in the first available, blank column in the query. Type the name to give to the new calculated field, followed by a colon (:). -
What is the difference between calculated field and item?
The key difference between them is that: Calculated Fields are formulas that can refer to other fields in the pivot table. Calculated Items are formulas that can refer to other items within a specific pivot field. -
How do you create a calculated field in Access 2019?
Open the table by double-clicking it in the Navigation Pane. Scroll horizontally to the rightmost column in the table, and click the Click to Add column heading. In the list that appears, click Calculated Field, and then click the data type that you want for the result. -
How do I automatically insert rows in Excel and keep formulas?
Suggested clip How to Insert a Row & Have Formulas Automatically Included in the ...YouTubeStart of suggested clipEnd of suggested clip How to Insert a Row & Have Formulas Automatically Included in the ... -
How do you create a calculated field in SQL?
In SQL Server Data Tools, click the Model menu, then point to Model View, and then click Data View. ... In the model designer, click the Date table (tab). Right-click the Calendar Quarter column, and then click Insert Column. ... In the formula bar above the table, type the following formula. -
How do you create a calculated field in Excel?
Select a cell in the pivot table, and on the Excel Ribbon, under the PivotTable Tools tab, click the Options tab (Analyze tab in Excel 2013). In the Calculations group, click Fields, Items, & Sets, and then click Calculated Field. Type a name for the calculated field, for example, RepBonus. -
How do you create a new column in Access query?
Add the column in Design view On the Access status bar, click Design View. In the Field Name column, select a blank row and type a name for the new field. In the Data Type column, next to your new field name, select a data type for the new column. Save your changes. -
How do I remove a formula from a pivot table?
Select any cell in the Pivot Table and go to Pivot Table Tools > Options > Formulas > Calculated Field. In the Formula Name drop down there, select the formula which you had written. Click on Delete > OK.
What active users are saying — urge calculated field


Related searches to urge calculated field with airSlate airSlate SignNow

Urge calculated field
hello again everyone and welcome back to programming in Access 2013 my name is Steve Bishop and today we're going to be continuing our section on reports and today we're going to talk about grouping and sorting and also adding some different calculations to our reports that might be helpful to the user so let's go ahead and go back into our Access database here and just so you can see what a report looks like currently again we've got our three different addresses that are all separated by this nice little line here and I'm going to go back into the design view and let's say that I want to take those users or take those addresses and group them together I probably didn't need to hop out of there but you can see there's kind of this separation here between the smiles incorporated up here and then this smile is incorporated down here and it's separated by this hamster wheels inc and that's kind of inconvenient we want the smiles incorporated ones to be together and this hamster wheels inc to be separate so what we can do is we can go into the design view and then we can click on the design tab and there's this button here called group and sort if you click on that you'll get a panel down here at the bottom where we can add groups and sorts to our report so I'm going to go ahead and click on add a group and now I have the option to select from any one of the fields that our record source has and since I want a group based upon that customer name that's the one I'm going to go ahead and select you'll notice that there we get this customer name header up here up at the top this is a new design area here that will appear at the top of each one of our groups so it's going to group our details together and then we have this header above each one of those groups group rows together so what I'm going to do is I'm going to take the customer name and I'm actually going to move it up to our header and I also want to change the size so that it's nice and clear that hey this is in effect a grouping just to make it a little bit more clear oops I didn't want only want to do that want to move this over here make right size make this the right size and adjust this a little bit alright the other thing I'm going to do is I think I want to move the address type over here as well move it to where the spot was where the customer was and let's see what that looks like right now I don't think this is going to be a good finished product and you'll see that this really does take some tinkering to make it look right yeah see it's not quite how I want maybe I want a little bit more separation between the customer name and that bottom line there so let me let me go in here and I'm going to move this down again I'm just pressing the down arrow and then I'll add a little extra space above our customer name each time so let's see what that looks like that's getting a little better I got the gray back here behind it I want to get rid of that so let's see right-click alternate fill back color is none and remember i just right-clicked on the bar that is of our header so now what do we have I think that looks pretty good I'd say that that looks pretty decent here you can see we've got our hamster wheel zinc is the customer name here's one address and then over here is our smiles incorporated and we have two addresses for them so that looks pretty good now just to show you I can just like as I have on the the page header and the page footer I can also add a customer name footer okay the way you do that is down here in our little panel down here that we have our groups in our sorts you can click on the more' button and this will give us more options of what we can do with our group here and I'm not going to go into each one of these you can tinker around with them and you know figure out what each one of these options are for yourself but for right now I'm just going to click on this option that basically adds a footer section okay and you'll see this is just going to give us a little bit of space here there's some little extra space now below each one of our groups if I just put in something here I don't know let's do a you know what let me go ahead and I'm going to add a count to this and this is going to look kind of ugly but at least you'll get the idea let's say I want to know how many so you know under right now the way this looks we don't really have a count of how many of these smiles incorporated customers addresses that we have you know how many addresses do we have for small incorporated that might be an important thing to know on a report maybe not particularly this report but it's still something that might want to go on a report so in this box that I just created here this is what I'm going to do I'm going to go ahead and make it a count of addresses so I'm going to change the label here to total addresses and let's move it around a little bit here all right and let's get rid of the formatting here no background no border and make sure that it is aligned all the way to the left okay so now when we've got a value in here and a little butt up against the end of the total addresses here all right so now I need to give just like all these other things you'll notice we've got a concatenated string here we've got our addresses in here what we can do for this particular textbox is we can actually do some calculations from our report so I'm going to go into the data tab and in the control source I'm going to click on the ellipsis and we get our fancy expression builder again now in our expression builder and I'm not going to go over everything that's in expression builder you're welcome to explore everything that's in here because there's a lot of functionality that this expression builder presents to us and it's a very very handy tool one of the best parts of access really I'm going to go into the built-in functions and under the built-in functions if I scroll down to the text egg or the sequel aggregate excuse me I have different types of a cow Galatians I can do on some of the data and one of them the one in particular that I want is this count and if I click on it you can see it calculates the number of Records returned by a query so I want to get the number of records returned by a query but even more so since I'm putting this in our grouping since I putting it in our group it's actually an account how many total rows I get or how many total I should say total number a you know basically a count of how many records I have for that particular group I know that's kind of complicated but once I put this in you'll see what I'm talking about I'm going to group it according to the customer I'm going to count the customer name and click OK and you'll see that now I get a total addresses of 1/4 hamster wheels Inc and a total addresses of 2 for smiles Incorporated I could put this information anywhere and really that particular count or the total or like you may have seen there's a min there's an average here I'll go back in here to the expression builder there's really a lot of other types of things we can do for our data built-in functions go down our sequel aggregate so we can do an average so if we were like for example doing a profit and loss type of thing you may want to have some sort of averages like what's the average amount that you had on sales you know how was the average number of total sales per month so maybe we're grouping according you know maybe we're doing a group according to month you know all the sales in January all the sales in February and then you may want to have an average price of you know an average sale per you know for that particular month you could do all sorts of different types of what they call aggregates and count is the one that we did here but average max-min sum all those are really something that we're probably going to get on when we do the VBA because these are actually calculations you can do in VBA you can also do them within a query in order to get the same type of information so I really urge you to look and investigate what these different sum average count max mins what these all mean because they will become very important when you're trying to to calculate your data and give back your customer or your your user the right kind of information that they're going to want all right so let's go back and account put in customer name click OK I'm going to also drop the alternate background here I'm going to save it and I'm going to do one more thing I'm going to say on the customer footer I'm going to go under where is it that here we go under the format tab what I can say is I want to force a new page after each footer so what this is going to do is I'm going to force access to make and the next grouping its own separate page that's essentially what I'm doing I'm saying after the footer section okay after this particular section force a new page to start for our data and what we'll see now is only one customer shows up per page so that I go to this page - and there's our smells incorporated see how that works so I can actually separate out our report according to the customer name and give the total addresses and they would all print out maybe not on one particular page they might you know if you get like 50 obviously it'll go to you know page 1 page 2 page 3 and then after that it will be sure that no matter where you're ending up on that page with your information you will automatically start a new page when you get to the next customer name alright I hope that's really important to you and that you've learned something these reports are very very to really get down because they are a very big way that you expressed the data and present it back to your user and if there's anything that you want to learn if there's anything more about reports you would like to see done which I'm sure there probably is please feel free to send me a message right here on YouTube just send me a message and I'll see if I can if I can't answer your question directly via email maybe I'll go ahead and make a video about it alright so thank you very much and we'll see you in the next video
Show moreFrequently asked questions
How do I add an electronic signature to a PDF in Google Chrome?
How can you have your customers eSign PDFs online?
How can I add a personal signature to a PDF?
Get more for urge calculated field with airSlate SignNow
- Print electronically sign Church Donation Receipt
- Prove electronically signed Colorado Rental Agreement
- Endorse digisign Portrait Photography Contract Template
- Authorize electronically sign Service Invoice Template
- Anneal mark Wedding Contract
- Justify esign Business Gift Certificate
- Try countersign Land Contract Form
- Add Joint Venture Agreement digital signature
- Send Residential Roofing Contract Template electronically signed
- Fax Community Service Letter of Recommendation byline
- Seal Management Report esign
- Password 1040EZ Form signature block
- Pass Leave of Absence Agreement signature service
- Renew Land Contract Form email signature
- Test Rental Deposit Receipt signatory
- Require Distribution Agreement Template initials
- Print receiver signature
- Champion visitor initial
- Call for trustee digital sign
- Void Manufacturing and Supply Agreement template signed
- Adopt Assumption Agreement template digi-sign
- Vouch Fundraiser Ticket template esign
- Establish Travel Gift Certificate template initial
- Clear Grant Proposal Template template signature
- Complete Video Production Order template email signature
- Force Delivery Order Template template countersignature
- Permit Basic Employment Resume template digital signature
- Customize IOU template electronically signed