Vouch Initials Template with airSlate SignNow
Award-winning eSignature solution


Improve your document workflow with airSlate SignNow
Flexible eSignature workflows
Instant visibility into document status
Easy and fast integration set up
Vouch initials template on any device
Detailed Audit Trail
Strict protection standards
See airSlate SignNow eSignatures in action


airSlate SignNow solutions for better efficiency
Our user reviews speak for themselves


Why choose airSlate SignNow
-
Free 7-day trial. Choose the plan you need and try it risk-free.
-
Honest pricing for full-featured plans. airSlate SignNow offers subscription plans with no overages or hidden fees at renewal.
-
Enterprise-grade security. airSlate SignNow helps you comply with global security standards.

Your step-by-step guide — vouch initials template
Employing airSlate SignNow’s electronic signature any organization can accelerate signature workflows and sign online in real-time, delivering a better experience to consumers and employees. vouch initials template in a few simple steps. Our mobile apps make operating on the move achievable, even while off-line! eSign contracts from anywhere in the world and close tasks quicker.
Take a walk-through guide to vouch initials template:
- Sign in to your airSlate SignNow account.
- Locate your needed form within your folders or upload a new one.
- Access the record adjust using the Tools list.
- Drop fillable fields, add text and eSign it.
- Include several signees using their emails configure the signing sequence.
- Choose which recipients can get an signed copy.
- Use Advanced Options to limit access to the record and set up an expiration date.
- Click Save and Close when done.
Moreover, there are more advanced functions available to vouch initials template. List users to your shared work enviroment, browse teams, and track collaboration. Numerous users all over the US and Europe concur that a solution that brings everything together in one unified digital location, is exactly what enterprises need to keep workflows functioning smoothly. The airSlate SignNow REST API allows you to integrate eSignatures into your app, internet site, CRM or cloud storage. Check out airSlate SignNow and get quicker, smoother and overall more effective eSignature workflows!
How it works
airSlate SignNow features that users love


See exceptional results vouch initials template with airSlate SignNow
How to complete and sign a PDF online
Try out the fastest way to vouch initials template. Avoid paper-based workflows and manage documents right from airSlate SignNow. Complete and share your forms from the office or seamlessly work on-the-go. No installation or additional software required. All features are available online, just go to signnow.com and create your own eSignature flow.
A brief guide on how to vouch initials template in minutes
- Create an airSlate SignNow account (if you haven’t registered yet) or log in using your Google or Facebook.
- Click Upload and select one of your documents.
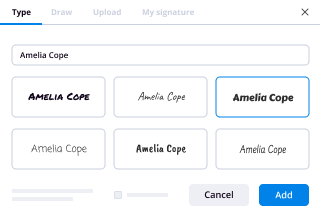
- Use the My Signature tool to create your unique signature.
- Turn the document into a dynamic PDF with fillable fields.
- Fill out your new form and click Done.
Once finished, send an invite to sign to multiple recipients. Get an enforceable contract in minutes using any device. Explore more features for making professional PDFs; add fillable fields vouch initials template and collaborate in teams. The eSignature solution gives a secure process and functions according to SOC 2 Type II Certification. Make sure that all of your information are protected and that no one can change them.
How to eSign a PDF in Google Chrome
Are you looking for a solution to vouch initials template directly from Chrome? The airSlate SignNow extension for Google is here to help. Find a document and right from your browser easily open it in the editor. Add fillable fields for text and signature. Sign the PDF and share it safely according to GDPR, SOC 2 Type II Certification and more.
Using this brief how-to guide below, expand your eSignature workflow into Google and vouch initials template:
- Go to the Chrome web store and find the airSlate SignNow extension.
- Click Add to Chrome.
- Log in to your account or register a new one.
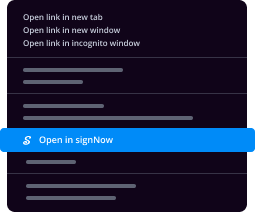
- Upload a document and click Open in airSlate SignNow.
- Modify the document.
- Sign the PDF using the My Signature tool.
- Click Done to save your edits.
- Invite other participants to sign by clicking Invite to Sign and selecting their emails/names.
Create a signature that’s built in to your workflow to vouch initials template and get PDFs eSigned in minutes. Say goodbye to the piles of papers on your desk and start saving money and time for additional significant duties. Selecting the airSlate SignNow Google extension is a smart practical option with plenty of benefits.

How to eSign an attachment in Gmail
If you’re like most, you’re used to downloading the attachments you get, printing them out and then signing them, right? Well, we have good news for you. Signing documents in your inbox just got a lot easier. The airSlate SignNow add-on for Gmail allows you to vouch initials template without leaving your mailbox. Do everything you need; add fillable fields and send signing requests in clicks.
How to vouch initials template in Gmail:
- Find airSlate SignNow for Gmail in the G Suite Marketplace and click Install.
- Log in to your airSlate SignNow account or create a new one.
- Open up your email with the PDF you need to sign.
- Click Upload to save the document to your airSlate SignNow account.
- Click Open document to open the editor.
- Sign the PDF using My Signature.
- Send a signing request to the other participants with the Send to Sign button.
- Enter their email and press OK.
As a result, the other participants will receive notifications telling them to sign the document. No need to download the PDF file over and over again, just vouch initials template in clicks. This add-one is suitable for those who like concentrating on more important aims as an alternative to burning time for nothing. Improve your day-to-day routine with the award-winning eSignature solution.
How to sign a PDF on the go without an app
For many products, getting deals done on the go means installing an app on your phone. We’re happy to say at airSlate SignNow we’ve made singing on the go faster and easier by eliminating the need for a mobile app. To eSign, open your browser (any mobile browser) and get direct access to airSlate SignNow and all its powerful eSignature tools. Edit docs, vouch initials template and more. No installation or additional software required. Close your deal from anywhere.
Take a look at our step-by-step instructions that teach you how to vouch initials template.
- Open your browser and go to signnow.com.
- Log in or register a new account.
- Upload or open the document you want to edit.
- Add fillable fields for text, signature and date.
- Draw, type or upload your signature.
- Click Save and Close.
- Click Invite to Sign and enter a recipient’s email if you need others to sign the PDF.
Working on mobile is no different than on a desktop: create a reusable template, vouch initials template and manage the flow as you would normally. In a couple of clicks, get an enforceable contract that you can download to your device and send to others. Yet, if you want a software, download the airSlate SignNow mobile app. It’s secure, quick and has an incredible design. Take advantage of in effortless eSignature workflows from the office, in a taxi or on a plane.
How to sign a PDF employing an iPhone
iOS is a very popular operating system packed with native tools. It allows you to sign and edit PDFs using Preview without any additional software. However, as great as Apple’s solution is, it doesn't provide any automation. Enhance your iPhone’s capabilities by taking advantage of the airSlate SignNow app. Utilize your iPhone or iPad to vouch initials template and more. Introduce eSignature automation to your mobile workflow.
Signing on an iPhone has never been easier:
- Find the airSlate SignNow app in the AppStore and install it.
- Create a new account or log in with your Facebook or Google.
- Click Plus and upload the PDF file you want to sign.
- Tap on the document where you want to insert your signature.
- Explore other features: add fillable fields or vouch initials template.
- Use the Save button to apply the changes.
- Share your documents via email or a singing link.
Make a professional PDFs right from your airSlate SignNow app. Get the most out of your time and work from anywhere; at home, in the office, on a bus or plane, and even at the beach. Manage an entire record workflow effortlessly: generate reusable templates, vouch initials template and work on PDF files with partners. Transform your device right into a powerful enterprise tool for closing deals.
How to eSign a PDF using an Android
For Android users to manage documents from their phone, they have to install additional software. The Play Market is vast and plump with options, so finding a good application isn’t too hard if you have time to browse through hundreds of apps. To save time and prevent frustration, we suggest airSlate SignNow for Android. Store and edit documents, create signing roles, and even vouch initials template.
The 9 simple steps to optimizing your mobile workflow:
- Open the app.
- Log in using your Facebook or Google accounts or register if you haven’t authorized already.
- Click on + to add a new document using your camera, internal or cloud storages.
- Tap anywhere on your PDF and insert your eSignature.
- Click OK to confirm and sign.
- Try more editing features; add images, vouch initials template, create a reusable template, etc.
- Click Save to apply changes once you finish.
- Download the PDF or share it via email.
- Use the Invite to sign function if you want to set & send a signing order to recipients.
Turn the mundane and routine into easy and smooth with the airSlate SignNow app for Android. Sign and send documents for signature from any place you’re connected to the internet. Generate professional-looking PDFs and vouch initials template with just a few clicks. Created a perfect eSignature workflow with just your mobile phone and increase your overall productivity.
Get legally-binding signatures now!
FAQs
-
How do you make initials?
Suggested clip How to Make a Monogram with Cricut Explore - YouTubeYouTubeStart of suggested clipEnd of suggested clip How to Make a Monogram with Cricut Explore - YouTube -
How do you initial your name?
As indicated earlier, monograms for one person, whether they're married or not, use the first letters of their first, middle and last name. If you are following the traditional initial order, the last name initial will be the largest and in the center, with the first and middle name on the left and right. -
How do you do your wedding initials?
First, last, middle; with the center initial larger than the flanking initials. First, last, maiden; with the center initial larger than the flanking initials. First, middle, last; with all initials being the same size. -
How do you make cool initials?
Suggested clip How to design your own amazing monogram - YouTubeYouTubeStart of suggested clipEnd of suggested clip How to design your own amazing monogram - YouTube -
How do I create a logo with initials?
Suggested clip How to Create Initials Logo Design in Illustrator - Two Letter Logo ...YouTubeStart of suggested clipEnd of suggested clip How to Create Initials Logo Design in Illustrator - Two Letter Logo ... -
How do you make a 3 letter monogram?
Suggested clip How to make 1, 2 and 3 letter monograms in Microsoft Word (i.e. for ...YouTubeStart of suggested clipEnd of suggested clip How to make 1, 2 and 3 letter monograms in Microsoft Word (i.e. for ... -
How do you do initials on a monogram?
If all the letters are the same size (also known as block), initials are ordered like your name: first, middle and last. If the monogram features a larger center initial, the ordering is always first name, last name, and middle name. -
How do you make monogram letters?
Step 1: Start by lettering your initial. ... Step 2: Draw a cloud shape around your letter. ... Step 3: Go back and add a second line to each of the bumps. ... Step 4: Fill in the lines. ... But wait, that's not all! ... Fill it in with polka dots! -
How do you make monogram letters on Microsoft Word?
Click the \u201cInsert\u201d tab and select \u201cWord Art.\u201d You can pick any style of Word Art to start; you'll change the shape and color later. I like to start with the initial for the last name, which will be in the middle of the monogram. Type the letter and select \u201cmonogram kk\u201d from the font drop down menu. -
How do you do initials on Cricut?
Download your favorite monogram font. You can find awesome ones on my 30 FREE Monogram Fonts post! Open Cricut Design Space to a blank canvas. Type your FIRST NAME initial using the Text Tool. Select your font. ... Add the MIDDLE initial. ... Add the LAST name Initial. ... Center the Three Initials. ... Weld or Attach Your Initials. -
How do you do monograms on Cricut?
Download your favorite monogram font. You can find awesome ones on my 30 FREE Monogram Fonts post! Open Cricut Design Space to a blank canvas. Type your FIRST NAME initial using the Text Tool. Select your font. ... Add the MIDDLE initial. ... Add the LAST name Initial. ... Center the Three Initials. ... Weld or Attach Your Initials. -
What Cricut font is best for monograms?
There are all kinds of fonts you can use for monograms. For the swirly classical monograms I use the font called Monogram KK. You can find this font on dafont.com and it's free for personal use. If you're not sure how to download fonts to use them in design space see my post on text editing tips here. -
How do initials look monogrammed?
If all the letters are the same size (also known as block), initials are ordered like your name: first, middle and last. If the monogram features a larger center initial, the ordering is always first name, last name, and middle name. -
How do you type initials?
initials in a name When a person uses two initials and a last name, a space should be inserted between the initials. A space also should be inserted between the last initial and the last name. But, no space between two-letter abbreviations (i.e., U.S., P.O.). -
What are initials example?
Initials are the capital letters which begin each word of a name. For example, if your full name is Michael Dennis Stocks, your initials will be M. ... a silver Porsche car with her initials JB on the side.
What active users are saying — vouch initials template


Related searches to vouch initials template with airSlate airSlate SignNow

Vouch initials template
now I'm going to show you how to upload your gift voucher to to print I use and I recommend got print because you can print as few as 100 or as more as 10,000 to paint how many you need and you get about a two-week turnaround time I like it because when you order a hundred the pricing is very reasonable with shipping I think it's under $50 for a hundred of them and I also like Miller's lab because you can actually order as many as 25 and get them within about 2 to 4 days depending on your location that's just shipping within the United States I am not sure what their prices and times are her shipping internationally so to get your file ready for print what you need to do is go to file - export and that's gonna open up another dialog box and in the format of adobe print adobe PDF print i want you to save this one as page one or front because we need to set separate this document to two different pdfs because we're going to be uploading two different files for got print so we're gonna call this front and i'm going to click Save and another dialog box comes up we're gonna click on range instead of all and type in page one or just number one we want to leave it as pages we do not need crop marks but we do need our bleeds and then the output make sure your inks are converted to all spots to process and click OK under compression make sure that your image is size to 300 dpi and click oh and then of course your compatibility or Acrobat should be set at 8 and 9 PDF 1.7 then click export I'm just gonna run an export and then it's going to automatically open up a preview of that PD in Adobe Acrobat for us that way you can double-check and make sure everything looks good as you can tell I've actually made some changes to the text beyond what the previous tutorial when we were editing so just make sure that you you make all those little extra changes again the text that I put on there just starter text so you can change it to anything that you want I'm gonna close out of Acrobat because we just have that single page there the front side of our gift box sure and I'm gonna go back into InDesign and another little feature I didn't show you in the previous tutorial is the pages to have the pages tab is another way of navigating through the different pages that you have on your document now I was just showing you the scrolling option because we only have two pages is easy to go back and forth between those two but another way you can do it is open up the pages panel you can just click on the tap the thumbnail for the side that you want to work on and if you just go back and forth like that it's very quick and easy to go through that I'm gonna close this tab because now we're on the second page and again I made a couple of little minor adjustments I change the images around because I wanted to kind of instead of having two of the same family members next to each other I kind of want to spur it on give it a little more balance and again I have it omit the logo in the center of my document here and let's export the second page go to file - export and we're going to call this side - or back okay so it's family kicked out sure and I put it back in parenthesis the format should be Adobe PDF print and click Save again we want to make sure that we choose a chain our page range in this case we're going to select page two and still in the pages format export compression again make sure that all of your images are set to 300 dpi or sorry pixels per inch so that's PPI your marks and bleeds will still be set from the last time you exported so mark simply is to do not I'm sorry we do not make crop marks but we do need document bleeds and the compatibility should be set at the highest that you can go and advanced I'm sorry output click on ink managers to double check that all the sponsors are such a process because that's gonna print and CMYK click OK and export again that's gonna run and export and then open up for us in a Adobe Acrobat so you can take one more look at it and just take a couple of seconds while that's coming up and here we go everything looks good so I'm gonna quit out of that now I'm gonna launch got print and here is the website for got print comm we're gonna click on products oh and then you might want to join and login when you join you can actually keep track of your anything that you order and it will give you notifications on tracking and things like that but just another way to go back and then if you want to ever reorder the same document or again you can go back log in and see all your past orders and do some reordering I'm gonna click on all products and then I'm going to select postcards so see postcards I here it's gonna take us to another page and I'm gonna select our size options with this five by seven the horizontal orientation is what we're gonna select and then the paper I put for this 16-point premium map cover it's just I don't know what it is but it has this kind of like nobody kind of look to it but if you like gloss coated paper this is another option for you that's 14-point gloss cover it's gonna make give it kind of a shiny finish on your postcard on the front and back now keep in mind if you want to handwrite your expiration date this may not work for you as well because the the gloss in there does not hold ink very well and it doesn't you're not doesn't allow you to write on it very well so if you do want to handwrite your expiration dates I would highly recommend that you choose the premium matte cover if you did the option where you're going to type in a an expiration date and have it printed on there then the gloss is perfect for you I'm gonna collect select that premium Cody and yes it's gonna be full color on both sides even though some of my images are black and white the rest of it the cons the the logos in the text is are in a yellow I'm sorry I read in a gold so then you have to pick full color on both sides I'm inch I choose this the minimum quality of a hundred and I don't want rounded corners because it doesn't work with this particular look and it doesn't suit my brand so I'm just going to leave that as none if you are choosing the gloss option for the printing then you want the UV coating on both sides what it's going to do is add an extra little coating of gloss on it so that when you touch it it doesn't make fingerprints on it it just gives it a more Sheen high-end look to it and it also makes it just a slightly bit thicker okay and I don't need a rush I'm just going to put this on a regular to day business day I'm in Bakersfield so it's about a two-hour Tunip hour drive for delivery so I get them a little bit faster to paint on where you are in the United States or internationally your shipping will be more and will take more time so it just depends on give yourself at least if you're designing these things for an event coming up give yourself at least three weeks to a month ahead of time just in case you run into any difficulties with shipping don't ever order something at the last minute but if you do I would suggest the millers lab a few united states you could get it a lot faster but again give yourself some lead time whenever you're printing something for an event process time I'm gonna instantly process this I'm gonna upload my digital files now so that's just kind of an automatic just make sure they're selected I'm gonna scroll down to estimated shipping all you need to do is put in your zip code mine's nine three three one one that's gonna calculate the shipping for me and it gives you all the options for economy standard Express next business day and then if you're international it will show those prices on there as well so now I'm going to upload the fronts I'm gonna select that option I'm going to browse my files and my file is located on my desktop so just make sure that you are saving that someplace you're gonna remember where it is I'm just gonna take a few minutes to access my desktop sorry it's you can't shoot with this I have to click on my desktop and I'm gonna select the front option if you don't see the file names you can just go down to list the contents so I am looking for a family gift voucher front I must select that and click Choose ok sorry I put in some extra characters in there so I'm gonna have to go in and rename my files I forgot it doesn't like those parentheses on there so I'm gonna click on my finder menu go to my desktop and just reading that file very quickly and take off those extra characters on there so you can use underscores if you want to or put all caps makes it easier while I'm here I'm going to change this one too so it's gonna ask me to rename that I know that so I'm going to take off my fur entha C's sorry about that I forgot there that particular company doesn't like those types of things when they're uploading so clicking on front again do that now I'm going to click on the Browse files again and try to upload that file one more time we're clicking them on the front option clicking shoes and it's going to take a couple minutes or a few seconds to upload that file while you're waiting just maybe you're gonna raise your desk or get a cup of coffee here we go so the next option is just to they want to double check to make sure that everything is correct so here are their safe areas and make sure that none of the text is at the edge of that because if you get cut off everything looks good this is where you want to double check where you if you have any sort of text issues if you misspelled a word or something because they will not reprint that for free it'll be on you so make sure that you've done your spell check and that everything is correct the way you want it said and printed on the skip voucher because that is done after that we're gonna click continue all right and then we're gonna upload the back again I'm gonna click browse files and rent you the back of our gift voucher and again it's gonna take a couple seconds to upload and watch it go around and around there we go again you're gonna be double-checking at your file it's okay if my images go past that bleed line because this is just where I'm gonna have this particular documents gonna cut off and I've already expected that I had an extra little bleed marker on there because it depends on you know where you're getting it printed got prints bleed markers are a little bit shorter than what I have in the template but it doesn't make the h8 any difference with your design it will not affect it in any way as so long as you stay within those safe areas so everything looks good again I'm gonna again double check your text because once you print this that's done you know you're gonna have to reprint it if you made a mistake I'm gonna click the proofs and it's going to show you an online proof so you have one more opportunity to double check everything to make sure it looks right again that's gonna take a couple of minutes to process well ty here we go alright so now we are in the final stages and they're going to want you to initial each thing and agree to their terms and conditions putting your initials and proceed to checkout here is where you are going to get to your estimated shipping and cost of printing all in one and you can double check your quantity if you change your mind you can add more before shipping the price of printing a hundred double-sided gift vouchers in full color is twenty nine seventy five and then you go to secure checkout and pay for your order all right now we're gonna go into Miller's lab I'm going to open up that program and I'll show you how to order them now this is the home page when you log into their Roe's engine this is how you order your product once you click on order products you can either click a knife on the tabs above or the tabs on the side um under product selection we're gonna click on that drop down menu and we're gonna go to press proof or press printing and see where is that pressed products expect delays because things are going on right now with shipping you know let you know that how long it's gonna take right now maybe your shipping is gonna be a lot longer than 2 to 4 days like I mentioned before but in normal circumstances it's 2 to 4 days to paying on where you are located in the United States it could be more if you're out in a more of a rural area ok then we're gonna go down under catalog directory we're gonna choose flat cards so just keep clicking the arrow to the right until we get to flat cards select that we're going to scroll down to 5 by 7 horizontal and select that card and then they're blank template is going to show up on here and we're gonna have to add images now we can add I believe that on Miller's you can upload PDFs if not I will show you how to export the JPEGs as the option so I'm going to see if they'll let us do that I'm gonna click on desktop it's been a while sign into that nope it won't because I think they're jpg only because this is a printer for photographers we're going to go back into InDesign very quickly and I'm gonna go back to page 1 or the front side and we're gonna export as JPEGs go to file - export and then format just select JPEG and again you want to label that front my front distance front and all caps and click Save and on your arrange I'm going to pick page 1 and it should be in pages resolutions should be at 300 dpi and make sure that your use document bleed is selected because then it's gonna it's going to add in this share a bit of of your document so that it trims right here on this line and then we're gonna click export and that's gonna save that to your desktop or wherever the destination you chosen I'm gonna go to file - export again and now we're gonna export in the second side we're gonna call this back again the file format will be jpg and click Save and now the page range should be - and everything else is same oh you might want to select RGB for this one because I forgot that they're more they do everything in for photography so it's me this may be a factor I've uploaded JPEG I'm sorry um CMYK and I've not had any problems but if you do you can go back and export that as a RGB it's been a while since I've uploaded anything to Miller so I can't quite remember what their specifications are on that so don't hold that against me again use your document bleed setting and how to make sure that is selected and click export right now we're gonna go back into so that's the wrong one we're gonna go back into Miller's lab I'm gonna collapse this window and then I'm gonna click on add images let me just bring this in just a little bit so we can see everything there I'm going to click on this little tab called add images click on that plus sign and we're gonna go that to the place where you have your document selected I'm going to click on open and it's going to add the J penny JPEGs that we have there hmm are they not popping up and hit - on there maybe they're not done processing I'm gonna click on my finder menu and see what's going on here desktop there let's try this again click Add desktop and yeah we're gonna have to convert or export our pages as RGB so the CMYK is not something that an option so let's try exporting it one more time cloud export and format file format is JPEG and we're gonna save over the original and click Save yes I want to replace it and we're going to use the color spaces RGB 350 dpi page rate one doc and please select it and click export and then we're gonna do that again for the side to file export and I'm going to save over the back side so I'm just selecting the original JPEG I saved a few minutes ago file format shape and I click Save yes I want to replace that and our Jimmy is our color space together bleeds and we're going to pick page to click export all right now we're back in two rows program so I'm gonna collapse this window and read twice one more time to see how we do open there we go yeah it was just how to change it to our DV now I remember okay so now that we have the template open for the front page all you have to do this double-click on that image and it'll fill it or you can click and drag it in there and then I'm going to click on next page and we're gonna put our backside in there and click and drag it on here is at the bottom is where you want to select your quantity their minimum is 25 if 25 is what you want just click Add to Cart and then you go into your shopping cart and oh we need to select our paper so let's click on click on item and let's see up here I love my favorite thing is to print on the smooth paper and for here you want the coolest UV coating again this me may run into some issues if you are handwriting in your your expiration date sharpies may work but I would just use it really an affine felt point Sharpie not the big thick sharpies so you can put in your expiration date that may work if not you can always use a smooth paper and do not add the UV coating to it I like the UV coating I'm going to select that one no rounded corners you can get plain envelopes for this I choose no envelopes for it because I'm just double sided I mean you can actually see the product when you put it in your hand and if it's great when you're going to events where you're going to network means actually you just hand it to somebody okay once all that is selected I'm gonna click Save it's gonna save my in my cart and it's added an extra two dollars so it's 88 cents per card for printing and our total is $22 now is before shipping now all you do is go to the checkout when you click on that it's gonna ask you for your payment information and all that stuff so once you have entered all that in you'll send in your order it'll give you an estimated time for how long it's going to take to get those shipped to you and that's it if you have any questions please be sure to post them in the comments section on my youtube channel or you can go to design fully templates on facebook
Show moreFrequently asked questions
How do I add an electronic signature to a PDF in Google Chrome?
How do you sign your name on a PDF?
How do you sign a PDF without uploading it?
Get more for vouch initials template with airSlate SignNow
- Print electronically sign Acupuncture Medical Consent
- Prove electronically signed Job Quote
- Endorse digisign Prenuptial Agreement
- Authorize electronically sign Game Development Proposal Template
- Anneal mark Donation Receipt
- Justify esign Community Service Letter
- Try countersign Portrait Party Invoices
- Add Settlement Agreement signature block
- Send Freelance Graphic Design Contract Template signature service
- Fax Letter of Recommendation for a Teacher Colleague countersign
- Seal Trainee Daily Progress Report signatory
- Password IRS Form 1040-ES initials
- Pass Durable Power of Attorney eSign
- Renew Florida Condo Lease Agreement esigning
- Test Church Donation Receipt digisign
- Require Technical Services Consulting Agreement Template electronic signature
- Print guest byline
- Champion roomer electronically signed
- Call for subject digital signature
- Void Release of Liability Form (Waiver of Liability) template signature
- Adopt Deposit Agreement template email signature
- Vouch Prom Ticket template signatory
- Establish Photography Gift Certificate template electronically signed
- Clear Training Proposal Template template byline
- Complete Landscaping Work Order template esigning
- Force PPC Proposal Template template esign
- Permit Truck Driver Application template signature block
- Customize Affidavit of Death template signature service