Write Signer Dropdown with airSlate SignNow
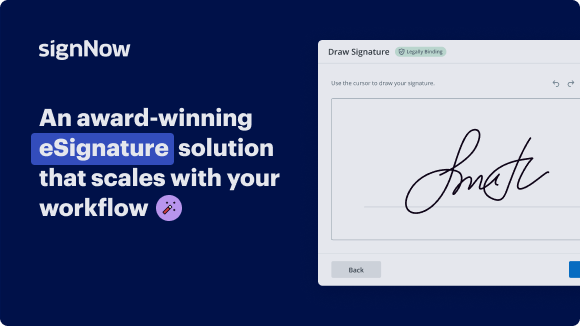
Award-winning eSignature solution


Get the powerful eSignature features you need from the solution you trust
Select the pro service designed for professionals
Set up eSignature API with ease
Collaborate better together
Write signer dropdown, within minutes
Cut the closing time
Maintain important data safe
See airSlate SignNow eSignatures in action


airSlate SignNow solutions for better efficiency
Our user reviews speak for themselves


Why choose airSlate SignNow
-
Free 7-day trial. Choose the plan you need and try it risk-free.
-
Honest pricing for full-featured plans. airSlate SignNow offers subscription plans with no overages or hidden fees at renewal.
-
Enterprise-grade security. airSlate SignNow helps you comply with global security standards.

Your step-by-step guide — write signer dropdown
Using airSlate SignNow’s eSignature any business can speed up signature workflows and eSign in real-time, delivering a better experience to customers and employees. write signer dropdown in a few simple steps. Our mobile-first apps make working on the go possible, even while offline! Sign documents from anywhere in the world and close deals faster.
Follow the step-by-step guide to write signer dropdown:
- Log in to your airSlate SignNow account.
- Locate your document in your folders or upload a new one.
- Open the document and make edits using the Tools menu.
- Drag & drop fillable fields, add text and sign it.
- Add multiple signers using their emails and set the signing order.
- Specify which recipients will get an executed copy.
- Use Advanced Options to limit access to the record and set an expiration date.
- Click Save and Close when completed.
In addition, there are more advanced features available to write signer dropdown. Add users to your shared workspace, view teams, and track collaboration. Millions of users across the US and Europe agree that a solution that brings everything together in a single holistic workspace, is the thing that enterprises need to keep workflows working smoothly. The airSlate SignNow REST API allows you to embed eSignatures into your app, internet site, CRM or cloud storage. Try out airSlate SignNow and enjoy faster, smoother and overall more effective eSignature workflows!
How it works
airSlate SignNow features that users love


Get legally-binding signatures now!
FAQs
-
How do you add signers to airSlate SignNow?
Open your document in the airSlate SignNow editor and click Edit Signers. Add signers by clicking the blue silhouette icon. You can customize signer names and add their email addresses in the corresponding fields (or leave them blank). -
How do I add multiple signatures?
Sign using airSlate SignNow Open your document with airSlate SignNow. Select File and Request signatures. Add the email addresses of the signers and click Specify where to sign. Click the relevant area of the document to place signature fields. ... Once you have finished, click Send to email the recipients. -
How do you add multiple signers to airSlate SignNow?
How to add multiple signers to a document with airSlate SignNow. If you need more than one person to sign your document, simply add more signers to your eSignature invite and provide the necessary fields in the document for all your recipients to fill out. -
How do I send a document to multiple recipients in airSlate SignNow?
Turn your document into a template by clicking More >> Make Template. Once you've finished editing, close the document. Then, click More and select Bulk Invite from the menu. In the invite window, enter your recipients' emails.
What active users are saying — write signer dropdown


Print signer initials
hi everyone welcome to part 5 on my video series featuring the quantum stylus 99 60 in this segment I'm going to show you the alphabets which are built in to the memory of this machine this is the LCD screen as it appears when you turn on your machine now the lower right-hand button is the same button that we use to access many of the decorative stitches we press that button you'll notice that it suggests to use footbe in your machine and just below it is is a series of decorative stitches if we press that button one more time you'll notice that the five different alphabets that are built into this machine will appear once again your machine has suggested using foot be installed in your machine while stitching out the letter stitching so I wanted to give you a small explanation as to why that is and what makes that foot the perfect foot to use while using decorative stitching or your letter stitching now here is foot a which is your general purpose sewing foot what is used for regular sewing for utility sewing any simple sewing that you would do and what I'd like you to notice on the back is there's a small depression this is so the foot comes in closer contact with the fabric as you're sewing along now I'd like you to notice would be which is the foot that they suggest you use while using your decorative stitches and your letter stitch pattern now on the back notice that there is a larger groove this is so the foot floats over the stitches that it's stitching so that it doesn't get hung up or caught on any of the decorative stitch patterns you're using or letters that you may be stitching out after deciding what you'd like to stitch out whether it be a name a date or a special phrase the machine can memorize a maximum of 60 different characters or patterns together for this demonstration I'm going to be using the first font the Gothic stitch and we're going to scroll through I'm going to stitch out the word stitch using the capital S scrolling over to the lowercase T scrolling back to the eye scrolling forward back to the T scrolling back to the C and forward to the H next I'd like you to notice the third row of buttons down these buttons are your editing tools this first button if you press that button will bring you all the way back to the beginning of the word stitch the last button will bring you to the end of the word stitch now these two Center buttons will either back you up by one or will advance you one character at a time to add a letter or to insert a pattern the last thing I'd like to show you before I stitch this out is that you can create a space and then insert either a decorative stitch or a pattern so we're going to scroll all the way to the end after the number nine and we're going to use this empty box to create a space then I would like to insert a butterfly so we will go to the bottom right-hand button again scroll through all the fonts until we get back to the decorative stitch menu and now we're going to scroll through through the butterfly and insert a butterfly at the very end for stitching out this test pattern I prepared a piece of poly cotton woven fabric and I've used bonded fusible interfacing on the back when doing any kind of decorative stitching or letter stitching it's always a smart idea to interface your fabric it will help you avoid any kind of puckering and will help make your stitches look more professional now let's drop the presser foot and stitch the word stitch as you can see I'm barely holding the fabric and guiding it along as it stitches and that's because this machine has a box feeding system which is very smooth and pulls your fabric along very evenly now we're coming to the end and the space and now it's stitching out the butterfly and you can choose to stop at the end of the butterfly or it will start to stitch the word stitch again but I'm going to stop it here so I can show you what that looks like now if you notice between each of the letters there's a little tack stitch or a jump stitch and if you just snip in between those and cut them apart your word will look nice and clean and neat and here's the final product of the word stitch with the little butterfly notice that I cut out all the little tack or jump stitches between the letters and it looks nice and neat and professional now if you'd like to see a sample of what each one of the fonts look like you can go to my blog and I've stitched out all the uppercase the lowercase and the numbers of each of the four fonts so you can see exactly what they look like and how they stitch out well thanks everyone for stopping by for part 5 in my video series on the singer quantum stylus 99 60 always appreciate your emails messages and any comments you leave me and especially when you request something in particular that you would like to see me do a video on so have a happy creative day bye now
Show more