How To Implement eSignature in Word
Contact Sales
Make the most out of your eSignature workflows with airSlate SignNow
Extensive suite of eSignature tools
Robust integration and API capabilities
Advanced security and compliance
Various collaboration tools
Enjoyable and stress-free signing experience
Extensive support
Keep your eSignature workflows on track
Our user reviews speak for themselves


Award-winning eSignature solution


How to integrate eSignature in Word
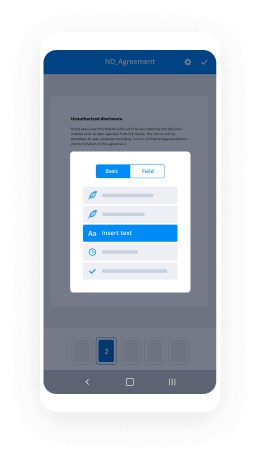
Incorporating electronic signatures (eSignatures) in Word documents can optimize your business operations and improve productivity. With airSlate SignNow, you can effortlessly sign and distribute documents for signatures, directly from within Word. This guide will lead you through the procedures to successfully integrate eSignature in your Word documents using airSlate SignNow.
How to integrate eSignature in Word
- Launch your web browser and visit the airSlate SignNow site.
- Sign up for a free trial account or log in if you already possess one.
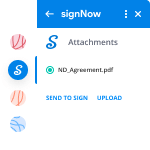
- Choose the document you intend to sign or distribute for signatures.
- If you intend to use this document regularly, save it as a template for later use.
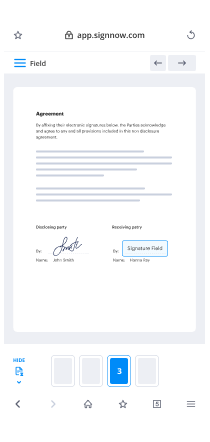
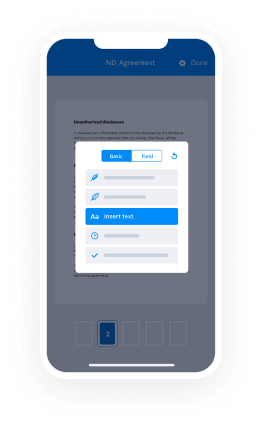
- Open the document and modify it by including fillable fields or relevant information.
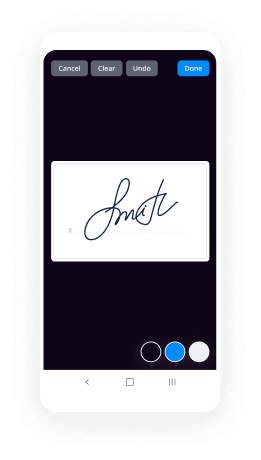
- Get ready to sign by adding your signature and any required signature fields for recipients.
- Click 'Continue' to complete the setup and issue the eSignature request.
In summary, utilizing airSlate SignNow to integrate eSignature in Word not only streamlines the signing procedure but also improves document handling. This robust tool provides businesses with a holistic solution for managing electronic signatures effectively.
Ready to enhance your document workflow? Begin your free trial with airSlate SignNow today and discover the advantages of effortless eSigning!
How it works
Rate your experience
-
Best ROI. Our customers achieve an average 7x ROI within the first six months.
-
Scales with your use cases. From SMBs to mid-market, airSlate SignNow delivers results for businesses of all sizes.
-
Intuitive UI and API. Sign and send documents from your apps in minutes.
A smarter way to work: —how to industry sign banking integrate
How to electronically sign and complete a document online
Document management isn't an easy task. The only thing that makes working with documents simple in today's world, is a comprehensive workflow solution. Signing and editing documents, and filling out forms is a simple task for those who utilize eSignature services. Businesses that have found reliable solutions to how to integration e signature implement word don't need to spend their valuable time and effort on routine and monotonous actions.
Use airSlate SignNow and how to integration e signature implement word online hassle-free today:
- Create your airSlate SignNow profile or use your Google account to sign up.
- Upload a document.
- Work on it; sign it, edit it and add fillable fields to it.
- Select Done and export the sample: send it or save it to your device.
As you can see, there is nothing complicated about filling out and signing documents when you have the right tool. Our advanced editor is great for getting forms and contracts exactly how you want/need them. It has a user-friendly interface and full comprehensibility, supplying you with complete control. Register right now and start increasing your eSign workflows with efficient tools to how to integration e signature implement word on-line.

How to electronically sign and complete forms in Google Chrome
Google Chrome can solve more problems than you can even imagine using powerful tools called 'extensions'. There are thousands you can easily add right to your browser called ‘add-ons’ and each has a unique ability to enhance your workflow. For example, how to integration e signature implement word and edit docs with airSlate SignNow.
To add the airSlate SignNow extension for Google Chrome, follow the next steps:
- Go to Chrome Web Store, type in 'airSlate SignNow' and press enter. Then, hit the Add to Chrome button and wait a few seconds while it installs.
- Find a document that you need to sign, right click it and select airSlate SignNow.
- Edit and sign your document.
- Save your new file to your account, the cloud or your device.
By using this extension, you prevent wasting time and effort on boring assignments like downloading the file and importing it to a digital signature solution’s catalogue. Everything is easily accessible, so you can easily and conveniently how to integration e signature implement word.
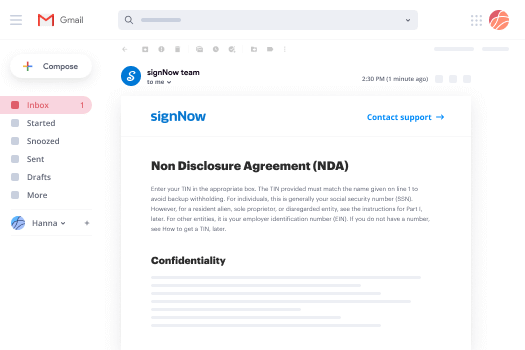
How to electronically sign docs in Gmail
Gmail is probably the most popular mail service utilized by millions of people all across the world. Most likely, you and your clients also use it for personal and business communication. However, the question on a lot of people’s minds is: how can I how to integration e signature implement word a document that was emailed to me in Gmail? Something amazing has happened that is changing the way business is done. airSlate SignNow and Google have created an impactful add on that lets you how to integration e signature implement word, edit, set signing orders and much more without leaving your inbox.
Boost your workflow with a revolutionary Gmail add on from airSlate SignNow:
- Find the airSlate SignNow extension for Gmail from the Chrome Web Store and install it.
- Go to your inbox and open the email that contains the attachment that needs signing.
- Click the airSlate SignNow icon found in the right-hand toolbar.
- Work on your document; edit it, add fillable fields and even sign it yourself.
- Click Done and email the executed document to the respective parties.
With helpful extensions, manipulations to how to integration e signature implement word various forms are easy. The less time you spend switching browser windows, opening multiple accounts and scrolling through your internal files trying to find a document is more time for you to you for other significant tasks.
How to safely sign documents using a mobile browser
Are you one of the business professionals who’ve decided to go 100% mobile in 2020? If yes, then you really need to make sure you have an effective solution for managing your document workflows from your phone, e.g., how to integration e signature implement word, and edit forms in real time. airSlate SignNow has one of the most exciting tools for mobile users. A web-based application. how to integration e signature implement word instantly from anywhere.
How to securely sign documents in a mobile browser
- Create an airSlate SignNow profile or log in using any web browser on your smartphone or tablet.
- Upload a document from the cloud or internal storage.
- Fill out and sign the sample.
- Tap Done.
- Do anything you need right from your account.
airSlate SignNow takes pride in protecting customer data. Be confident that anything you upload to your account is secured with industry-leading encryption. Auto logging out will shield your user profile from unauthorized entry. how to integration e signature implement word out of your phone or your friend’s phone. Safety is crucial to our success and yours to mobile workflows.

How to eSign a PDF document with an iPhone or iPad
The iPhone and iPad are powerful gadgets that allow you to work not only from the office but from anywhere in the world. For example, you can finalize and sign documents or how to integration e signature implement word directly on your phone or tablet at the office, at home or even on the beach. iOS offers native features like the Markup tool, though it’s limiting and doesn’t have any automation. Though the airSlate SignNow application for Apple is packed with everything you need for upgrading your document workflow. how to integration e signature implement word, fill out and sign forms on your phone in minutes.
How to sign a PDF on an iPhone
- Go to the AppStore, find the airSlate SignNow app and download it.
- Open the application, log in or create a profile.
- Select + to upload a document from your device or import it from the cloud.
- Fill out the sample and create your electronic signature.
- Click Done to finish the editing and signing session.
When you have this application installed, you don't need to upload a file each time you get it for signing. Just open the document on your iPhone, click the Share icon and select the Sign with airSlate SignNow button. Your doc will be opened in the app. how to integration e signature implement word anything. In addition, using one service for all of your document management demands, things are quicker, smoother and cheaper Download the application right now!
How to digitally sign a PDF file on an Android
What’s the number one rule for handling document workflows in 2020? Avoid paper chaos. Get rid of the printers, scanners and bundlers curriers. All of it! Take a new approach and manage, how to integration e signature implement word, and organize your records 100% paperless and 100% mobile. You only need three things; a phone/tablet, internet connection and the airSlate SignNow app for Android. Using the app, create, how to integration e signature implement word and execute documents right from your smartphone or tablet.
How to sign a PDF on an Android
- In the Google Play Market, search for and install the airSlate SignNow application.
- Open the program and log into your account or make one if you don’t have one already.
- Upload a document from the cloud or your device.
- Click on the opened document and start working on it. Edit it, add fillable fields and signature fields.
- Once you’ve finished, click Done and send the document to the other parties involved or download it to the cloud or your device.
airSlate SignNow allows you to sign documents and manage tasks like how to integration e signature implement word with ease. In addition, the security of your info is top priority. Encryption and private web servers are used for implementing the most up-to-date functions in information compliance measures. Get the airSlate SignNow mobile experience and work more proficiently.


FAQs
-
What is the best way to learn how to implement eSignature in Word?
To learn how to implement eSignature in Word, start by exploring airSlate SignNow’s user-friendly features that seamlessly integrate with Microsoft Word. Our platform offers comprehensive tutorials and support resources that guide you through the process step-by-step, ensuring a smooth experience for both you and your clients.
-
Can I use airSlate SignNow to implement eSignature in Word documents easily?
Yes, airSlate SignNow allows you to easily implement eSignature in Word documents. With our simple tools, you can upload your Word files, add signature fields, and send them for signing in just a few clicks, making the process quick and efficient.
-
What are the pricing options for using airSlate SignNow to implement eSignature in Word?
airSlate SignNow offers flexible pricing plans to accommodate various business needs when implementing eSignature in Word. You can choose from individual, business, or enterprise plans, each designed to provide value and scalability based on your requirements.
-
Does airSlate SignNow support other document formats besides Word for eSignature?
Yes, in addition to demonstrating how to implement eSignature in Word, airSlate SignNow supports multiple document formats. You can easily upload PDFs, Excel files, and other common formats, making it a versatile solution for all your eSignature needs.
-
What are the benefits of implementing eSignature in Word with airSlate SignNow?
Implementing eSignature in Word with airSlate SignNow offers numerous benefits, including enhanced efficiency, reduced turnaround times, and improved document security. Our platform streamlines the signing process, allowing you to focus on your core business activities while ensuring compliance and security.
-
How secure is the eSignature process when I implement it in Word using airSlate SignNow?
The eSignature process when implementing it in Word with airSlate SignNow is highly secure. We utilize industry-leading encryption and compliance standards to protect your documents and signatures, ensuring that your sensitive information remains confidential and secure.
-
What integrations does airSlate SignNow offer for implementing eSignature in Word?
airSlate SignNow offers a wide range of integrations that enhance how you implement eSignature in Word. You can connect with popular applications like Google Drive, Dropbox, and various CRM platforms, allowing for seamless workflows and greater efficiency in document management.
-
How do I incorporate digital signature on invoices? We are an automobile OEM, & print around 600 invoices per day. We currently
DSC Signer [ https://www.dscsigner.com ] is desktop software in which you can sign multiple PDF files by selecting input and output directory, and it doesn't limit the number of PDF files to be signed. And close important deals easily, quickly and securely! Don’t lose precious time and money on paper, postage, faxing, scanning or using other document signing software that takes you hours to set up. It’s allows you to sign PDF documents without any need to purchase signNow, thus dramatically reducing the TCO (Total Cost of Ownership). The software supports hot folder signing, which means you can install the software on your file server and set up DSC Signer Server to watch over the newly-uploaded PDF files in the specified hot folder and sign them on the fly. "The Easiest, Fastest and most Secure way to get documents signed Anytime." We offer a complete software solution for Digitally Signing Invoices, Consignment Note, Delivery orders, etc. With just few clicks, you can digitally sign your Invoices & other documents, in a very user friendly way. You may prepare your Invoice and related documents such as Delivery PDF Documents, from any software, accounting package, MS Office, or even scan from physical copies, digitally sign them using our Invoice File Signing software and email to the recipients. For more info visit below webstes:- Dsc Signer | PDF Signer | Digital Signature Software [ https://www.dscsigner.com/ ] www.dscsigner.com [ https://www.dscsigner.com/ ]
-
How do you make an electronic signature in Word?
Does this option work - How to Create an Electronic Signature in Microsoft Word Documents?
-
How can we increase customer satisfaction by implementing e signatures into our ECM?
So I'm the founder and CEO of ApproveMe and the WP E-Signature WordPress plugin which focuses 100% on legally binding documents and UETA & ESIGN compliance in the WordPress space.Using eSignature in your ECM can save you hours upon hours in administrative time by automating the signature collection for redundant forms like NDA's, Time Sheets, Terms of Service Agreements, New Hire Documents, etc. Create it once... and watch it repeat forever (don’t spend precious time crafting, sending or even scanning standard documents).You could also automatically sync saved document to a Dropbox account (using WP e-Sign Dropbox Sync Add-On). Or send "Auto" Signing Reminder Emails when users have not signed their assigned documents within a pre-defined time frame.
-
In the English language, why does the word "execute" mean both "to implement a plan" and "to kill someone"?
To “execute” does not really mean “to implement a plan”. Rather, it means “to carry out”. It refers to following through on a plan or an order.In the context of a plan, if you say you are going to do something, to be effective you should not just talk about it but carry it out.If breaking a certain rule was punishable by death and the rule was indeed broken the execution needed to be carried out.The word derives from the Latin executare, to follow up, to carry out.
-
How do I enable multiple signatures in MS word without losing the previous signatures?
Add a Digital Signature Using a Signature Line 1. To add a digital signature, open your Microsoft Word document and click where you’d like to add your signature line. 2. From the Word ribbon, select the Insert tab and then click Signature Line in the Text group. 3. A Signature Setup pop-up box appears. Enter your information in the text fields and click OK. 4. Double-click the signature line. 5. A Sign pop-up box appears. At the X, type your name. Next, look at the Signing as: field. Select the signing certificate. To ensure that this is the correct certificate, click the Change button. 6. Click on Click here to view certificate properties. 7. The Certificate Details box appears. Go to the Details tab and scroll down to Key Usage. Single-click on it. The lower text box should now display Digital Signature, Non-Repudiation. If it does, then this is the right certificate. Click OK. 8. If this is the wrong certificate, click OK. Then click More Choices to see other certificates. Select another certificate and repeat these steps until you find the correct certificate. 9. Click the Sign button to sign the document. Insert your PIV card into the card reader. Enter your Smart Card (PIV) PIN and click OK. 10. The Signature Confirmation box tells you that Word saved your digital signature. Click OK. Once you've digitally signed your document, if you edit it, Word will remove the digital signature. Don't worry. You can always go back to Step 1 and digitally sign it again. Add an Invisible Digital Signature You can add an invisible digital signature to prevent your name from appearing in a document. 1. Open your document and click the File tab. 2. Click Info and then click Protect Document. 3. From the Protect Document drop-down menu, click Add a Digital Signature. 4. Select a Commitment Type, such as created and approved this document, and then click Sign. 5. Insert your PIV card into the card reader. Enter your Smart Card (PIV) PIN and click OK. 6. The Signature Confirmation box tells you that Word saved your digital signature. Click OK. 7. Add Multiple Digital Signatures Using Signature Lines Once you digitally sign a document, you can have others also digitally sign it. (Note: If you are the first approver, you should create the signature lines for all of the approvers. Then, send the document to the second approver.) 1. If you are the second (or other) approver, open the document you’ve received. Double-click your signature line to sign. Follow Steps 4-10 from Add a Digital Signature Using a Signature Line [ https://piv.idmanagement.gov/userguides/signworddoc/#add-a-digital-signature-using-a-signature-line ]. 2. A Signature Setup pop-up box appears. Enter your information in the text fields and click OK 3. Double-click your signature line. 4. A Sign pop-up box appears. At the X, type your name. 5. Next, look at the Signing as: field. You should see your name and certificate information. If you don’t, click the Change button to select a different certificate and click Sign. 6. Insert your PIV card and enter your Smart Card (PIV) PIN. Click OK. 7. The Signature Confirmation box tells you that Word saved your digital signature. Click OK. 8. Send the digitally signed document to the next approver. Each successive approver will be able to open the document and double-click the Signature Line with his/her name and complete the signing process. Add Multiple Invisible Digital Signatures Multiple approvers may digitally sign a document. Use the same procedures as you would to add one invisibile digital signature: Add an Invisible Digital Signature [ https://piv.idmanagement.gov/userguides/signworddoc/#add-an-invisible-digital-signature ]. The final approver will see multiple “invisible” signatures in the document. View Digital Signatures If you use Word 2013 and open a digitally signed Word 2007 or 2010 document, you may have compatibility issues. You can view digital signatures in an incompatible Word document in one of two ways: 1. Click the View Signatures button just below the Word ribbon. OR 1. Click the File tab and select Info. Then click View Signatures. For either option, you will be able to see the digital signature details in the Signatures box. Remove a Digital Signature 1. If you want to remove a digital signature, open your Word document and go to the signature line. 2. If there is no signature line, click the View Signatures button just below the Word ribbon. 3. From the Signatures box, select the signature you want to to delete. 4. Right-click on the signature and then click Remove Signature. 5. When prompted, click Yes. Verify Digital Signature Settings Please ask your Technical Support staff for help. Administrator privileges are required for these steps. By default, Microsoft Word uses the SHA-1 hash algorithm to generate digital signatures. The SHA-1 hash algorithm is no longer considered secure. More secure hash algorithms, such as SHA-256, should be used. (See NIST’s guidance on hash functions) [ https://csrc.nist.gov/Projects/Hash-Functions/NIST-Policy-on-Hash-Functions ] You can use either option below to verify/change the hash algorithm settings for Microsoft Office: 1. Group Policy settings: Digital Signature Settings in Office 2013 [ https://technet.microsoft.com/en-us/library/cc545900.aspx ]. (For additional information, consult Microsoft’s technical documents.) 2. Computer registry settings. Change the Microsoft Office signature algorithm, as follows: [code]Word 2010: Computer\HKEY_CURRENT_USER\Software\Policies\Microsoft\Office\14.0\common\signatures Word 2013: Computer\HKEY_CURRENT_USER\Software\Policies\Microsoft\Office\15.0\common\signatures Word 2016: Computer\HKEY_CURRENT_USER\Software\Policies\Microsoft\Office\16.0\common\signatures [/code]Enable digital signatures so that users can sign part of a form 1. On the Tools menu, click Form Options. 2. Under Category, click Digital Signatures, and then click Enable digital signatures for specific data in the form. 3. Click Add. 4. In the Set of signNow Data dialog box, type a name for the part of the form template for which you want to enable digital signatures.Tip: The name you use cannot contain any spaces. 5. Click Select XPath next to the Fields and Groups to be signed box. 6. In the Select a Field or Group dialog box, click the field or group for which you want to enable digital signatures, and then click OK. 7. Under Signature options in the Set of signNow Data dialog box, do one of the following:To allow only one signature for this part of the form template, click Allow only one signature.To allow multiple signatures that are independent of each other, and that can be added or removed without affecting the other signatures, click All the signatures are independent (co-sign).To allow multiple signatures that sign preceding signatures, click Each signature signs the preceding signatures (counter-sign). 8. In the Signature confirmation message box, type the text that you want to show the user when they sign this part of the form, and then click OK twice. 9. In the form template, associate the part of the form template for which you enabled digital signatures with a section.How?Place your cursor where you want to insert the section.If the Data Source task pane is not visible, click Data Source on the View menu.In [ http://menu.In ] the Data Source task pane, do one of the following:To add a control that is bound to a field, right-click the field, and then click the control that you want to bind to this field.To [ http://field.To ] add a section that is bound to a group, right-click the group, and then click Section with Controls.Note: If the field or group that you specified repeats, you must select a non-repeating group that contains that field or group. 10. In the form template, double-click the Section label below the section that contains the other sections or controls that you just inserted. 11. Click the Digital Signatures tab. 12. Select the Allow users to digitally sign this section check box. 13. In the Sign the following data in the form when this section is signed box, click the name of the section that you created a digital signature for in step 4. 14. To display signatures in the section as they are added, select the Show signatures in the sectioncheck box. 15. To make the controls in the section read-only once they are signed, select the When signed, make controls read-only check box. Top of Page [ https://support.office.com/en-us/article/enable-or-disable-digital-signatures-d5050d09-c39e-470f-a548-7f2b98c6e4e1#top ] Disable digital signatures 1. On the Tools menu, click Form Options. 2. Under Category, click Digital Signatures, and then do one of the following:To disable digital signatures for the entire form template, click Do not enable digital signatures.To disable digital signatures for a specific part of the form template, click Enable digital signatures for specific data in the form, click the part of the form template in the Data in the form that can be signed list that you want to disable digital signatures for, and then click Remove.
-
Can I implement a word cloud in Microsoft Excel? How?
I have been looking at the same thing recently. The explanations here are both very good, depending on how you want this to happen:http://chandoo.org/wp/2008/04/22...http://www.clearlyandsimply.com/...
Trusted esignature solution— what our customers are saying


Get legally-binding signatures now!
Frequently asked questions
How do i add an electronic signature to a word document?
How do they know an electronic signature is actually you?
How to sign pdf in system viewer?
Get more for How To Implement eSignature in Word
Find out other How To Implement eSignature in Word
- Lessee name and address form
- Landlord rental forms real estate legal contract
- Model security deposit agreement form
- Chapter 6 lease requirements and leasing activities 6 1 form
- Appendix d lease agreement georgina island form
- Appendix g sample repairs letters montpirgorg form
- Summary dissolution marriage montanalawhelporg form
- In the workers compensation court of the form
- 245322 depositions administrative rules of the state of form
- Control number mt name 2 form
- Control number mt name 3 form
- Form pc instructions massgov
- In the matter of the name change of form
- Your current legal name form
- Judicial district court form
- District judge presiding form
- Judicial district court county form
- Montana state name change process for transgender form
- Courtsmtgovformsname change
- Your county form