Add Custom Logo, Set Phone Call Authentication and Sign
Award-winning eSignature solution


Upgrade your document workflow with airSlate SignNow
Versatile eSignature workflows
Instant visibility into document status
Easy and fast integration set up
Add custom logo set phone call authentication and sign on any device
Detailed Audit Trail
Rigorous protection requirements
See airSlate SignNow eSignatures in action


airSlate SignNow solutions for better efficiency
Our user reviews speak for themselves


Why choose airSlate SignNow
-
Free 7-day trial. Choose the plan you need and try it risk-free.
-
Honest pricing for full-featured plans. airSlate SignNow offers subscription plans with no overages or hidden fees at renewal.
-
Enterprise-grade security. airSlate SignNow helps you comply with global security standards.

Your step-by-step guide — add custom logo set phone call authentication and sign
Add custom logo, Set phone call authentication and Sign. Get maximum performance from the most trusted and safe eSignature system. Simplify your electronic deals using airSlate SignNow. Optimize workflows for everything from simple personnel records to advanced agreements and payment forms.
Know how to Add custom logo, Set phone call authentication and Sign:
- Import multiple documents from your drive or cloud storage space.
- Drag & drop custom fillable boxes (signature, text, date/time).
- Modify the fields size, by tapping it and selecting Adjust Size.
- Insert dropdowns and checkboxes, and radio button groups.
- Add signers and create the request for additional materials.
- Add custom logo, Set phone call authentication and Sign.
- Include the formula the place you require the field to appear.
- Apply comments and annotations for the signers anywhere on the page.
- Save all modifications by clicking on DONE.
Connect users from inside and outside your organization to electronically work on essential signNows and Add custom logo, Set phone call authentication and Sign anytime and on any system using airSlate SignNow. You may monitor every activity completed to your documents, receive notifications an audit report. Remain focused on your business and consumer interactions while with the knowledge that your data is accurate and secure.
How it works
airSlate SignNow features that users love


See exceptional results Add custom logo, Set phone call authentication and Sign

How to submit and sign a document online
Enjoy the fastest approach to add custom logo set phone call authentication and sign. Steer clear of paper-based workflows and manage documents right from airSlate SignNow. Fill out and send out your forms from the business office or easily work on-the-go. No installment or additional software needed. All features can be found online, go to signnow.com and create your personal eSignature flow.
A short instructions on how to add custom logo set phone call authentication and sign in minutes
- Make an airSlate SignNow profile (in the event you haven't signed up yet) or log in using your Google or Facebook.
- Click on Upload and select one of your documents.
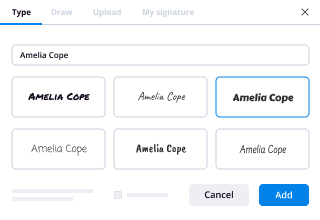
- Use the My Signature to create your unique signature.
- Turn the sample in a powerful PDF with fillable fields.
- Complete your form and click on Done.
Once done, send an invite to sign to a number of recipients. Get an enforceable agreement within minutes employing any gadget. Find far more features for creating significant PDFs; add more fillable fields add custom logo set phone call authentication and sign and collaborate in teams. The eSignature platform supplies a reliable workflow and operates according to SOC 2 Type II Certification. Be sure that your records are guarded and therefore no one can change them.

How to eSign a PDF in Google Chrome
Are you searching for a solution to add custom logo set phone call authentication and sign straight from Chrome? The airSlate SignNow extension for Google is here to help you. Find a PDF template and right from your browser easily open it in the editor. Insert fillable fields for textual content and signature. eSign the PDF template and send it safely and securely in accordance with GDPR, SOC 2 Type II Certification and more.
By using this simple how-to guide listed below, boost up your eSignature workflow into Google and add custom logo set phone call authentication and sign:
- Visit the Chrome web store and select the airSlate SignNow extension.
- Click Add to Chrome.
- Sign in to your profile or create a new one.
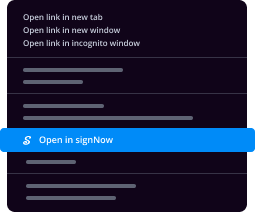
- Add a PDF and click on Open in airSlate SignNow.
- Modify the PDF file.
- Sign the PDF file using the My Signature instrument.
- Click Done to save the edits.
- Ask other users to eSign by simply clicking Invite to Sign and choosing their email addresses/names.
Create a signature that's built in to the workflow to add custom logo set phone call authentication and sign and get PDFs eSigned within minutes. Say goodbye to the piles of papers on your desk and start saving money and time for more important tasks. Choosing the airSlate SignNow Google extension is a great practical choice with a lot of benefits.
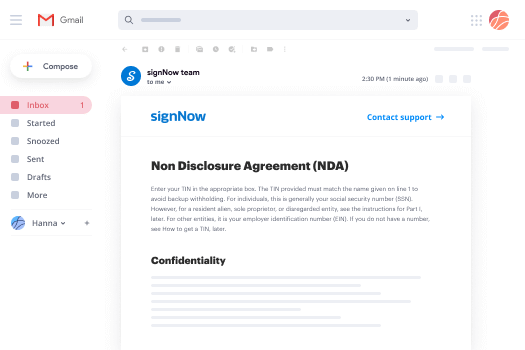


How to sign an attachment in Gmail
If you're like the majority of, you're used to downloading the email attachments you get, printing them out and after that putting your signature on them, correct? Well, we have now great news for you. Signing PDFs in your email became a lot easier. The airSlate SignNow add-on for Gmail allows you to add custom logo set phone call authentication and sign without the need of leaving your inbox. Do everything that you need; put fillable fields and share signing links in a few clicks.
How you can add custom logo set phone call authentication and sign in Gmail:
- Choose airSlate SignNow for Gmail within the from the G Suite Marketplace and then click Install.
- Sign in to your airSlate SignNow profile or make a new one.
- Open up your email with the PDF file you need to eSign.
- Click Upload if you want to save the document to your airSlate SignNow account.
- Click Open document to start the editor.
- eSign the PDF file using My Signature.
- Send a signing links for the other customers using the Send to Sign option.
- Put in their email address and click OK.
As a result, all clients will get message telling them to eSign the document. No requirement to download the PDF file again and again, just add custom logo set phone call authentication and sign in clicks. This add-one is suitable for those who prefer working on more essential tasks as an alternative to burning up time for nothing. Boost your daily monotonous tasks with the award-winning eSignature application.


How to sign a PDF template on the go with no app
For many solutions, getting offers accomplished on the go means the installation of the mobile app on the phone. We're happy to say at airSlate SignNow we've produced singing on the go more quickly and easier by reducing the demand for a mobile app. To eSign, open your browser (any mobile browser) and get immediate access to airSlate SignNow and all sorts of its powerful eSignature instruments. Change docs, add custom logo set phone call authentication and sign and much more. No installing or additional software necessary. Manage your contracts from just about anywhere.
Have a look at our brief guidelines that teach you the best way to add custom logo set phone call authentication and sign.
- Start your browser and go to signnow.com.
- Log in or register a new profile.
- Add or open the document you want to modify.
- Put fillable fields for text, eSignature and date/time.
- Draw, type or upload your eSignature.
- Simply click Save and Close.
- Click Invite to Sign and enter in a recipient's email if you need other people to sign the PDF.
Working on documents with mobile is the same as on a desktop: build a reusable template, add custom logo set phone call authentication and sign and deal with the process as you would generally. In a couple of clicks, get an enforceable agreement that you can download to your internal storage and send out to customers. Yet, if you truly want an application, download the airSlate SignNow app. It's comfortable, fast and has an excellent layout. Try out smooth eSignature workflows from your workplace, in a taxi or on an airplane.


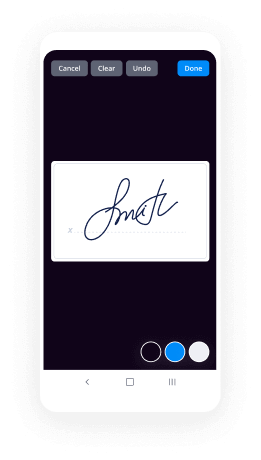
How to sign a PDF file using an iPhone
iOS is a very well-known operating system filled with native instruments. It lets you sign and modify PDFs using Preview without any additional application. Even so, as wonderful as Apple's option is, it doesn't provide any automation. Enhance your iPhone's abilities by using the airSlate SignNow app. Utilize your iPhone or iPad to add custom logo set phone call authentication and sign and a lot more. Present eSignature automation to the mobile processes.
Putting your signature by using an iPhone has never ever been simpler:
- Select the airSlate SignNow app from the AppStore and set it up.
- Make a new account or log in with the Facebook or Google.
- Click Plus and upload the PDF you need to sign.
- Click in the PDF where you would like to put your signature.
- Explore additional features: add more fillable fields or add custom logo set phone call authentication and sign.
- Utilize the Save button to apply the adjustments.
- Send out your PDFs through email or a singing link.
Take a professional PDFs right from your airSlate SignNow application. Get the most from your efforts and job from anyplace; in your own home, the workplace, on a bus or plane, as well as at the beach. Control a complete record process smoothly: make reusable templates, add custom logo set phone call authentication and sign and work on PDF files with business partners. Transform your device right into a powerful enterprise instrument for closing offers.

How to eSign a PDF using an Android
For Android users to manage documents from the device, they must install additional software. The Play Market is vast and plump with alternatives, so finding a great app isn't too hard when you have time and energy to browse through a huge selection of applications. To save time as well as stop aggravation, we recommend airSlate SignNow for Android. Store and edit documents, create signing roles, and even add custom logo set phone call authentication and sign.
The 9 simple steps to enhancing your mobile workflow:
- Open up the mobile app.
- Log in using your Facebook or Google profiles or create a new if you haven't authorized yet.
- Click + to upload a new document using your camera, internal or cloud storages.
- Touch anywhere in your PDF and put in your eSignature.
- Simply click OK to confirm and eSign.
- Try out far more editing features; put graphics, add custom logo set phone call authentication and sign, build a reusable template, and so on.
- Click on Save to make alterations once you finish.
- Download the PDF or send it using email.
- Take advantage of the Invite to sign function if you would like set up And send out a signing link to users.
Change the mundane and routine into easy and smooth with the airSlate SignNow mobile app for smartphone. Sign and send documents for eSignature from anywhere you're connected to the internet. Generate professional PDFs and add custom logo set phone call authentication and sign with a few clicks. Come up with a faultless eSignature process with only your smartphone and improve your general productivity.
Get legally-binding signatures now!
FAQs
-
How do I set up Google Authenticator on my new phone?
From your favorite browser, open the Google account security page. Click on \u201c2-Step Verification\u201d Under the Authenticator App section, click \u201cSetup\u201d Choose your device type (Android, iPhone) and click \u201cNext\u201d to reveal a QR code. Open the Authenticator app on your device. Tap on \u201cBEGIN SETUP\u201d -
How do I sync Google Authenticator?
Open the main menu in the Google Authenticator app. Tap Settings. Tap Time correction for codes. Tap Sync now. -
Can I have Google Authenticator on two devices?
Setting up Google Authenticator on multiple devices You can set up Google Authenticator so that you can generate verification codes from more than one device. Make sure that you have Google Authenticator downloaded on all devices that you want to use. ... Use the same QR code or secret key on all your devices. -
How do I get my Runescape authenticator on my new phone?
Log into game as normal. You will be asked to enter your Authenticator code. Open your Authenticator app on your mobile device. Enter the six digit code from the app into the box provided. You now have an option whether you want the device to remain recognised for 30 days. -
How do I change my authenticator to a new phone?
Back on the web on the 2-Step Verification screen, click Change phone under the Authenticator app heading, then follow the instructions. You'll be asked to scan a barcode in the Authenticator app on your new phone (tap the red plus button to do this), which will then be verified. -
How do I set up Microsoft authenticator on my new phone?
Install the Authenticator app. Launch the app. Tap the "+" button to add a new account. Tap the camera button on the screen and scan the barcode to pair the device. Type the code generated on your phone on the last step, and click Next. -
How do I transfer my authenticator to a new phone?
Step One: Install the Google Authenticator on the new device. Simply install the app from the Google Play Store as you would any other app. Step Two: Head over to the two-step verification web page and click Move to a different phone. Select Android from the list and click Continue. -
How do I transfer Google Authenticator to new phone?
Step One: Install the Google Authenticator on the new device. Simply install the app from the Google Play Store as you would any other app. Step Two: Head over to the two-step verification web page and click Move to a different phone. Select Android from the list and click Continue. -
How do I get my old authenticator on my new phone?
Step 1: Install the Authenticator app on your new iPhone or Android phone. Step 2: Visit Google's two-step verification site on your computer. Log in to your Google account to view your current 2SV settings. Make sure you have both your old and new phone nearby when moving Google Authenticator. -
How do I get my Google Authenticator back on my new phone?
Step 1: Install the Authenticator app on your new iPhone or Android phone. Step 2: Visit Google's two-step verification site on your computer. Log in to your Google account to view your current 2SV settings. Make sure you have both your old and new phone nearby when moving Google Authenticator.
What active users are saying — add custom logo set phone call authentication and sign


Related searches to Add custom logo, Set phone call authentication and Sign
Frequently asked questions
How do you generate a document and apply an electronic signature to it?
How do I create a PDF and send it to my customer for signing?
How you can sign a PDF using a digital signature?
The ins and outs of eSignature


Find out other add custom logo set phone call authentication and sign
- Easily Sign Documents in JPG Format Online
- Convert Your Signatures to PNG Easily with Our PNG ...
- Simplify Document Signing with Our Revolutionary Photo ...
- Streamline Your Workflow with pdf signature copy
- Convert Your Name to Signature Online
- Enhance Your Document Workflow with Kofax Power PDF ...
- Convert JPG to E Signature for Free with airSlate ...
- Effortlessly Copy Your Signature from Email with ...
- Effortlessly Convert Your Signature Images with ...
- Unlock Efficiency with SmallPDF Sign In
- Streamline Your Workflow with Smallpdf Add Signature
- Convert Your Signature to PNG Easily with airSlate ...
- Simplify Your Workflow with Smallpdf Online Signature
- Convert Your Signature to PNG Easily with airSlate ...
- Revolutionize Document Management with Our Signature ...
- Streamline Document Workflow with Signature Scan Copy
- Streamline Your Workflow with airSlate SignNow for ...
- Convert PNG files to digital signatures effortlessly ...
- Convert Pictures to Signatures for Free
- Save PDF with Digital Signature - The Easy Solution for ...