Assign Title Notification. Use eSignature Tools that Work Where You Do.
Award-winning eSignature solution


Do more online with a globally-trusted eSignature platform
Standout signing experience
Trusted reports and analytics
Mobile eSigning in person and remotely
Industry regulations and conformity
Assign title notification, quicker than ever before
Helpful eSignature extensions
See airSlate SignNow eSignatures in action


airSlate SignNow solutions for better efficiency
Our user reviews speak for themselves


Why choose airSlate SignNow
-
Free 7-day trial. Choose the plan you need and try it risk-free.
-
Honest pricing for full-featured plans. airSlate SignNow offers subscription plans with no overages or hidden fees at renewal.
-
Enterprise-grade security. airSlate SignNow helps you comply with global security standards.

Your step-by-step guide — assign title notification
Assign title notification. Get greatest performance from the most respected and safe eSignature system. Simplify your digital transactions using airSlate SignNow. Optimize workflows for everything from simple personnel records to advanced agreements and sales templates.
Learn how to Assign title notification:
- Import multiple pages from your device or cloud storage space.
- Drag & drop custom fillable boxes (signature, text, date/time).
- Alter the fields size, by tapping it and selecting Adjust Size.
- Insert checkboxes and dropdowns, and radio button groups.
- Add signers and create the request for attachments.
- Assign title notification.
- Add the formula the place you require the field to generate.
- Use remarks and annotations for the signers anywhere on the page.
- Save all changes by simply clicking DONE.
Connect people from outside and inside your company to electronically access important signNows and Assign title notification anytime and on any system utilizing airSlate SignNow. You can track every activity carried out to your templates, get notifications an audit report. Stay focused on your business and customer partnerships while knowing that your data is accurate and protected.
How it works
airSlate SignNow features that users love


See exceptional results Assign title notification. Use eSignature Tools that Work Where You Do.


How to fill in and sign a document online
Enjoy the fastest way to assign title notification. Prevent paper-based workflows and deal with contracts from airSlate SignNow. Edit and send out your forms from the workplace or smoothly work on-the-go. No set up or more application required. All functions are available online, just go to signnow.com and configure your personal eSignature flow.
A short guideline on how to assign title notification within a few minutes
- Create an airSlate SignNow account (in the event you haven't signed up yet) or log in using your Google or Facebook.
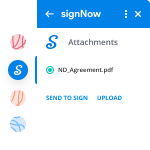
- Click Upload and select one of the PDF files.
- Use the My Signature tool to create your unique signature.
- Turn the template in a powerful PDF with fillable fields.
- Complete your new form and click on Done.
When completed, send an invite to sign to a number of people. Have an enforceable contract quickly using any gadget. Check out far more features for making significant PDFs; put fillable fields assign title notification and collaborate in teams. The eSignature service gives a reliable process and works according to SOC 2 Type II Certification. Make sure that your information are protected and therefore no person can edit them.


How to eSign a PDF template in Google Chrome
Are you searching for a service to assign title notification directly from Chrome? The airSlate SignNow extension for Google is here to help. Get a PDF file and right from the web browser easily open it up with the editor. Add more fillable fields for textual content and eSignature. Sign the PDF file and send out it securely in accordance with GDPR, SOC 2 Type II Certification and more.
By using this simple how-to guide below, boost up your eSignature workflow into Google and assign title notification:
- Visit the Chrome web store and find the airSlate SignNow extension.
- Click on Add to Chrome.
- Sign in to the account or register a new one.
- Add a PDF and then click Open in airSlate SignNow.
- Change the PDF file.
- eSign the PDF file utilizing the My Signature tool.
- Click on Done to save the edits.
- Encourage other individuals to eSign by clicking Invite to Sign and deciding on their email addresses/names.
Create a signature that's built-in to your processes to assign title notification and receive PDFs eSigned within minutes. Leave behind the piles of paper reports located on your workdesk and begin saving money and time for more essential duties. Selecting the airSlate SignNow Google extension is a great practical choice with plenty of advantages.


How to sign an attachment in Gmail
If you're like most, you're used to downloading the email attachments you receive, printing them out and then putting your signature on them, isn't it? Well, we certainly have very good news to suit your needs. Putting your signature on PDF files within your inbox became much easier. The airSlate SignNow add-on for Gmail lets you assign title notification without leaving your mailbox. Do everything that you need; put fillable fields and share signing requests in a few clicks.
How to assign title notification in Gmail:
- Get airSlate SignNow for Gmail in the G Suite Marketplace and then click Install.
- Sign in to the airSlate SignNow account or make a new one.
- Open up your email with the PDF you should eSign.
- Click Upload to save the PDF file to your airSlate SignNow account.
- Just click Open document to open up the editor.
- eSign the PDF making use of My Signature.
- Send a signing links for the other members with the Send to Sign option.
- Put in their email and press OK.
As a result, all members will receive message telling them to eSign the PDF. No reason to download the attachment again and again, just assign title notification in clicks. This add-one is ideal for entrepreneur who prefer focusing on more important aims as an alternative to wasting time for absolutely nothing. Improve your daily routine with the award-winning eSignature service.


How to eSign a PDF file on the go with no app
For a lot of products, getting offers done on the go means the installation of an application on the smartphone. We're delighted to say at airSlate SignNow we've made singing on the go faster and easier by eliminating the need for an application. To eSign, open your browser (any mobile browser) and try out immediate access to airSlate SignNow and its powerful eSignature instruments. Change docs, assign title notification and a lot more. No installation or additional software needed. Manage your contracts from anywhere.
Take a look at our step-by-step guidelines that show you how to assign title notification.
- Start your mobile browser and visit signnow.com.
- Log in or register a new account.
- Add or open the document you want to change.
- Insert fillable fields for textual content, eSignature and date/time.
- Draw, type or upload your eSignature.
- Click on Save and Close.
- Click on Invite to Sign and enter in a recipient's email if you need others to sign the PDF file.
Close deals with mobile is no different than on a desktop: create a reusable template, assign title notification and manage the flow as you would normally. In a few clicks, get an enforceable agreement that you can download to the device and share to other people. However, if you truly want a software, download the airSlate SignNow app. It's comfortable, quick and has an excellent design. Try out effortless eSignature workflows from your workplace, in a taxi or on a plane.


How to sign a PDF having an iPad
iOS is definitely a well-known operating system full of native tools. It allows you to sign and edit PDFs using Preview without the extra application. Even so, as great as Apple's option is, it doesn't provide any automation. Boost your iPhone's functionality by taking advantage of the airSlate SignNow application. Use your iPhone or iPad to assign title notification and more. Bring in eSignature automation to your mobile workflow.
Signing with an iPhone has never ever been simpler:
- Get the airSlate SignNow app from the AppStore and install it.
- Make a new profile or sign in with the Facebook or Google.
- Click on Plus and add the document you wish to sign.
- Click in the PDF file exactly where you would like to insert your signature.
- Discover other features: add fillable fields or assign title notification.
- Click on Save button to make the adjustments.
- Share your PDF files through email or using a singing link.
Make a professional PDFs straight from your airSlate SignNow iPhone app. Get the most from your time and work from anyplace; at home, in the office, on a bus or airplane, and even at the beach. Manage a complete document workflow seamlessly: create reusable templates, assign title notification and work on documents with business partners. Transform your device right into a effective enterprise tool for executing deals.


How to eSign a PDF using an Android
For Android users to control agreements using their device, they should find and install additional application. The Play Market is vast and plump with choices, so choosing a good program isn't too hard if you have time for you to read through a huge selection of applications. To save your time as well as stop stress, we propose airSlate SignNow for Android. Save and change documents, make signing roles, and even assign title notification.
The 9 easy steps to optimizing your smartphone workflow:
- Open up the app.
- Sign in using your Facebook or Google accounts or register if you haven't authorized already.
- Click on + to add your record taking advantage of your camera, internal or cloud storages.
- Touch just about anywhere on the PDF and put your eSignature.
- Just click OK to confirm and sign.
- Experience a lot more enhancing functions; add images, assign title notification, design a reusable template, and many others.
- Simply click Save to apply alterations as soon as you finish.
- Download the PDF or send out it through mail.
- Use the Invite to sign function if you wish to set up & send out a signing order to recipients.
Turn the mundane and routine into easy and smooth together with the airSlate SignNow app for smartphone. eSign and send documents for signature from any place you're connected to the internet. Create professional-looking PDFs and assign title notification with couple of clicks. Assembled a perfect eSignature workflow using only your mobile phone and increase your total efficiency.
Get legally-binding signatures now!
FAQs
-
How do I set priority alerts on Android?
The second way to get into your app's notification priority level setting is to go to the Apps tab in your Settings Menu. To get there, pull down your notification bar twice so you can tap the \u201cGear\u201d icon. Scroll to the app you'd like to alter and tap on it. -
How do I prioritize notifications on Android?
Toggle the Priority slider to \u201con\u201d if you want notifications from that app to be considered Priority notifications. You can also get to this screen any time an app's notification appears by pressing and holding on the notification until you see the little info button (it looks like a lowercase "i" in a circle) appear. -
How do I set notifications on Android?
Open your phone's Settings app. Tap Apps & notifications Notifications. Under \u201cRecently Sent,\u201d tap an app. Tap a type of notification. Choose your options: Choose Alerting or Silent. To see a banner for alerting notifications when your phone is unlocked, turn on Pop on screen. -
How do I prioritize Oreo notifications on Android?
Go into the Apps & Notifications section of your system settings, then select any app and tap "App notifications." If the app has proper Oreo-level notification support (Google Photos is a good example), you'll be able to select different categories of notifications for the app and then change their importance level. -
What are priority notifications Android?
Priority interruptions To choose which notifications you'd like to treat as priority notifications, head on over to your phone's Settings app, then tap Sound & notification\u2014a one-stop shop of sorts for all things related to notifications and alert sounds. Next, tap Do not disturb, then tap Priority only allows. -
How do I change my notification settings?
Select the Start button, and then select Settings . Go to System > Notifications & actions. Do any of the following: Choose the quick actions you'll see in action center. Turn notifications, banners, and sounds on or off for some or all notification senders. Choose whether to see notifications on the lock screen. -
How do you reset notification settings on Android?
Open device Settings. Navigate to Apps and notifications or Application Manager or Apps depending on your device and software version. Tap the three dots present at the top right corner and select \u201cShow System\u201d. ... Then tap \u201cAndroid System\u201d. -
How do you reset app notifications?
Step 1: Delete your app from the device. Step 2: Turn the device off completely and turn it back on. Step 3: Navigate to Settings > General > Date & Time and set the date ahead a day or more. Step 4: Turn the device off completely again and turn it back on. Step 5: Re-install your app and open it. -
What does it mean to Reset app preferences?
What is Reset App Preferences? Hidden under the Installed apps setting of your Android phone lies the Reset app preferences option. If you tap the Reset app preferences button, you get a warning pop-up like this: The pop-up lists the settings and behaviors that will be affected once you tap the reset apps button. -
How do you get rid of sound pickers?
1 Answer. All you have to do, is clear defaults for the sound picker app. To do so, go to settings \u2192 application manager (apps) \u2192 in the three dots menu, select "show system apps" \u2192 sound picker \u2192 defaults \u2192 clear defaults. After clearing defaults, you will now be able to choose between the other options.
What active users are saying — assign title notification


Related searches to Assign title notification. Use eSignature Tools that Work Where You Do.
Frequently asked questions
How do I insert an electronic signature into a Word document?
How can I make a PDF easy to sign?
How can I insert an electronic signature into a PDF?
The ins and outs of eSignature


Find out other assign title notification
- Write signature in Word in India
- Create e-signature in India
- Insert a signature line in Word in India
- Notarize signature in India
- Create signature on Outlook in India
- Create signable PDF in India
- Insert signature in Gmail in India
- Sign PDF on Android in India
- Sign agreement in India
- Capture signature on iPad in India
- Sign a PDF on Mac in India
- IPhone sign up in India
- Signature online generator in India
- PDF online signature in India
- Free electronic signature generator in India
- Get electronic signature in India
- PNG signature maker in India
- Electronic signatures PDF in India
- Online PDF sign in India
- Signature free in India