Get Your Cash Bill Format in Word Free Download for Staffing
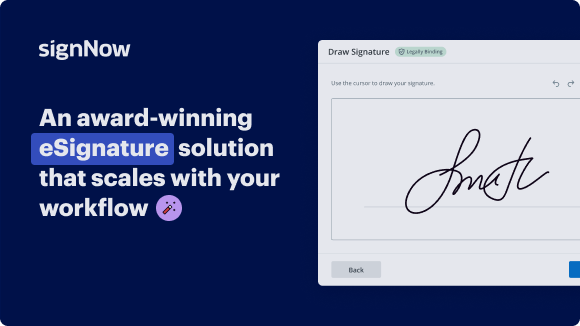
Move your business forward with the airSlate SignNow eSignature solution
Add your legally binding signature
Integrate via API
Send conditional documents
Share documents via an invite link
Save time with reusable templates
Improve team collaboration
See airSlate SignNow eSignatures in action
airSlate SignNow solutions for better efficiency
Our user reviews speak for themselves
Why choose airSlate SignNow
-
Free 7-day trial. Choose the plan you need and try it risk-free.
-
Honest pricing for full-featured plans. airSlate SignNow offers subscription plans with no overages or hidden fees at renewal.
-
Enterprise-grade security. airSlate SignNow helps you comply with global security standards.
Cash bill format in word free download for staffing
Creating a cash bill may seem daunting, but with the right tools, it can be an easy process. One such tool is airSlate SignNow, which offers a user-friendly platform for signing and managing documents. This guide will walk you through the steps to effectively utilize airSlate SignNow for your cash bill template needs.
Cash bill format in word free download for staffing
- Visit the airSlate SignNow website using your preferred browser.
- Register for a free trial or log into your existing account.
- Select and upload the document you wish to sign or distribute for signature.
- If you plan to utilize this document frequently, consider saving it as a template.
- Access your document and customize it by adding required fillable fields or information.
- Complete your document by signing it and designating signature areas for recipients.
- Click on 'Continue' to initiate and send an eSignature invitation.
Using airSlate SignNow can signNowly streamline your document management process. With a rich feature set and cost-effective solutions, the platform provides businesses with a great return on investment.
Moreover, airSlate SignNow is designed for simplicity and scalability, making it a fitting choice for small to medium-sized businesses. With transparent pricing and exceptional customer support available 24/7 for all paid plans, you can confidently manage your document signing needs. Start maximizing your efficiency today!
How it works
airSlate SignNow features that users love
Get legally-binding signatures now!
FAQs
-
What is the cash bill format in word free download for Staffing?
The cash bill format in word free download for Staffing is a customizable document template designed for companies to easily create and manage billing statements. This format allows for clear itemization of services provided, ensuring accurate record-keeping and financial transparency. -
How can I download the cash bill format in word for free?
To download the cash bill format in word free download for Staffing, visit our resource section on the airSlate SignNow landing page. Simply click on the download link, and you'll receive instant access to the template in Word format, ready for your use. -
Is the cash bill format compatible with different versions of Word?
Yes, the cash bill format in word free download for Staffing is compatible with various versions of Microsoft Word. Whether you are using an older version or the latest Office 365, you can seamlessly edit and customize the template to meet your staffing needs. -
What are the benefits of using a cash bill format for my staffing business?
Utilizing a cash bill format in word free download for Staffing helps streamline your billing process, ensuring you permanently maintain consistent documentation. This boost in professionalism aids in client trust and simplifies tax-related tasks for your staffing business. -
Are there any costs associated with using the cash bill format?
The cash bill format in word free download for Staffing is available at no cost, allowing you immediate access to essential billing documentation. However, additional features may be available through our paid services if you require more advanced functionalities in document management and e-signature capabilities. -
Can I edit the cash bill format for my specific needs?
Yes, the cash bill format in word free download for Staffing is fully customizable. You can easily modify headings, add your company logo, and tailor the sections according to your unique billing processes, making it perfectly suited for your staffing business. -
What integrations are available with the cash bill format?
While the cash bill format in word free download for Staffing is primarily a standalone template, it integrates well with airSlate SignNow’s eSignature features, allowing for seamless document management. This ensures your clients can easily sign and return documents electronically, enhancing efficiency in your staffing operations. -
How can I ensure my cash bill format stays compliant with local regulations?
To ensure compliance when using the cash bill format in word free download for Staffing, regularly review local billing regulations and amend the template as needed. airSlate SignNow provides resources and support to help you stay updated on any changes in compliance requirements that may affect your staffing business.
What active users are saying — cash bill format in word free download for staffing
Related searches to Get your cash bill format in Word free download for staffing
Cash bill format in word free download for Staffing
In this video series you will learn how to create this automated and fillable invoice design which will even include a custom macro to automatically calculate the values in the invoice table. A lot of people are using Excel for creating invoices but I really don’t recommend it. In Word it is way easier to create a good-looking design AND the design is way more stable. For example, when you transfer an Excel document to another computer, it can often be the case, that the column width changes. And that’s the reason why we will create this invoice design in Word. By the way: you will find the link to the template in the video description below. Just a quick, but important information at the beginning: In this video we will create an invoice template which is similar to the US format. Note, that there are various different ways on how to structure the content in the invoice, so this is just one of many possible layouts FOR THE US. Additionally, it is important to know that each country has separate rules for which data an invoice needs to contain. This means, that this layout may or may not be an invoice suitable for your country. Therefore I recommend you the following procedure: Follow this tutorial and create the document together with me, so that you learn all the necessary skills and so that you have the invoice template. Then, check out some invoices from companies in your country and also check the local laws to know what information your invoice needs to contain. And afterwards, you can add additional information if needed. One more note before we start: you can change the speed of the video in the YouTube video player, so if the video is too slow or too fast for you, adapt it to your desired speed. All right, let’s start with the editing now. As with every professional document, we first of all set the document size, the orientation and the margins in the “Layout” tab. For this sample invoice we will be using the standard US letter format. The orientation is already set correctly, so we continue with the margins and we’ll setup custom margins for this invoice. For top and bottom margins we set 3.5cm and for the left and right margins 1.5cm. Note, that these are numbers I choose since they fit for my design. However, some countries like Germany for example, might have a dedicated standard for business letters and then you should of course set the margins ing to these standard. After we have set the basic page layout, we move to the design tab and here we now set the fonts and colors for our document. Let’s start with the colors. We click on “Colors”, “Customize Colors” and there we now integrate the color from our corporate design. If you don’t have a corporate design, simply select colors that you will later on want to use throughout the document. I’ve created a small video especially for the Theme Colors, so check it out if you want to know more about this function in Word. Ok, after setting the colors, we will now do the same for the fonts. So we click on “Fonts”, “Customize Fonts” and select the default font for our document. Again, you’ll also find a separate small video about the theme font functions, if you want to learn about it in more detail. Now that everything is setup, we will start with the header and footer of the document. To activate the header and footer area, we simply double click into the top margin of the document. Note, that we typically put all the content in the header and footer area, which does not need to be changed and always stays the same – so for example a document title. Therefore, we now enter the title “Invoice” – then we change the size of it to 24pt, set the casing to all uppercase and change the font color to the accent color 1, that we have previously set in the “Design” tab. On the right side of the document, we will implement the company logo. To do that, you can simply drag and drop your logo into the document. Then we resize the logo, by pulling the white circle dot at the bottom right corner – and, we also set the layout options to “In front of text”, so that we can move the image around freely. And now we position it at the right margin. Here we can actually use the alignment function, to make sure that it is exactly aligned at the right margin. So while the image is selected, we go to the “Format” tab, click on “Align” – and then we make sure that it says “Align to Margin” here, so that the document margins are the relation for the alignment function. Now we can “Align right” to the margin and as you can see, it is now perfectly aligned. Let’s move on to the footer content. In the footer, you would typically implement the page number and all the contact data of your company. So, we start with the page number and type it in – and afterwards, we align it to the right by pressing the tab key multiple times. In the ruler you can see the so-called tab-stops. As you can see, there are 2 tabs-stops, therefore, I had to press the tab key 2 times for the content to move to the far right of the document. In case your tab-stop at the right is not aligned properly with the margin, you can simply drag it to the desired position. Now we press the enter key and in each new line we insert another part of our company details. Since we will want to integrate fancy looking icons at the left of the company details, we need to move the content a bit to the right. For that, we select the details and now we click at the 1cm position mark in the ruler. This will create a tap-stop at 1cm for all these positions. And with that tap-stop, we can click into each line, press the tab key and the content will be shifted to this tab position. Then we are going to insert the icons by going to the “Insert” tab, clicking on icons and searching for the relevant icons. For example, when I search for “house”, I can select it and then click on “Insert”. So, you will have to search for the icons “house”, “phone”, “mail” and “globe”. Once we inserted all 4 of these, we will have to change the layout text wrapping option for all of these to “behind text”. If the text wrapping options don’t pop up at the right of the icon, you will also find them by selecting the image, going to the “Format” tab and then you will see “Wrap text” here. Ok, now that we changed the layout options, we select all 4 icons at once. You can do that by holding the “CTRL” key down while selecting them. When they are all selected, we go to the “Format” tab and give them a size of 0.5cm. Now we position all of the icons roughly in line with the company details. And to align them perfectly, we again select all 4 of them, go to the “Format” tab and click on “Align”. To now align them relative to each other, we make sure that “Align selected objects” is marked and then we press “Align left” – and “Distribute Vertically”. We are almost finished with the footer but to visually separate the page number from the company data, we are gonna insert a line here. For that, click into the line which contains the page number – and in the “Home” tab, we activate the bottom border button. And if you want, we can also insert a grey version of our logo into the background for example. This will put an emphasis on our company branding. Alright – with the footer being finished, we can close the header and footer area with a double click into the editing area. By the way, note that in some countries, the footer also contains your bank details, in case the customer wants to use a bank transfer to pay the invoice. So, make sure to check some other invoices from your country, to see if you need more details in the footer area. Before we now start editing the content, we make sure that the paragraph spacing of our standard text is 0pt. For that, we do a right-click on the “Normal” style, click on “Modify” and as you can see, there is still a standard line spacing of 8pts. To change that to 0, we click on “Format”, “Paragraph” and in the “After” text box, we enter 0 and press “OK”. Now we are good to go. And if you like the video so far, please support the channel by liking the video and subscribing to the channel. So, for the actual content, we will create 3 information blocks in this sample invoice. The first block is the “BILL TO” information. We write down “BILL TO” and then the customer details in each line. I’m gonna make the “BILL TO” title all caps and also bold, so that it sticks out. Next, we will create the “SHIP TO” section in the same way. For this video, I’m simply gonna copy the dummy data for the customer. To make it more obvious that these 2 blocks are separate, we click into the last line BEFORE the “SHIP TO” section, go to the “Layout” tab and enter an “After” value of 8pt. Note, that the ”SHIP TO” section is typically only needed if you are sending physical goods to a customer or if you are providing a service at the customers location. But even if this doesn’t apply to you, you can also use this area to note down some project details, so that your customer immediately knows what this invoice is for. Alright, so there is still one information block missing, which we are going to put on the right side of the document, at the height of the “BILL TO” section. To do that, we highlight the whole “BILL TO” section and now we need to create 2 tab-stops in the ruler. So, we click into 2 random positions in the ruler and we do a double click on one of the tabs. This will open up the tabs editor. Here we select the one with the higher number, we change the alignment to a “Right” alignment and confirm with “OK”. Now we have 1 tab with a left alignment and one with a right alignment. We drag the left alignment tab roughly to the position of 12.5cm. And then the right alignment tab to the right page margin. Like that, we can now start entering content to the right of the “BILL TO” section while keeping a perfect alignment. So, you click into the first line of the “BILL TO” section, press the tab key and enter the first title for the invoice data section. I’ll enter “Inovice #” as an example here. Then we press the tab key again and enter the invoice number. And like that, we can do this for all the other lines for which we created the tab stops. These are typically the invoice date – a reference number (this can be the purchase order number from the customer for example or the customers’ project number) – and in the last line the due date. After implementing the invoice data block, let’s also make the titles of this block bold. Now it’s time for the actual invoice table. At the end of the “SHIP TO” block, we add a 30pt paragraph spacing, to create a bigger visual separation. Then, in the “Insert” tab, we click on “Table” and implement a table with 4 columns and 8 rows. In the top of this table, we write the titles. These are “Description”, “Price”, “Quantity” and “Amount”. Then we will leave one line empty and in this example we now have 3 lines which we can fill with some dummy content. In the next line, in the “Quantity” columns, we write “Subtotal” – one line below, we note the sales tax – and in the last table line we write the total value. Now we have to format the whole table. So, let’s start with the column width. We drag the column borders to change the column width and typically the description column should be the widest one. Then we continue with the row height. We select the first whole row, go to the “Layout” tab of the table formatting tools and where it says height, we enter 1cm. For the empty row below, we will do 0.5cm – for all the content rows, it will be 1.3cm and then for the bottom rows 1cm again. Then, we change the text alignment by selecting the whole table and again in the “Layout” tab, we choose the left horizontal alignment with the center vertical alignment. For the price and quantity columns, we will do horizontal center and vertical center. And for the “Amount” column, we will use horizontal right and vertical center. Now, for the colors of the table, we highlight the first line, go to the “Design” tab, click on “Shading” and choose the accent color 1. Of course, feel free to choose any other color from your palette. Additionally, we make the font bold – font size 12pt - and the font color white. And we repeat this for the total row. And for all of our products, we could also use the bold styling to lay the focus on the products. The only thing left, is, that we remove the table borders. So, we again select the whole table, go to the “Design” tab, click on the “Borders” dropdown arrow and select “No Border”. By the way, if you need more lines in your table, simply click into one of the product lines, go to the “Layout” tab and click on “Insert Below”. Ok, so let’s implement the Terms & Conditions section now. This one is fairly simple – we write down the terms and conditions title and then content of our terms. Here, we will again make the title bold and we will give it a paragraph spacing of 30pt BEFORE the paragraph. And as a last detail, we will also insert a thank you sentence. This one is gonna be centered in the middle – size 28 – with 36pt of spacing before the paragraph – and I’m gonna choose the font “Brush Script MT” here. Alright, so this is the whole invoice design, but stay with me for a few more seconds because I want to show you something exciting. In the next part of this video series, we will improve this document A LOT. I’m talking about fillable fields, an automatically updating date field, automatic page numbers and in the end even a custom calculation script which will do the whole total amount calculation for you. Also, if this free content was helpful for you, please consider supporting me by liking the video and subscribing to the channel, as the creation of this video was a bunch of work and the subscription is totally free for you with almost no effort. With that being said, I see you in the next video.
Show moreGet more for cash bill format in word free download for staffing
Find out other cash bill format in word free download for staffing
- Create your gratis online PDF signature effortlessly
- Easily identify PDF files and streamline your signing ...
- Master electronic signature production with airSlate ...
- Create the perfect email signature layout with airSlate ...
- Experience free PDF signing no account needed for ...
- Free online PDF to Word conversion without sign up made ...
- Convert PDF to Word for free online with airSlate ...
- Join a PDF document effortlessly with airSlate SignNow
- Effortlessly add an internet signature on document with ...
- Execute document electronically with airSlate SignNow ...
- Convert your documents for free with our free document ...
- Sign documents online with a free PDF signature ...
- Effortless online DOCX file signing made simple
- Create your signature creator PDF free with airSlate ...
- Easily place signature in PDF online free
- Streamline your workflow with online signature ...
- Create your online sign-up form free and streamline ...
- Discover the no sign up PDF text editing tool online ...
- Effortless online signature SharePoint integration for ...
- Easily create an online signature in Gmail for ...