Email Signature School Itinerary Made Easy
Award-winning eSignature solution


Do more online with a globally-trusted eSignature platform
Standout signing experience
Trusted reports and analytics
Mobile eSigning in person and remotely
Industry regulations and compliance
Email signature school itinerary, faster than ever before
Helpful eSignature extensions
See airSlate SignNow eSignatures in action


airSlate SignNow solutions for better efficiency
Our user reviews speak for themselves


Why choose airSlate SignNow
-
Free 7-day trial. Choose the plan you need and try it risk-free.
-
Honest pricing for full-featured plans. airSlate SignNow offers subscription plans with no overages or hidden fees at renewal.
-
Enterprise-grade security. airSlate SignNow helps you comply with global security standards.

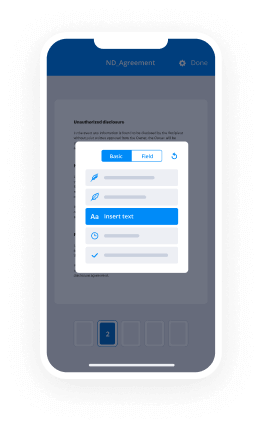
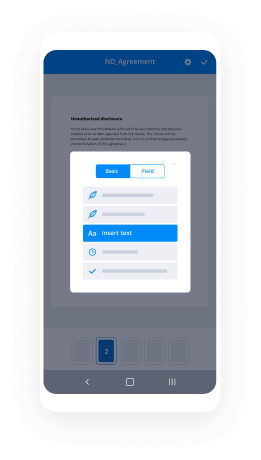
Your step-by-step guide — email signature school itinerary
Employing airSlate SignNow’s eSignature any organization can enhance signature workflows and eSign in real-time, providing a better experience to customers and employees. Use email signature School Itinerary in a couple of easy steps. Our mobile apps make work on the move feasible, even while off-line! eSign signNows from anywhere in the world and complete trades in less time.
Follow the stepwise guide for using email signature School Itinerary:
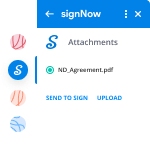
- Sign in to your airSlate SignNow account.
- Find your record in your folders or upload a new one.
- Open the template and edit content using the Tools menu.
- Drag & drop fillable fields, add textual content and eSign it.
- Add several signees using their emails and set the signing sequence.
- Indicate which users will get an completed copy.
- Use Advanced Options to limit access to the template add an expiration date.
- Click on Save and Close when finished.
Furthermore, there are more advanced tools available for email signature School Itinerary. Include users to your shared work enviroment, browse teams, and keep track of teamwork. Millions of users all over the US and Europe agree that a system that brings everything together in a single unified work area, is what companies need to keep workflows performing smoothly. The airSlate SignNow REST API allows you to embed eSignatures into your application, website, CRM or cloud storage. Try out airSlate SignNow and enjoy quicker, easier and overall more productive eSignature workflows!
How it works
airSlate SignNow features that users love


See exceptional results email signature School Itinerary made easy

How to fill in and eSign a PDF online
Try out the fastest way to email signature School Itinerary. Avoid paper-based workflows and manage documents right from airSlate SignNow. Complete and share your forms from the office or seamlessly work on-the-go. No installation or additional software required. All features are available online, just go to signnow.com and create your own eSignature flow.
A brief guide on how to email signature School Itinerary in minutes
- Create an airSlate SignNow account (if you haven’t registered yet) or log in using your Google or Facebook.
- Click Upload and select one of your documents.
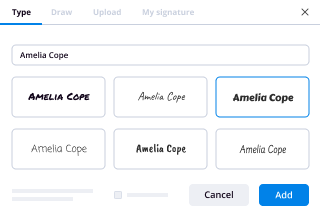
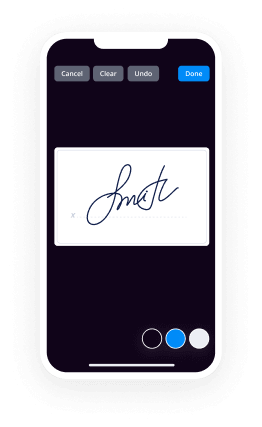
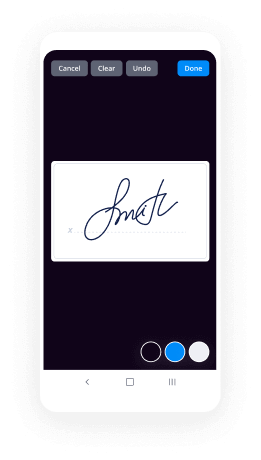
- Use the My Signature tool to create your unique signature.
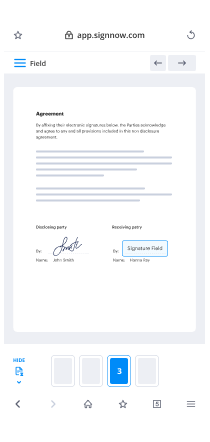
- Turn the document into a dynamic PDF with fillable fields.
- Fill out your new form and click Done.
Once finished, send an invite to sign to multiple recipients. Get an enforceable contract in minutes using any device. Explore more features for making professional PDFs; add fillable fields email signature School Itinerary and collaborate in teams. The eSignature solution supplies a reliable workflow and runs according to SOC 2 Type II Certification. Be sure that all your records are guarded and that no person can take them.
How to eSign a PDF file in Google Chrome
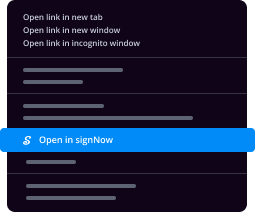
Are you looking for a solution to email signature School Itinerary directly from Chrome? The airSlate SignNow extension for Google is here to help. Find a document and right from your browser easily open it in the editor. Add fillable fields for text and signature. Sign the PDF and share it safely according to GDPR, SOC 2 Type II Certification and more.
Using this brief how-to guide below, expand your eSignature workflow into Google and email signature School Itinerary:
- Go to the Chrome web store and find the airSlate SignNow extension.
- Click Add to Chrome.
- Log in to your account or register a new one.
- Upload a document and click Open in airSlate SignNow.
- Modify the document.
- Sign the PDF using the My Signature tool.
- Click Done to save your edits.
- Invite other participants to sign by clicking Invite to Sign and selecting their emails/names.
Create a signature that’s built in to your workflow to email signature School Itinerary and get PDFs eSigned in minutes. Say goodbye to the piles of papers sitting on your workplace and begin saving time and money for additional important activities. Picking out the airSlate SignNow Google extension is a great handy option with a lot of benefits.
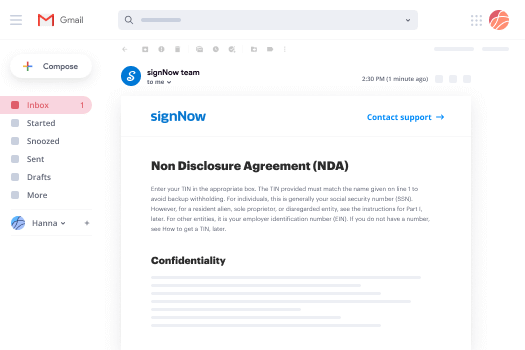

How to eSign an attachment in Gmail
If you’re like most, you’re used to downloading the attachments you get, printing them out and then signing them, right? Well, we have good news for you. Signing documents in your inbox just got a lot easier. The airSlate SignNow add-on for Gmail allows you to email signature School Itinerary without leaving your mailbox. Do everything you need; add fillable fields and send signing requests in clicks.
How to email signature School Itinerary in Gmail:
- Find airSlate SignNow for Gmail in the G Suite Marketplace and click Install.
- Log in to your airSlate SignNow account or create a new one.
- Open up your email with the PDF you need to sign.
- Click Upload to save the document to your airSlate SignNow account.
- Click Open document to open the editor.
- Sign the PDF using My Signature.
- Send a signing request to the other participants with the Send to Sign button.
- Enter their email and press OK.
As a result, the other participants will receive notifications telling them to sign the document. No need to download the PDF file over and over again, just email signature School Itinerary in clicks. This add-one is suitable for those who like focusing on more essential tasks rather than wasting time for practically nothing. Enhance your daily compulsory labour with the award-winning eSignature platform.
How to eSign a PDF on the go with no application
For many products, getting deals done on the go means installing an app on your phone. We’re happy to say at airSlate SignNow we’ve made singing on the go faster and easier by eliminating the need for a mobile app. To eSign, open your browser (any mobile browser) and get direct access to airSlate SignNow and all its powerful eSignature tools. Edit docs, email signature School Itinerary and more. No installation or additional software required. Close your deal from anywhere.
Take a look at our step-by-step instructions that teach you how to email signature School Itinerary.
- Open your browser and go to signnow.com.
- Log in or register a new account.
- Upload or open the document you want to edit.
- Add fillable fields for text, signature and date.
- Draw, type or upload your signature.
- Click Save and Close.
- Click Invite to Sign and enter a recipient’s email if you need others to sign the PDF.
Working on mobile is no different than on a desktop: create a reusable template, email signature School Itinerary and manage the flow as you would normally. In a couple of clicks, get an enforceable contract that you can download to your device and send to others. Yet, if you want an application, download the airSlate SignNow app. It’s secure, quick and has an excellent interface. Take advantage of in seamless eSignature workflows from your business office, in a taxi or on a plane.
How to sign a PDF file utilizing an iPhone
iOS is a very popular operating system packed with native tools. It allows you to sign and edit PDFs using Preview without any additional software. However, as great as Apple’s solution is, it doesn't provide any automation. Enhance your iPhone’s capabilities by taking advantage of the airSlate SignNow app. Utilize your iPhone or iPad to email signature School Itinerary and more. Introduce eSignature automation to your mobile workflow.
Signing on an iPhone has never been easier:
- Find the airSlate SignNow app in the AppStore and install it.
- Create a new account or log in with your Facebook or Google.
- Click Plus and upload the PDF file you want to sign.
- Tap on the document where you want to insert your signature.
- Explore other features: add fillable fields or email signature School Itinerary.
- Use the Save button to apply the changes.
- Share your documents via email or a singing link.
Make a professional PDFs right from your airSlate SignNow app. Get the most out of your time and work from anywhere; at home, in the office, on a bus or plane, and even at the beach. Manage an entire record workflow easily: generate reusable templates, email signature School Itinerary and work on PDF files with business partners. Transform your device right into a highly effective organization tool for executing offers.
How to sign a PDF file Android
For Android users to manage documents from their phone, they have to install additional software. The Play Market is vast and plump with options, so finding a good application isn’t too hard if you have time to browse through hundreds of apps. To save time and prevent frustration, we suggest airSlate SignNow for Android. Store and edit documents, create signing roles, and even email signature School Itinerary.
The 9 simple steps to optimizing your mobile workflow:
- Open the app.
- Log in using your Facebook or Google accounts or register if you haven’t authorized already.
- Click on + to add a new document using your camera, internal or cloud storages.
- Tap anywhere on your PDF and insert your eSignature.
- Click OK to confirm and sign.
- Try more editing features; add images, email signature School Itinerary, create a reusable template, etc.
- Click Save to apply changes once you finish.
- Download the PDF or share it via email.
- Use the Invite to sign function if you want to set & send a signing order to recipients.
Turn the mundane and routine into easy and smooth with the airSlate SignNow app for Android. Sign and send documents for signature from any place you’re connected to the internet. Build good-looking PDFs and email signature School Itinerary with a few clicks. Assembled a flawless eSignature process with only your mobile phone and boost your general efficiency.
Get legally-binding signatures now!
FAQs
-
How do you put your signature on an email?
Name, title and company. Your name tells the reader who sent the email. ... Contact information. Your contact information should include your business website. ... Social links. ... Logo (optional). ... Photo (optional). ... Responsive design. ... Legal requirements. -
How do I create an email signature?
Open a new message. ... On the E-mail Signature tab, click New. Type a name for the signature, and then click OK. In the Edit signature box, type the text that you want to include in the signature. -
Who has the best signature?
John Hancock, former president of United States Congress, has arguably one of the most famous signatures around. -
What is a professional email signature?
Making a Professional Email Signature. You should think of a professional email signature as an electronic, 21st-century business card. ... At its most basic, a professional email signature used by an employee includes personal information such as their full name, job title, phone number and email address. -
How do I create a professional email signature?
Emphasize your name, affiliation, and secondary contact information. Keep colors simple and consistent. Use design hierarchy. Include a call-to-action (and update it regularly). Include clickable icons linking to your social profiles. Make links trackable. Use space dividers. -
How do you end an email to a student?
End your email with a \u201cthank you\u201d or \u201cbest\u201d and your full name. Staff and professors are often keeping track of thousands of students, so clearly identifying yourself is the easiest way to ensure you get an answer. -
How can I create a signature?
Suggested clip How to design your own amazing signature - YouTubeYouTubeStart of suggested clipEnd of suggested clip How to design your own amazing signature - YouTube -
How do I end my email signature?
Best. Sincerely. Regards. Kind regards. Thank you. Warm wishes. With gratitude. Many thanks. -
How do you put your name at the bottom of an email?
Open Outlook. Click Tools. Click Options. Click the 'Mail Format' tab. Click 'Signatures' Click 'New' Type what you want to be at the bottom of each email. Click OK until you're back to the standard Outlook screen.
What active users are saying — email signature school itinerary


Related searches to email signature School Itinerary made easy

Email signature school itinerary
hi this is bright in this tutorial I'm gonna show you everything you need to use Google Gmail I'm gonna show you how to navigate your inbox how to start emails that are important set up your profile picture signatures how to compose a message with attachments schedule emails to send later and snooze emails that arrived in your inbox I'll show you how to organize messages with labels and filters to save you time and use the search feature to find the messages to get started go to gmail comm and log in with your Google account next to your inbox you're gonna find a number that number tells you how many unread messages you have you can tell which ones are unread also by looking at the bolded sender and the boldest subject line some emails are more important than others you can highlight which ones are important by clicking the start icon next to your message that lets you trigger them as being important then on the left hand side you can click on this starred folder that will show you all the ones you've highlighted is important after you're done with the email and you no longer want to starred and click the start icon to remove it from the start list in the sent folder you'll find any emails that you've sent from this email account below sense you'll find the drafts folder you may have a number there that shows how many drafts you have drafts are emails that you've started but haven't finished under drafts you'll notice a more section with an arrow pointing down if you click that that will expand and show you a lot of Loess use folders you can drag those folders above the LES and those will be easier to find in the future so here I'm going to drag the all mail the spam and the trash and you can see that when I collapse the folders those three are still visible on their all mail you'll find all of your mail anything you've sent received or drafts so anything that's in your system at all will be visible under all mail under spam you're gonna find anything that Google thinks is garbage mail anything is in spam for more than 30 days will be automatically deleted anything that you delete will be moved to trash for 30 days after 30 days is deleted permanently your profile picture shows up in the upper right hand corner by default it will show a circle with your first initial if you click on the circle you'll see a picture or a camera icon over your face if you click that icon this lets you upload a photo or if you have a photo you've uploaded previously you can use that as well click set my profile picture to close this window next let's have a look at setting up your signature click on the gear icon and then click see all settings there's a lot of settings here but if we scroll down to near the bottom you'll find a setting for your signature by default you have no signature setup so you click create new to setup a new signature give it a name and then click create from here type in what you want your signature to look like usually has your first name last name phone number email address you can include a quote here as well you have some simple editing features such as bolding or italics you can also include links to things such as your Twitter profile you could have multiple email signatures by default we're going to use the new signature we created for our new emails and then use no signature for reply emails then scroll to the bottom and click Save Changes now let's write a message to compose message click the compose button in the upper left hand corner this opens up a new message window in the bottom right-hand corner you'll notice that while you're typing a new message you can still navigate your inbox to view messages in your inbox if you click the minimize button that'll collapse the new message window to the bottom of the screen so you can see more of your inbox you can also click the expand icon so you can have more room to write your message if you hold down the shift key while you click the expand button that'll pop that out into a separate window from the floating new message window you can click the pop in button to combine the screens again to send your message start by putting an email address in the to field if it's somebody you've sent an email to before you can simply type their name and your address book will find it the CC means Carbon Copy that means you're going to send a copy of this email to that person as well B C C stands for blind carbon copy that means gonna go to another person the other people that are receiving this email are not going to know who is in the bcc line now to click the subject telling what the email is about add the main message to the body of the email quickly formatting options button to show the formatting toolbar this gives you formatting options for bolding italics and some very basic text editing options you can attach files by clicking on the paperclip button this will let you upload files that have been downloaded to your computer if you're on a Chromebook you might be better off using the Google Drive icon to upload files or attach files but this lets you upload something to the Internet that's on your local computer as I said the Google Drive icon allows you to import items directly from your Google Drive so you can attach a Google sheet or a Google document or you can any sort of files it's just an image or PDF file having a photo to your email is similar to inserting an attachment or uploading a Google Drive document from here it will insert it from your Google photos account so in this case it has access to the photo that I have for my for my profile photo or if you have an album full of photos then this lets you insert that very easily from your google photos account when you're ready to send your email you can click the blue send button to send it right away or you can click the up arrow to schedule the send to be delivered at another time that's handy if you're doing a lot of email over the weekend but you don't want them to be received until Monday a lot of people don't appreciate receiving emails with their own vacation or if it's over weekend so if you use the delay send or schedules and then it lets it arrive at a more appropriate time so for this I'm going to send it tomorrow morning but you can pick any date or time in the future where you want it to be sent if you send an email that includes a document that is in Google Drive it will prompt you to share that document with a person you're sending it to that's a quick little way to make sure that when they receive an email that you're able to open all the attachments if they're in Google Drive the email we sent a schedule and you can find it in the scheduled folder on the left hand side that's handy if you change your mind and decide you don't want to send it or if you change your mind want to send in a different time so if you click on the schedules folder you can see all of your scheduled messages to view an email click on any email within your inbox and that will open up the email so you can see the full body of it you can reply to this email by clicking the reply arrow at the upper right hand corner or the bottom reply button in the bottom left-hand corner entering your message and then click send if you hit the triple dot button here this gives you a menu of other options you can do with this for example you can forward the email to somebody else or you could if you wanted to mark it as spam or market as phishing that's handy if you need to report a malicious an email that came from a bad person you also have options for creating filters which I'll explain later another handy feature from your inbox is to snooze an email if you snooze email you can delay it to come back at the top of your inbox of another date or time that way you can give it the attention you need when you need to give it attention you could find snoozed emails in the left hand side so if you want to change when it's news you can do that from there let's talk about how emails are organized in your inbox and health labels work this email right now is in your inbox and has the embossed label attached to it if you archive this email by clicking the archive button it will remove that inbox label and then because it has a label removed it will no longer be in your Inbox the email is not deleted it's just no longer in your inbox it's kind of a way of keeping all of your messages but not having them in your way you can click the label button to assign a label to an email a label is kind of your own way to categorize it and organize your messages think of them as folders but a little bit different you can have them nested so you can have one label under the other but it lets you categorize your messages in a certain way I'm gonna create a label called demo so I'm a typing demo it's not an existing label so I have to click on create new here I confirm that I want to create the label and it gets attached to this message now I want to create a new label I'm gonna name this one after the school year then I'm going to nest this new label under my existing label and it looks like a folder structure on the left hand side if you move your cursor over the label on the left hand side you see a triple down menu they can do some options from here you can assign the color to the label which is a handy way to see it from your inbox so they have something that's a higher priority you can find it that way next I'll show you how to create a filter based on an email address coming into your inbox from the triple-dog click on to filter messages like these here you see that it has an email address that's the sender of this message then click the Create filter button I'm going to select to skip the inbox that way I don't have to see it right away and then I'm gonna apply a label to it this way I still have it in my email system but it just doesn't come to the top of my inbox and allows me to focus on them only what I want to I can apply this to matching conversations it will go through all of my existing emails and if it matches this filter it will apply this label to it and remove it from my inbox then I click on create filter and now any emails that come in from that sender will have this label applied to it and it will be removed and archived from my inbox it doesn't delete it it just means it won't be in my way and I can focus on these emails when actually I'm working on that task you can search within your inbox by typing in a keyword and that will search within the subject or the body of the email you can also click on advanced search to get more options or click the drop down arrow to see the advanced search dialog from here you can search it from sender if you search by who they sent it to the subject you can also search by if as attachment or not in this case I'm going to do an example of searching by the sender so who sent the email and then I'm going to search also by date range so you can give us a pretty specific search criteria [Music]
Show moreFrequently asked questions
How can I make documents so that someone else can electronically sign them?
How do I sign a PDF contract?
How do you add an eSignature to a PDF?
Get more for email signature School Itinerary made easy
- Certify signatory
- Prove electronically signing Camp Counselor Cover Letter
- Endorse digi-sign Music Business Proposal
- Authorize signature service Postnuptial Agreement
- Anneal mark Governance Agreement
- Justify eSignature Payment Receipt
- Try initial Letter of Recommendation for Law School
- Add Tax Sharing Agreement digi-sign
- Send Android App Development Proposal Template esign
- Fax Job Safety Inspection Report signature block
- Seal Shift Schedule signature
- Password Retirement Plan email signature
- Pass Birthday Party Contract Template signatory
- Renew Online Therapy Consent electronically signed
- Test Pet Boarding Confirmation Letter byline
- Require Equipment Rental Agreement esigning
- Comment grownup sign
- Boost endorser countersignature
- Compel beholder electronically sign
- Void Editor Contract Template template digital sign
- Adopt Accounts Receivable Purchase Agreement template initial
- Vouch Video Production Proposal template signature
- Establish Volunteer Certificate template countersignature
- Clear Business Sale Agreement Template template digital signature
- Complete Delivery Driver Contract template electronically signed
- Force Human Resources Proposal Template template signed
- Permit Past Medical History Form template digi-sign
- Customize Book Publishing Contract Template template esign