Initial Authentication Made Easy
Award-winning eSignature solution


Do more online with a globally-trusted eSignature platform
Standout signing experience
Reliable reports and analytics
Mobile eSigning in person and remotely
Industry rules and conformity
Initial authentication, quicker than ever
Handy eSignature extensions
See airSlate SignNow eSignatures in action


airSlate SignNow solutions for better efficiency
Our user reviews speak for themselves


Why choose airSlate SignNow
-
Free 7-day trial. Choose the plan you need and try it risk-free.
-
Honest pricing for full-featured plans. airSlate SignNow offers subscription plans with no overages or hidden fees at renewal.
-
Enterprise-grade security. airSlate SignNow helps you comply with global security standards.

Your step-by-step guide — initial authentication
Leveraging airSlate SignNow’s eSignature any organization can enhance signature workflows and sign online in real-time, giving an improved experience to consumers and workers. Use initial authentication in a few simple actions. Our mobile apps make working on the run feasible, even while offline! eSign contracts from any place worldwide and close up deals faster.
Take a step-by-step instruction for using initial authentication:
- Sign in to your airSlate SignNow account.
- Locate your needed form in your folders or import a new one.
- Access the record and make edits using the Tools list.
- Place fillable fields, type textual content and sign it.
- List multiple signees using their emails configure the signing sequence.
- Indicate which recipients will receive an completed doc.
- Use Advanced Options to restrict access to the template and set an expiry date.
- Click Save and Close when done.
Moreover, there are more advanced capabilities accessible for initial authentication. Add users to your shared digital workplace, view teams, and keep track of teamwork. Millions of users across the US and Europe concur that a system that brings people together in one unified enviroment, is exactly what organizations need to keep workflows performing easily. The airSlate SignNow REST API enables you to embed eSignatures into your application, internet site, CRM or cloud. Try out airSlate SignNow and get faster, easier and overall more productive eSignature workflows!
How it works
airSlate SignNow features that users love


See exceptional results initial authentication made easy
How to fill in and sign a document online
Try out the fastest way to initial authentication. Avoid paper-based workflows and manage documents right from airSlate SignNow. Complete and share your forms from the office or seamlessly work on-the-go. No installation or additional software required. All features are available online, just go to signnow.com and create your own eSignature flow.
A brief guide on how to initial authentication in minutes
- Create an airSlate SignNow account (if you haven’t registered yet) or log in using your Google or Facebook.
- Click Upload and select one of your documents.
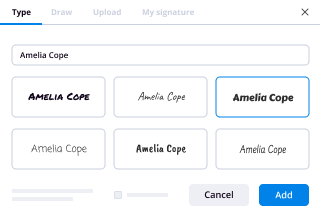
- Use the My Signature tool to create your unique signature.
- Turn the document into a dynamic PDF with fillable fields.
- Fill out your new form and click Done.
Once finished, send an invite to sign to multiple recipients. Get an enforceable contract in minutes using any device. Explore more features for making professional PDFs; add fillable fields initial authentication and collaborate in teams. The eSignature solution supplies a reliable process and works in accordance with SOC 2 Type II Certification. Ensure that all of your data are protected and therefore no person can edit them.
How to eSign a PDF template in Google Chrome
Are you looking for a solution to initial authentication directly from Chrome? The airSlate SignNow extension for Google is here to help. Find a document and right from your browser easily open it in the editor. Add fillable fields for text and signature. Sign the PDF and share it safely according to GDPR, SOC 2 Type II Certification and more.
Using this brief how-to guide below, expand your eSignature workflow into Google and initial authentication:
- Go to the Chrome web store and find the airSlate SignNow extension.
- Click Add to Chrome.
- Log in to your account or register a new one.
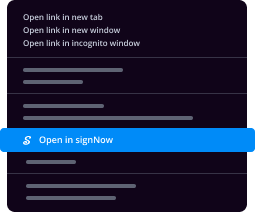
- Upload a document and click Open in airSlate SignNow.
- Modify the document.
- Sign the PDF using the My Signature tool.
- Click Done to save your edits.
- Invite other participants to sign by clicking Invite to Sign and selecting their emails/names.
Create a signature that’s built in to your workflow to initial authentication and get PDFs eSigned in minutes. Say goodbye to the piles of papers sitting on your workplace and begin saving time and money for extra crucial tasks. Selecting the airSlate SignNow Google extension is a great convenient decision with lots of advantages.

How to sign an attachment in Gmail
If you’re like most, you’re used to downloading the attachments you get, printing them out and then signing them, right? Well, we have good news for you. Signing documents in your inbox just got a lot easier. The airSlate SignNow add-on for Gmail allows you to initial authentication without leaving your mailbox. Do everything you need; add fillable fields and send signing requests in clicks.
How to initial authentication in Gmail:
- Find airSlate SignNow for Gmail in the G Suite Marketplace and click Install.
- Log in to your airSlate SignNow account or create a new one.
- Open up your email with the PDF you need to sign.
- Click Upload to save the document to your airSlate SignNow account.
- Click Open document to open the editor.
- Sign the PDF using My Signature.
- Send a signing request to the other participants with the Send to Sign button.
- Enter their email and press OK.
As a result, the other participants will receive notifications telling them to sign the document. No need to download the PDF file over and over again, just initial authentication in clicks. This add-one is suitable for those who like focusing on more valuable tasks as an alternative to burning time for nothing. Increase your day-to-day monotonous tasks with the award-winning eSignature service.
How to sign a PDF template on the go with no mobile app
For many products, getting deals done on the go means installing an app on your phone. We’re happy to say at airSlate SignNow we’ve made singing on the go faster and easier by eliminating the need for a mobile app. To eSign, open your browser (any mobile browser) and get direct access to airSlate SignNow and all its powerful eSignature tools. Edit docs, initial authentication and more. No installation or additional software required. Close your deal from anywhere.
Take a look at our step-by-step instructions that teach you how to initial authentication.
- Open your browser and go to signnow.com.
- Log in or register a new account.
- Upload or open the document you want to edit.
- Add fillable fields for text, signature and date.
- Draw, type or upload your signature.
- Click Save and Close.
- Click Invite to Sign and enter a recipient’s email if you need others to sign the PDF.
Working on mobile is no different than on a desktop: create a reusable template, initial authentication and manage the flow as you would normally. In a couple of clicks, get an enforceable contract that you can download to your device and send to others. Yet, if you want a software, download the airSlate SignNow app. It’s comfortable, fast and has a great layout. Try out effortless eSignature workflows from the business office, in a taxi or on an airplane.
How to sign a PDF file using an iPad
iOS is a very popular operating system packed with native tools. It allows you to sign and edit PDFs using Preview without any additional software. However, as great as Apple’s solution is, it doesn't provide any automation. Enhance your iPhone’s capabilities by taking advantage of the airSlate SignNow app. Utilize your iPhone or iPad to initial authentication and more. Introduce eSignature automation to your mobile workflow.
Signing on an iPhone has never been easier:
- Find the airSlate SignNow app in the AppStore and install it.
- Create a new account or log in with your Facebook or Google.
- Click Plus and upload the PDF file you want to sign.
- Tap on the document where you want to insert your signature.
- Explore other features: add fillable fields or initial authentication.
- Use the Save button to apply the changes.
- Share your documents via email or a singing link.
Make a professional PDFs right from your airSlate SignNow app. Get the most out of your time and work from anywhere; at home, in the office, on a bus or plane, and even at the beach. Manage an entire record workflow effortlessly: create reusable templates, initial authentication and work on documents with business partners. Turn your device into a effective business for executing contracts.
How to eSign a PDF file taking advantage of an Android
For Android users to manage documents from their phone, they have to install additional software. The Play Market is vast and plump with options, so finding a good application isn’t too hard if you have time to browse through hundreds of apps. To save time and prevent frustration, we suggest airSlate SignNow for Android. Store and edit documents, create signing roles, and even initial authentication.
The 9 simple steps to optimizing your mobile workflow:
- Open the app.
- Log in using your Facebook or Google accounts or register if you haven’t authorized already.
- Click on + to add a new document using your camera, internal or cloud storages.
- Tap anywhere on your PDF and insert your eSignature.
- Click OK to confirm and sign.
- Try more editing features; add images, initial authentication, create a reusable template, etc.
- Click Save to apply changes once you finish.
- Download the PDF or share it via email.
- Use the Invite to sign function if you want to set & send a signing order to recipients.
Turn the mundane and routine into easy and smooth with the airSlate SignNow app for Android. Sign and send documents for signature from any place you’re connected to the internet. Build good-looking PDFs and initial authentication with just a few clicks. Assembled a perfect eSignature workflow with only your smartphone and improve your total productiveness.
Get legally-binding signatures now!
FAQs
-
What is the process of authentication?
The process of identifying an individual, usually based on a username and password. In security systems, authentication is distinct from authorization , which is the process of giving individuals access to system objects based on their identity. -
What do you mean by authenticated?
Definition: Authentication is the process of recognizing a user's identity. It is the mechanism of associating an incoming request with a set of identifying credentials. ... The credential often takes the form of a password, which is a secret and known only to the individual and the system. -
What is the user authentication concept?
User authentication is a process that allows a device to verify the identify of someone who connects to a network resource. There are many technologies currently available to a network administrator to authenticate users. ... The Firebox also has its own authentication server. -
How do I use user authentication?
When you land on the page, you'll be asked to enter your username and password. Your credentials are sent to the website's server and compared with the information they have on file. When a match is found, you'll be able to enter your account. -
What is the purpose of authentication?
Authentication is important because it enables organizations to keep their networks secure by permitting only authenticated users (or processes) to access its protected resources, which may include computer systems, networks, databases, websites and other network-based applications or services. -
What is the most secure authentication method?
But, the most secure authentication method is biometric authentication. -
What is authentication process?
Authentication is the process of determining whether someone or something is, in fact, who or what it declares itself to be. ... Users are usually identified with a user ID, and authentication is accomplished when the user provides a credential, for example a password, that matches with that user ID. -
How do authentication tokens work?
Token-based authentication is a security technique that authenticates the users who attempt to log in to a server, a network, or some other secure system, using a security token provided by the server. ... The service validates the security token and processes the user request.
What active users are saying — initial authentication


Initial authentication
what's up everyone thank you for coming to check this out I hope it's interesting for you guys let me move this clock over here so if you're like me you're probably sitting in the audience looking at this stick figure and thinking like is this guy really going to be able to tell me everything I ever want to know about authentication in 30 minutes so the backstory here is that originally when I agreed to give this talk I was actually told it would be a one-hour slot and that was a while ago so anyways I learned his thirty minutes so I cut some scope here and there so I'm officially renaming this to almost everything you ever wanted to know about level authentication so bear with me we're gonna use up the whole 30 minutes so prepare yourselves so anyways my name is Randall DAGs I'm a developer advocate at a company called Octus a security company we have a booth here you can come say hi after after this if you want and I do a ton of open-source work in Python no tango and for the last you know just about four years I've spent almost all of my time like free time and work time building open-source security tools and security libraries and my primary focus is really web authentication and so that's what I've really been working on and what I've come to realize like through the course of doing this for the last several years is that the moment at which a developer really understands the way authentication works is when they actually see how simple it is behind the scenes and just like with so many other things you know the truth is a lot simpler than you might make it think so people say security is hard all the time that's not true so I'm going to spell that myth today so what I'm going to show you is the journey that happens when you're building an application and you actually are able to sign in to an to an application authenticate so let's do it we're going to build is a very simple website that has three pages of registration page a login page in a dashboard page we're going to register users log them in and you know force them to authenticate so I'm also going to assume for this that you know some JavaScript you don't need to know and if you're like me when you see you freak out a little bit because you don't like it because you do real database work but anyways we're just using this because it's simple to show an example so don't judge me I'm a postcard guy the first things we need to do any site is like have the tendencies right like in the node world we need Express which is the web framework we're going to use a lot of people use it and PUD which is just a templating language for HTML for what we're going to talk about today you can completely ignore the HTML because it's very insignificant the other thing we're going to do is everything I show you in this talk this is code that actually runs like I run this code and copy the output here so like this is legit everything in here if you type it it will work there's two files we're going to well one file that we're really going to be looking at today which is a server JS file and inside of that file we're going to put all the application logic we're writing in the talk just to keep things simple the real world you obviously don't want to do that so the first thing we need to do is just define some basic HTML templates now this is a security talk so there's no fancy design in here these are just basic HTML templates I'm just going to scroll through them but basically there's a home page a registration page a login page and a dashboard page and again all that stuff is totally insignificant to what we're about to get into now what you see here is a boilerplate node application using Express so this will run at the top of a file we're importing the Express library we're defining an express application at the bottom of our file down here we're telling Express to start a web server on port 3,000 so we can actually run this thing locally and play around with it on this line here anything that says app dot set means we're telling Express hey we want to set some setting and in this case we're just saying use this template again gin called pug to generate our HTML again insignificant ignore that everything else in here this is where the magic happened these are your no two routes so anything that says app dot get your app post we're basically the way this reads is we're saying you know if the user makes a get request to this URL then we're going to run this function over here and what this function does is it called this render method and all this render thing does is says hey show this HTML to the user so all these things you see here they basically say hey if the user visits the login page show them the login HTML code easy stuff if we run this and we go when we test out each of those URLs I just showed you will actually see this this is what the site looks like right now and to explore this stuff we need to actually see how it's built so we're just walking through that now all authentication you know the authentication story let me rephrase begins with HTML forms everyone knows what hTML is everyone knows what forms are but that's like the magic that makes everything happen it's where the browser sends information to a server to say hey I'm logging in without that nothing else works and in this form we're going to require four fields for user to register for our site first name last name email password pretty standard and the important thing here is the method so in browsers it's really only two methods that a browser cares about there's a get request which is essentially saying hey server web server give me some information I want it then there's the post method which is where the browser is telling the server hey I'm sending useful now pay attention to it right so if we go into our you know our server code and we want to parse that incoming form data from our registration you know like template we need to be able to read that data into our application the way we do that in node is using this body parser library which you can install on NPM I'm going to hold all these libraries and dependencies I'm using so we can just skip through that once you import the library you set up this Express middleware here and what a middle area is this is app dot use statement where we're initializing this function and in layman's terms what's happening is we're saying hey every time a user makes a request to my web site before you run any other code run this middleware function and what that middleware function is going to do is it's going to look to see if the browser sent us any post data any any information wants to send to us and if it did it's going to make it available in our route code as this request body variable so if we fill out our information on this page and we define this post route down here which basically says hey if the user submits a post request to our register URL then just display this the data they sent to us as JSON that's what this is reading in layman's terms and if we actually run this and test it out and go visit the registration page type in our information hit submit we'll just see our information echoed back to us on the screen everyone gets a fire hopefully in some nods okay so now let's talk about databases real quick so we're using for an example as I'm earlier so let's get a really quick introduction to MongoDB on the command line just so you can understand the basics so in MongoDB much like a relational database you have the concept of a database and tables accept calls them collections for whatever reason so in you don't need to create a database explicitly it's created automatically when you switch into it so if you say use test we're creating a DB called test if you say show collections you're saying hey show me all the collections of which there are none in this example yet and if you say DB users which is the collection name insert and give it a JSON document it's going to go ahead and create a collection called users or otherwise the table and go ahead and create that that object for you that document and then finally you can use the find command in to just list all the things that have been stored in the table or a collection whatever you want to call it and the important thing to note here is every single user that we create or everything that was created in has this field called underscore ID which is unique ID for that objects like a primary key field now working with in node is a little tricky so we're going to use a library called Mongoose to make it a little bit easier all you need to do to get Mongoose up and running is import it and then connect to your local database and that's it you then need to tell Mongoose how you're going to interact with the database and what sort of data you're going to give to it and so to do that we're going to define a model and because this application is storing user information and user data well we're basically just going to create one model called a user because that's what we intend on storing so we're going to find this model we're going to give it the fields we intend to store in the database here and the important thing to note is all these fields are required we're going to make a mandatory and finally the email field is going to be unique that way a user can only sign up with one email address unique across the whole website that's like your typical login stuff now if we actually want to modify our registration code from earlier to store users when a user's on the registration page all we need to do is instead of printing the JSON data from the form out to the screen we initialize this model we pass it in the form data from before the request stop body and then we call it a save method and what the save method does is it actually executes the MongoDB query and says hey we're going to write this information into the database for reals we handle some errors up here that's that part isn't particularly important you can figure it out and at the bottom we're going to redirect the user to the dashboard page so the logic of our app so far is you go to the registration page you hit enter you type in your information the user is created in the database then you're redirected to the dashboard page and I can verify this because if I go and do what I just said then I go back into and I use the find command and I now have a user in the database there's my email there's my password it's all legit so we're on our way the next thing we need to do is support log in to actually authenticate a user right so how do we do that well it's actually not that hard we use that model we created earlier and we used to find one command which is basically saying hey execute a query where we look for a user whose email equals the email that's inputted on our login page and then we're going to check for some errors and we're basically going to say you know if the email the person types in on the login page is not equal to the password that's in the database or sorry if the password that the user enters on the login page is not equal to the password this in the database then you know they're obviously incorrect credentials otherwise they're logged in so redirect them to the dashboard page so now this is where things get interesting I promise okay HTTP sessions is where all the magic happens in the in the real world this is the part of authentication that I think many people find sort of enlightening so pay attention close all right the idea with the session is that you know HTTP is a stateless protocol so let's say you log into your bank account when you log in for the first time you send your email and your password to them to authenticate if you then click a link from the dashboard to go to your billing page you need to tell the server who you are again because a web server has no way of remembering who you are web servers are really stupid they remember only one thing and they forget it immediately so the idea of a session is that wouldn't it be great if instead of needing to type your email and password in for every single page you visit on a website if you only had to log in once and then the browser could somehow remember who you are that's where the idea of sessions came about and that's how they work so we're basically going to have our web server when we authenticate tell our browser to remember who we are that way the browser every time they request a new page can talk back to us and say hey this is who I am remember me and the way this works behind the scenes is via cookies so everyone in here knows what cookies are you have to clear them to fix websites all the time because of shitty web developers you know but basically cookies behind the scenes are nothing more than strings they're really really simple they're not files and nothing special they're just strings pass them in a request and the way it works is on a web server when someone logs in we're basically going to tell the browser to - hey store some information for me in a cookie the browser is going to say sure no problem from now on every time this user makes your request back to your website I'm going to send that cookie back so you can remember things now every single HTTP request in the entire world has two components and I broke them down here so this top part here is called the HTTP headers this is like metadata about a request it's basically just key value pairs it's really simple then there's the body of the request which is where information is sent and received so when you make a get request for a web page the HTML code is in the body and the headers are in the top when you're sending data to a web server the data you send is in the body so that's the general gist of it now there's a lot of common HTTP headers out there for instance there's the user agent string there's the host but the cookie string is just what it is here it's just a cookie whoops let's go back so a cookie looks like this it has the header called cookie the name and the value is basically going to be the name of the cookie in this case session an equal sign and then the value of the cookie so just one two three four five if you want to have multiple cookies you can put a semicolon at the end and just say you know another session equals something else so it's really easy really simple if the way works now when you want to set a cookie so let's say someone logs in and you want to tell them hey remember this value it looks exactly the same like what I just showed you except the name of the header it's called set you so if you actually do this you will see as I'm going to show you in a second that it actually is that simple now the way we're going to work with sessions in node is via this client sessions library which I highly recommend you use if you're building a node site this library uses really strong cryptography and signing algorithms so I highly recommend it I vetted them all personally and the way you use it is you install another simple node middleware and you basically just apply a few options so you just apply a cookie name option which is basically going to allow you to access this little user as you'll see a secret key here which is basically just a really long random string now the secret is something that like needs to be the same on all of your web servers but should never be checked into like version control or made public on the Internet it's what is handling the encryption of your cookies behind the scenes and we'll see that in a moment and finally you need to specify the duration like when a user logs into your site how long will they stay logged in before their session expires so now that we know what sessions are let's actually implement that right so let's go back to the login page and let's modify it so that it remembers who we are once we've logged in so all we need to do so before we looked all this stuff up we checked the password that's all the same this is the only thing we had to change we say request session user ID equals the user ID from the database and damn just like that we've set a cookie and everything is going to be remembered pretty easy now let me show you this video that I recorded what I'm actually showing how this works in the real world so I actually ran this thing myself and recorded a screencast so this is what the site looks like with the code we have up until now so if I log into my account what's going to happen is I'm going to be able to go into the chrome inspector and copy those HTTP headers the server sends back to me and I'm going to show you exactly what an encrypted cookie looks like so I'm copying the headers I'm gonna paste it in another tab and bam it's a set - cookie and the value says session equals and a bunch of like long random looking string stuff so that's what this client sessions library does for us it encrypts those cookies and makes it easy for us to work with so we got that working right so now let's go back and refactor our dashboard so the dashboard right now we you know it allows anyone to log into it which sucks we only want authenticated people to be able to access it right so what we're going to do is we're going to add a check-in to our dashboard code which says hey if there's no session that variables available if there's no user ID then send the user back to the login page otherwise we're going to try to look up the user in MongoDB based on their ID value from the cookie and if they exist then we'll let them visit the dashboard otherwise we'll say hey go back and login again pretty simple so now let's talk about storing passwords so we've got users who can login now we can storm in the database we remember who they are but we still have this fundamental problem which is that if I look in right now you guys are probably getting a little upset because you see my password is stored in plain text and that's hella lame okay so let's talk about password hashing um everyone here has probably heard of the concept of password hashing and it's a really simple concept there's really only two things you need to know about password hashing if you remember these you're going to know more than every single person that works at Yahoo so PI yourselves on the back the first thing you want to know is that if you take a password and you hash it it's going to generate a really long random looking string but what's important to remember is that if you hatch the same password you're always going to get the same random long looking string okay the second important thing to know and this is a the one that Yahoo does guys the god who guys forgot just joking they forgot all of it but the second most important thing is that once you have this long hash you can never turn it back into the original password so it's called a one-way function because there's no way to like decrypt it to get the password out of it so it's really useful for storing sensitive information like a password now all of the things on the screen are password hashing algorithms you've probably heard of and I'm just going to go through and just do the smackdown on most of these guys so md5 sucks sha-256 sucks if it's not listed on here I'm telling you right now it sucks what you should use is B Crips it's been around since 1999 it's very safe it's well vetted there are two new contenders that I'm a huge fan of but have not been as well vetted there's s crypts and argon too so sometime in the next ten years the recommendation is probably going to switch to one of these guys but for now the safe bet is use B crypts so if your boss tells you how are we storing passwords your answer should always be decrypt now the way this works in pseudocode is really straightforward if you have a password you're going to run it through this bcrypt function and it's going to generate a really long random looking string and that's it so the way that we're going to implement this is we're going to modify our registration code such that you know we're not storing the password in plain text so we're going to install it decrypt jess library and again a node there's a lot of bcrypt libraries this is by far the best one I personally vetted all of them I highly recommend it and what we're going to do is we're just going to add these two lines to the top of our function which basically say hey when the user registers instead of storing their password in plain text we're going to run it through this bcrypt dot hash method we're going to specify this number here as 14 which is called a work factor and basically that's a parameter into the decrypt algorithm which determines how strong of a hash this is and we can talk about that later come find me there was enough time to squeeze in 30 minutes I apologize and then finally we're going to override the plain text password with our updated hashed password and then BAM is now way more secure pretty cool right now since we have this implemented our login is broken because if a user tries to login they're trying to compare their plain text password against a totally different random looking string so it's never going to work so what we need to do is modify our logging code so that we're now calling the decrypt doc compare method and we're passing our in plain text password in is the first parameter and then our hashed password from the database as our second parameter and bcrypt we'll just handle everything else for us so not that again it's pretty happy so now if we go back into we start up a new user we check to take a look at the database BAM we have a legit decrypt pastor - in there and we're way better than Yahoo okay so now we're at the part of the talk where we're going to just refactor things because like I'm obsessed with refactoring and I hate typing things out that I don't have to so the first thing we're going to do is we're going to take this concept right wouldn't it be great if we never need to think about sessions ever we just have a user object in all of our routes if a user exists and that's what we're doing here we're defining a middleware it's going to just check to see if a session exists if not it's going to do nothing but if it does exist it's going to load the user out of MongoDB so it's going to do that same query as before it's going to do some error checking and stuff then it's going to create error is going to take that MongoDB user object and it's going to store it in a local variable called a request user that way in any of our code later on we can access request user to access this user account and if you're wondering what this resolutely user thing is it's just a convenience thing I'm doing here what it allows us to do is access our user variable in any of our HTML templates so if you wanted to modify your dashboard page to say a Hello Randall or something like that this is a great way to do that finally we're going to define a second middle layer called login required and what this is going to do is it's going to check to see if a user's logged in if they are logged in it's going to let them do whatever they want if they're not logged in it's going to force them to login it's pretty cool and once we implement this all we're doing is we're checking to see if that request user value from the previous slide is there so really easy obviously it lets us refactor our dashboard route and delete like 99% of the code we no longer have to check sessions and all you have to do any real work all we have to do is put it in here and what happens is expressed as hey if the user tries to visit the dashboard page run this login required function if the user isn't logged in they'll log in then they'll come back when they are logged in then and only then will they be able to execute the rest of our dashboard page so now let's take a quick detour to talk about CSRF so let's say that your bank website has a little draw page right and the withdraw page has an HTML form that looks just like this it has three fields it has your account name who you want to transfer money to their account name and the amount of money you want to transfer that looks super fun and super cool and super awesome but it actually really sucks because of your friend sends you an email and tries to trick you in to clicking on a link they can actually get you to go to this withdraw page fill out those form fields and I would just be transferring a million dollars to someone who you know tricked me into clicking this link basically and that would be horrible that's called cross-site request forgery now the way we prevent this in the web development world is by generating random tokens and requiring and basically so it's a two-part strategy strategy one we generate a random token every time a new page request is made number two we insert that into a cookie number three we put that as an input field on a form so that we're able to you know send that back up to our web server and number four when we go to our web server and we attempt to like view form data we check to see if the value in that cookie is the one that was actually submitted by the form if those two things are different we say hey this isn't working for us and basically what we're doing is we're guaranteeing that no one can trick us into clicking a link because if they do there's an infinite number of random numbers that this token could be and there's no way for an attacker to know in advance what that token number is going to be and you can actually worry about it later if you want so I know the way we implement this is we install this library called CS urs it's going to handle this for us completely we install it we initialize it that's the middleware in any route that we have that's rendering a template that has a form on it like our registration page and login page we're going to pass in this extra information into our template that way in our HTML code we'll be able to use this this variable called CSRF token now the value for this token that we're supplying here is going to be this request CSRF token function it's going to generate that random token for us so that's what's going to handle the whole random token generation thing that's what does the security so then in our forms our HTML forms we need to modify them so that each one of them includes a hidden input field that's name is underscore CSRF and whose value is that randomly generated token and again this is going to change every time the user views a new page with a four minute so every single time you joking so once do that now let's talk about some overall security best practices we have our site users can log into it right we handle our session information well we have surpass words well we're doing better than Yahoo already feeling awesome so this is an obvious one I'm sure you've all heard it a million times by now but always use SSL so if you're running a website and you're not using SSL then that's a problem because any information a user sends from their browser to your website any anyone who can see that information in between like your internet service provider the NSA you know the Canadian police what I very well may be everyone except the Canadian police actually uh but everyone else can see that information and that's a bad thing SSL encrypted information from your browser to the server so it makes it really secure and no matter what form of authentication you're using if you're not using SSL then it's not it's not secure the other thing you can do is you can secure cookies a lot better than you think so there's three flags in particular you should know about you can set these in the way I'm showing you the first one is this HTTP only flag what this basically says is it tells the browser that do not allow any JavaScript code in the browser to access this cookie that is mandatory in my opinion because there's no reason some JavaScript should ever see this encrypted cookie the second thing is there's this flag called secure which you can set to true which basically tells the server to only set a cookie if the website is running using SSL that way no one can steal this cookie information in the middle and finally if you're building an application maybe a banking application or a healthcare application where security is really important you can use this flag called ephemeral and set that to true as well and all that means is that you know if the user closes their browser then no matter how long they should be logged in for they're good and finally the last thing is to use this library called helmet you can install it it sets up a bunch of HTTP headers on your site and secures them so it prevents things like clickjacking it requires us a cell and some other nice stuff and finally don't roll this stuff on your own use a popular library go check these libraries out there fantastic if you have questions come up to me afterwards that's it thank you guys very much everything is online and open-source the code projects fully refactored the slides will be up later tonight everything you guys are the best so thank you [Applause]
Show moreFrequently asked questions
What is the definition of an electronic signature according to the ESIGN Act?
How do I eSign a PDF on a PC?
How can I sign emailed documents?
Get more for initial authentication made easy
- Print electronically sign Settlement Term Sheet Template
- Prove electronically signed Bonus Program
- Endorse digi-sign Security Employment Application
- Authorize signature service Professional Model Release Contract
- Anneal mark Mobile App Design Proposal Template
- Justify esign Source Code License Agreement Template
- Try countersign Real Estate Purchase Agreement
- Add Pledge Agreement electronically signing
- Send Painting Proposal Template mark
- Fax Baptism Invitation signed
- Seal Music Camp Registration autograph
- Password Social Media Marketing Proposal Template digital sign
- Pass Affidavit of Service initial
- Renew General Bill of Sale electronically sign
- Test Short Medical History countersignature
- Require Non-Disclosure Agreement Template digital signature
- Comment beholder signed electronically
- Boost proof electronic signature
- Compel petitioner digisign
- Void Book Publishing Contract Template template eSign
- Adopt Hedging Agreement template eSignature
- Vouch Video Production Quote template autograph
- Establish Work for Hire Agreement template electronic signature
- Clear Hotel Business Plan Template template signed electronically
- Complete Camper Parental Authorization template electronically sign
- Force Acknowledgement Letter Template template sign
- Permit Rental Deposit Receipt template electronically signing
- Customize Affidavit of Service template mark