Various Initial Made Easy
Award-winning eSignature solution


Get the powerful eSignature capabilities you need from the company you trust
Select the pro platform made for professionals
Set up eSignature API with ease
Work better together
Various initial, within minutes
Reduce your closing time
Maintain important information safe
See airSlate SignNow eSignatures in action


airSlate SignNow solutions for better efficiency
Our user reviews speak for themselves


Why choose airSlate SignNow
-
Free 7-day trial. Choose the plan you need and try it risk-free.
-
Honest pricing for full-featured plans. airSlate SignNow offers subscription plans with no overages or hidden fees at renewal.
-
Enterprise-grade security. airSlate SignNow helps you comply with global security standards.

Your step-by-step guide — various initial
Using airSlate SignNow’s eSignature any company can accelerate signature workflows and sign online in real-time, giving an improved experience to customers and workers. Use various initial in a few simple steps. Our handheld mobile apps make operating on the move possible, even while off-line! Sign contracts from any place worldwide and close trades quicker.
Keep to the stepwise instruction for using various initial:
- Log in to your airSlate SignNow account.
- Find your needed form in your folders or upload a new one.
- Open the template and edit content using the Tools list.
- Drag & drop fillable boxes, add text and eSign it.
- List multiple signers via emails and set up the signing sequence.
- Specify which recipients can get an completed version.
- Use Advanced Options to restrict access to the document and set an expiry date.
- Click on Save and Close when done.
Additionally, there are more extended capabilities available for various initial. Add users to your shared workspace, browse teams, and track collaboration. Numerous users across the US and Europe concur that a system that brings everything together in a single cohesive digital location, is the thing that organizations need to keep workflows performing easily. The airSlate SignNow REST API allows you to embed eSignatures into your app, internet site, CRM or cloud. Try out airSlate SignNow and enjoy faster, easier and overall more effective eSignature workflows!
How it works
airSlate SignNow features that users love


See exceptional results various initial made easy
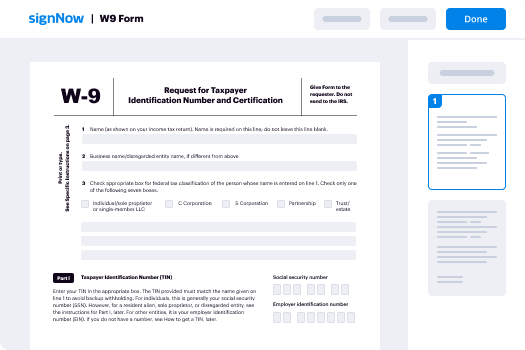

How to complete and sign a PDF online
Try out the fastest way to various initial. Avoid paper-based workflows and manage documents right from airSlate SignNow. Complete and share your forms from the office or seamlessly work on-the-go. No installation or additional software required. All features are available online, just go to signnow.com and create your own eSignature flow.
A brief guide on how to various initial in minutes
- Create an airSlate SignNow account (if you haven’t registered yet) or log in using your Google or Facebook.
- Click Upload and select one of your documents.
- Use the My Signature tool to create your unique signature.
- Turn the document into a dynamic PDF with fillable fields.
- Fill out your new form and click Done.
Once finished, send an invite to sign to multiple recipients. Get an enforceable contract in minutes using any device. Explore more features for making professional PDFs; add fillable fields various initial and collaborate in teams. The eSignature solution supplies a reliable process and runs according to SOC 2 Type II Certification. Be sure that all your records are protected and that no one can change them.
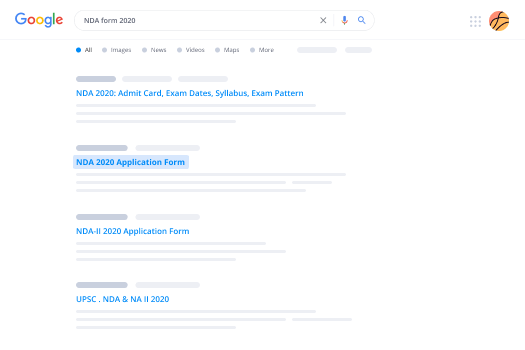
How to eSign a PDF in Google Chrome
Are you looking for a solution to various initial directly from Chrome? The airSlate SignNow extension for Google is here to help. Find a document and right from your browser easily open it in the editor. Add fillable fields for text and signature. Sign the PDF and share it safely according to GDPR, SOC 2 Type II Certification and more.
Using this brief how-to guide below, expand your eSignature workflow into Google and various initial:
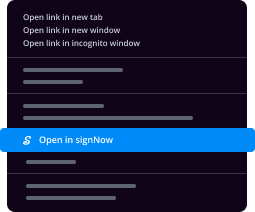
- Go to the Chrome web store and find the airSlate SignNow extension.
- Click Add to Chrome.
- Log in to your account or register a new one.
- Upload a document and click Open in airSlate SignNow.
- Modify the document.
- Sign the PDF using the My Signature tool.
- Click Done to save your edits.
- Invite other participants to sign by clicking Invite to Sign and selecting their emails/names.
Create a signature that’s built in to your workflow to various initial and get PDFs eSigned in minutes. Say goodbye to the piles of papers sitting on your workplace and begin saving time and money for extra crucial activities. Picking out the airSlate SignNow Google extension is a great practical option with plenty of benefits.
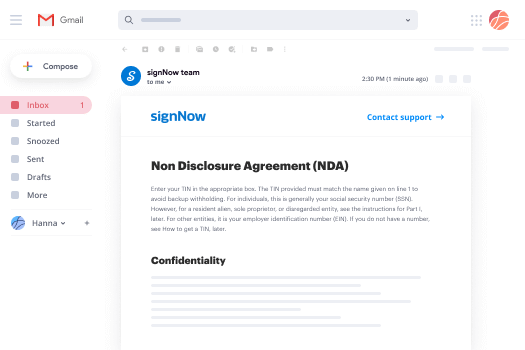

How to eSign an attachment in Gmail
If you’re like most, you’re used to downloading the attachments you get, printing them out and then signing them, right? Well, we have good news for you. Signing documents in your inbox just got a lot easier. The airSlate SignNow add-on for Gmail allows you to various initial without leaving your mailbox. Do everything you need; add fillable fields and send signing requests in clicks.
How to various initial in Gmail:
- Find airSlate SignNow for Gmail in the G Suite Marketplace and click Install.
- Log in to your airSlate SignNow account or create a new one.
- Open up your email with the PDF you need to sign.
- Click Upload to save the document to your airSlate SignNow account.
- Click Open document to open the editor.
- Sign the PDF using My Signature.
- Send a signing request to the other participants with the Send to Sign button.
- Enter their email and press OK.
As a result, the other participants will receive notifications telling them to sign the document. No need to download the PDF file over and over again, just various initial in clicks. This add-one is suitable for those who like focusing on more valuable things instead of burning up time for nothing. Improve your day-to-day routine with the award-winning eSignature solution.
How to sign a PDF on the go without an app
For many products, getting deals done on the go means installing an app on your phone. We’re happy to say at airSlate SignNow we’ve made singing on the go faster and easier by eliminating the need for a mobile app. To eSign, open your browser (any mobile browser) and get direct access to airSlate SignNow and all its powerful eSignature tools. Edit docs, various initial and more. No installation or additional software required. Close your deal from anywhere.
Take a look at our step-by-step instructions that teach you how to various initial.
- Open your browser and go to signnow.com.
- Log in or register a new account.
- Upload or open the document you want to edit.
- Add fillable fields for text, signature and date.
- Draw, type or upload your signature.
- Click Save and Close.
- Click Invite to Sign and enter a recipient’s email if you need others to sign the PDF.
Working on mobile is no different than on a desktop: create a reusable template, various initial and manage the flow as you would normally. In a couple of clicks, get an enforceable contract that you can download to your device and send to others. Yet, if you want a software, download the airSlate SignNow app. It’s comfortable, fast and has an intuitive layout. Enjoy effortless eSignature workflows from the office, in a taxi or on a plane.
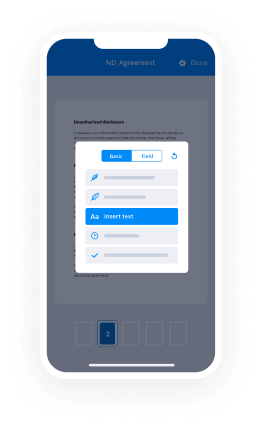
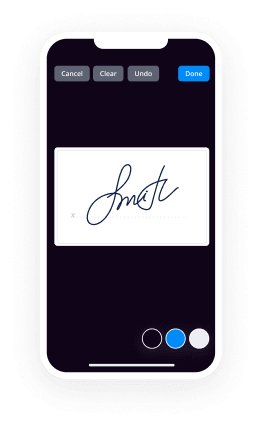
How to sign a PDF employing an iPhone
iOS is a very popular operating system packed with native tools. It allows you to sign and edit PDFs using Preview without any additional software. However, as great as Apple’s solution is, it doesn't provide any automation. Enhance your iPhone’s capabilities by taking advantage of the airSlate SignNow app. Utilize your iPhone or iPad to various initial and more. Introduce eSignature automation to your mobile workflow.
Signing on an iPhone has never been easier:
- Find the airSlate SignNow app in the AppStore and install it.
- Create a new account or log in with your Facebook or Google.
- Click Plus and upload the PDF file you want to sign.
- Tap on the document where you want to insert your signature.
- Explore other features: add fillable fields or various initial.
- Use the Save button to apply the changes.
- Share your documents via email or a singing link.
Make a professional PDFs right from your airSlate SignNow app. Get the most out of your time and work from anywhere; at home, in the office, on a bus or plane, and even at the beach. Manage an entire record workflow effortlessly: create reusable templates, various initial and work on documents with partners. Turn your device into a powerful enterprise tool for closing deals.
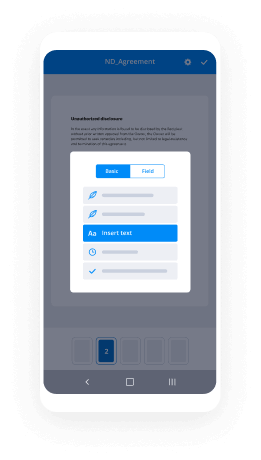
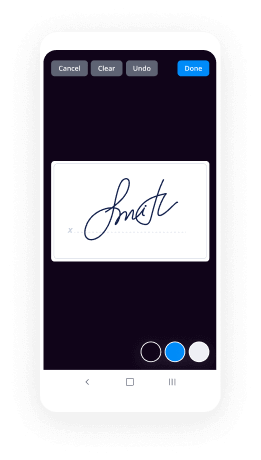
How to eSign a PDF using an Android
For Android users to manage documents from their phone, they have to install additional software. The Play Market is vast and plump with options, so finding a good application isn’t too hard if you have time to browse through hundreds of apps. To save time and prevent frustration, we suggest airSlate SignNow for Android. Store and edit documents, create signing roles, and even various initial.
The 9 simple steps to optimizing your mobile workflow:
- Open the app.
- Log in using your Facebook or Google accounts or register if you haven’t authorized already.
- Click on + to add a new document using your camera, internal or cloud storages.
- Tap anywhere on your PDF and insert your eSignature.
- Click OK to confirm and sign.
- Try more editing features; add images, various initial, create a reusable template, etc.
- Click Save to apply changes once you finish.
- Download the PDF or share it via email.
- Use the Invite to sign function if you want to set & send a signing order to recipients.
Turn the mundane and routine into easy and smooth with the airSlate SignNow app for Android. Sign and send documents for signature from any place you’re connected to the internet. Build good-looking PDFs and various initial with just a few clicks. Come up with a flawless eSignature process with only your mobile phone and increase your overall productivity.
Get legally-binding signatures now!
What active users are saying — various initial


Related searches to various initial made easy

Test initial
[Music] hello there my name is sandy Clifton and I have a food blog and it's called simply happy foodie and you can find it at simply happy foodie calm you can also find me on Facebook and Pinterest in all the usual places so recently we had a lot of people purchasing instant pots most of you are first-time users and today I'm going to show you how to do the water test now what the water test is is literally just a test where we pressure cook some water and that's to show you that your pot is working that it does come to pressure and everything functions properly and it also helps you start to get familiar with some of the functionality of your instant pot so let's go ahead and get started okay so when you first get your pot there really isn't a whole lot that you have to worry about assembling it's gonna come in different pieces you're gonna get some you know plastic spoons and you're gonna get a little middle rack that goes in here and everything but let's go ahead and talk about the lid right now so pressure cookers are very unique because they have a seal in them I'm using a blue one which you can buy on the instant pot website and the reason for that is I have more than one seal aiyoo seals they're made out of silicone and they can absorb I won't say they can they will absorb odor and it's kind of a surprising thing for most people to find out that their seal stinks you know you do have to wash it and soak it in water and I recommend having two seals so I have a blue one and a red one and the blue one is what I use for desserts sweet dishes you know things that I want to stay neutral in flavor applesauce that sort of thing and then the red one is what I call my spicy ring and then the red one is for you know curry and you know pulled pork with all that spice and stuff like that and I do wash them and I do run them through the dishwasher and there's a bazillion methods that people have come up with to clean these ceiling rings some of them work some of them work for some people some of them don't what I found is that as long as I have to and I use one for sweet and one for spicy then I don't have a problem the other thing I'm just jumping ahead a little bit is when you store your lid don't store it on the pot because then what that does is that restricts any air from getting to the ring and so what I do is I just put it on upside-down like this and that's how I store my pot and this is always exposed to air and I don't have a problem with my home smelling and trust me I have several instant cuts but anyway so that's the sealing ring and let's go ahead and look at how to take it off and put it in okay because it's really important if this isn't improperly then your pot won't seal that pressure so you can just kind of pull it out okay and then I'll go ahead and pull it all the way out okay so it has a little groove in the middle and then it has this extruded part here in your lid you have you'll see this little track right that runs around there same on the on either side so you can put it in this way or this way it doesn't matter and when you get it in there you're going to want to just get an one edge of it and shove it down in there and you see how I'm shoving it down in there because that groove that's where this metal piece goes in so then I just push it and I just go all along I like that little satisfying click and that lets me know that I got right down in there okay this one's folded a little bit no big deal you just push it okay and then I just do this and I run my fingers all the way around it and I take a quick peek and I go yep it's in there so that's great you'll see this it kind of moves and what that is is that's your little pin and it's like a float valve because it floats until the pot comes to pressure then it pops up and when the pot loses pressure or you know you release the pressure it goes down this is your steam release knob I'll talk a little bit more about that in a little while and then under here this is called an anti block shield sometimes I can get it off with my bare hands I get my fingernail under there there we go and then you pop it off and then so what this does is because when the steam comes out of the pot it comes out through here mostly well you don't want chunks of food clogging that up a clogged pressure cooker is not a good thing so this little anti block shield just keeps food particles and then you just snap it on there and it's all good to go these can discolor a little bit I haven't done the stainless cleaner on mine but you can get some stainless steel cleaner called bar keeper's friend they have a powder and a liquid version and then you just clean it and this will be all shiny and new but I'm not going to worry about that right now okay so you have your handle here which is great heed the warnings on your sticker this metal part here and here gets super hot and you don't ever want to touch this okay I think that's why they give you such a big generous handle okay so we'll just take a quick look here you have a display panel and your display panel excuse me has all these different presets and everything and all the different buttons we're only going to talk about a couple of the buttons today and I have another video that goes more in depth on the buttons so you can go look at that every pop comes with a pot so what we really call this is this is the stainless-steel inner liner and you'll always have that in no matter what when you're cooking okay and that's the basic rundown of it some pots have a condensation cup on the back - supposed to but it fell off and I don't know where it ended up going but it goes right here let's see I might even have another one on another pot that I can show you oh yeah here's one obviously they're not that crucial sometimes I get stuff in the condensation Cup and sometimes I don't but it looks like this so if you see this little thing all you have to do there's two tabs I guess on the side and they just fit right over it this is for a bigger pot so that's why it's not fitting but it just lives like that and then when water comes down the channel there's a little hole right here and then it goes in there just check it once in a while in case there was some liquid in there because if you don't ever check it or rinse it out it can get a little funky maybe even a little moldy nobody wants that okay so why don't you go ahead and get yourself a cup of water I'm gonna go get myself a cup of water and let's start the water test it's pretty easy so let's get started with the actual water test now you're going to take that cup of water and remember if you have an 8 quart pot use 2 cups of water you're going to make sure that your stainless inner liner is in the housing you never want to put anything inside because you've got your little heating element down there so always make sure that you have your silver lining ok so just pour in your cup of water so let's put the lid on now and it's pretty easy once you do it once or twice you're just going to want to line up this really wide part here with the wide part on the other side of the housing your model might have an arrow and on this model you can see it's right here right there and there's also an arrow on the housing so all you do is you're going to line up those two arrows ok and it like singing a little song and then you're going to turn it clockwise just until it sets in there now it isn't locked you can still move it freely but this way now you know that your lid is on after you get the lid on you're going to want to put the steam release knob in the sealing position and that's this right here some people call it a vent but I just call it a knob since it really is a knob this is very wobbly and you can see it comes off very easily and this is where the actual steam shoots out of when you release pressure so there's a little silicone piece and it fits on there ok so when it's turned all the way counterclockwise this is the venting position and that means that there's no way the Popkin seal because it's open if you close it which means you're turning it clockwise just until it stops there's no click or anything it just stops that's the sealing position and then that's where you want to put it whenever you're cooking something that pressure needs to build in order to cook and that's most of the things if you're going to have the lid on okay so ceiling and then venting and I'll show you more of that when we actually do it but since we're just starting out we're just going to set this to the ceiling position now that we have the vent sealed it's time to actually start the cooking process and so what we're doing today is we're going to pressure cook this water test you know is to make sure that the pressure is actually going to build and stay pressurized in your pot okay so you have a button down here in the lower right of your display panel and it's called pressure cook there are some models that have a button called manual and you just need to look at your pot and see if that's the one that you have in this case this one has a pressure cook button so I'm going to press it and it's going to default to the last time that I used which happens to be two minutes if I want to change that I have about 10 seconds to do so using the plus or the minus button okay so you can go up or down at this point to you can also toggle between high and low pressure by using the pressure level button on some models there's an adjust button but we're going to keep it on high pressure and we're just going to do a two-minute test and as soon as you have that set it'll wait a second and then it'll beep to let you know it there it goes it's letting you know that it got the instructions it's ready to rock and roll okay so now what's happening at this point is the heating element that you saw on the bottom of the pot it's going to heat up the contents that are in there and then the steam is going to build because the water is getting hot right so after the steam builds it's going to get to a point where it creates pressure in there in that sealed environment and then once it does that the pin on the lid will pop up to show you that the pot has come to pressure and as soon as it starts to do that I'm going to show you what that looks like so now you just saw that the pin popped up I don't think I could have timed that any better normally what will happen is steam will come out of here as its building pressure and then this little valve will kind of start wiggling and rocking back and forth because it's trying to pop up from the pressure and then after this pin pops up you know that your pot is almost fully at pressure it's at pressure but the unit will beep when it actually hits full pressure and I hope that makes sense now some of the older models don't beep when they reach full pressure just look for this to pop up and then on your display panel it will still say on just for a few more minutes until it really does build up to the full amount of pressure then it will switch to the time that we chose and if you remember we chose two minutes so it will change to two minutes very shortly and then it will count down from there as the time goes by I'm going to release the pressure now and to do that I just move the steam release knob from the ceiling position to the venting position now we're looking at it from the back of the pot so it's going to be the opposite from the other way but it might scare you a little bit the first time you do it see make a little bit on here so what you're gonna do is you're just going to turn it and then this is going to hiss and there's going to be a lot of steam that comes out and if it's too much or it scares you you can always put it back to the ceiling position but the reason that's the reason why this is so loose it's because you don't really want tension on this okay so I'm gonna move the camera position just a little bit so I don't get it wet and then I'll show you what that looks like okay so now I'm a safe distance away and if the first time you're not comfortable putting your finger near here because you don't ever want to put your finger up above when the seams coming out because obviously it is hot steam you can use a spoon a handle a brush anything you want and then you can just use that if you have pets be forewarned that it might scare them a little bit and you're gonna also be watching for the pin to drop back down and that's really important because as soon as the pin drops back down then that releases the lock on the lid and it is then safe to open up your pressure cooker you never want to try to force your pressure cooker open if that pin is up if there's any pressure left in the pot if the lid does not open very easily then you need to wait for the pot to cool down and as the pot cools down then the pressure will stop building and it'll start to decrease and dissipate and I've never had that happen to me where I couldn't open the lid I always wait for the pin to drop but just in case you just want to be safe it can take a few minutes for the pressure to all come out of the pot it depends on how large of a pot you are using and how full your pot is mainly with liquid when you only have about a cup of liquid it doesn't usually take that long but if you have a big pot of soup it could take a lot longer and also always refer to the recipe you're using as to whether or not you're going to do an immediate quick release or do a natural release which again I'll explain that in just a moment okay so the pin is down and that means that it is safe to open up the pot now and like I said it should just open with ease see okay so I'm going to turn it around now so you can see the display panel so now that the pressure is released and the pin in the lid has dropped down before I open it I just wanted to show you what happens after pressure cooking so whether or not you release the pressure quickly which means immediately after it's done pressure cooking or if you wait a while if you don't turn the pot off then this is what's going to happen so what this is doing right now is it's counting up in minutes and what this is letting you is hey I'm done pressure cooking and this is how long I've been sitting here so since we released the pressure and even if we hadn't released the pressure but since the pressure cooking cycle was done it's been sitting here for four minutes so far now some of my recipes are going to call for a ten minute natural release or a fifteen minute or maybe even only a five minute and so what that means is after you're done pressure cooking you don't let the pressure out you let it just sit there and this will count up let's say if I wanted you to do a five minute natural release on ribs or something like that as soon as that hits the five now you know you can go up and release your pressure we just did a five minute natural release if I wanted you to do a full natural release what that means is let this sit there regardless of how many minutes until the pin in the lid drops of its own accord all right and then if I want you to do what we call it quick release then that means as soon as this is done pressure cooking don't let it count up immediately let the pressure out and so the pin can drop because as it's sitting here it's still very hot in there and the food is still cooking so there are many types of foods that you don't want to overcook pasta vegetables and certain delicate cuts of meat and things like that but like I said always look at your recipe and if you get your recipe from a trusted source then they should have tested the recipe multiple times to be able to give you an accurate timing okay so then all you have to do oh and before I go on let me just mention so this has a keep warm button and so what this means is that let's say that your food is in here it's naturally releasing you're good to go but you don't really want to get to it yet you have guests coming over later and you just want it to stay warm so what this will do is as soon as your temperature drops of the food drops below about 140 degrees this will kick on and keep the food warm okay now it doesn't matter if this is on or not when you're doing only like a ten-minute natural release because the food isn't gonna get cold enough for it to really cook kick on and then what you want to do is just turn off the pot you know when you're all done with it and you can just hit cancel your model might say off they're all different if you don't want the keep warm to come on when you hit pressure cook you can just turn it off and then it won't kick into a keep warm and it won't count up it will just go off as soon as this cooking cycle is done okay alright so let's go ahead and open it up and you can see this lovely hot water that we made okay so here you can get a really clear view of the arrow and the other arrow right down here I don't know if you can see that one or not and you're really only going to turn it counterclockwise and you can't go any further but you can see at least how the arrows match up and then that's how you know you can lift it off sometimes they stick a little bit it's not a big deal you can have hot water or whatever and also that hot water can drain in here you have a condensation Cup on some of the models on the back of the unit that will take that extra water it'll run down this little channel and it'll just go in that pot or in the cup excuse me now the lux model does not have this but the duo's in ultra and the plus is the Nova's and some of these other models of instant pot do have this little notch right in the handle and that's very very handy for letting your lid sit there and you can do it on either side okay and then we have our hot water and so we are completing our water test so what this showed us is that a the pot is working great it came up to pressure the pin popped up the pin went down everything worked normal the buttons work it's all good the other thing that this does in my opinion is it gives you a little bit of a comfort with using a pressure cooker if you're not familiar with them or maybe the last one you used was your grandma's pressure cooker then you know sometimes there's a little bit of fear there and what this does is this can help you you know be more familiar with how this works there's a lot of safety built in and this sucker is really sturdy and I've never once had an issue I have several pots I've been doing this for several years and it's one of my favorite things so thank you so much for hanging out with me today to learn how to do the water test go to simply happy foodie calm and I have some beginner recipes there for you and I have lots of other recipes too all in all there's over 400 and something recipes on my site granted they're not all instant pot some are crock-pot and other recipes but the majority of them are instant pot so I think you'll find something good to make and please leave me a comment and let me know how you like this video let me know if you have any questions something I may have skipped over in this video and I will definitely do my best to answer that for you take care bye bye [Music]
Show more