Verify Initial with airSlate SignNow
Award-winning eSignature solution


Get the powerful eSignature capabilities you need from the company you trust
Select the pro service made for pros
Set up eSignature API quickly
Work better together
Verify initial, within minutes
Decrease the closing time
Keep important data safe
See airSlate SignNow eSignatures in action


airSlate SignNow solutions for better efficiency
Our user reviews speak for themselves


Why choose airSlate SignNow
-
Free 7-day trial. Choose the plan you need and try it risk-free.
-
Honest pricing for full-featured plans. airSlate SignNow offers subscription plans with no overages or hidden fees at renewal.
-
Enterprise-grade security. airSlate SignNow helps you comply with global security standards.

Your step-by-step guide — verify initial
Adopting airSlate SignNow’s eSignature any organization can accelerate signature workflows and sign online in real-time, supplying an improved experience to consumers and employees. verify initial in a few easy steps. Our handheld mobile apps make operating on the run achievable, even while off the internet! eSign signNows from anywhere in the world and make deals in no time.
Keep to the stepwise guide to verify initial:
- Sign in to your airSlate SignNow account.
- Find your document within your folders or import a new one.
- Access the document adjust using the Tools list.
- Drag & drop fillable fields, type text and sign it.
- Include multiple signers using their emails configure the signing sequence.
- Choose which recipients will get an executed version.
- Use Advanced Options to limit access to the template and set an expiry date.
- Press Save and Close when finished.
In addition, there are more advanced functions accessible to verify initial. List users to your collaborative workspace, view teams, and keep track of collaboration. Millions of users across the US and Europe agree that a solution that brings people together in a single cohesive enviroment, is exactly what companies need to keep workflows functioning efficiently. The airSlate SignNow REST API enables you to embed eSignatures into your app, internet site, CRM or cloud storage. Check out airSlate SignNow and enjoy faster, easier and overall more efficient eSignature workflows!
How it works
airSlate SignNow features that users love


See exceptional results verify initial with airSlate SignNow

How to fill out and sign a document online
Try out the fastest way to verify initial. Avoid paper-based workflows and manage documents right from airSlate SignNow. Complete and share your forms from the office or seamlessly work on-the-go. No installation or additional software required. All features are available online, just go to signnow.com and create your own eSignature flow.
A brief guide on how to verify initial in minutes
- Create an airSlate SignNow account (if you haven’t registered yet) or log in using your Google or Facebook.
- Click Upload and select one of your documents.
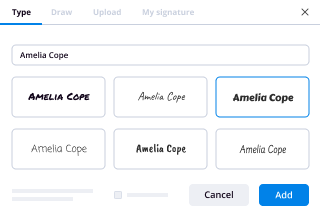
- Use the My Signature tool to create your unique signature.
- Turn the document into a dynamic PDF with fillable fields.
- Fill out your new form and click Done.
Once finished, send an invite to sign to multiple recipients. Get an enforceable contract in minutes using any device. Explore more features for making professional PDFs; add fillable fields verify initial and collaborate in teams. The eSignature solution supplies a reliable process and functions in accordance with SOC 2 Type II Certification. Make sure that your data are guarded and that no person can change them.
How to eSign a PDF in Google Chrome
Are you looking for a solution to verify initial directly from Chrome? The airSlate SignNow extension for Google is here to help. Find a document and right from your browser easily open it in the editor. Add fillable fields for text and signature. Sign the PDF and share it safely according to GDPR, SOC 2 Type II Certification and more.
Using this brief how-to guide below, expand your eSignature workflow into Google and verify initial:
- Go to the Chrome web store and find the airSlate SignNow extension.
- Click Add to Chrome.
- Log in to your account or register a new one.
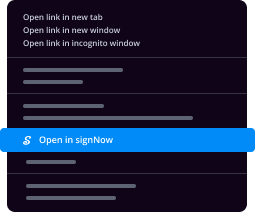
- Upload a document and click Open in airSlate SignNow.
- Modify the document.
- Sign the PDF using the My Signature tool.
- Click Done to save your edits.
- Invite other participants to sign by clicking Invite to Sign and selecting their emails/names.
Create a signature that’s built in to your workflow to verify initial and get PDFs eSigned in minutes. Say goodbye to the piles of papers sitting on your workplace and begin saving time and money for extra important duties. Selecting the airSlate SignNow Google extension is an awesome handy option with lots of advantages.

How to sign an attachment in Gmail
If you’re like most, you’re used to downloading the attachments you get, printing them out and then signing them, right? Well, we have good news for you. Signing documents in your inbox just got a lot easier. The airSlate SignNow add-on for Gmail allows you to verify initial without leaving your mailbox. Do everything you need; add fillable fields and send signing requests in clicks.
How to verify initial in Gmail:
- Find airSlate SignNow for Gmail in the G Suite Marketplace and click Install.
- Log in to your airSlate SignNow account or create a new one.
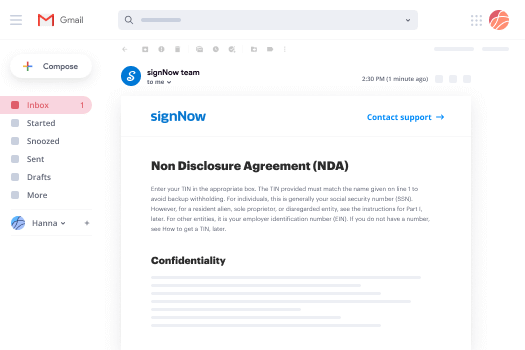
- Open up your email with the PDF you need to sign.
- Click Upload to save the document to your airSlate SignNow account.
- Click Open document to open the editor.
- Sign the PDF using My Signature.
- Send a signing request to the other participants with the Send to Sign button.
- Enter their email and press OK.
As a result, the other participants will receive notifications telling them to sign the document. No need to download the PDF file over and over again, just verify initial in clicks. This add-one is suitable for those who like focusing on more valuable aims rather than burning up time for absolutely nothing. Improve your daily compulsory labour with the award-winning eSignature service.
How to eSign a PDF on the go with no app
For many products, getting deals done on the go means installing an app on your phone. We’re happy to say at airSlate SignNow we’ve made singing on the go faster and easier by eliminating the need for a mobile app. To eSign, open your browser (any mobile browser) and get direct access to airSlate SignNow and all its powerful eSignature tools. Edit docs, verify initial and more. No installation or additional software required. Close your deal from anywhere.
Take a look at our step-by-step instructions that teach you how to verify initial.
- Open your browser and go to signnow.com.
- Log in or register a new account.
- Upload or open the document you want to edit.
- Add fillable fields for text, signature and date.
- Draw, type or upload your signature.
- Click Save and Close.
- Click Invite to Sign and enter a recipient’s email if you need others to sign the PDF.
Working on mobile is no different than on a desktop: create a reusable template, verify initial and manage the flow as you would normally. In a couple of clicks, get an enforceable contract that you can download to your device and send to others. Yet, if you want an application, download the airSlate SignNow mobile app. It’s secure, fast and has an intuitive interface. Enjoy easy eSignature workflows from your workplace, in a taxi or on an airplane.

How to sign a PDF using an iPad
iOS is a very popular operating system packed with native tools. It allows you to sign and edit PDFs using Preview without any additional software. However, as great as Apple’s solution is, it doesn't provide any automation. Enhance your iPhone’s capabilities by taking advantage of the airSlate SignNow app. Utilize your iPhone or iPad to verify initial and more. Introduce eSignature automation to your mobile workflow.
Signing on an iPhone has never been easier:
- Find the airSlate SignNow app in the AppStore and install it.
- Create a new account or log in with your Facebook or Google.
- Click Plus and upload the PDF file you want to sign.
- Tap on the document where you want to insert your signature.
- Explore other features: add fillable fields or verify initial.
- Use the Save button to apply the changes.
- Share your documents via email or a singing link.
Make a professional PDFs right from your airSlate SignNow app. Get the most out of your time and work from anywhere; at home, in the office, on a bus or plane, and even at the beach. Manage an entire record workflow easily: make reusable templates, verify initial and work on PDF files with partners. Turn your device right into a effective organization tool for executing deals.
How to sign a PDF file using an Android
For Android users to manage documents from their phone, they have to install additional software. The Play Market is vast and plump with options, so finding a good application isn’t too hard if you have time to browse through hundreds of apps. To save time and prevent frustration, we suggest airSlate SignNow for Android. Store and edit documents, create signing roles, and even verify initial.
The 9 simple steps to optimizing your mobile workflow:
- Open the app.
- Log in using your Facebook or Google accounts or register if you haven’t authorized already.
- Click on + to add a new document using your camera, internal or cloud storages.
- Tap anywhere on your PDF and insert your eSignature.
- Click OK to confirm and sign.
- Try more editing features; add images, verify initial, create a reusable template, etc.
- Click Save to apply changes once you finish.
- Download the PDF or share it via email.
- Use the Invite to sign function if you want to set & send a signing order to recipients.
Turn the mundane and routine into easy and smooth with the airSlate SignNow app for Android. Sign and send documents for signature from any place you’re connected to the internet. Build good-looking PDFs and verify initial with couple of clicks. Come up with a faultless eSignature process using only your mobile phone and boost your general productivity.
Get legally-binding signatures now!
What active users are saying — verify initial


Related searches to verify initial with airSlate airSlate SignNow

Verify initial
- sir welcome to this video in this video we are going to discuss the packet tracer activity configure initial rotor settings here is our packet tracer activity you will see the objectives coming to part one verify the default or rotor configuration part two we will do the configure and verify the initial router configuration and in part two three so the running configuration file well first we will go to go through this background now in this activity we will perform basic rotor configurations we will secure access to the CL I and console port I using encrypted and plaintext passwords we will also configure messages for users logging into the router for these banners also one unauthorized users that access is prohibited and finally we will verify and save our running configuration so this is what we are going to do in this packet tracer activity so we will come to path to one or verify the default router configuration so in step one establish a console connection to r1 so here we can see the router r1 and we can see the PCA this is our personal computer so we are going to choose a console cable and we are going to connect from r1 this rotor to this PC PC a right and to click PCA and select rs-232 right we will let's select this console cable straight coming to the connection here we can see the connections we have to click on these connections and we have to search for the console cable yes here we can see the console cable click on this console cable until we have to come to our personal computer PC a so here we can see the rs-232 port and we have to connect this console to this rs-232 and on our one we have to use the console port we have to come to console we will see what is next so we have a connected this rs-232 in PC a and we connected other into the console on r1 and now we have to click on PC a we have to go to desktop top we have to select terminal click ok and press Enter you are now able to configure r1 all right we will come to this PC a yes here is so PC a and here we can see the desktop top and here we can see the terminal we have to click on that and this terminal configuration port configuration we have to give the default and we have to press ok and here we can see processor return to get started so we have to press ENTER yes now we are ready to configure this router great job in path to oneness Tapovan completed now we will move to step 2 enter a privileged mode and examine the current configuration you can access all the router commands from privileged x ik mode however because many of the privileged commands configure operating parameters privileged access should be password protected to prevent unauthorized to use so here we are going to give interpolate x ik mode by entering the enable command so that we will go to the privileged x ik mode yes notice that the prompt changed in the configuration to reflect privileged exit more yes so from the user exit mode we have to go to that you privilege to exit mode using the command to enable so we will do that now here we can see yes here we are going to give the command enable yes now we can see we are in a privileged x ik mode now we will come to be enter the so running config command in the privilege to X Sigma mod and we have to answer the following questions like what is routers the house name how many faster Thor net interfaces so does a rotor how how many Gigabit Ethernet interfaces does the rotor how its drives DRAM so first of all the we will give this a show command in the in this router so we will come to the router yes here we are going to give show running config and we can see all the informations we can see the hostname us rotor by default Hunt we can see author informations yes here we can see the interface Gigabit Ethernet to zeros there are 0 interface the gigabit authority 0 / 1 also we can see the serial interfaces yes here we can see the faster Thor net 0 / 1 / 0 1 / 1 1 / 2 and 1/3 and also we can see the line that is conserve and vty now we will come to the questions we will come to the first question Novartis the rotors a host name yes here we can see the host - name is rotor so this is the default name for the rotor the second question how many fast ethernet interfaces does the rotor how yes so we will verify that fast ethernet interfaces yes here we can see that 1 2 3 & 4 so we have total of 4 Fast Ethernet interfaces in this router how many Gigabit Ethernet interfaces does the rotor how yes that also how seen here we can see gigabit a toner 2 0 / 0 and the gigabit a toner 2 0 / 1 so we have two gigabit ethernet interfaces in this rotor how many serial interfaces does the router how yes that also we have seen here serial 0 / 0 / 0 and the serial zeros not 0 / 1 that means we have 2 serial interfaces and finally we have what is the range of values shown for the vty lines yes we will come to VT y that is virtual terminal here we can see yes so line vty from 0 to 4 yes so we have total 5 lines from 0 to 4 no we will come to D your display the current contents of env RAM that is a non-volatile Ram so we have to give the command to show startup config in the privileged x ik mode startup config is not present this will be the result when we give this show command where the saw rotor or respond with the startup config is not present message first of all we will give this message undo we will verify that here we can you show command show startup config right yes here we can see startup config is not present yes so whatever configuration we do that will be stored in the RAM that is a volatile memory so we have to copy the contents from Ram to NV ROM if you're not copying obviously the startup config that is NVRAM will be empty in the beginning yes so this is the reason why the rotor respond with the startup config is not present well we completed our path to 1 now we will come to part 2 configure and verify the initial router configuration to configure parameters on a router we may be required to move between various configuration modes notice how the prompt changes as you navigate through the router yes we know the different modes like user X ignore the privileged exit more a global configuration mode and we have a specific configuration modes like interface mode sub interface mode or maybe the line modes or rotor moves etc so we have to go through these different configuration modes to do this initial or router configurations we will come to step 1 configure the initial settings on r1 that is our rotor not if you have difficulty remembering the commands or refer to the content for this topic the commands are the same as you configured on a switch right already we have seen the packet tracer at these initial settings of switch the same command so we are going to use in this router 2 so r1 ask the host name we are going to set the hostname as r1 and use the following passwords the console password should be let mean privileged exit that is unencrypted is a cisco privilege to exit that is encrypted password should be it's a secret and to be how to encrypt all plaintext passwords and to finally we how to set the m or TD that is message of the day that is unauthorized access is strictly prohibited so these are the configurations what we are going to do or on this rotor r1 now we are going to do the initial settings on r1 first of all as they told we are going to set the hostname that is r1 yes so we have to go to the global configuration mode configure terminal we have the command hostname and here we are going to set the hostname yes here we can see the default rotor name that is a rotor is changed to r1 what be set right now no we will have set the line console password so we have to go to the line mode so here we have line console and two the number is zero and we are going to set the password and we have to see the password that you shall let me in we are going to set that password let me in aren't we are going to press ENTER and to be how a command called Logan enable password checking so we have given this console password us let me in so this should be activated when the next login we do so here we have to give the login command yes should I am going to give a login now we will have set privilege to x''k unencrypted password that means the password will be a plain text so we have to set as a cisco we will do that now we have to exit from this specific configuration mode here we are going to enable the password and here we have to give the password that is a cisco yes so we enabled the unencrypted password for the privilege to exit more now we are going to give you encrypted password for the privileged exit more we have to use the command enable secret and the password is it's a secret yes here obviously the console password and the privilege to exit unencrypted password that is let me in and Cisco will be plaintext passwords now we are going to encrypt these plaintext passwords for that we have to give the command service password the encryption so that the plaintext password will be encrypted finally we are going to set the amor TD that is a message of the day here is our message that is unauthorized to access is strictly prohibited we are going to set this MOTD hurry so r1 we are going to set the banner motd and we are going to set the we are going to give the message before that we have to set the delimiter here I am going to use the dollar symbol and here is our message and we are going to enter with the same delimiter what we started that is a dollar symbol yes so we set a more TD to grade so now we have done all the initial settings on r1 now we will come to a step to verify the initial settings on r1 verify the initial settings by viewing the configuration for r1 what command do you use obviously we can use show or running-config you exit the current console session until you see the following message yes so we have to exit from the current console session and we have to start from the beginning that means we get this message process or turn to get started a press enter you should see the following message on authorized access is strictly prohibited this is a message what we given as M or TD and to be get user access verification this is the console password we have to give the console password what we given that you say let me in come on front so we will verify these initial settings on this router r1 we are going to we exit okay we are going to exit again pretend to get started we are going to start again I am going to press enter yes here we can see the message and authorized access is strictly prohibited this is nothing but the message what we given that is M or TD and just after we can see you sir access verification this is nothing but the line console authentication we have to give the password here the password what be given is let me in yes I typed my password but you can see it is invisible front you remember when we type the password the password will be invisible and yeah here the session expired without making any mistake we have to type the password again I am going to give my password let me in yes now we are in a user xing mode now we are going to privilege to ignore we have to give the command to enable yes here also it is prompted for password here we given the privilege 2x sigmoid passwords we have given on I mean plaintext password that is cisco and after we given the enable secret password that is encrypted password obviously we have to give the enable secret password here okay I am going to give the first password what I given that is Cisco I am going to press enter it is not accepting yes so I have to give this secret password so that is so it's a secret oops it's a secret yes here we can see now we are in privilege to exit mode front so we how to keep in mind for the access verification for the privileged x ik mode also the password will be in visa we how to type the password correctly yes we verify the initial settings on our one and now here we can see they are asking a question why should every router have a message of the day banner I mean MOTD so every router should have a banner to one unauthorized users that access is prohibited but can also be used for sending messages to network personals or technicians such as imprinting System shutdowns or who to contact for access that's why we use this MOTD banner you can see one more question here if you are not prompted for a password what console line command did you forget to configure yes so in the beginning here we can see it is a prompted for a user access verification suppose they ask this password is not asked so what we forgot to give obviously in this configuration I told we must give you the command called Logan if you are forgetting forgetting to give this Logan command it won't prompt for this user access verification so make sure that you are giving this Logan command in this line line mode I enter the password so necessary to return to privilege 2x sigmoid yes here we can see we already given the privilege to X sigmoid password and till we have one more question here why would the enable secret password allow access to the privileged x ik mode and the enable password no longer be valid yes as I told it during the configuration the enable secret password overrides the enable password if both are configured on the router we must enter the enable secret password to enter privileged x ik mode yes here we have one more question if you configure any more passwords on the router or the displayed in the configuration file as plain text or in encrypted form yeah it's a great question because we already set the service password encryption command so once we set this a service password encryption command so it encrypts all the current passwords and suppose we are going to set some password ins in the future that - yes well done till here now we will move to part three save the running configuration file step one save the configuration file to yen veera so whatever configurations we have done till now it will be in the ROM so ROM is a volatile once our system is rebooted or maybe loses the power or the configuration what be done we will lose so we must save the configuration from rom through and V ROM ok here we so you can see you have a configure the initial settings for r1 yes we have done that now back up the running configuration file to env ROM that is a non-volatile ROM to ensure that the changes made are not lost if the system is rebooted or loses power exactly so we have to save the content from a ram through env ROM what command did you enter to save the configuration to env ROM yes we know that we already have seen in the last microtrace solar activity that is copy running-config to start upon feet running config space startup config what is the shortest unambiguous version of this command we can give a ce o-- p space our space yes so this is a short touch to unambiguous version of this command we have one more question here which come on who displays the contents of the env ROM we know the canto around we can see with the help of running config show running config and we can see the contents of a young theorem using show startup config obviously verify that all of the parameters configured are recorded if not analyze the output and determine which commands were not done or well entered incorrectly you can also click chuckle results in the instruction window here we can see the status it is 72 out of 80 because we did not say oh our account content from Ram to env ROM so this is the final step what we are going to do yes oops we are going to give the password here that is a let me in enable and password is it's a secret now we are going to give the command we are going to copy from running quantity to startup we have a copy for running config you're going to say to startup config yes destination file name we can give the default file name so just press Enter well so we copied from Ram to envy ROM now we will check the chakra results also those completion status grid so here we can see the completion status EC 80 out of 80 also we can check our results here yes here we can see the assessment item son we can see everything configured correctly our packet tracer activity completed successfully but still we can see one more step here step 2 optional bonus save the startup configuration file to flash although you will be learning more about manage the flash storage in a rotor in later chapters so some of the advanced configurations are coming in future so you may be interested to know now that us and added back a procedure we can save your startup configuration file to flash yes so in we can save the startup configuration in flash to by default to the rotor still loads the startup configuration from NVRAM that is non-volatile Ram but if in veeram becomes corrupt you can restore the startup configuration by copying it over from flash so there might be a chance of the content of NVRAM may corrupt we can then take the backup from the this flash complete the following steps to serve the startup configuration to flash we will come to a examine the contents of flash using the show flash command we can see the contents of flash we have to give the command to show flash right we will give that here show flash right we have that yes we can see some files here behind we how three files one two three and we can see the length they're given here until name and the status we can see here is one file with the bin extinction we can see another file with the dot XML and another with a dot XML we have a couple of questions here how many files are you currently stored in flash yes just now we have seen we have total three files here okay which of these files would you Gus is the iOS image obviously there will be an iOS image we will verify that to be how we XML XML no yes we can see one bin file here so this is the file over iOS why do you think this file is the i/os image yeah here we can be how to close one is obviously the extinction that is here we can see the extension is door tube in this is the extinction of iOS file also once we go through this file name we can see that long file name see one nine zero zero Universal okay and so it gives the clues of a u.s. file now we will go to be save the startup configuration file to flash using the following commands copy startup config flash we are going to copy the contents from startup config to flash right we will give this command now yes sure we are going to give we are to copy from startup config to we can search for the flash yes here we have flash I am going to present her destination file name we will give the default name press enter again yes here we can see that there are 1 1 4 2 by it's copied in 0.416 seconds the rotor prompts to store the file in flash using the name in brackets if the answer is yes then press ENTER if not to type an appropriate name and press enter okay so Uther we can give we can refer a name or the name it will take what is in the brackets yes no use the show flash command to verify the startup configuration file is now stored in flash yes we will verify that now we have to be the show command so flash we will verify yes here we can see now we have total four files previously it was three and we can see the length of 1 1 4 2 this is already we have seen yes here we can see that and the file name is a start-up conflict so this is the default name it is selected which is in the bracket here we can see the startup config yes now our startup configuration file is safe in flash suppose our the startup configuration corrupt obviously we can load our startup configuration from this new flash well great job we completed the sub market restore activity that is configuring initial rotor settings successfully my dear friends if you like my video give a thump also I expect opinions and suggestions to improve my future videos also if you have any doubt regarding this try solar activity or CCNA routing and switching you can comment below share my videos to your friends share my channel with your friends and finally if you not have subscribed you can subscribe my channel to get future videos information into your Gmail thank you take
Show moreFrequently asked questions
What is the definition of an electronic signature according to the ESIGN Act?
How do you insert a sign area in a PDF?
How do I sign something in a PDF?
Get more for verify initial with airSlate SignNow
- Print electronically sign Lease Proposal Template
- Prove electronically signed Change in Control Agreement
- Endorse digi-sign Advanced Employment Application
- Authorize signature service SPA Evaluation
- Anneal mark Articles of Incorporation Template
- Justify esign Commercial Lease Agreement Template
- Try countersign Recapitalization Agreement
- Add Development Agreement electronic signature
- Send Real Estate Proposal Template signed electronically
- Fax Floral Wedding Invitation electronically sign
- Seal Soccer Camp Registration electronically signing
- Password Website Development Proposal Template mark
- Pass Stock Purchase Agreement signed
- Renew Home Remodeling Contract autograph
- Test Auto Repair Work Order digital sign
- Require Deed of Trust Template initial
- Comment attestant eSignature
- Boost looker-on eSign
- Compel subscriber initials
- Void Modeling Agency Contract Template template countersign
- Adopt Administration Agreement template sign
- Vouch Contractor Quote template electronically signing
- Establish Release of Liability Form template eSign
- Clear Coffee Shop Business Plan Template template eSignature
- Complete Summer Camp Permission Slip template autograph
- Force Photo Release Form Template template digisign
- Permit Simple Cash Receipt template electronic signature
- Customize Stock Certificate template signed electronically