How Can I eSign Form for Procurement
Make the most out of your eSignature workflows with airSlate SignNow
Extensive suite of eSignature tools
Robust integration and API capabilities
Advanced security and compliance
Various collaboration tools
Enjoyable and stress-free signing experience
Extensive support
Keep your eSignature workflows on track
Our user reviews speak for themselves


Award-winning eSignature solution


How can I electronically sign a form for procurement
If you're curious about how to electronically sign a form for procurement, airSlate SignNow provides a smooth solution. This platform facilitates the signing procedure, enabling users to handle documents effectively while maintaining compliance and security. With its intuitive interface, businesses can swiftly integrate e-signature technology to improve their procurement workflows.
How can I electronically sign a form for procurement using airSlate SignNow
- Launch your web browser and go to the airSlate SignNow website.
- Create a complimentary trial account or log in to your current account.
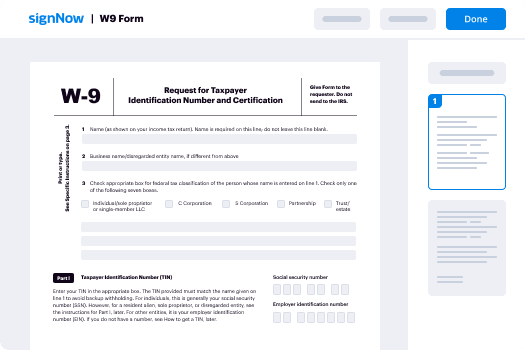
- Select the document you want to sign or send for signatures.
- If you intend to reuse the document, transform it into a reusable template.
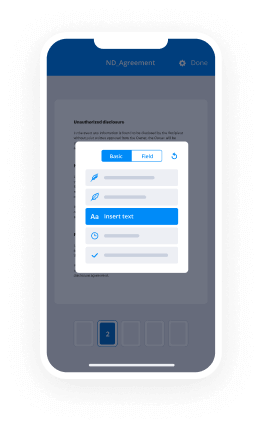
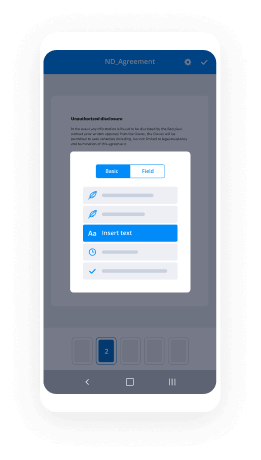
- Access the document to make necessary changes: add fillable fields and include relevant details.
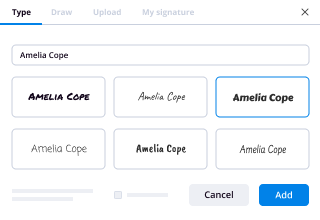
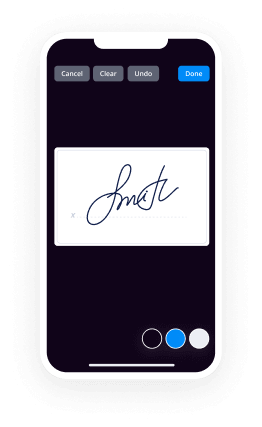
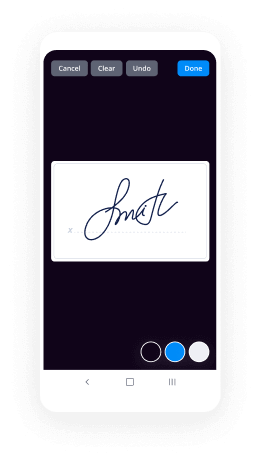
- Affix your signature and assign signature fields for the designated recipients.
- Click on 'Continue' to complete the setup and send the eSignature request.
With airSlate SignNow, electronically signing forms for procurement becomes an uncomplicated task. Its extensive features provide signNow returns on investment, making it a perfect option for small to medium-sized enterprises. The platform is built for effortless scalability and effective document management, ensuring that users can accommodate increasing demands without difficulties.
Eager to simplify your procurement process? Begin your experience with airSlate SignNow today and discover the advantages of efficient e-signatures. Register for a free trial and harness the potential of digital document management!
How it works
Rate your experience
-
Best ROI. Our customers achieve an average 7x ROI within the first six months.
-
Scales with your use cases. From SMBs to mid-market, airSlate SignNow delivers results for businesses of all sizes.
-
Intuitive UI and API. Sign and send documents from your apps in minutes.
A smarter way to work: —how to industry sign banking integrate
How to eSign and fill out a document online
Document management isn't an easy task. The only thing that makes working with documents simple in today's world, is a comprehensive workflow solution. Signing and editing documents, and filling out forms is a simple task for those who utilize eSignature services. Businesses that have found reliable solutions to how can i department e sign procurement form don't need to spend their valuable time and effort on routine and monotonous actions.
Use airSlate SignNow and how can i department e sign procurement form online hassle-free today:
- Create your airSlate SignNow profile or use your Google account to sign up.
- Upload a document.
- Work on it; sign it, edit it and add fillable fields to it.
- Select Done and export the sample: send it or save it to your device.
As you can see, there is nothing complicated about filling out and signing documents when you have the right tool. Our advanced editor is great for getting forms and contracts exactly how you want/need them. It has a user-friendly interface and full comprehensibility, offering you total control. Sign up right now and begin enhancing your digital signature workflows with efficient tools to how can i department e sign procurement form on the web.
How to eSign and complete documents in Google Chrome
Google Chrome can solve more problems than you can even imagine using powerful tools called 'extensions'. There are thousands you can easily add right to your browser called ‘add-ons’ and each has a unique ability to enhance your workflow. For example, how can i department e sign procurement form and edit docs with airSlate SignNow.
To add the airSlate SignNow extension for Google Chrome, follow the next steps:
- Go to Chrome Web Store, type in 'airSlate SignNow' and press enter. Then, hit the Add to Chrome button and wait a few seconds while it installs.
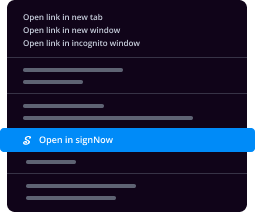
- Find a document that you need to sign, right click it and select airSlate SignNow.
- Edit and sign your document.
- Save your new file to your account, the cloud or your device.
By using this extension, you avoid wasting time and effort on monotonous assignments like saving the document and importing it to an eSignature solution’s collection. Everything is easily accessible, so you can quickly and conveniently how can i department e sign procurement form.
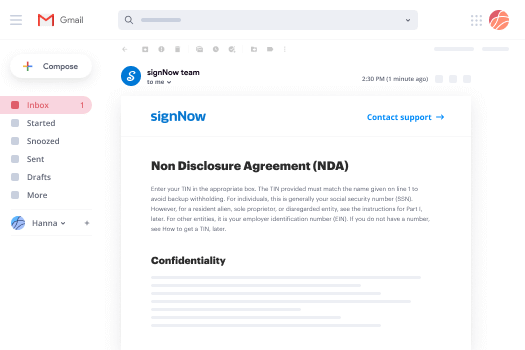
How to digitally sign documents in Gmail
Gmail is probably the most popular mail service utilized by millions of people all across the world. Most likely, you and your clients also use it for personal and business communication. However, the question on a lot of people’s minds is: how can I how can i department e sign procurement form a document that was emailed to me in Gmail? Something amazing has happened that is changing the way business is done. airSlate SignNow and Google have created an impactful add on that lets you how can i department e sign procurement form, edit, set signing orders and much more without leaving your inbox.
Boost your workflow with a revolutionary Gmail add on from airSlate SignNow:
- Find the airSlate SignNow extension for Gmail from the Chrome Web Store and install it.
- Go to your inbox and open the email that contains the attachment that needs signing.
- Click the airSlate SignNow icon found in the right-hand toolbar.
- Work on your document; edit it, add fillable fields and even sign it yourself.
- Click Done and email the executed document to the respective parties.
With helpful extensions, manipulations to how can i department e sign procurement form various forms are easy. The less time you spend switching browser windows, opening several profiles and scrolling through your internal data files searching for a template is much more time and energy to you for other crucial assignments.
How to safely sign documents in a mobile browser
Are you one of the business professionals who’ve decided to go 100% mobile in 2020? If yes, then you really need to make sure you have an effective solution for managing your document workflows from your phone, e.g., how can i department e sign procurement form, and edit forms in real time. airSlate SignNow has one of the most exciting tools for mobile users. A web-based application. how can i department e sign procurement form instantly from anywhere.
How to securely sign documents in a mobile browser
- Create an airSlate SignNow profile or log in using any web browser on your smartphone or tablet.
- Upload a document from the cloud or internal storage.
- Fill out and sign the sample.
- Tap Done.
- Do anything you need right from your account.
airSlate SignNow takes pride in protecting customer data. Be confident that anything you upload to your account is secured with industry-leading encryption. Auto logging out will protect your profile from unauthorized entry. how can i department e sign procurement form from your phone or your friend’s phone. Protection is vital to our success and yours to mobile workflows.
How to sign a PDF file on an iPhone
The iPhone and iPad are powerful gadgets that allow you to work not only from the office but from anywhere in the world. For example, you can finalize and sign documents or how can i department e sign procurement form directly on your phone or tablet at the office, at home or even on the beach. iOS offers native features like the Markup tool, though it’s limiting and doesn’t have any automation. Though the airSlate SignNow application for Apple is packed with everything you need for upgrading your document workflow. how can i department e sign procurement form, fill out and sign forms on your phone in minutes.
How to sign a PDF on an iPhone
- Go to the AppStore, find the airSlate SignNow app and download it.
- Open the application, log in or create a profile.
- Select + to upload a document from your device or import it from the cloud.
- Fill out the sample and create your electronic signature.
- Click Done to finish the editing and signing session.
When you have this application installed, you don't need to upload a file each time you get it for signing. Just open the document on your iPhone, click the Share icon and select the Sign with airSlate SignNow button. Your sample will be opened in the mobile app. how can i department e sign procurement form anything. In addition, making use of one service for all of your document management needs, things are faster, better and cheaper Download the application today!
How to electronically sign a PDF on an Android
What’s the number one rule for handling document workflows in 2020? Avoid paper chaos. Get rid of the printers, scanners and bundlers curriers. All of it! Take a new approach and manage, how can i department e sign procurement form, and organize your records 100% paperless and 100% mobile. You only need three things; a phone/tablet, internet connection and the airSlate SignNow app for Android. Using the app, create, how can i department e sign procurement form and execute documents right from your smartphone or tablet.
How to sign a PDF on an Android
- In the Google Play Market, search for and install the airSlate SignNow application.
- Open the program and log into your account or make one if you don’t have one already.
- Upload a document from the cloud or your device.
- Click on the opened document and start working on it. Edit it, add fillable fields and signature fields.
- Once you’ve finished, click Done and send the document to the other parties involved or download it to the cloud or your device.
airSlate SignNow allows you to sign documents and manage tasks like how can i department e sign procurement form with ease. In addition, the security of your info is priority. Encryption and private servers are used for implementing the newest features in data compliance measures. Get the airSlate SignNow mobile experience and operate better.


FAQs
-
How can I eSign Form for Procurement using airSlate SignNow?
To eSign a form for procurement using airSlate SignNow, simply upload your document to our platform, add the necessary fields for signatures, and send it to the relevant parties. Our intuitive interface makes it easy to customize your forms and track the signing process. Whether you need to eSign contracts, purchase orders, or other procurement documents, airSlate SignNow streamlines the entire workflow.
-
What features does airSlate SignNow offer for eSigning procurement forms?
airSlate SignNow provides a variety of features perfect for eSigning procurement forms, including customizable templates, automated reminders, and secure cloud storage. You can also integrate with popular business applications to enhance your workflow. With our solution, you can efficiently manage your procurement documentation and ensure timely approvals.
-
Is airSlate SignNow affordable for small businesses looking to eSign procurement forms?
Yes, airSlate SignNow offers cost-effective pricing plans suitable for small businesses. Our tiered pricing allows users to choose a plan that fits their needs without breaking the bank. By utilizing our eSigning solution, small businesses can save time and resources when managing procurement forms.
-
Can I integrate airSlate SignNow with other software for procurement processes?
Absolutely! airSlate SignNow seamlessly integrates with various software applications, including CRM systems, ERP solutions, and project management tools. This integration capability enhances your procurement process by allowing you to eSign forms directly within the applications you already use.
-
What benefits does eSigning procurement forms with airSlate SignNow provide?
eSigning your procurement forms with airSlate SignNow offers numerous benefits, including increased efficiency, reduced turnaround times, and enhanced security. With our electronic signatures, you can eliminate the need for paper, streamline approvals, and ensure that your documents are legally binding.
-
How secure is the eSigning process with airSlate SignNow for procurement forms?
The eSigning process with airSlate SignNow is highly secure, utilizing encryption and authentication protocols to protect your documents. We comply with industry standards to ensure the integrity and confidentiality of your procurement forms. You can confidently eSign knowing that your sensitive information is protected.
-
What types of documents can I eSign for procurement with airSlate SignNow?
You can eSign a wide range of documents for procurement with airSlate SignNow, including contracts, purchase orders, invoices, and more. Our platform supports various file formats, making it easy to work with the documents you need. This flexibility allows you to manage all your procurement needs efficiently.
-
How can I create a sign-up form?
It really depends on what the sign-up form is for.IF you are just creating a sign-up form for an email capture and you don’t have an email marketing software in place, go with Google Forms.This is the simplest way to create a sign-up form for capturing information if you don’t have an email management system in place.Here’s the 11 steps you need to follow (links go to screenshots from a step-by-step tutorial I created):Log into your Google account (also your gmail account)Go to forms.google.comClick the plus sign to create a new formAdjust the Google form theme to your likingGive the form a...
-
How can I create a sign-up form using php?
You can use PHP script to connect your form with a database like this:It would be pretty much better if you have shared your piece of code. I will write PHP script for you.
-
How can I edit my pic and sign after submitting a CHSL form?
It is to my understanding that once you have signed this form, which is a government form you cannot edit any of its information until after it is been submitted and accepted. Once it's accepted and you're in the system then you can fill out another Form to have it edited or as they say, updated. This is based upon information that I have seen in the past on government form such as this and what I saw on the website According to their rules. I hope this is help you in some way and again this is what I have seen and I could not substantiate this as carved in Granite but then again what form of government document is ever carved in Granite? Have a good day and take good care.
-
How do I add an email sign-up form to my website?
hi friends,i use sendinblue email subscription service to capture email from my landing page.In this tutorial, i’ll show you how to create your subscription form in just a few clicks. You will be able to:customize the form as you see fitchoose the form that best suits youFirst of all Create a free Account on Sendinblue and login to your account. after logged in follow the below step.1. Creating a subscription formNavigate to the tab Contacts.Now click to Manage your forms.Now let’s choose + Create a new subscription form.Personalizing your formWe can achieve a great level of personalization by modifying:BackgroundText Fonts, Sizes & ColorsInstruction Text (directing users how to unsubscribe)Success Message (confirming that a user has successfully unsubscribed)Form fields (add as many fields as you want)New form field typesAdd additional form fields to collect information about your subscribers and populate existing contact attributes (such as a text, number or date value).You may also add a multi-list subscription field to allow subscribers to declare interests or preferences at signup and place them in corresponding lists.Each new form field will correspond to a contact attribute or contact list:Text (contact attribute)Number (contact attribute)Date (contact attribute)Multi-list subscription (contact form)CaptchaTo protect you from spam, we activate a Captcha to your form by default. To configure the Captcha that matches your website, go to Google Captcha.Once this has been set up, enter the site key in the field provided in your SendinBlue form.Editing form HTMLAfter creating the form, you can also directly edit the HTML code if you want to go further. You can find this code in the "Share" tab. Here is an example of personalization:2. Sign-up settingsThis section is where you can choose what type of confirmation message your subscribers will receive (if any).2.1 No confirmation Choose this option if you do not want SendinBlue to send a confirmation email once the person has subscribed.2.2 Simple confirmation Choose this option if you want SendinBlue to send a confirmation email to a new subscriber confirming that they will now receive your emails. Next, select the SMTP template you would like the system to use when sending the confirmation. The default template, titled "Default Template – Single Confirmation", is available and you can customize it or create another template confirmation.Note: To create a new SMTP template, navigate to Campaigns within the Email & SMS Campaigns area. In the drop down menu, select SMTP Templates and then +Create a Template. If you create a new SMTP template, be sure to activate it so that it will appear as an option when setting up a form with Simple Confirmation.2.3 Double Opt-in Confirmation The double opt-in subscription process requires the subscriber to complete two steps:Your new subscriber enters their email address into your SendinBlue sign-up form.The subscriber must click the link in a confirmation email to be added to your SendinBlue email list.The double opt-in confirmation feature allows subscribers to verify that they want to receive your emails. This feature eliminates accidental subscriptions and potential annoyances. Advantages of double opt-in confirmation:For your contacts:Allows them to verify they didn’t make a mistake in registering.For you:You have the assurance of knowing a subscriber is truly interested in receiving your emails.Since the subscriber twice confirmed their email address, you drastically reduce the number of hard bounces (invalid email addresses) in your campaigns.You have protection against malicious competitors who may provide you with phony email addresses to damage your reputation.You remain compliant with laws and regulations in some countries: the double opt-in is mandatory in several countries, including Germany.The confirmation email must be one of your SMTP templates and include double opt-in formatting (details below). You can use:The default template we provide, "Default template - Double optin confirmation"Or a new template that you create.a. Default Template The default template is simply called "Default template - Double optin confirmation". You can find and modify it in your SMTP templates.b. Custom Template You also have the ability to create or select your own template for the confirmation email. To do this, go to SMTP Templates and click "Create a Template".Create your template using one of the different newsletter editors.Next, edit the template as desired and insert this exact text as the double opt-in link: http://[DOUBLEOPTIN]Finally, save and activate the template, and return to your subscription form.c. Redirect URL (optional) Use this tool if you want your subscriber to be redirected to a specific page (i.e. a confirmation page or your website homepage) after registering.d. Final Confirmation Email (optional) Use this tool if you want your subscriber to receive a final confirmation email after he have completed the double opt-in process. As with the other confirmation emails, the default template is simply called “Default template - Final Confirmation”. You can find and modify it in your SMTP templates.e. Saving Contacts Before saving your double opt-in subscription form, you'll be required to select the list that new subscribers will be added to. This will automatically create a "Temporary Double Opt-in" list to save the contact information of the subscribers who have not yet completed the second step of the double opt-in process (confirming their email addresses).Your SendinBlue contact database will also be updated to include a new attribute (column) labeled "Double_opt -in". Contacts who are added via double opt-in will have a value of "Yes"within this column. If the contact subscribed through another type of form, this field value will be "No". If you did not use a SendinBlue subscription form to add contacts to your database, this field will be blank.3. Advanced settingsThis section is where you can choose what type of success message your subscribers will receive (if any). URL forwarding allows you to automatically redirect the user to a specific page after they have successfully completed the subscription form. For example, you may redirect your new subscriber to a landing page or to your website homepage. Pre-populating form fields is possible when your form is sent by email or shared by URL. It can be helpful to your users to fill in the form with sample information. For example, if you want to pre-populate the ‘Email’ field, you can add “/email/subscriber@email.com” to the end of your form URL. You can also pre-populate other fields on the form by following the same format and adding additional modifiers to the form URL: /field-name/sample text/.4. List selection and registration form integrationNext, select the list (or lists) where you will place the new contacts.After Saving, click on the Share tab to get the code for integrating the form into your website. There are three types of codes:Iframe code: easy to integrate, this code is a kind of mini-page you have to paste onto your website.HTML code: this code is much more customizable, with Ajax animation for messages.Simple HTML code: this is a simplified version of HTML form code that does not require calling JavaScript.Important : Captcha that requires calling JavaScript cannot be included in this form code. In addition, the forwarding URL has to be provided in order to integrate this code into you website.Finally, just paste the code on your website, and the form will appear!Hope this helps.Good Luck.
-
How can I install an email signup form onto my Tumblr blog?
I’d recommend you to try GetSiteControl - a set of tools for visitors engagement. This set includes the Subscribe widget that will help you to collect your visitors emails. It’s customizable - you can create a pop-up, a top bar or a side button (actually, there are 9 positions to select from) and choose any colour you like to make your widget noticeable. You can make it appear at once or when a visitor is about to leave your page. You can also integrate the Subscribe widget with MailChimp so that the collected data is automatically saved to the mailing list of your choosing. It’s really easy to install GetSiteControl on Tumblr - there are even step-by-step instructions for this procedure. And what is especially nice - it’s free. Check out this page to find out more about all the features available: https://getsitecontrol.com/subsc...
-
How can I create a sign up form in my website?
Here is my very general answer from a multi-stack Web developer for your very general question.For sure, you will need:A database (MySQLi [recommanded] or MySQL) to store users information, such as a username and a passaword.A basic HTML form (duh!) with the information you want the user to give you on sign up.An API for each of the automatic registration you want (e.g.: Google API to automatically give you the Gmail adress of the user).Form verification, in back-end and front end, preferably.Knowledge about Web programing, good plugins or the CMS (such as Wordpress) you use. Be always sure to check if plugins/frameworks/library exist before beginning to program. It can saves you a lot of time and monyThere is a lot of tutorial to help you out there, and there is no absolute way on how to program a sign up form. It depends of the programming languages and styles you use!Without any further information, this is all the help I can provide you with being sure I won't really mislead you.Other than that, I wish you good luck on your form body.
-
Can any type of doctor sign a ‘do not resuscitate’ form, i.e., even a gyno?
A gynaecologist is a specialist doctor in the same way as other surgeons. A gynaecologist would be able to sign a “do not resuscitate” form if the situation arose but it is highly unlikely because if a gynaecologist’s patient was so ill as to be on the verge of death he/she would call in other specialists to take over the care of the patient. Specialists like cardiologists, intensive care doctors etc.
-
How can I get a verified account on Instagram?
Hello from October 2019.What a nice time to live in. Especially since now Instagram disclosed specific criteria on how any account can get that magical verification badge.And today not only Hollywood celebrities and politicians can receive the badge, but regular people as well.Do you need to have a specific amount of followers? Absolutely not.For example, the following account has more than 700K followers. And it is not verified.Photo via Puppy Lovers (@puppy_lovings) • Instagram photos and videosHere is an example of a dog's account that is verified.Photo via Marnie The Dog (@marniethedog) • Instagram photos and videosCan you spot the difference?All speculations aside, here are criteria created by Instagram itself:AuthenticUniqueCompleteNotableAuthentic: Your account must represent a real person, registered business or entity.As long as you have not created a fan page for a celebrity or any other types of profiles that represent another business – Authenticity is the easiest step for you.Unique: Content on your profile must be unique. All pictures have to be yours and created by you.Complete: Your account has to be public and have a bio, profile picture and at least a few posts in your feed.Notable: Your account must represent a well-known, highly searched for person, brand or entity. We review accounts that are featured in multiple news sources, and we don’t consider paid or promotional content as sources for review.For example, there are many writers wrote about @Marniethedog. This is why it is “Notable”.(Retrieved from Marnie the Dog For Sure Dead Inside But What About Out, These Are the 10 Best Animals to Follow on Instagram)The first 3 are the easiest ones. Any business or person who created a profile for their own self, post their own content and have completed their profile satisfies the criteria.The trap is "Notable". Trap because ... Only a small percentage of the Insta account is "Notable".And it is the reason why 90% of accounts don't get the verification badge.This is the reason why the Socialityio team has come up with a complete GUIDE with PRO TIPS on transforming your IG account into a "Notable" one. Available here: How to Get Verified on Instagram? - Sociality.io Blog
Trusted esignature solution— what our customers are saying


Get legally-binding signatures now!
Frequently asked questions
How do i add an electronic signature to a word document?
How to make an electronic signature from a scan?
How to do electronic signature in quickbooks?
Get more for How Can I eSign Form for Procurement
Find out other How Can I eSign Form for Procurement
- Golden arrow award scouts form
- Erca forms
- Download majalah tempo terbaru gratis form
- Vssc chss portal form
- Manulife consumer markets extended health care claim form
- Epi schedule sri lanka form
- Office protection shield policy form
- Panchayat audit and accounts rules bengali form
- Heta arbeten blankett form
- Pl form
- Madrasa admission form
- Grade 2 math worksheets pdf form
- Kartu dplk manulife hilang form
- University of nairobi degree certificate sample form
- How to quit the elks form
- Arthritis impact measurement scale 2 short form pdf
- Speech banana audiogram printable form
- Ak jha physics pdf form
- Ics 203 100000110 form
- Anand rathi closure form