How To Add Sign in CMS
Contact Sales
Make the most out of your eSignature workflows with airSlate SignNow
Extensive suite of eSignature tools
Robust integration and API capabilities
Advanced security and compliance
Various collaboration tools
Enjoyable and stress-free signing experience
Extensive support
Keep your eSignature workflows on track
Our user reviews speak for themselves


Award-winning eSignature solution


How to incorporate sign in CMS
If you're seeking to optimize your document signing procedure, understanding how to incorporate sign in CMS using airSlate SignNow is crucial. This powerful platform delivers a comprehensive yet intuitive solution for overseeing eSignatures, making it perfect for organizations of any scale. With functionalities aimed at boosting productivity and streamlining workflows, airSlate SignNow is a superb option for anyone requiring effective document management.
How to incorporate sign in CMS using airSlate SignNow
- Launch your browser and access the airSlate SignNow site.
- Create a free trial account or log in to your pre-existing account.
- Choose the document you want to sign or send for signatures and upload it.
- If you intend to reuse this document, save it as a template.
- Open your document and modify it by adding fillable fields or inserting required information.
- Sign the document personally and assign signature fields for each receiver.
- Click 'Continue' to set up your eSignature invitation and send it out.
In summary, airSlate SignNow offers organizations a budget-friendly and effective method for managing eSignatures. With its extensive feature set, clear pricing, and outstanding customer support, it’s an intelligent choice for improving your document workflow.
Prepared to streamline your signing process? Initiate your free trial with airSlate SignNow today and witness the advantages firsthand!
How it works
Rate your experience
-
Best ROI. Our customers achieve an average 7x ROI within the first six months.
-
Scales with your use cases. From SMBs to mid-market, airSlate SignNow delivers results for businesses of all sizes.
-
Intuitive UI and API. Sign and send documents from your apps in minutes.
A smarter way to work: —how to industry sign banking integrate
How to electronically sign and complete a document online
Document management isn't an easy task. The only thing that makes working with documents simple in today's world, is a comprehensive workflow solution. Signing and editing documents, and filling out forms is a simple task for those who utilize eSignature services. Businesses that have found reliable solutions to how to integration sign add cms don't need to spend their valuable time and effort on routine and monotonous actions.
Use airSlate SignNow and how to integration sign add cms online hassle-free today:
- Create your airSlate SignNow profile or use your Google account to sign up.
- Upload a document.
- Work on it; sign it, edit it and add fillable fields to it.
- Select Done and export the sample: send it or save it to your device.
As you can see, there is nothing complicated about filling out and signing documents when you have the right tool. Our advanced editor is great for getting forms and contracts exactly how you want/need them. It has a user-friendly interface and full comprehensibility, offering you full control. Register today and start increasing your eSign workflows with highly effective tools to how to integration sign add cms on-line.
How to electronically sign and complete forms in Google Chrome
Google Chrome can solve more problems than you can even imagine using powerful tools called 'extensions'. There are thousands you can easily add right to your browser called ‘add-ons’ and each has a unique ability to enhance your workflow. For example, how to integration sign add cms and edit docs with airSlate SignNow.
To add the airSlate SignNow extension for Google Chrome, follow the next steps:
- Go to Chrome Web Store, type in 'airSlate SignNow' and press enter. Then, hit the Add to Chrome button and wait a few seconds while it installs.
- Find a document that you need to sign, right click it and select airSlate SignNow.
- Edit and sign your document.
- Save your new file to your account, the cloud or your device.
By using this extension, you prevent wasting time on monotonous activities like saving the document and importing it to an electronic signature solution’s catalogue. Everything is easily accessible, so you can easily and conveniently how to integration sign add cms.
How to electronically sign docs in Gmail
Gmail is probably the most popular mail service utilized by millions of people all across the world. Most likely, you and your clients also use it for personal and business communication. However, the question on a lot of people’s minds is: how can I how to integration sign add cms a document that was emailed to me in Gmail? Something amazing has happened that is changing the way business is done. airSlate SignNow and Google have created an impactful add on that lets you how to integration sign add cms, edit, set signing orders and much more without leaving your inbox.
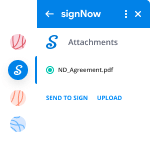
Boost your workflow with a revolutionary Gmail add on from airSlate SignNow:
- Find the airSlate SignNow extension for Gmail from the Chrome Web Store and install it.
- Go to your inbox and open the email that contains the attachment that needs signing.
- Click the airSlate SignNow icon found in the right-hand toolbar.
- Work on your document; edit it, add fillable fields and even sign it yourself.
- Click Done and email the executed document to the respective parties.
With helpful extensions, manipulations to how to integration sign add cms various forms are easy. The less time you spend switching browser windows, opening several profiles and scrolling through your internal records searching for a template is a lot more time to you for other crucial jobs.
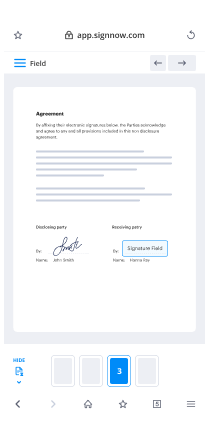
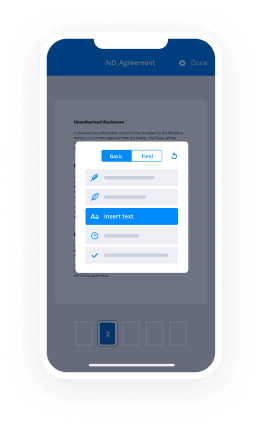
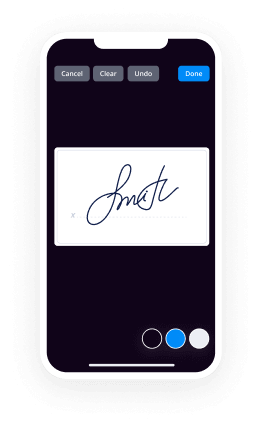
How to safely sign documents using a mobile browser
Are you one of the business professionals who’ve decided to go 100% mobile in 2020? If yes, then you really need to make sure you have an effective solution for managing your document workflows from your phone, e.g., how to integration sign add cms, and edit forms in real time. airSlate SignNow has one of the most exciting tools for mobile users. A web-based application. how to integration sign add cms instantly from anywhere.
How to securely sign documents in a mobile browser
- Create an airSlate SignNow profile or log in using any web browser on your smartphone or tablet.
- Upload a document from the cloud or internal storage.
- Fill out and sign the sample.
- Tap Done.
- Do anything you need right from your account.
airSlate SignNow takes pride in protecting customer data. Be confident that anything you upload to your account is secured with industry-leading encryption. Auto logging out will protect your account from unwanted access. how to integration sign add cms from your phone or your friend’s mobile phone. Safety is crucial to our success and yours to mobile workflows.
How to eSign a PDF with an iPhone or iPad
The iPhone and iPad are powerful gadgets that allow you to work not only from the office but from anywhere in the world. For example, you can finalize and sign documents or how to integration sign add cms directly on your phone or tablet at the office, at home or even on the beach. iOS offers native features like the Markup tool, though it’s limiting and doesn’t have any automation. Though the airSlate SignNow application for Apple is packed with everything you need for upgrading your document workflow. how to integration sign add cms, fill out and sign forms on your phone in minutes.
How to sign a PDF on an iPhone
- Go to the AppStore, find the airSlate SignNow app and download it.
- Open the application, log in or create a profile.
- Select + to upload a document from your device or import it from the cloud.
- Fill out the sample and create your electronic signature.
- Click Done to finish the editing and signing session.
When you have this application installed, you don't need to upload a file each time you get it for signing. Just open the document on your iPhone, click the Share icon and select the Sign with airSlate SignNow button. Your doc will be opened in the app. how to integration sign add cms anything. Plus, utilizing one service for all of your document management needs, things are easier, better and cheaper Download the application right now!
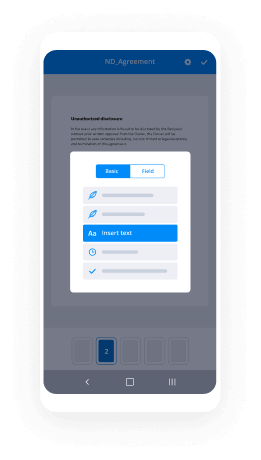
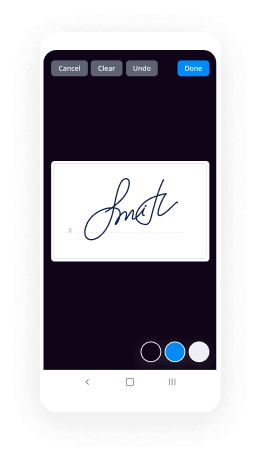
How to digitally sign a PDF file on an Android
What’s the number one rule for handling document workflows in 2020? Avoid paper chaos. Get rid of the printers, scanners and bundlers curriers. All of it! Take a new approach and manage, how to integration sign add cms, and organize your records 100% paperless and 100% mobile. You only need three things; a phone/tablet, internet connection and the airSlate SignNow app for Android. Using the app, create, how to integration sign add cms and execute documents right from your smartphone or tablet.
How to sign a PDF on an Android
- In the Google Play Market, search for and install the airSlate SignNow application.
- Open the program and log into your account or make one if you don’t have one already.
- Upload a document from the cloud or your device.
- Click on the opened document and start working on it. Edit it, add fillable fields and signature fields.
- Once you’ve finished, click Done and send the document to the other parties involved or download it to the cloud or your device.
airSlate SignNow allows you to sign documents and manage tasks like how to integration sign add cms with ease. In addition, the security of your info is priority. File encryption and private servers can be used as implementing the latest features in info compliance measures. Get the airSlate SignNow mobile experience and operate more proficiently.


FAQs
-
How to add sign in CMS using airSlate SignNow?
To add sign functionality in your CMS, you can integrate airSlate SignNow’s powerful API. This allows you to seamlessly embed eSigning capabilities into your content management system. Simply follow the documentation provided by airSlate SignNow to learn how to add sign in CMS effectively.
-
What are the benefits of using airSlate SignNow for eSigning in CMS?
Using airSlate SignNow for eSigning in CMS streamlines your document workflow and enhances user experience. By integrating this solution, you can reduce turnaround times and improve document accuracy. This makes it easier for businesses to manage contracts and agreements efficiently.
-
Is airSlate SignNow cost-effective for small businesses looking to add sign in CMS?
Yes, airSlate SignNow offers competitive pricing plans that cater to small businesses. By using this tool, you can add sign in CMS without breaking the bank while enjoying all necessary features for document signing. It provides an affordable solution that scales with your business needs.
-
Can I use airSlate SignNow with my existing CMS platform?
Absolutely! airSlate SignNow is designed to integrate smoothly with various CMS platforms. Whether you're using WordPress, Joomla, or another system, you can easily learn how to add sign in CMS with our integration guides and support.
-
What features does airSlate SignNow offer for adding sign in CMS?
airSlate SignNow provides a range of features including customizable templates, real-time tracking, and advanced security options. These capabilities make it simple to manage document signing processes directly within your CMS. Learn how to add sign in CMS to leverage these powerful tools.
-
Does airSlate SignNow support mobile eSigning in CMS?
Yes, airSlate SignNow supports mobile eSigning, allowing users to sign documents on-the-go. This functionality ensures that your team can add sign in CMS from any device, improving flexibility and responsiveness in completing agreements.
-
How can I ensure compliance when adding sign in CMS using airSlate SignNow?
airSlate SignNow is designed with compliance in mind, adhering to legal standards such as eIDAS and ESIGN. By using this solution to add sign in CMS, you can trust that your eSigned documents are legally binding and secure, meeting all necessary regulations.
-
Is there a free solution to add a blog to my existing website?
Yes, There are many options to do so. One of the easiest way is to use WordPress CMS for blog.If you have access to file manager or ftp, place WordPress › Blog Tool, Publishing Platform, and CMS in your public_html/yourdomain.com/blog folder and install it. You will have your blog running within minutes.
-
How much time does a beginner need to spend to learn (not just the basics) HTML, CSS, JavaScript, and PHP?
If you have plenty of free time, I would suggest to give atleast 1 hour on Learning things theoritically and atleast 3 hours practicing what you learnt."Practice is the key" here!More time you spend practicing, better you will get at web development.By practicing, I mean writing "real" HTML pages.Assuming you are absolute beginner (you have no idea how to write HTML/CSS), I would suggest you to first learn HTML from www.W3Schools.com and then start with the examples given there along with each chapter.Then, maybe create a web version of your resume using tables.Next step is to learn CSS (again from W3Schools.com) and use what you have learned to convert your resume into div based HTML. Get rid of all the tables and use HTML'sand tags to achieve the exact same look. Add some spice to your resume by adding colors, backgrounds etc. Show some creativity and do some experiments.Then, learn JavaScript (again from W3Schools.com) and make sections in your resume collapsible. Add a contact form to your page and add JavaScript validations.Then learn PHP (you know where to learn from) and add some logic to your resume, like your age should be auto calculated, so should your experience. Add some more spice. Think of what more "calculations" you can do. What "copy-paste" of HTML you can avoid by using arrays and loops. Mail yourself the submissions of your contact form.Just go innovative!Then learn SQL and record all the submissions of your contact us form into Database. Make an admin panel that allows you to Read, Edit, Delete and Search the submissions of your contact form.Now finally it's time to convert all your code in OOPS using classes whereever you can. Also, convert all your MySQL queries to PDO.Now convert all your JavaScript logic using jQuery!If you feel like doing more, make your resume dynamic. Everything in your resume should come from database. Nothing should be hardcoded in the HTML. Need more?Add pages to your admin panel which will allow you to add, edit and remove sections of your resume.There will always be validations written in JavaScript as well as PHP (both) whenever there a form.PS: Googling, reading tutorials, asking others etc is all part of learning.If you do this seriously and dedicatedly enough, you have achieved the following in just 3-6 months:Learnt HTML, CSS, JavaScript, PHP, SQL pretty well. Rest will come with practice, experience and time!Created an awesome resume for yourself to showcase in interviews.Created a mini CMS that would give your resume a big boost.Developed the sense of solving problems when it comes to coding.Learnt where and more importantly HOW to look for solutions when you are struck.Developed confidence in your coding skills and yourself.PS: You will get struck multiple times for hours, maybe days on how to do this particular task. Don't get disheartened. It's perfectly normal and a sign that your learning is paying off!Don't hesitate to ask silly questions. Believe me, no question is really silly, if look at it from the correct angle.All the best and happy learning!
- How do I add live chat in my website?
First, you need to decide which live chat tool you want to use. I’m with LiveChat, a provider of customer service software for online stores. The tool comes with a ticketing system that helps to manage after-hours queries and Reports that allows you to have insight into your service performance.LiveChat is simple to use and install and can be set up in various ways. If you decide that’s a proper solution for you, here’s how you place it on your site:Install LiveChat using a JavaScript code snippet - no coding!a) Log in to your LiveChat account and go to Settings → Channels → Chat widget.b) Copy the code.c) Paste the code to your website’s source code before the tag.d) Then you need to refresh the page to see a chat widget in the bottom right of your page.2. You can install LiveChat using integrationsOur product integrates with over 130 services, including the most popular CMS and e-commerce platforms:WordPressMagentoShopifyBigCommerceWooCommerceVolusionThanks to that you can get a chat widget on your site without coding.3. You can also install LiveChat on your site using Google Tag ManagerFirst, you need to set up your LiveChat account and then follow the steps presented in the tutorial.Hope I helped!- How do you install and host WordPress website in Google cloud platform?
I have given a detailed review about how to install and host wordpress.Check this article for knowing more about web hosting.As the owner of the site, you may be tired of relying on a single server with many periods of inactivity, long load times and higher costs, all are faults that are found when using only the same host. However, " cloud computing allows you to host your site on several servers, which allows you to save money and ensure permanent availability.Google Cloud offers one of the most competitive pricing policies among cloud hosting providers.How to install WordPress in the Google CloudOnce you have purchased Google Cloud, you must sign in to your Google account and access the Google Cloud Console. On the " Project " menu , click on " Create project ":In the next window, complete the project fields, including the name, billing account and location of the application engine. Once you have clicked "Yes" to confirm the terms and conditions, click Create. Go to " API Manager> Library " And in the " Google Cloud API " section, click on " Cloud Deployment Manager API ". Finally, click Activate:Now is the time to implement the WordPress installation! Look for the " Cloud Launcher And on the Blog / CMS tab », Click on WordPress:PEARL: The best WordPress theme for your businessOn the next screen, click Start on " Compute Engine ":You will have to complete the WordPress implementation form before continuing, being sure to check the following boxes:Install phpMyAdmin.Activate « Google Cloud Monitoring To receive regular reports on your service.Allow HTTP and HTTPS traffic, available in the Firewall section.To begin the installation, click Deploy:After WordPress has completed the installation, it will be redirected to the deployment monitor. Be sure to track the administrator and your WordPress password, as well as the MySQL administrator password and phpMyAdmin. To visit the installation, click on "Visit the WordPress website". You can also enter the IP address that is in the address of the site in your browser:Easily create your online storeDownload free WooCommerce, the best ecommerce add-ons to sell your physical and digital products in WordPress. [FREE]It's as simple as that. I hope that now I can install WordPress in Google Cloud successfully.- I have some basic knowledge in HTML, CSS, Bootstrap. Target: learn to make websites with CMS for clients. When site is made, how
I would suggest using an existing CMS like Wordpress for now, since you don’t seem to have the knowledge/skills required to create your own yet.Building your own CMS requires coding a backend in a language like Python, Ruby, Javascript, or PHP, and then tying it in to a database. You’ll need to learn to code in one of those languages and how to interact with a database, before you can create a CMS.Honestly though, even if you could create one yourself, there aren’t many reasons to actually do so. Unless your client has very specific needs that can’t be met by Wordpress or something similar, you should probably just use that instead of reinventing the wheel.- How do I add a CMS page to the navigation menu in Magento 2?
Go to Stores > Configuration > General > Web > Default PagesSt the configuration “Show Breadcrumbs for CMS Pages” as “YES”.- How do i add Django CMS to my existing website?
There are a couple of ways to approach this, depending on what you mean by adding Django CMS to an existing site. Do you mean:How to migrate a non-Django CMS site to use Django CMSHow to integrate Django CMS into an existing Django CMSI have an existing website made with CSS and HTML and am wondering how would I add Django CMS to the website? I don't want to use php or anything like that.Since your question is focused on the first, let’s start there.Migrating a static site to Django CMSActually, let’s start with the CSS part of your question. The good news is that you don’t need to change your CSS. You’ll need to know how to work with static files in Django, but otherwise you can keep these as-is.Presuming you have a static site written in HTML, your HTML is comprised of two things: page layout and content. The end goal is to get the content out of the HTML and loaded via Django CMS.Absent an existing Django project, the first thing you should do is set up a basic Django project using Django CMS. The full scope of how to do that is beyond this post, but the tutorials in the Django CMS docs will be helpful.I’d recommend mapping out the site structure before you start, to get an idea of what content you’re working with and how it’s organized. This includes pages, page types, and content areas in pages.You’ll start porting your static site to Django CMS by creating your templates, and first your base template. A good candidate page might be your home page, or if that’s radically different in structure from other pages, then something else such as a list page. The base might just be a thin frame with a common head element, or it could include a more extensive block structure to be reused by other page types.As you add each page (type) you’ll start identifying content blocks and replacing static HTML content with layout and CMS tags, and then adding the content for individual pages from the CMS.There’s a lot more detail involved in actually doing this, but at a high level I’d recommend you take this strategy. This discounts the use of structured data which is often best provided by a separate Django app and integrated into Django CMS using Django CMS’s plugin concept.- How do I add CMS to an HTML template?
What you should do is adding an HTML template to a CMS and not the other way around.It’s not a simple task and if you have to ask such a question I recommend to pick a CMS and get a theme for it that is close to what you want.Wordpress is a good candidate since its newbie friendly and have a huge theme collection.Actually if you got the HTML template from a designer on internet, is very possible the he already done a wordpress version of it. - How do I add live chat in my website?
Trusted esignature solution— what our customers are saying


Get legally-binding signatures now!
Frequently asked questions
How do i add an electronic signature to a word document?
What is a live electronic signature?
Where to sign in to the clarion ledger e-newspapers?
Find out other How To Add Sign in CMS
- Disability accommodation and services request form class of
- Random walks in euclidean space form
- About the dartmouth college rental car program with form
- Dpms requisition dartmouth college form
- Alcohol handbook form
- Restricting consumer credit access form
- Where is the missing credit card debt form
- Greek letter organizations advisors handbook dartmouth college form
- Dartmouth college self study report i introduction dartmouth dartmouth form
- Foampmehs 10i advance notification sop dartmouth college dartmouth form
- Osp learning form
- Education experience report form
- Download the self study report pdf dartmouth college form
- Planning for retirement form
- Association for practical and professional ethics dartmouth college form
- The elie wiesel prize in ethics guidelines dartmouth college dartmouth form
- Did the stimulus stimulate real time estimates of the effects of the form
- Norm transmission in networks of intergovermental form
- Upne university press of new england brandeis university press dartmouth college press university of new hampshire press form
- Registration dartmouth college dartmouth form